
Renew Internal Application Certificates
Overview
Veridium Manager provides GUI workflows for viewing, renewing, and removing internal application certificates.
If zookeper was created as a cluster, then this procedure must be executed only once for all datacenters. For implementations newer then 3.8.4, it needs to be executed only in one datacenter.
The recommended method for managing certificates is through the Validity Dashboard.
A. Managing Certificates Using the Validity Dashboard
1. Open the Validity Dashboard
Navigate to:
Veridium Manager → Certificates → Validity Dashboard
Sort the Status column to display expired certificates.
A. Managing Certificates Using the Validity Dashboard
1. Open the Validity Dashboard
Navigate to:
Veridium Manager → Certificates → Validity Dashboard
Sort the Status column to display expired certificates.
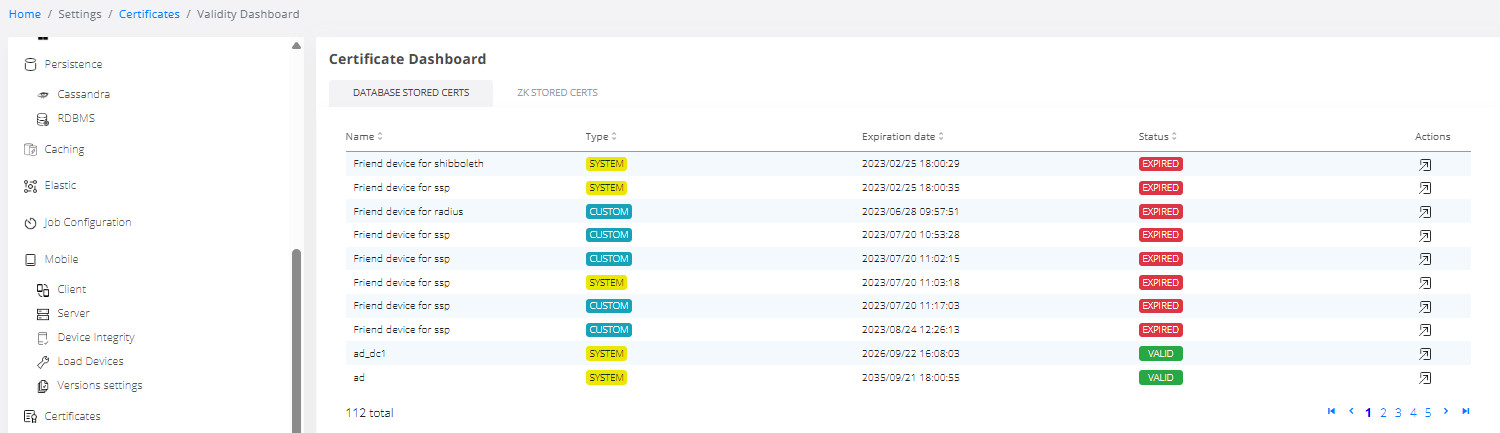
Certificate Types
The dashboard contains several types of certificates.
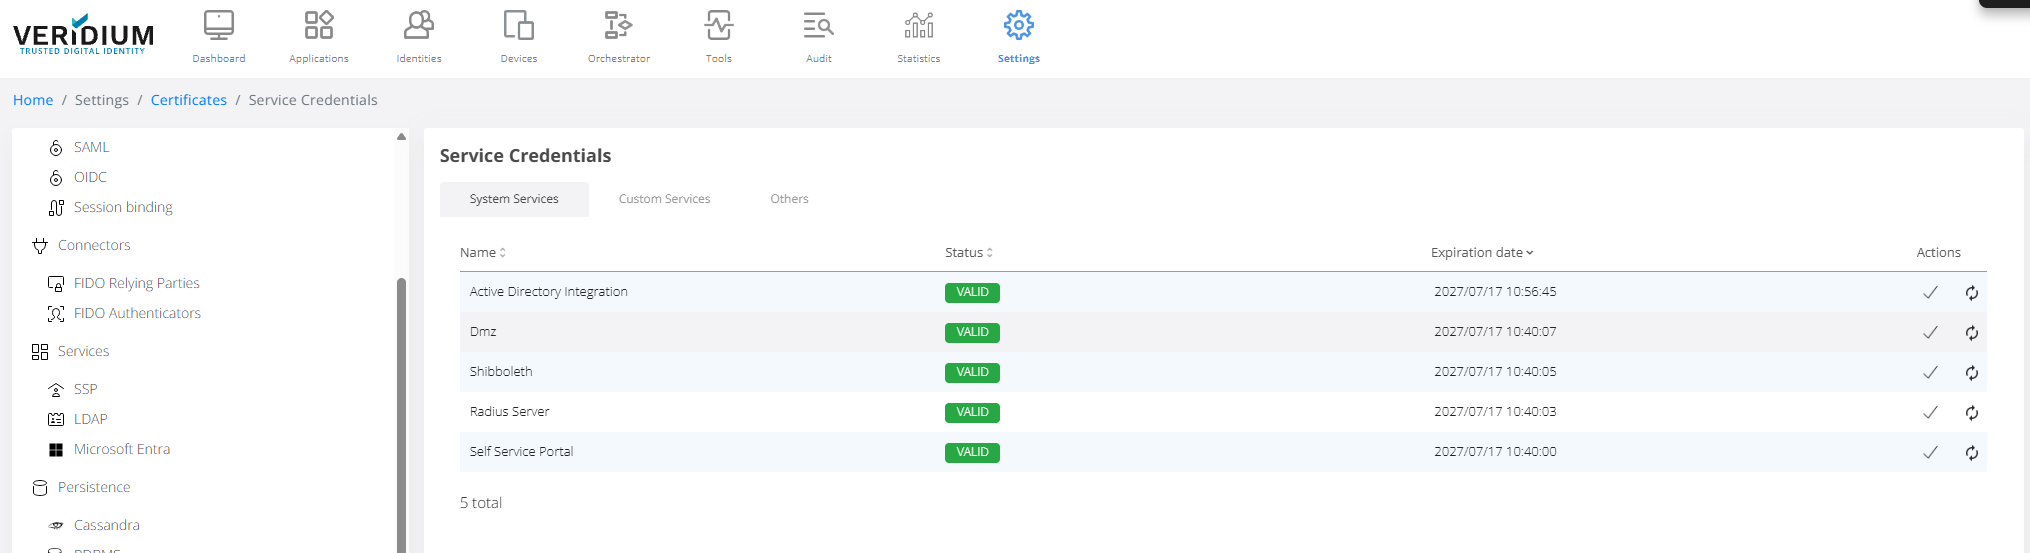
1. Service Credentials
Certificates used for authentication between internal services or external integrations.
System Services
Certificates used for internal communication between Veridium services, including:
-
Self Service
-
Radius Server
-
Shibboleth
-
DMZ services
-
Active Directory integrations
Custom Services
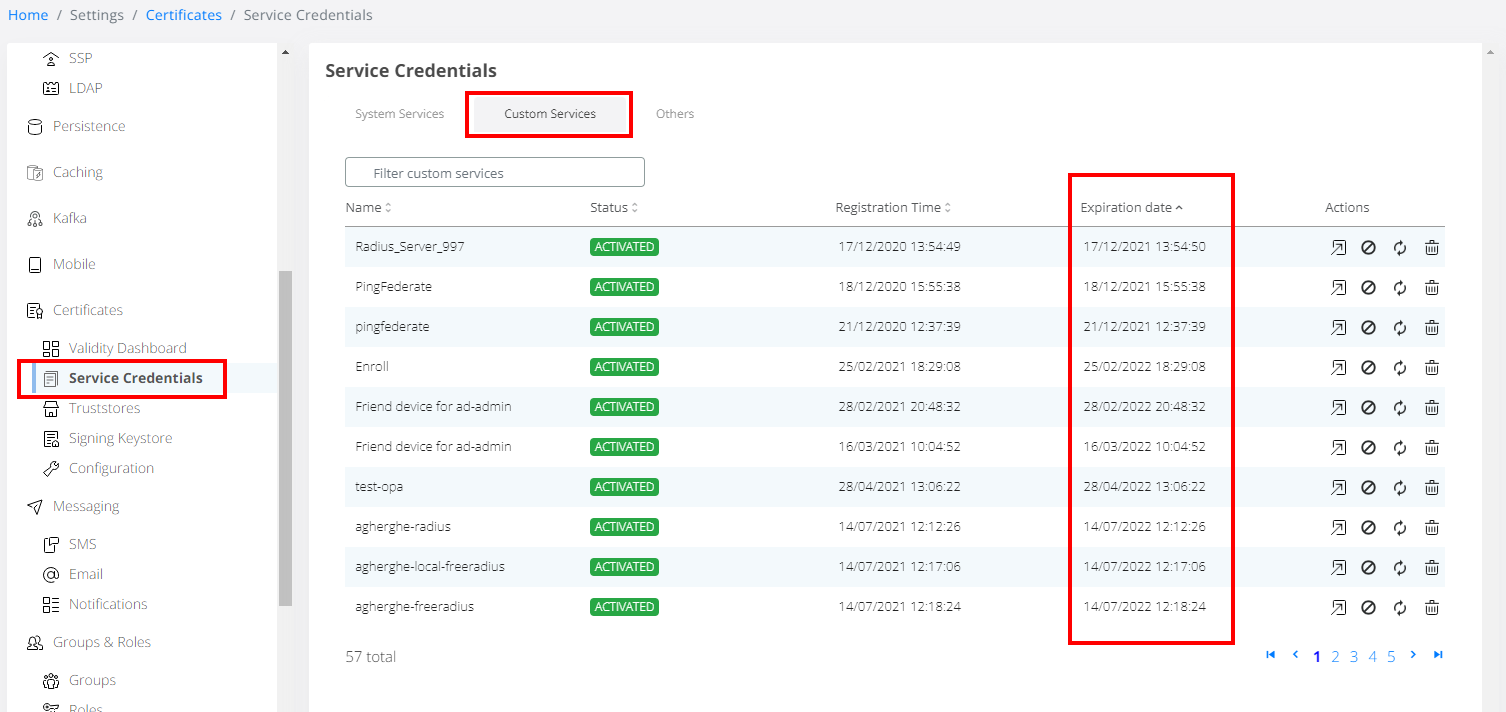
Certificates used by external systems to authenticate with Veridium services.
Other Certificates
Additional internal certificates including:
-
Default certificates used for enrollment (AD / Generic)
-
OPA internal certificates used by Veridium OPA services
Renew procedure:
-
For System services and Others, in order to renew them, just press Renew and everything is configured automatically.
-
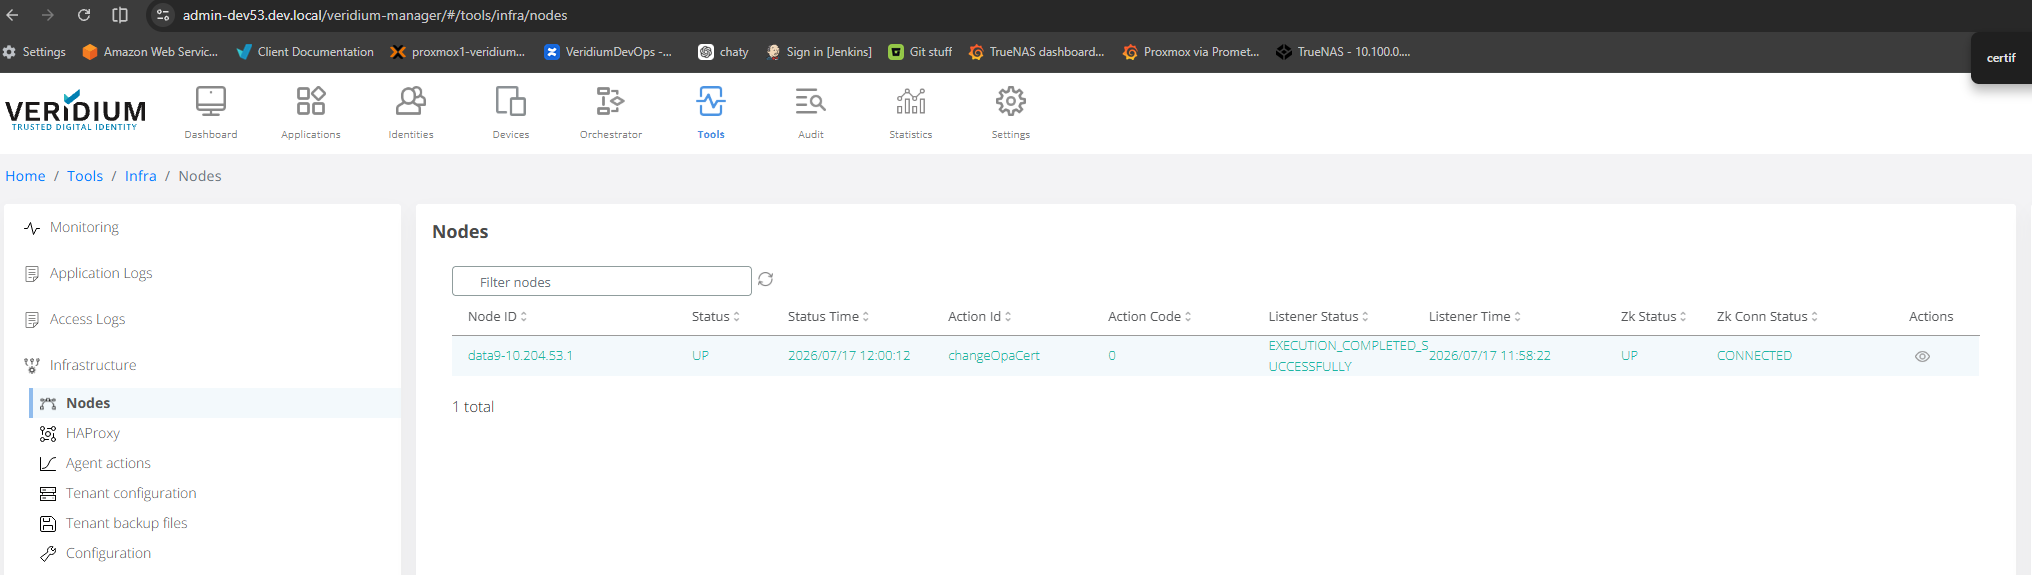
for OPA, additionally after the renew, check in websecadmin → Tools → Nodes → to see if the last executed action was changeOpaCert and it was successful.
-
-
for custom services is is necessary to create a new certificate and configure in external system, this way will be no downtime.
-
for Truststore just add new certificates in truststore and remove the old ones, that are expired.
2. Truststores
Internal Veridium truststores used by services to validate certificates.
Certificate Renewal Procedure
The renewal process depends on the certificate type.
System Services and Other Certificates
These can be renewed automatically.
Steps
-
Select the certificate.
-
Click Renew.
-
Veridium will automatically generate and configure the new certificate.
Custom Service Certificates
These certificates are used by external systems.
To avoid service downtime:
-
Create a new certificate.
-
Configure the external system to use the new certificate.
-
Once the migration is complete, remove the old certificate.
Truststore Certificates
Truststore certificates must be updated manually.
Steps:
-
Add the new certificate to the truststore.
-
Verify services trust the new certificate.
-
Remove the expired certificate.
Example – Renewing a Certificate
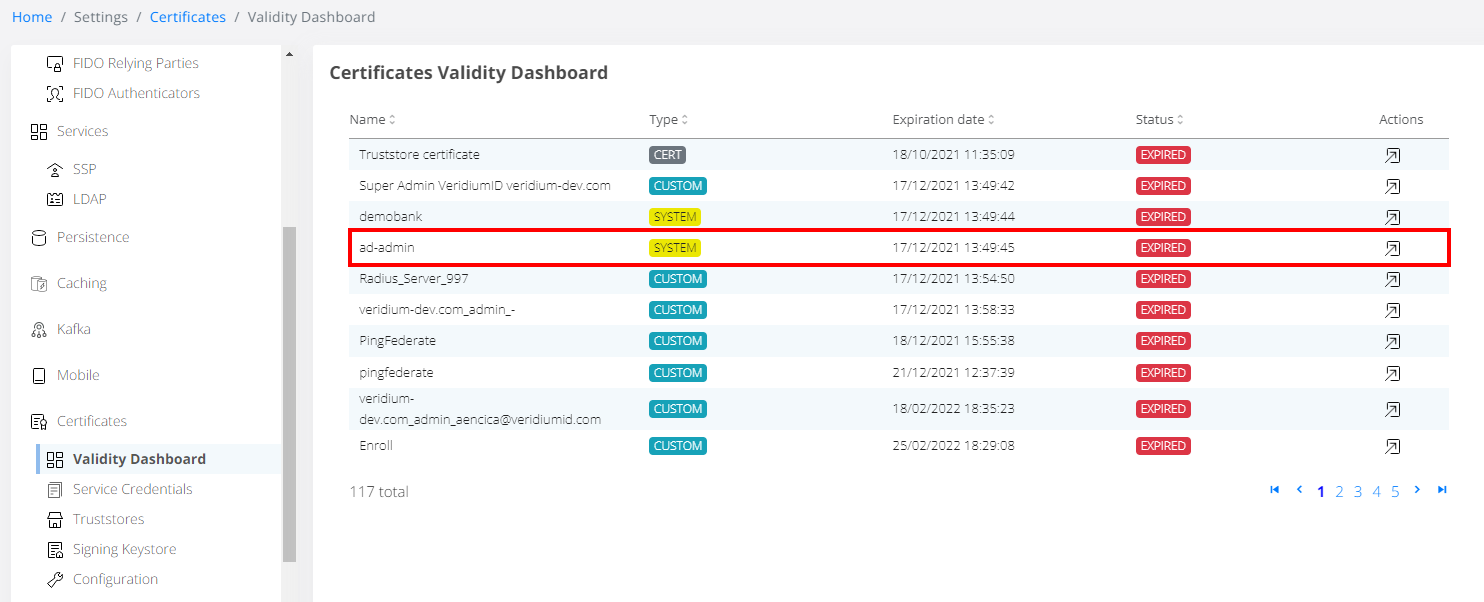
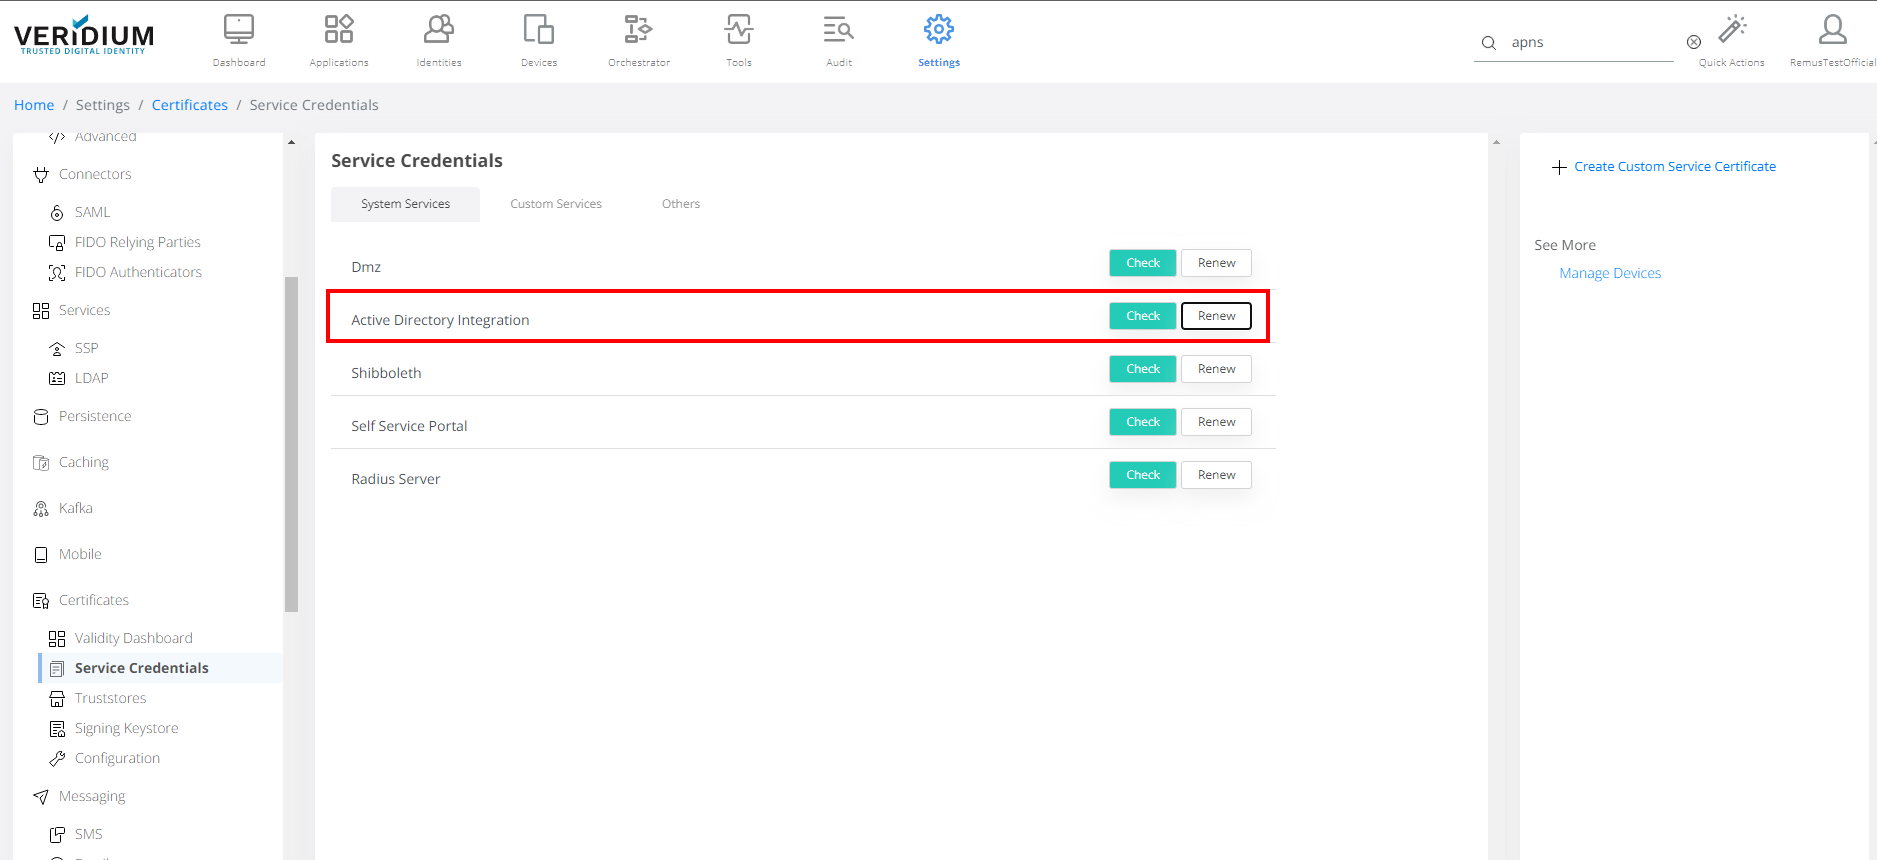
In this example, the certificate AD-ADMIN is expired.
Selecting the expired SYSTEM certificate redirects to the Service Credentials page, where it can be renewed.
Removing a Certificate
To remove a certificate:
-
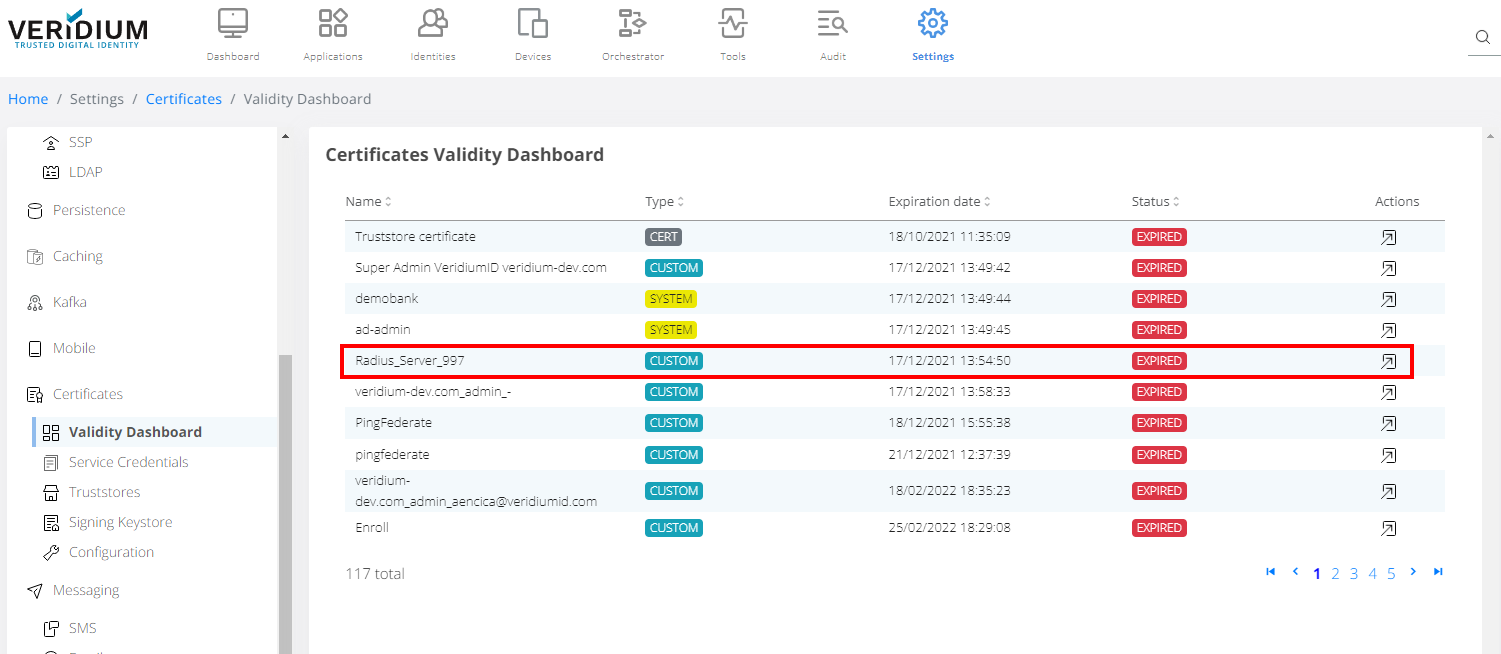
Select the certificate by double-clicking it or using the Action button.
-
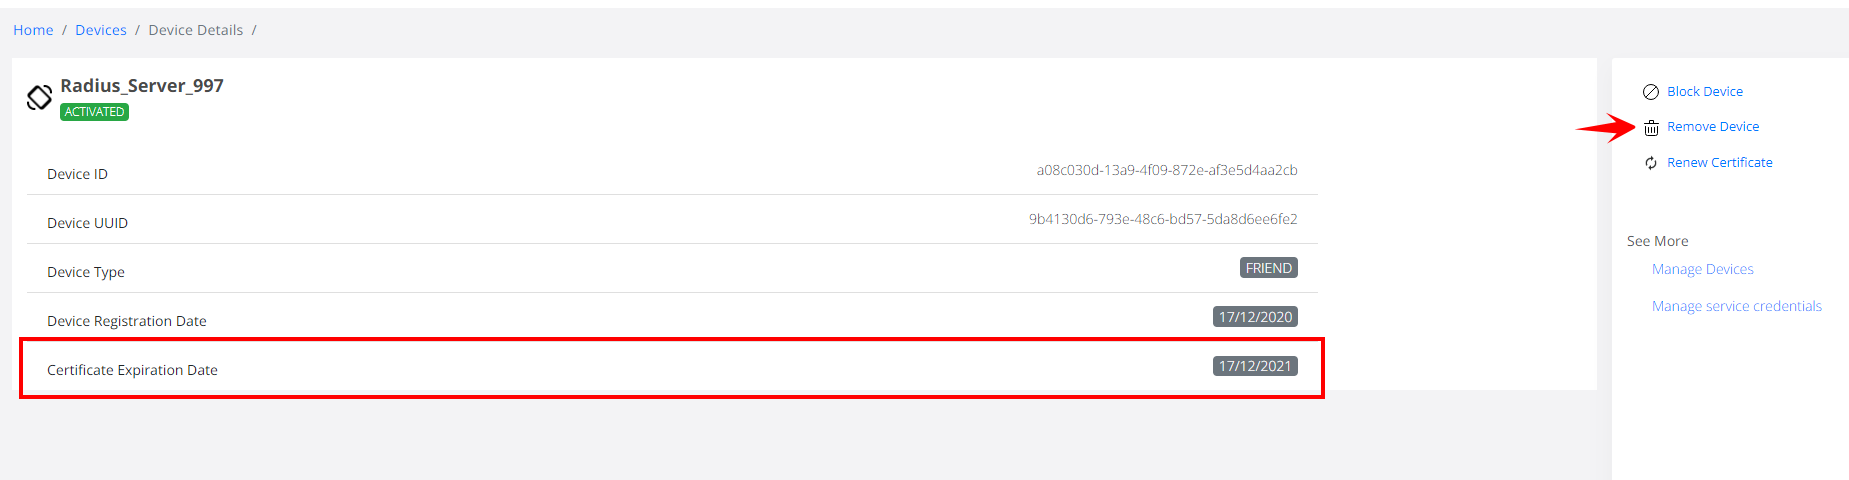
Review the certificate details.
-
From the top-right menu, choose one of the following options:
-
Remove
-
Renew
-
Block
B. Alternative Method – Managing ADMIN & FRIEND Certificates
ADMIN and FRIEND certificates are a subset of Custom certificates that have associated device entries in the database.
Because of this, they can also be managed through the Devices interface.
This approach offers:
-
better sorting
-
easier removal
-
improved UX
However, it does not easily display expired certificates.
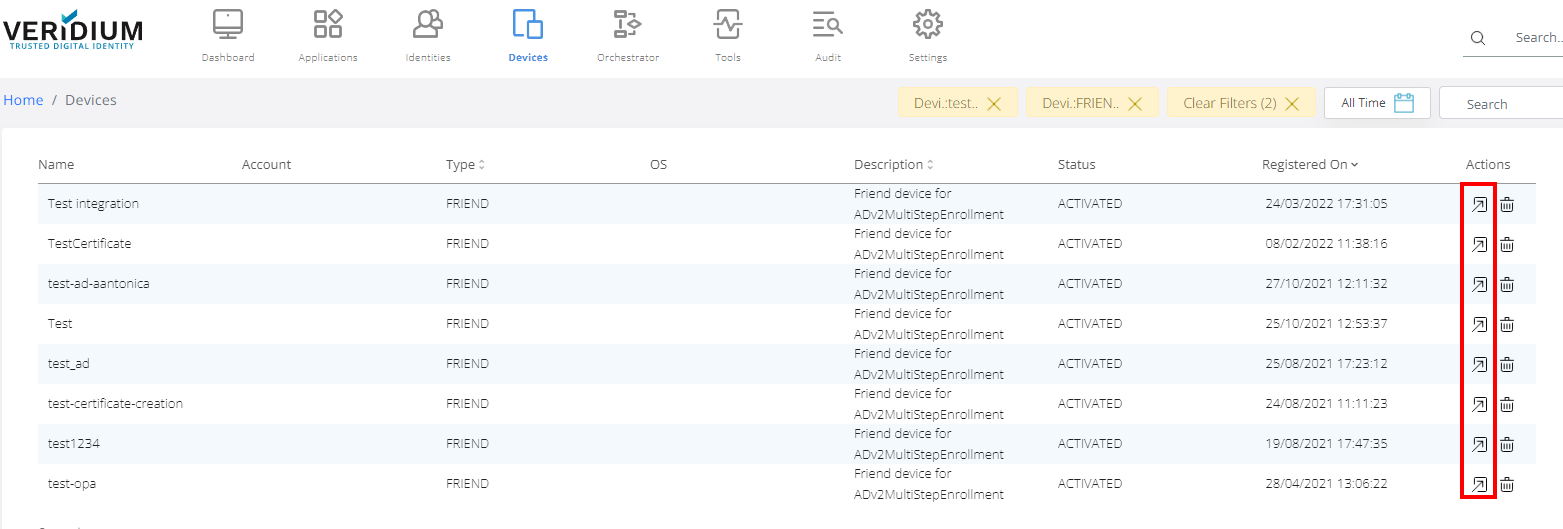
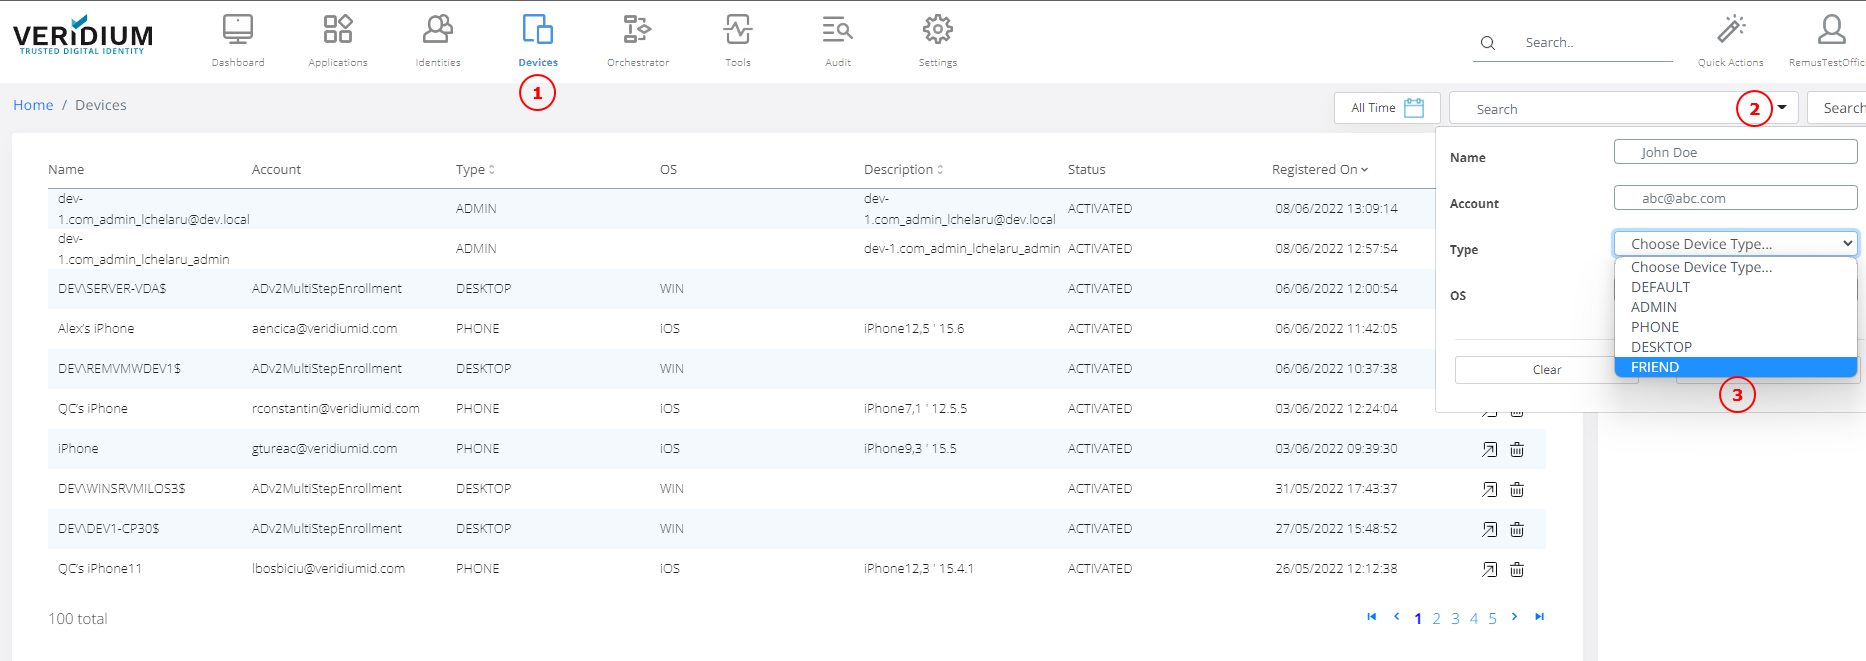
1. Search for Friend Devices
Navigate to:
Veridium Manager → Devices
Click Advanced Search.
Set the filter:
Type → FRIEND
Click Search.
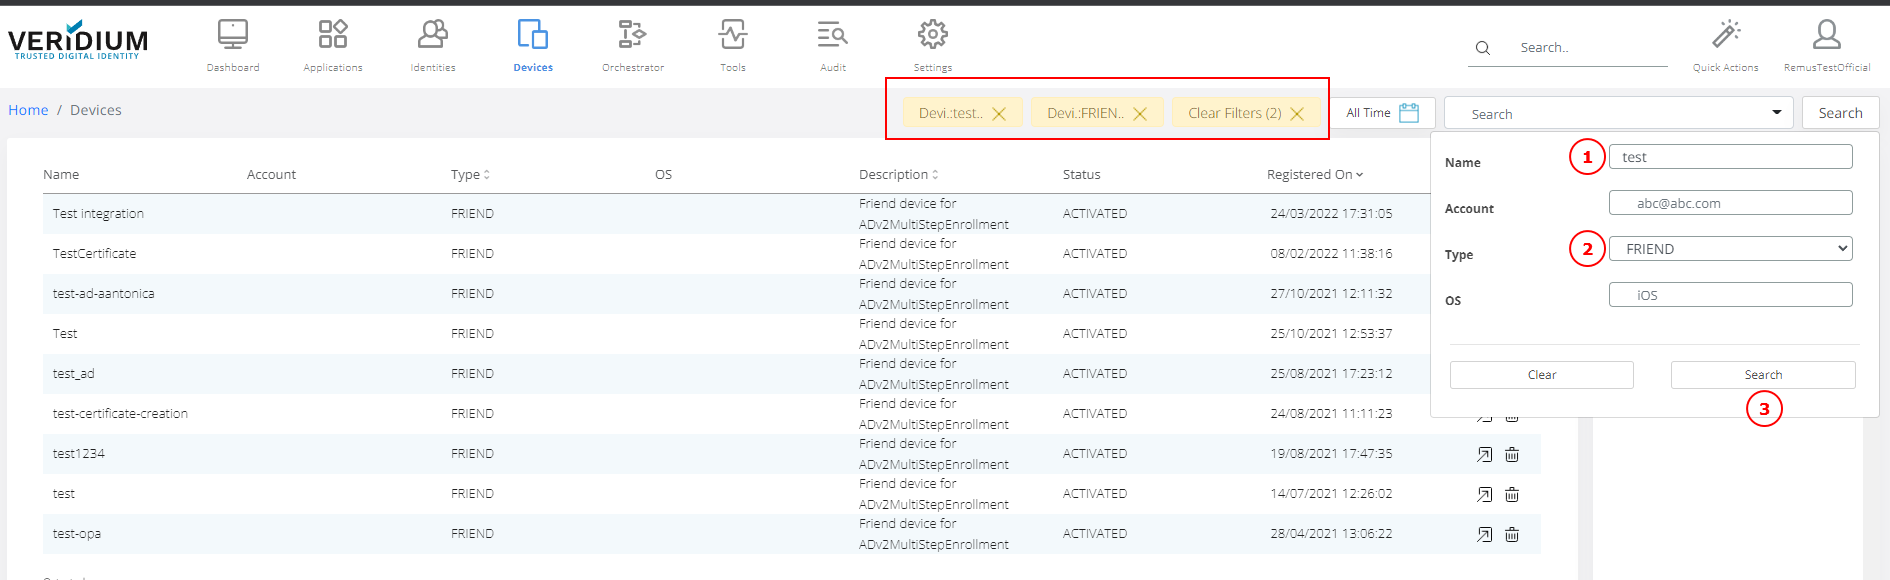
This will return all friend certificates.
Optional filters can also be applied.
2. Remove Devices
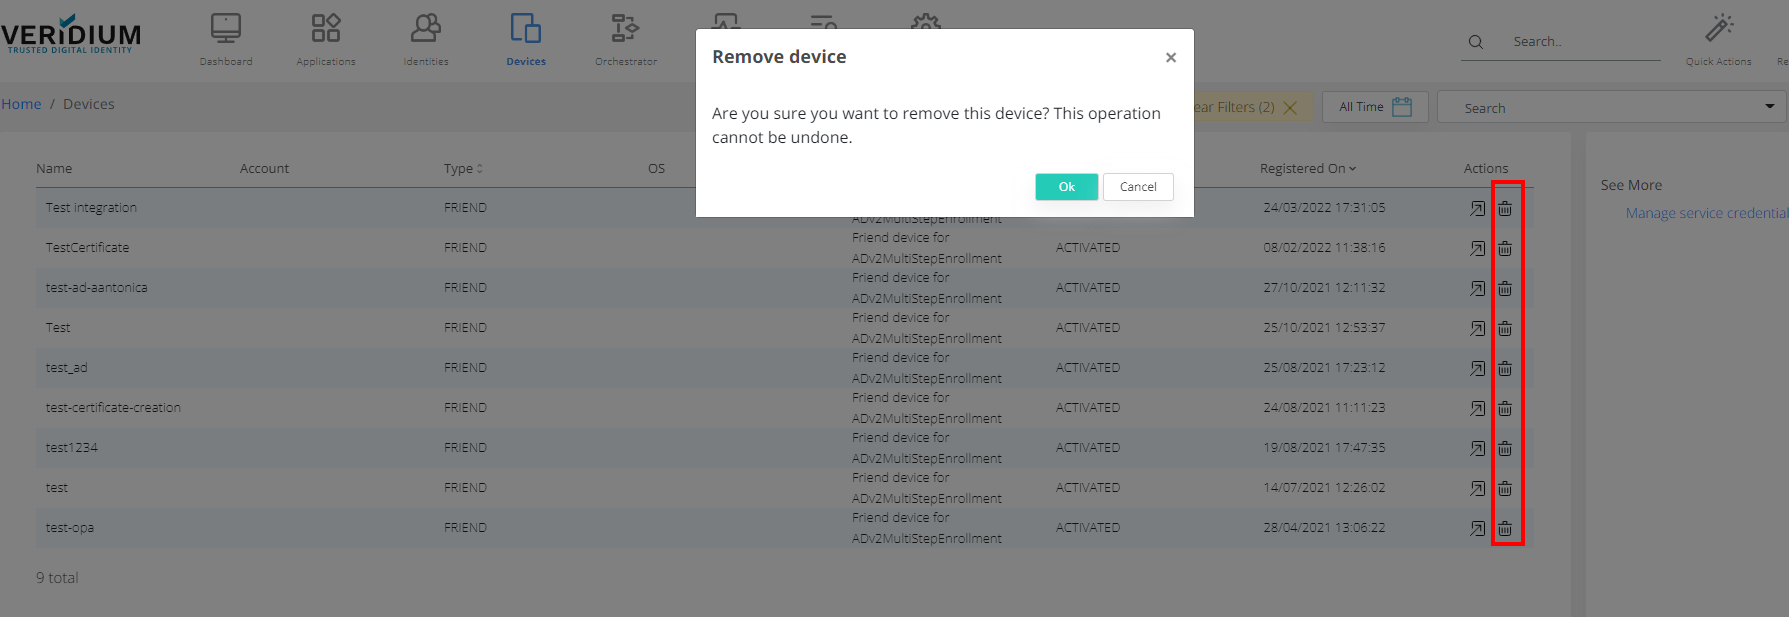
From the results list you can remove devices.
Option A – Delete directly
Use the Delete button from the Actions column.
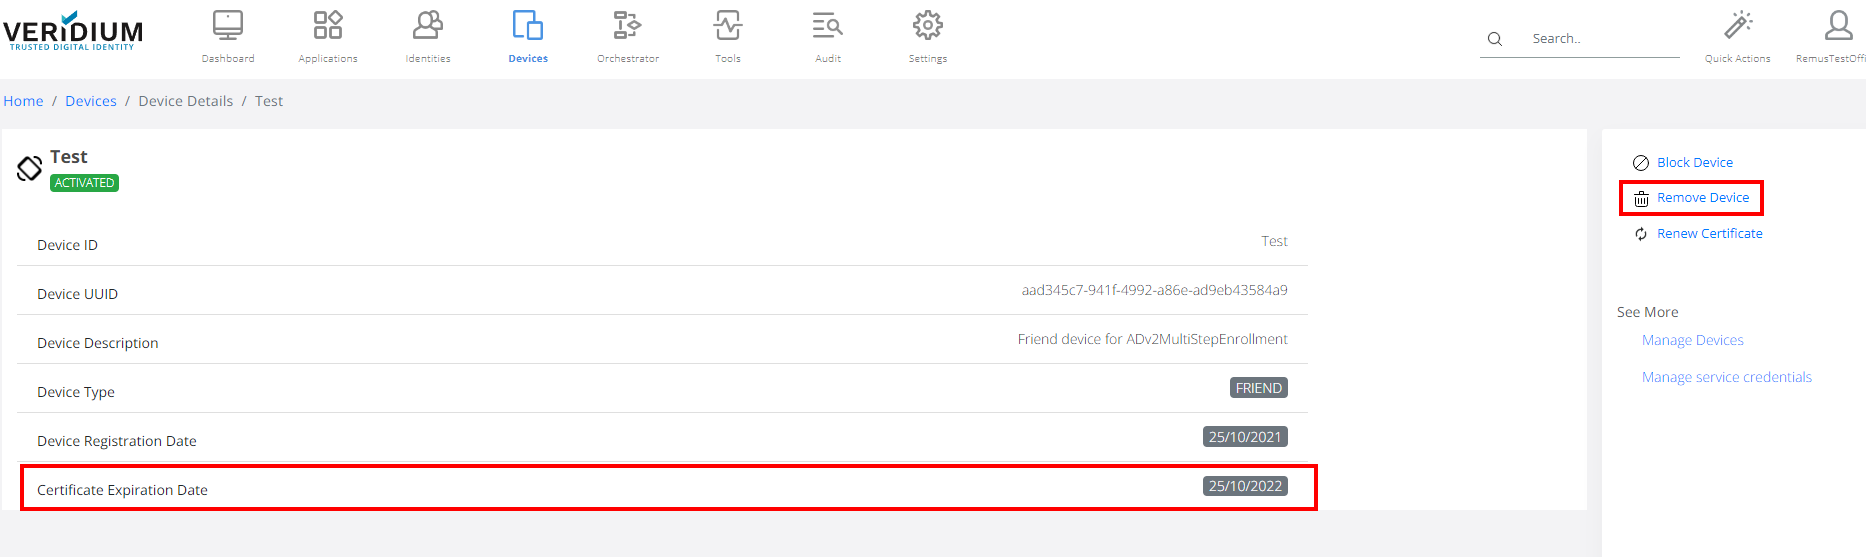
Option B – Review device details
Click Open in the Actions column.
Review device information.
Click Delete.
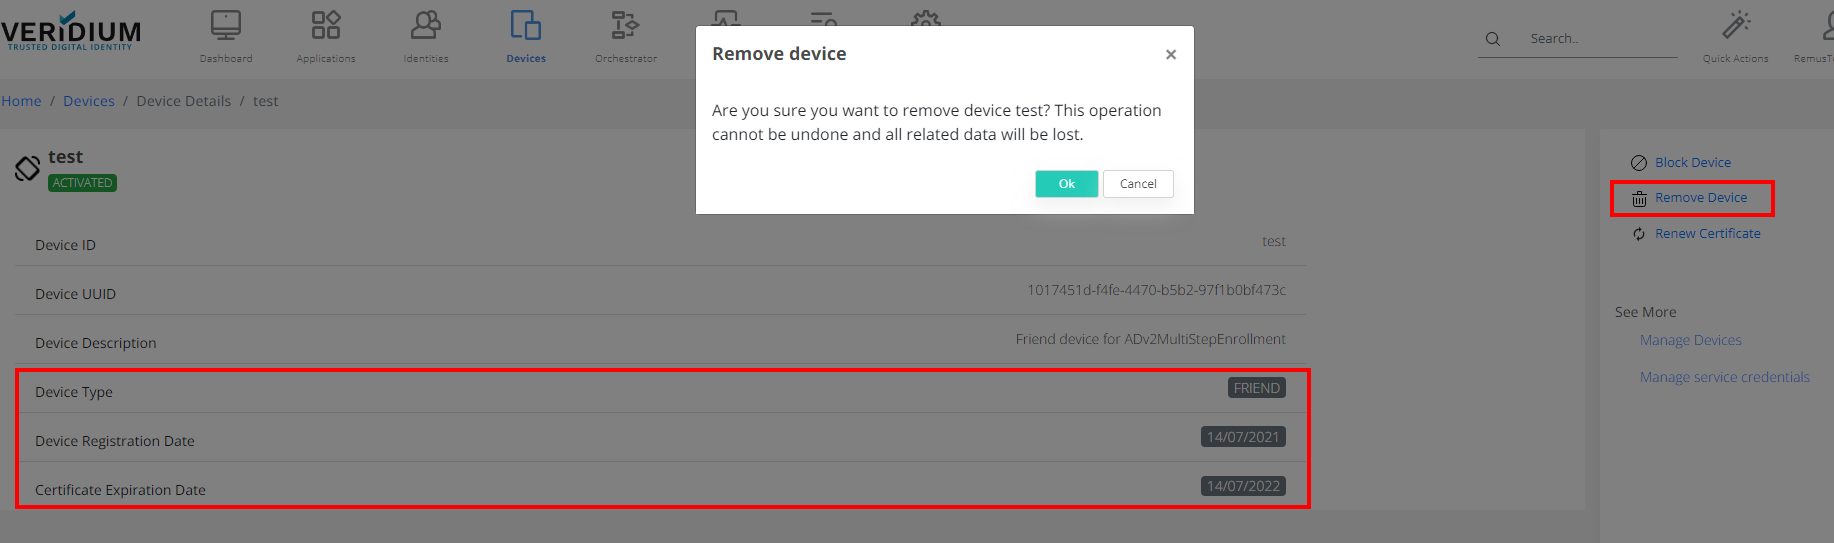
3. Confirm Deletion
Confirm the deletion request.
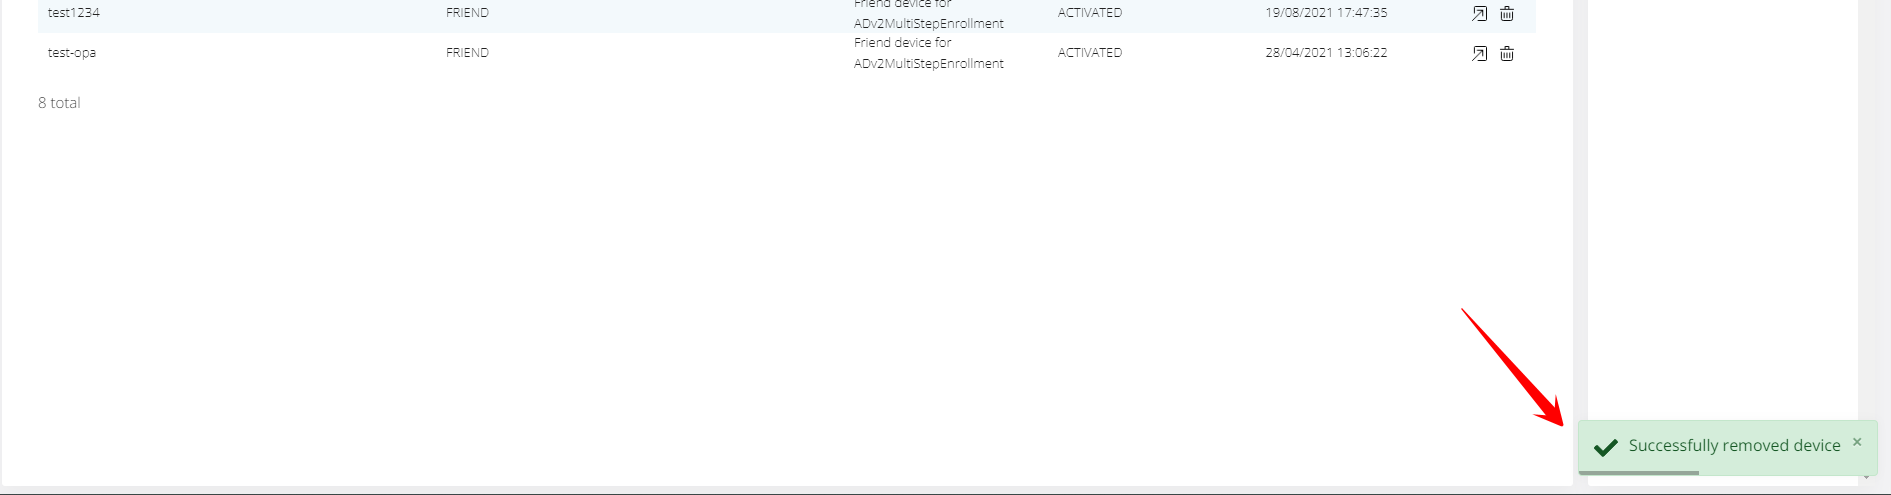
A green confirmation message will appear after successful deletion.