

Overview
This article describes how to replace the server.pem certificate used by the HAProxy service in the Veridium platform.
During the VeridiumID Server installation, a self-signed certificate is automatically generated for HAProxy. In production environments, this certificate should be replaced with a trusted certificate issued by a certificate authority (CA).
When the certificate expires or needs to be replaced, administrators can update it through the Veridium Admin Manager interface.
Depending on the deployment architecture, one of the following configurations applies:
-
Single certificate setup (same certificate used for all traffic)
-
Dual certificate setup (separate certificates for internal and external traffic)
Obs:
if Veridium is the point where the traffic is termined (server.pem is the public certificate), then you need to add the new certificate in certificate pining part - https://docs.veridiumid.com/docs/v3.9/certificate-pinning-usage-guide .
1. Using a Single Certificate for Veridium
This configuration applies when:
-
The same FQDN is used for both internal and external services, OR
-
Different FQDNs are used but SSL termination occurs at another infrastructure layer
If Veridium is not the first SSL termination layer, the default self-signed server.pem certificate must be replaced with a trusted certificate.
Upload the Trusted Certificate
-
In Veridium Manager, navigate to:
Tools → Haproxy configuration
-
Open the Certificates tab.
-
Choose the certificate upload method:
Option A — PKCS12 (Recommended)
Upload a PKCS#12 file (.p12 / .pfx) containing:
-
certificate
-
full chain
-
private key
Enter the password for the certificate.
Option B — Certificate + Private Key
Upload the certificate chain and private key as separate files.
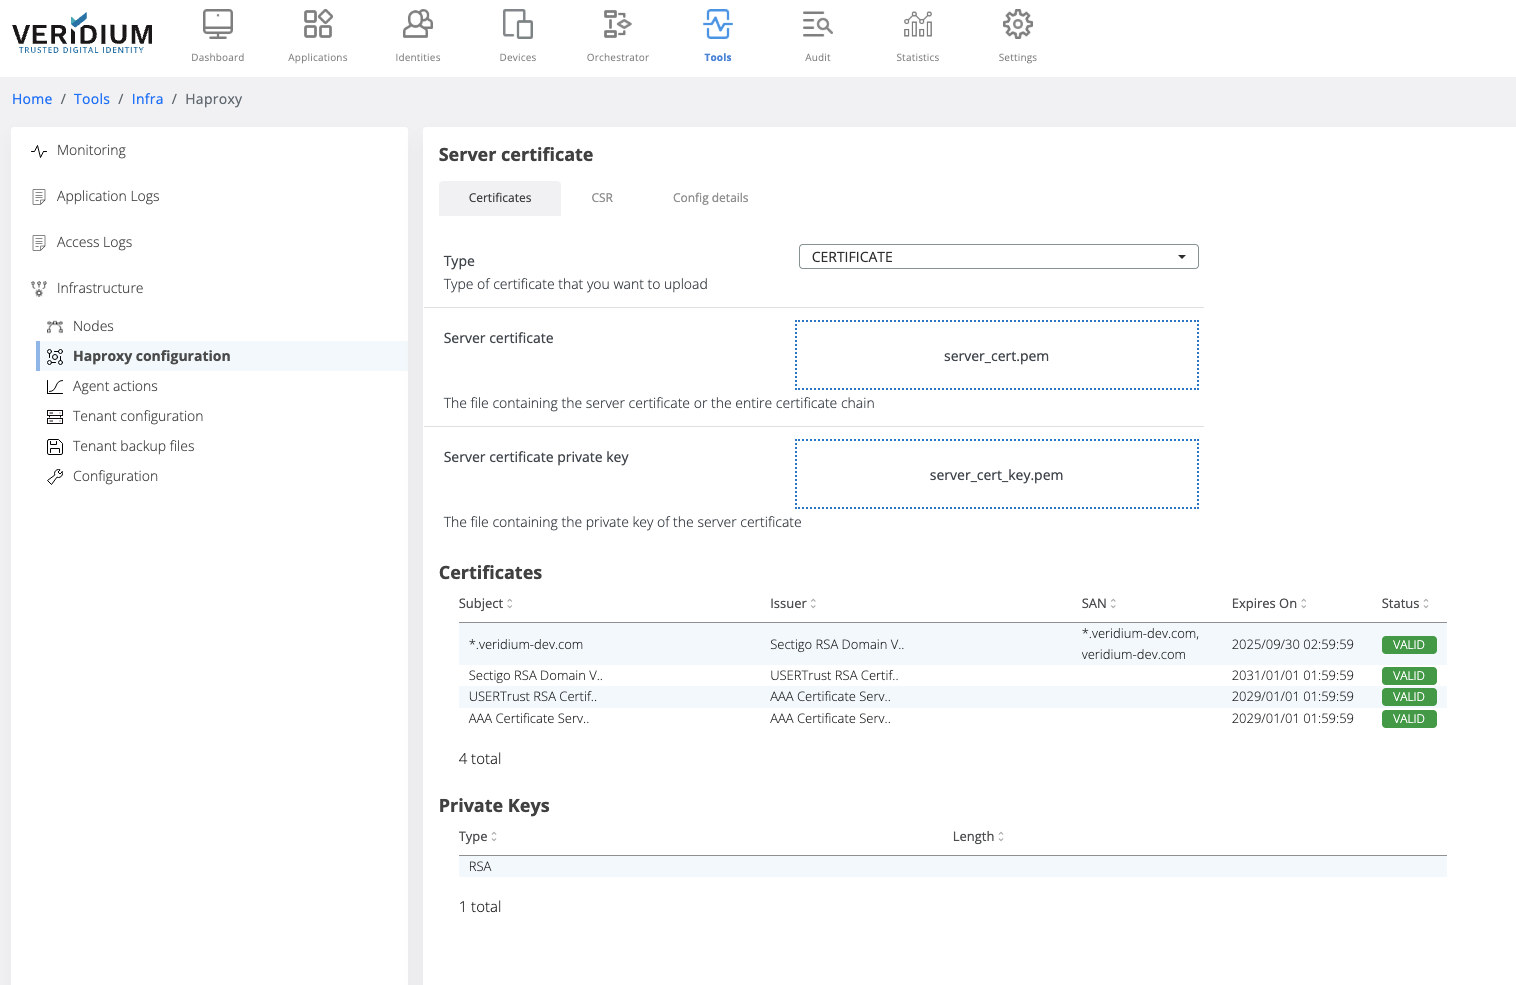
(Image – certificate upload interface)
After uploading, the interface will display:
-
the certificate chain
-
detected certificates
-
private key type
Save the Configuration
-
Click Save.
During this step:
-
the certificate chain is stored
-
it is also added to the Veridium server Truststore
Apply the Certificate on the Nodes
-
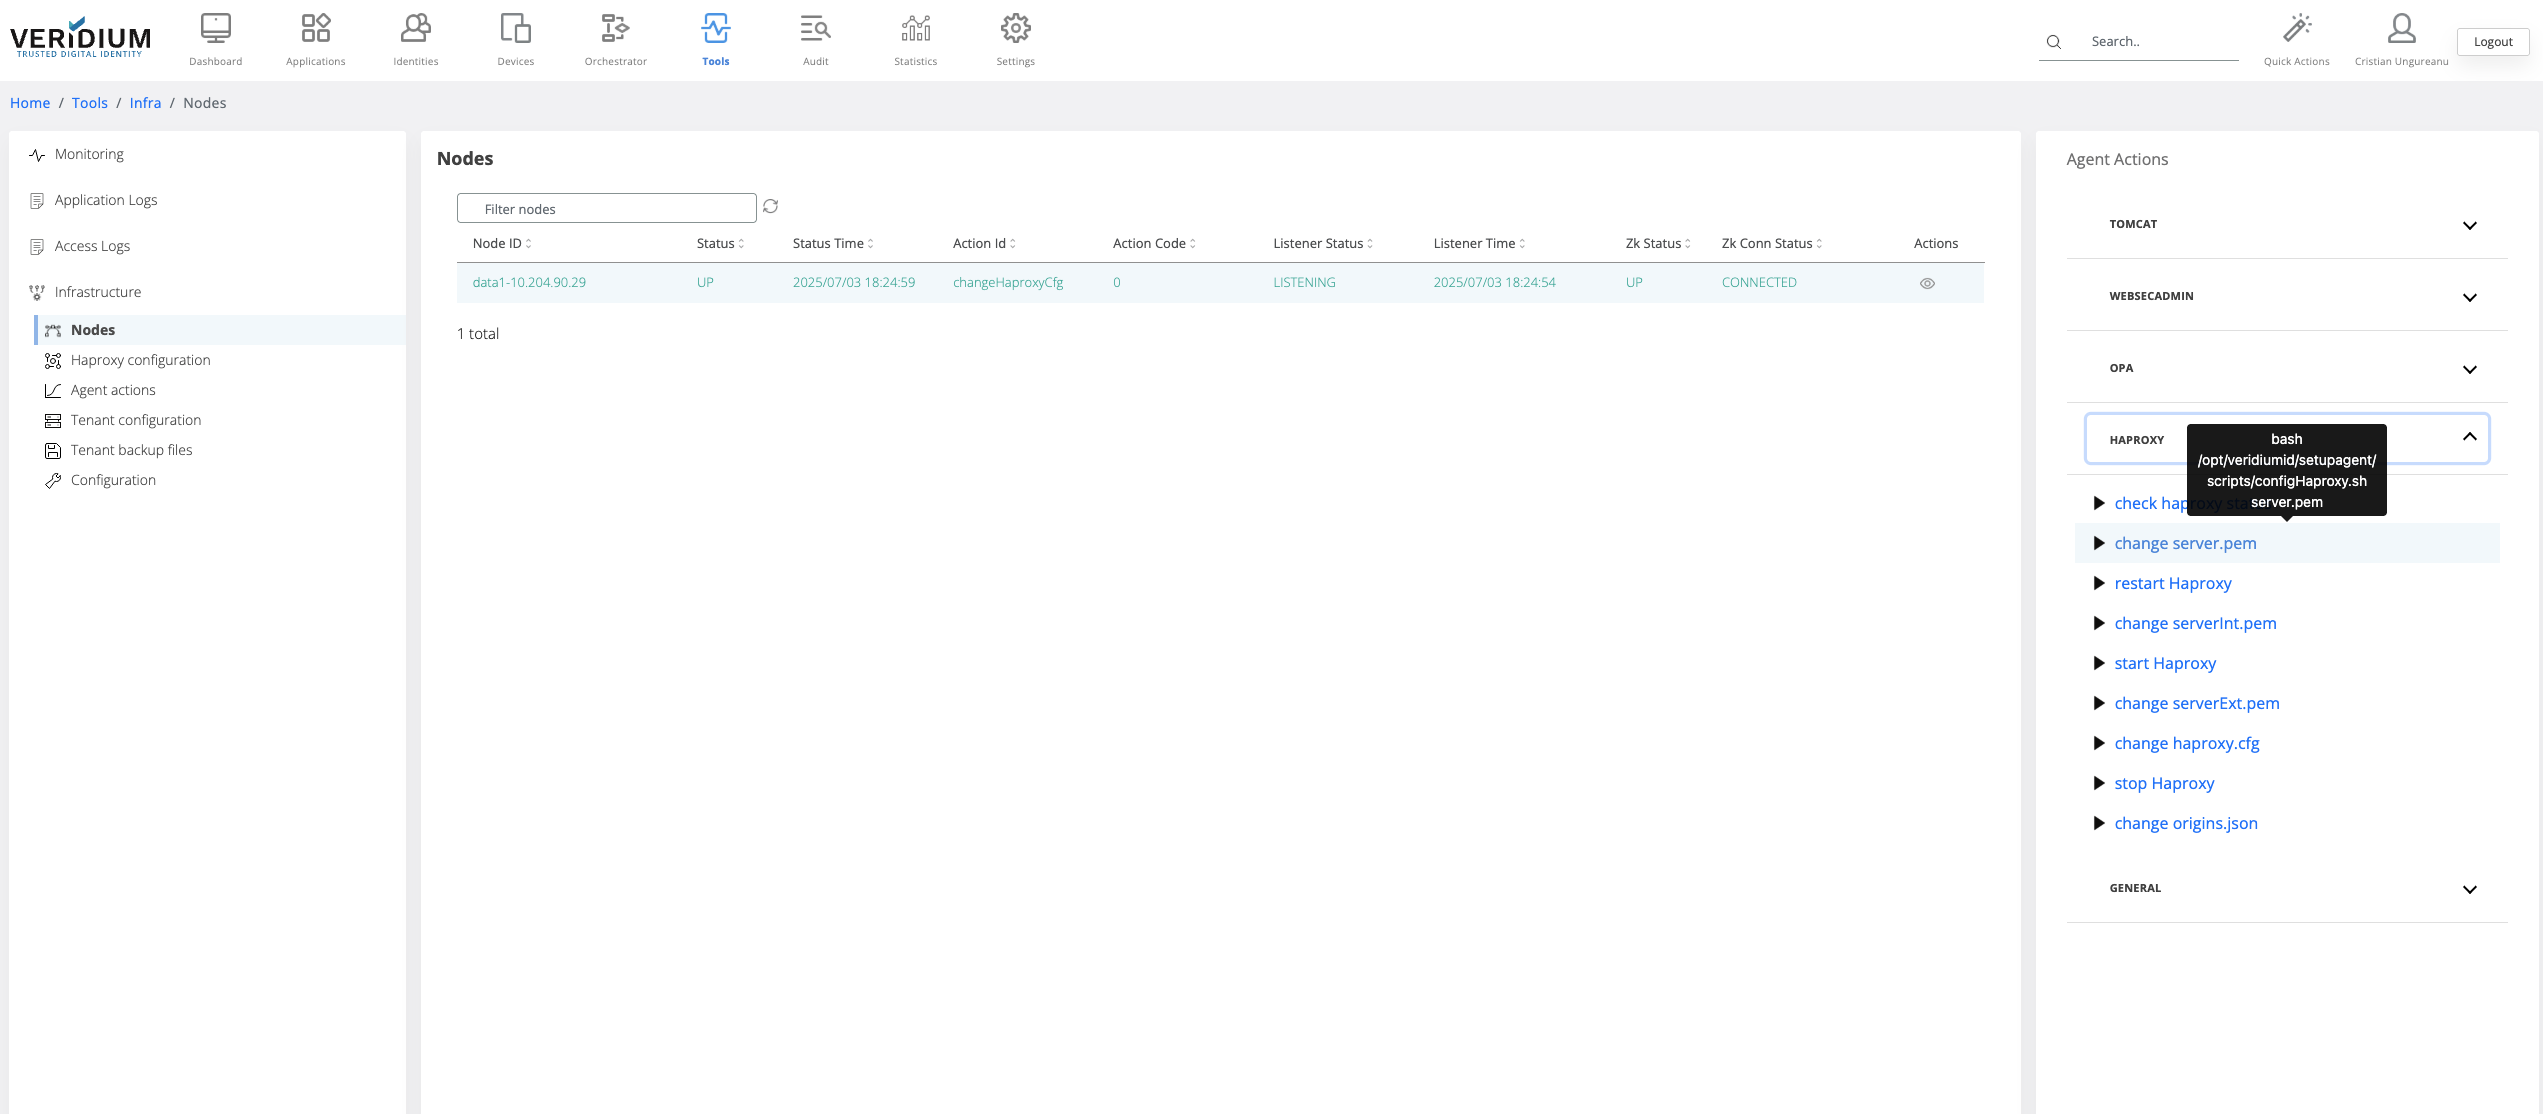
Navigate to:
Settings → Nodes
-
Expand the Haproxy section.
-
Click the command:
change server.pem
-
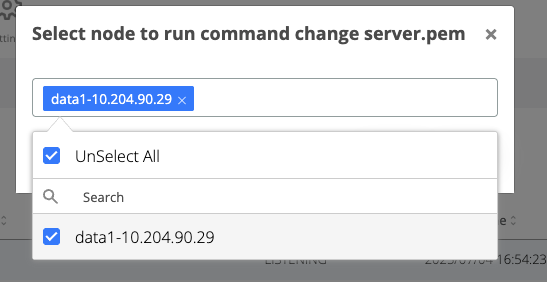
In the popup window:
-
select all webapp nodes
-
click Run
After uploading the certificate chain, the certificates part of the chain and the private key type are displayed below the upload boxes.
Verify the Execution
-
The execution status appears in the Nodes section.
Possible results:
|
Status |
Meaning |
|---|---|
|
Green |
Command executed successfully |
|
Red |
Command failed |
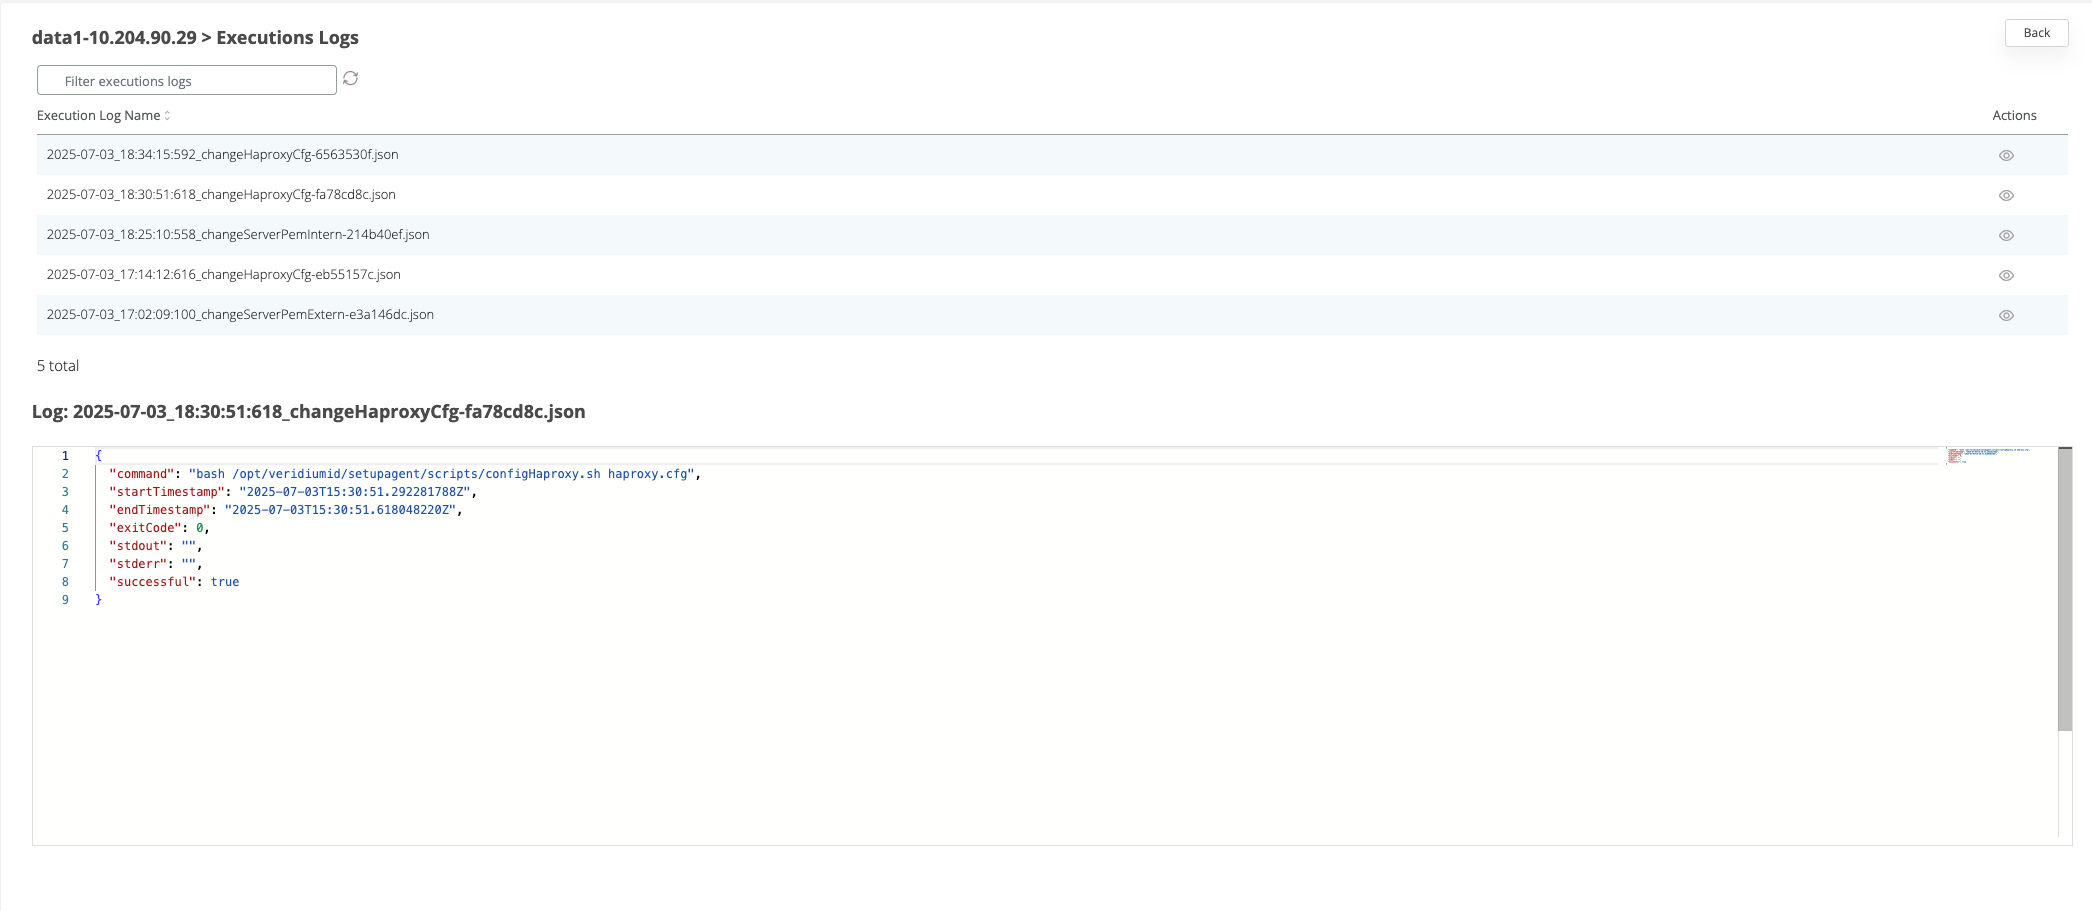
If a node fails:
-
click View actions
-
open the execution logs for troubleshooting
2. Using Two Certificates (Internal + External)
This configuration applies when:
-
Veridium performs the first SSL termination
-
Internal and external services use different FQDNs
Two certificates are required:
-
serverExt.pem– external traffic -
serverInt.pem– internal traffic
Supported formats:
-
PKCS12
-
P7B
-
PEM
Before uploading certificates, the HAProxy configuration template must be updated.
Updating the HAProxy Configuration
-
Navigate to:
Tools → Tenant configuration
-
Open the Templates tab.
-
Select haproxy.
-
Click View for
haproxy.cfg. -
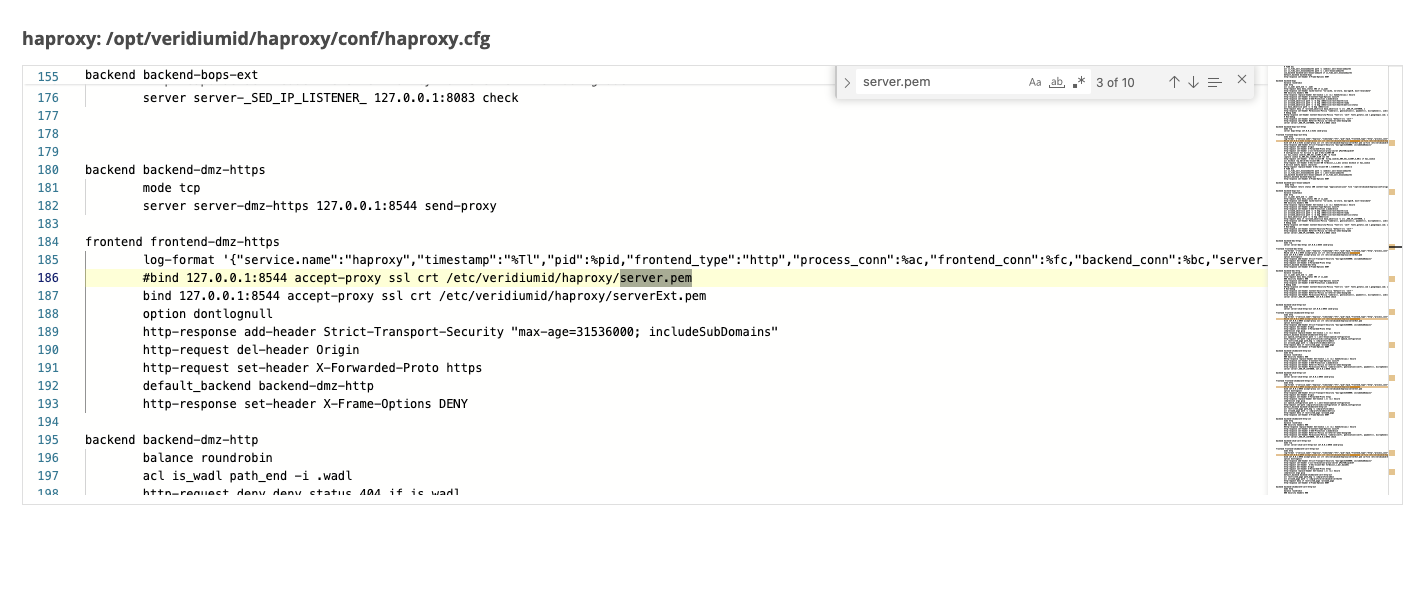
Search for:
server.pem
For every occurrence:
-
comment the line containing
server.pem -
uncomment the line referencing
serverExt.pemorserverInt.pem
Example:
# ssl crt /etc/veridiumid/haproxy/server.pem
ssl crt /etc/veridiumid/haproxy/serverExt.pem
ssl crt /etc/veridiumid/haproxy/serverInt.pem
This modification typically occurs 10 times in the configuration.
-
Save the configuration.
Apply the Template
-
Navigate to:
Tools → Nodes
-
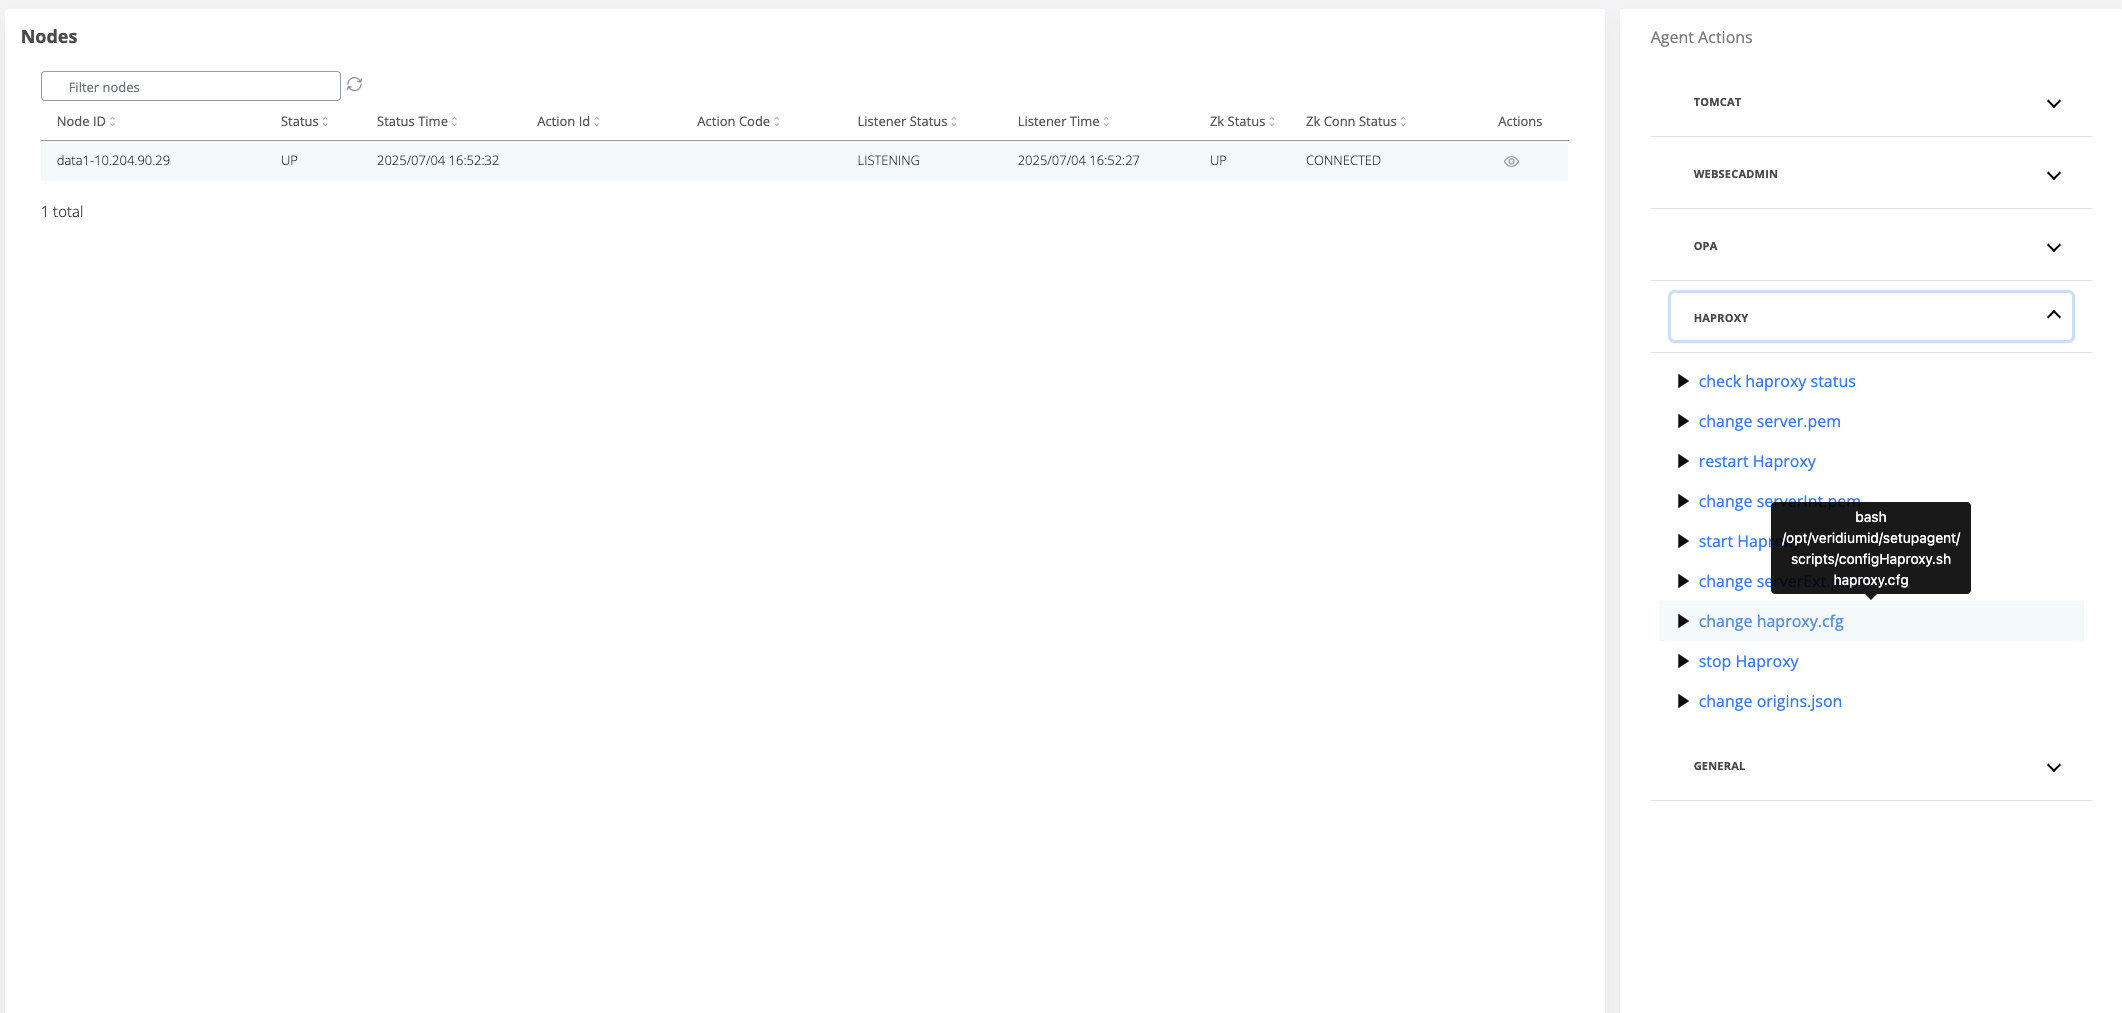
Expand Haproxy.
-
Run the command:
change Haproxy.cfg
-
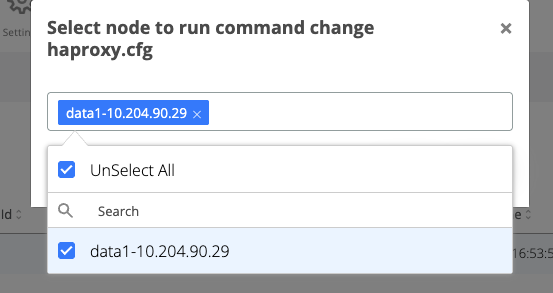
Select the webapp nodes.
-
Click Run.
Changing serverExt.pem
-
Navigate to:
Tools → Haproxy configuration
-
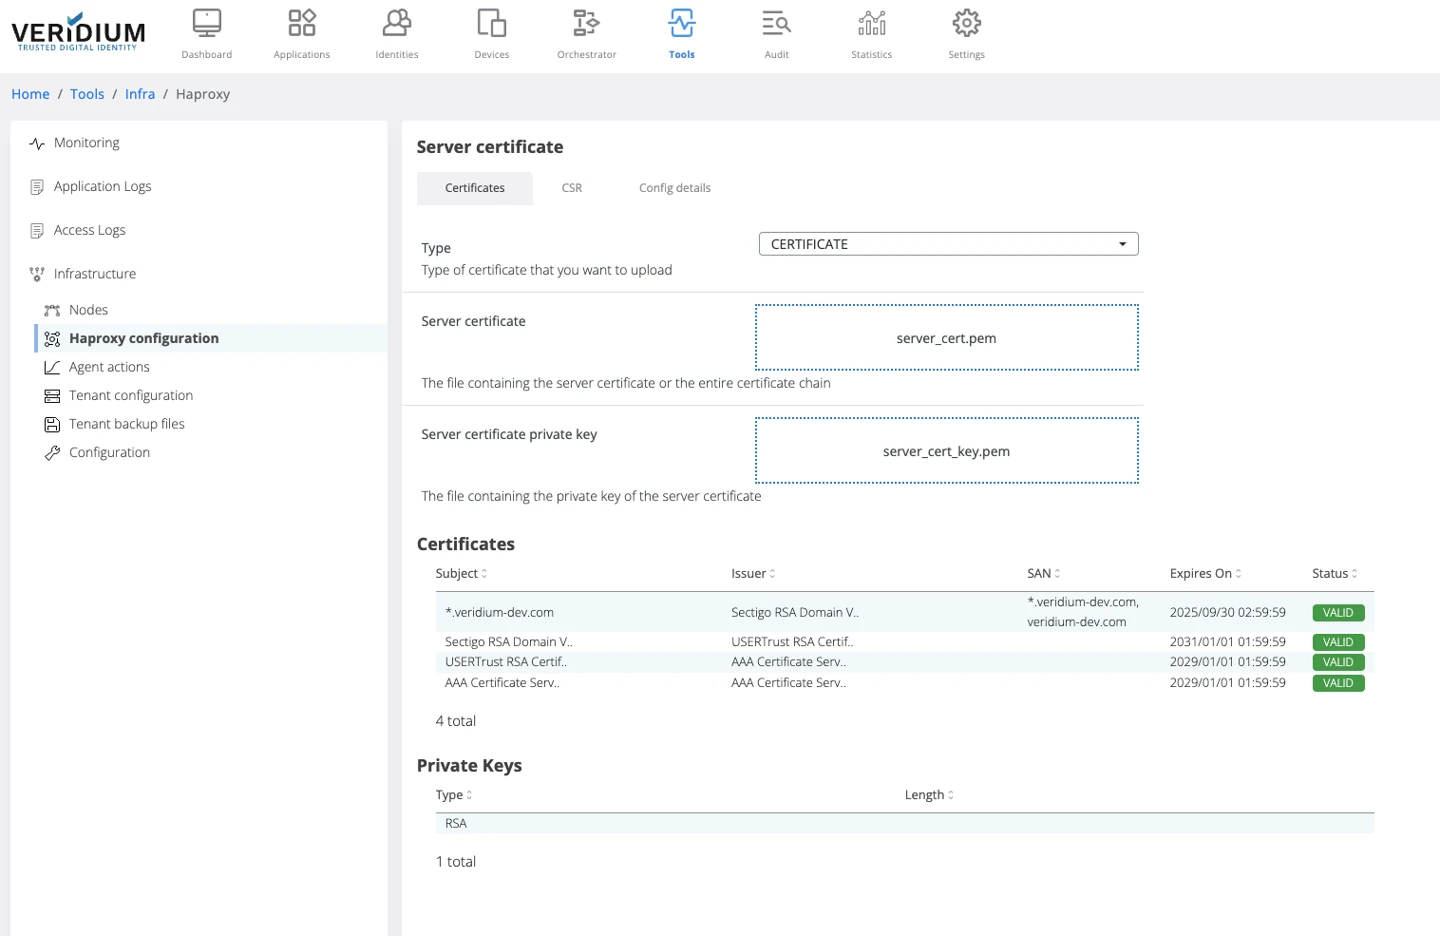
Open the Certificates tab.
-
Upload the external certificate using:
-
PKCS12 (recommended), or
-
Certificate + private key
-
Click Save.
The certificate chain will be automatically added to the server Truststore.
Apply serverExt.pem on Nodes
-
Go to:
Settings → Nodes
-
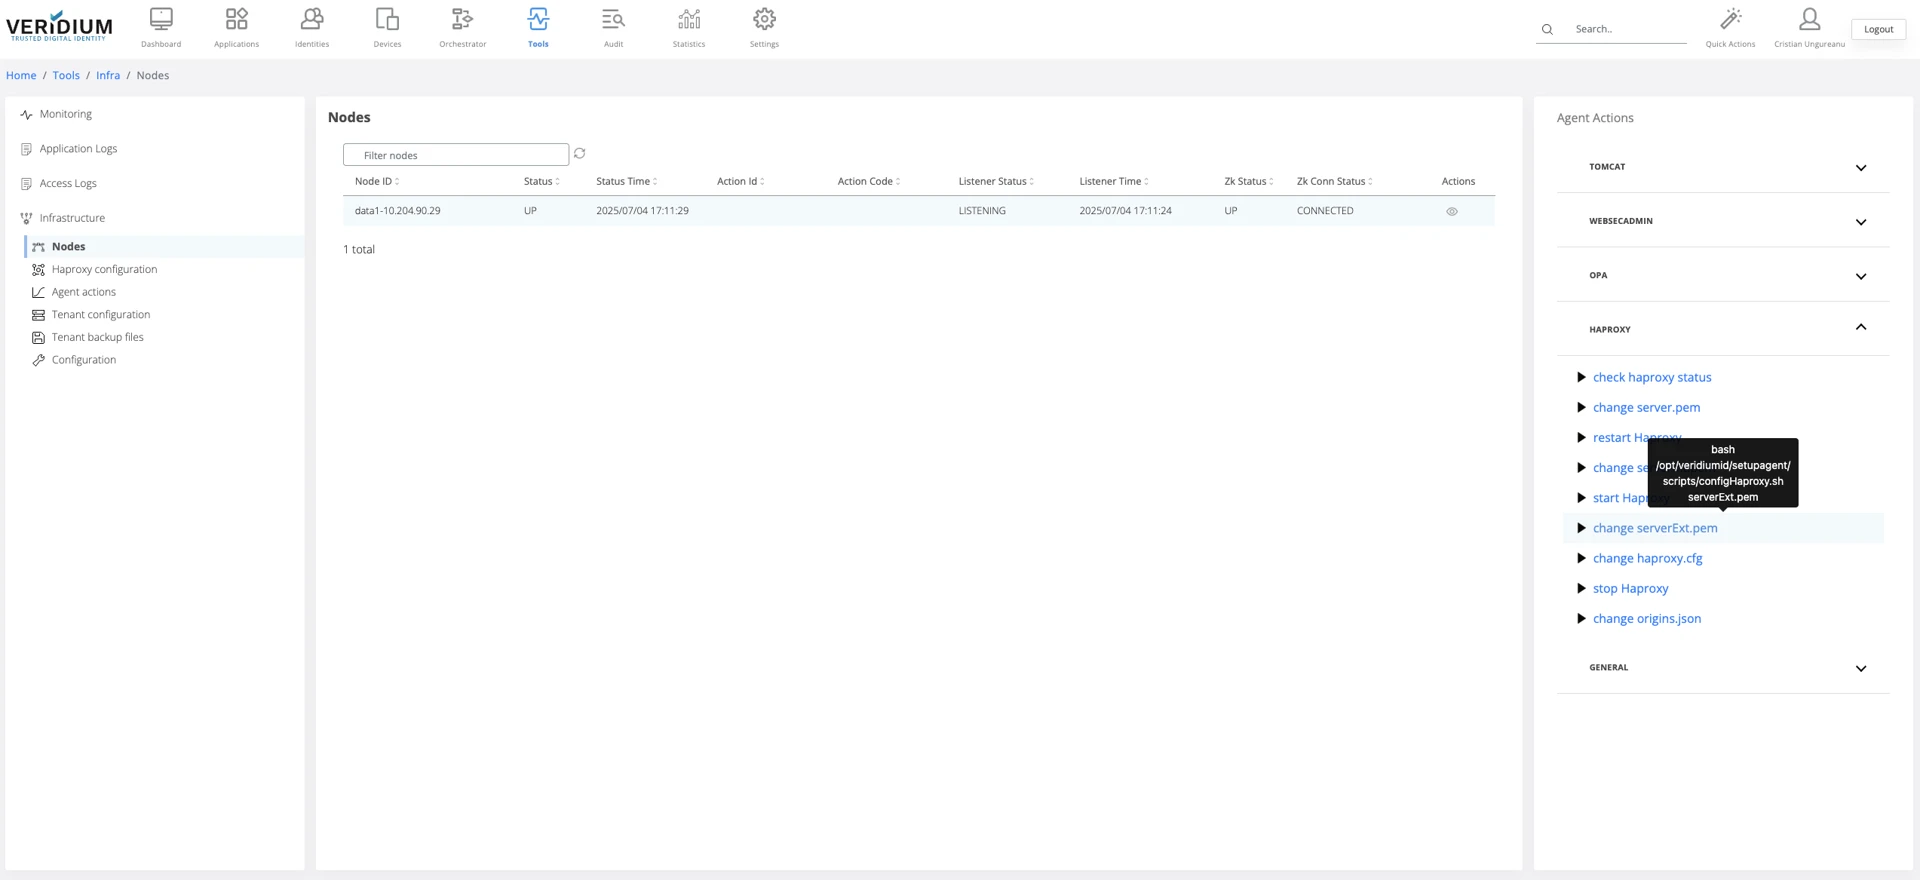
Expand Haproxy.
-
Run:
change serverExt.pem
-
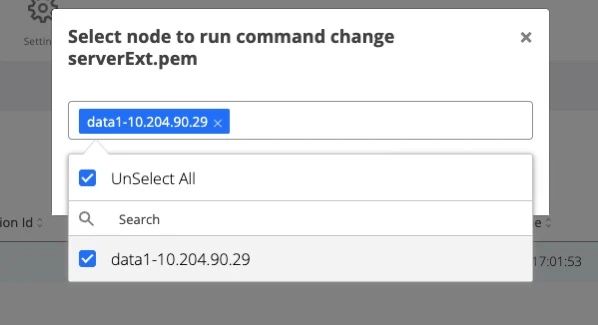
Select all webapp nodes.
-
Click Run.
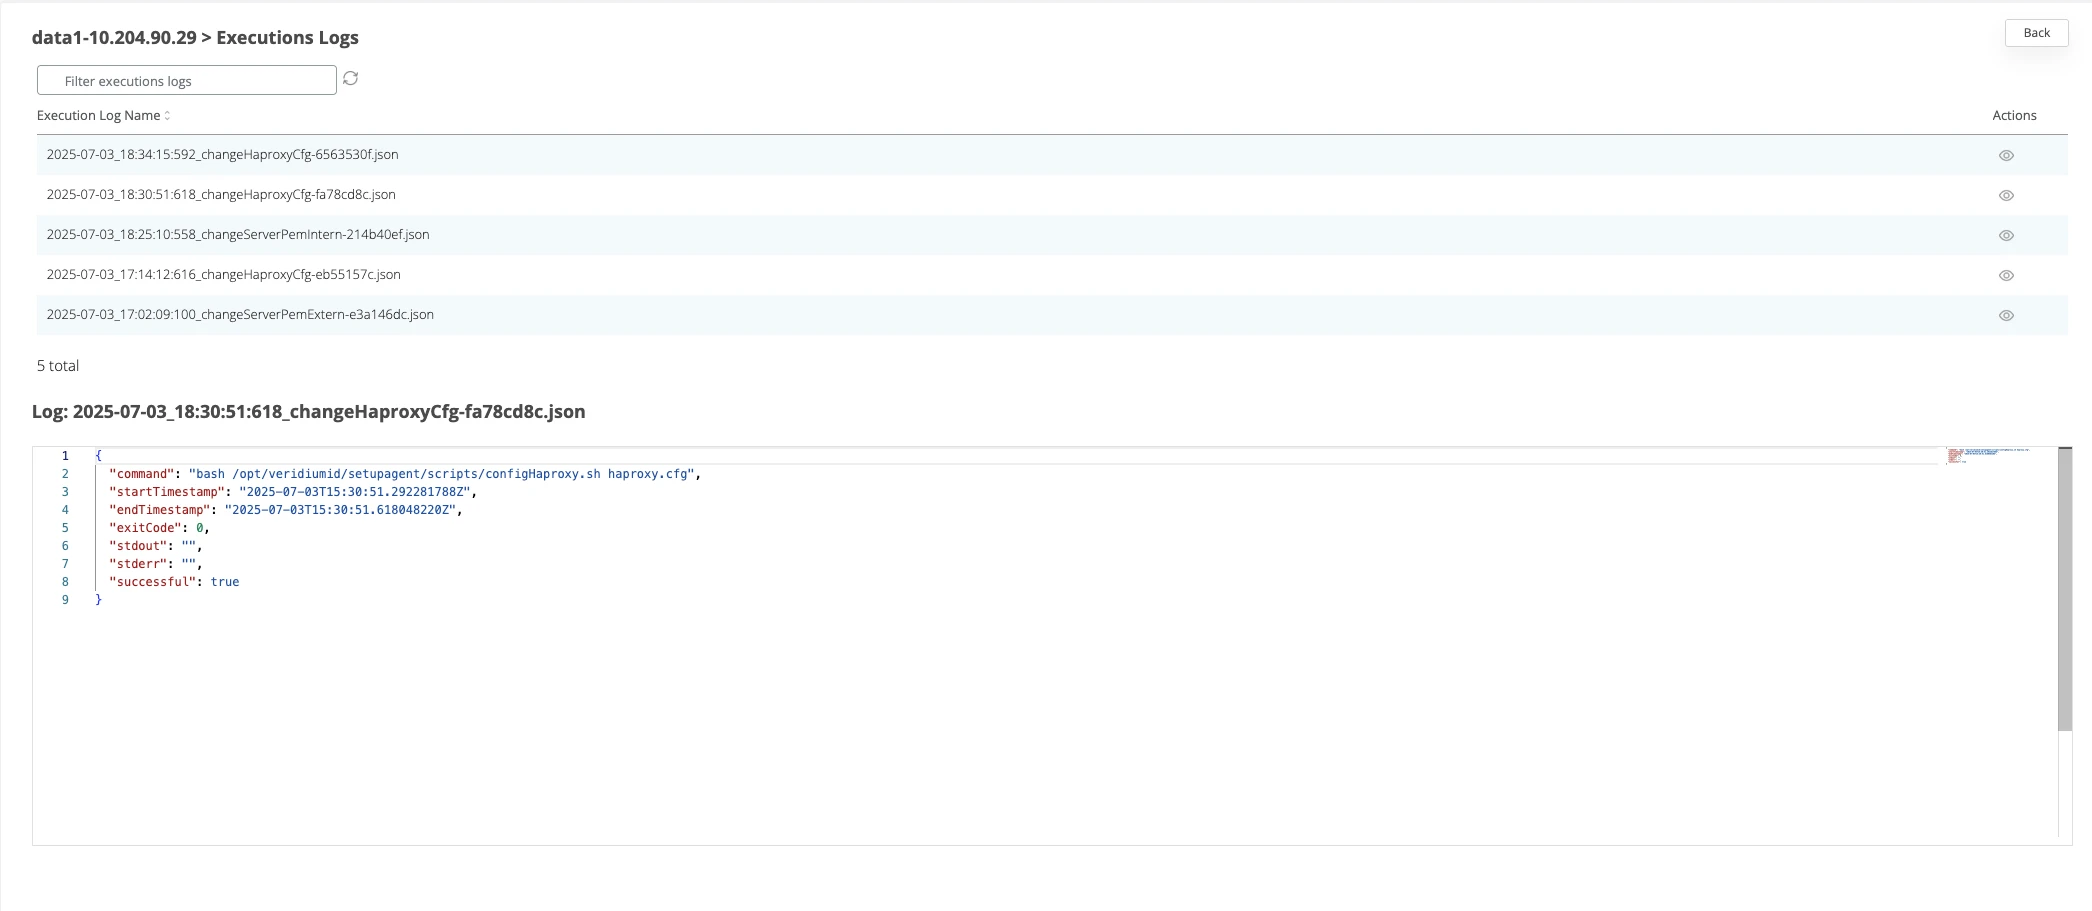
Execution results appear in the Nodes section.
Generating and Applying serverInt.pem
To configure the internal certificate, a certificate must first be issued by the internal certificate authority (CA).
Generate the CSR
-
Navigate to:
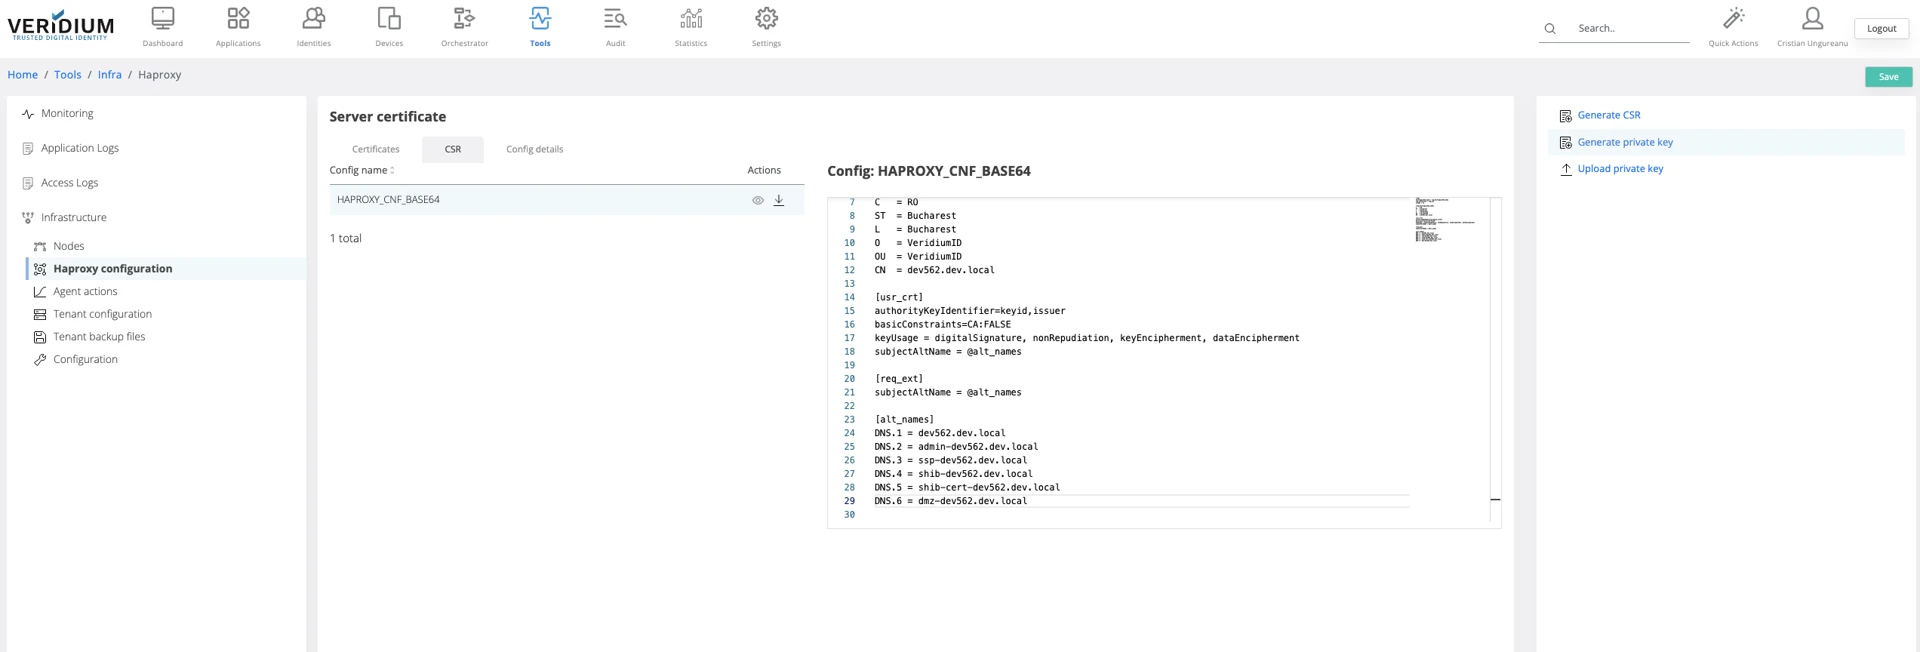
Tools → Haproxy configuration → CSR
-
Open:
HAPROXY_CNF_BASE64
-
Fill in the required CSR details.
-
Click Save.
Generate Private Key and CSR
-
Click Generate private key
(skip if a private key already exists)
-
Click Generate CSR and download the file.
Issue the Certificate from the CA
Example below uses Microsoft Active Directory Certificate Services.

-
Select Get a certificate.

-
Select Advanced certificate request.
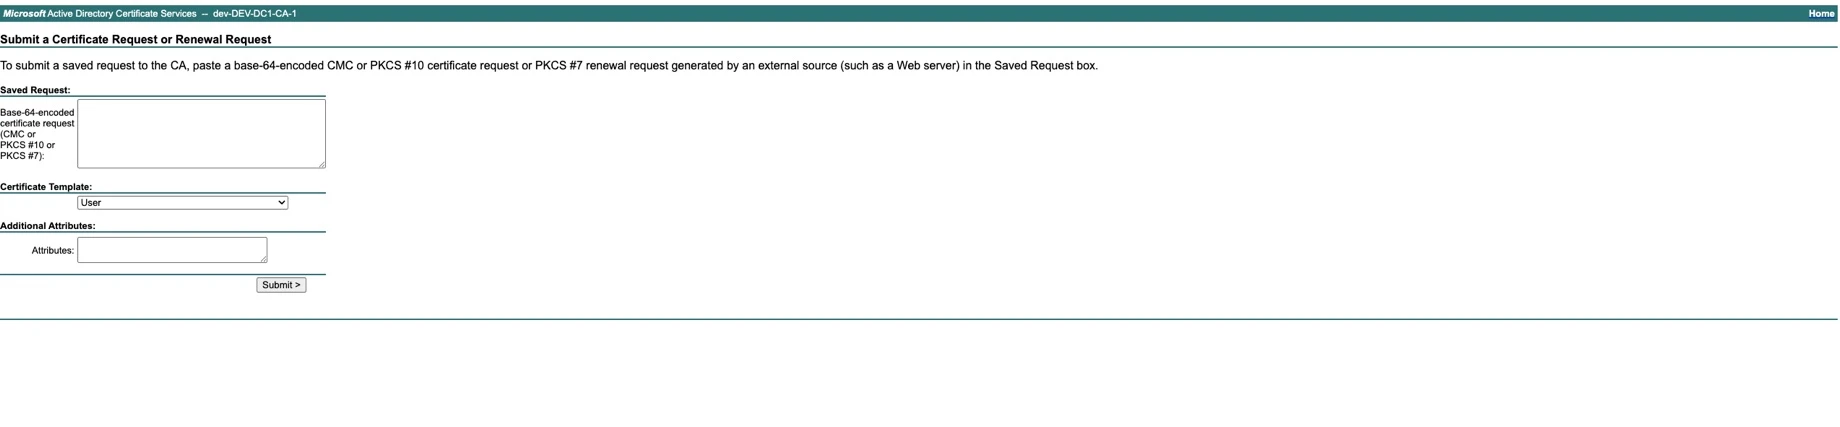
-
Paste the CSR and select:
Certificate Template = Web Server
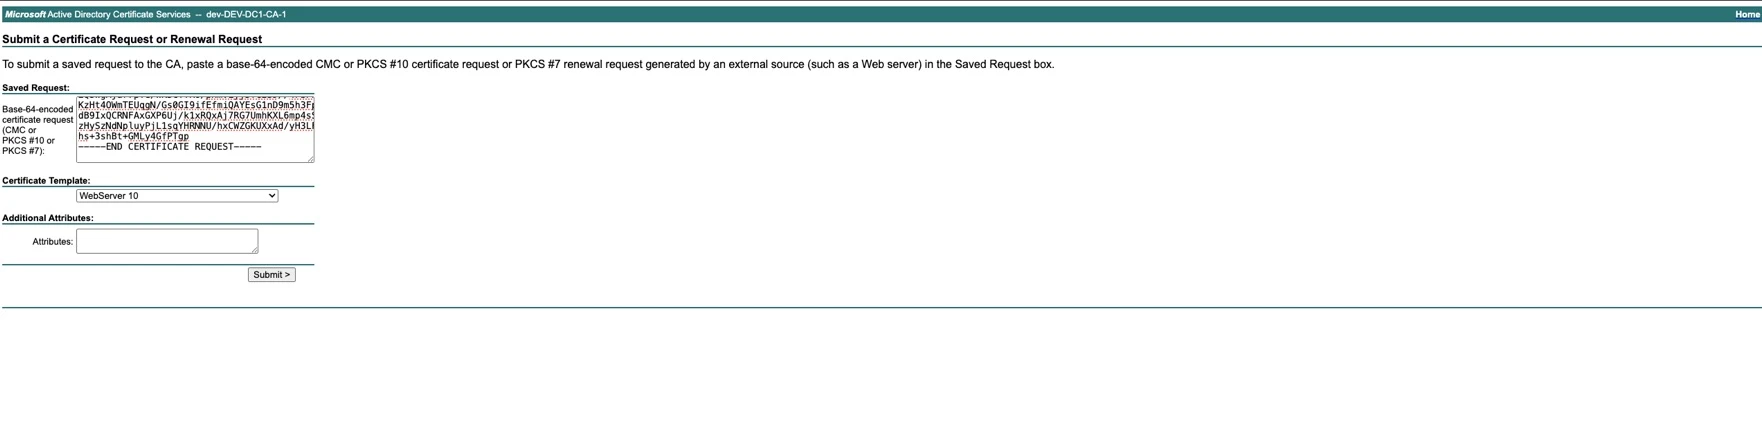
-
Submit the request.
-
Download the certificate Base64 encoded certificate chain.
Upload the Internal Certificate
-
Download the private key from:
Tools → Haproxy configuration
→ Config details
→ HAPROXY_PUBLIC_CERT_KEY_PEM_BASE64
-
Navigate to:
Tools → Haproxy configuration → Certificates
-
Select Type = CERTIFICATE
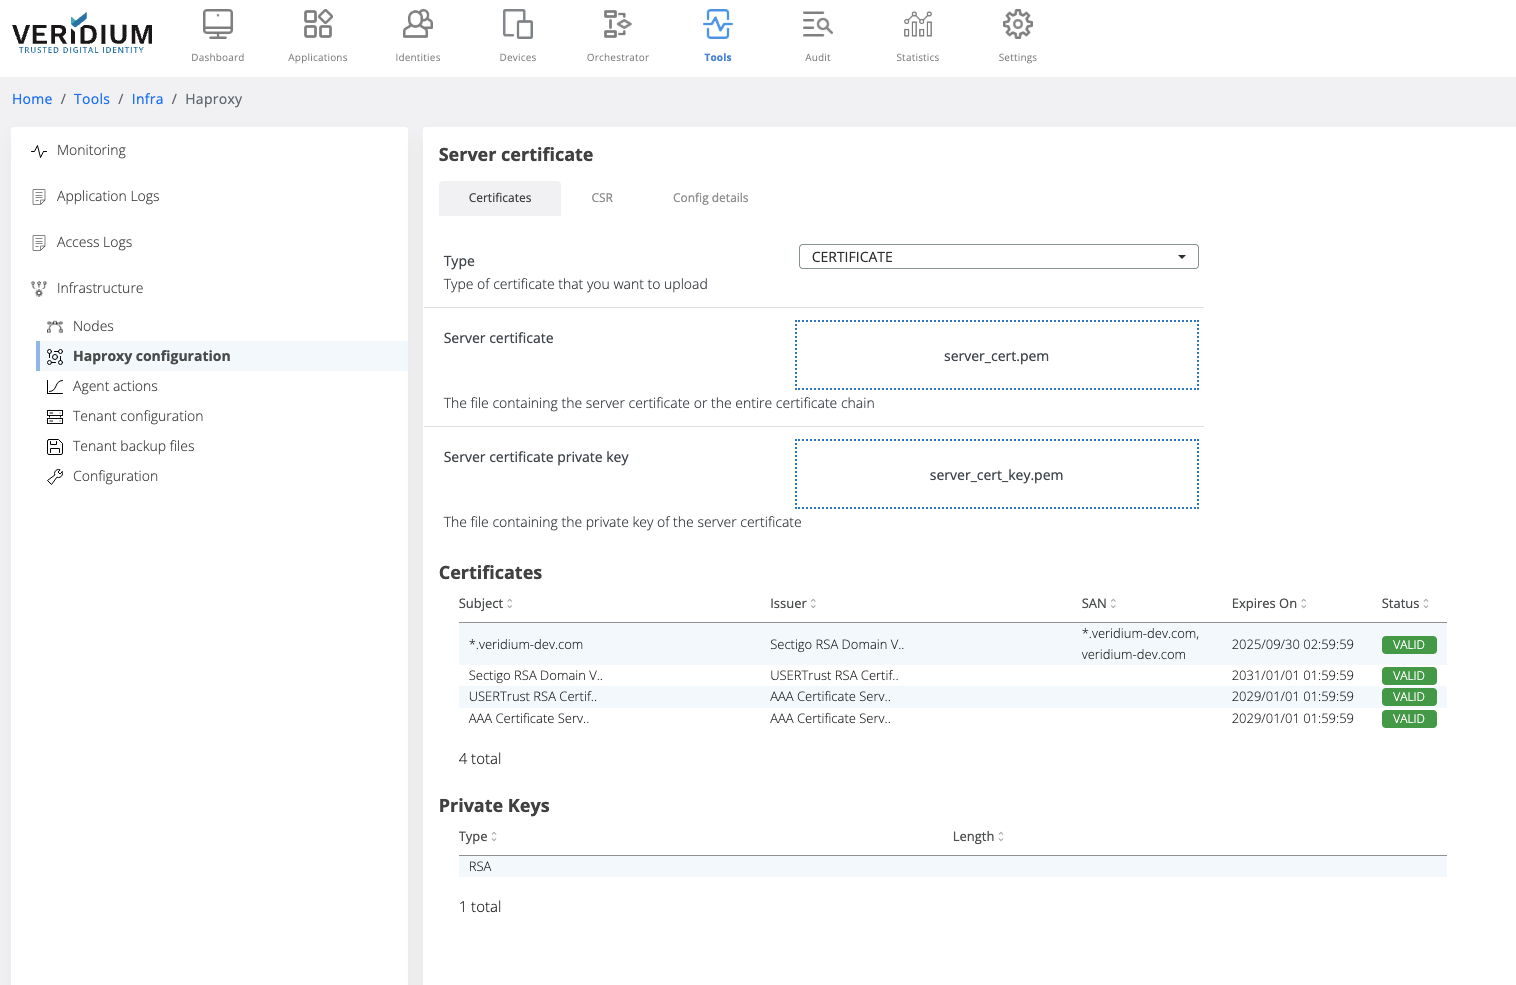
-
Upload:
-
certificate chain
-
private key
-
Click Save.
Apply serverInt.pem
-
Navigate to:
Tools → Nodes
-
Expand Haproxy.
-
Run:
change serverInt.pem
-
Select the webapp nodes and click Run.
Execution status will appear for each node.
(Optional) - Removing the the previous domain certificate from Truststores
This step is applicable when changing from self-signed certificate with another having a different chain.
-
Navigate to VeridiumID Admin Console → Settings → Certificates → Truststores.
-
Remove the entry for the self-signed certificate from the interface.