
Summary
This document describes the steps required to configure an F5 BIG-IP appliance to work as a reverse proxy and load balancer for VeridiumID services.
The configuration enables the F5 device to:
-
Terminate SSL connections
-
Perform client certificate authentication
-
Insert required Veridium headers:
-
X-SSL-Client-DN -
x-ssl-termination-proxy-secret
-
-
Load balance requests to the Veridium backend servers
-
Route traffic to the appropriate services using F5 policies and virtual servers
The guide walks through the complete configuration process, including:
-
Adding backend nodes
-
Creating load balancing pools
-
Creating required iRules
-
Importing SSL certificates
-
Creating SSL profiles
-
Configuring HTTP profiles
-
Creating traffic policies
-
Configuring virtual servers
The final result is an F5 configuration that properly routes requests to the following Veridium services:
|
Service |
Purpose |
|---|---|
|
BOPS |
Core Veridium authentication service |
|
DMZ Web Application |
External authentication endpoints |
|
IDP |
Identity Provider (SAML) |
|
SSP |
Self-Service Portal |
|
WebSec Admin |
Administrative interface |
The configuration also ensures that client certificate information is forwarded to VeridiumID using HTTP headers, allowing the platform to properly identify and authenticate users.
1. Add Backend Nodes
Login to the F5 management interface and Create nodes.
Local Traffic → Nodes
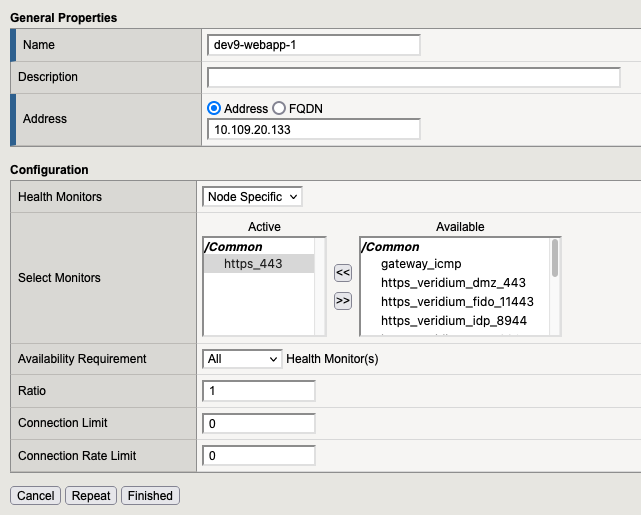
Final Node Configuration
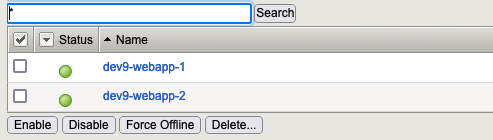
After creating both nodes, the list under Local Traffic → Nodes should look similar to:
2. Create Pools
Navigate to:
Local Traffic → Pools
Click Create.
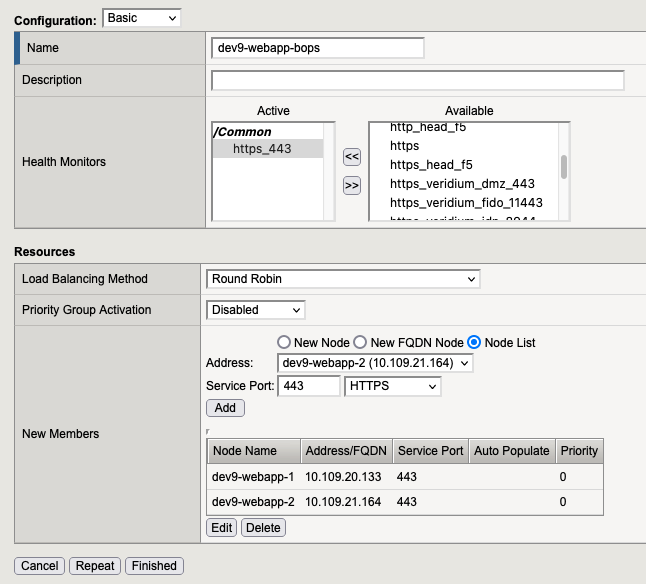
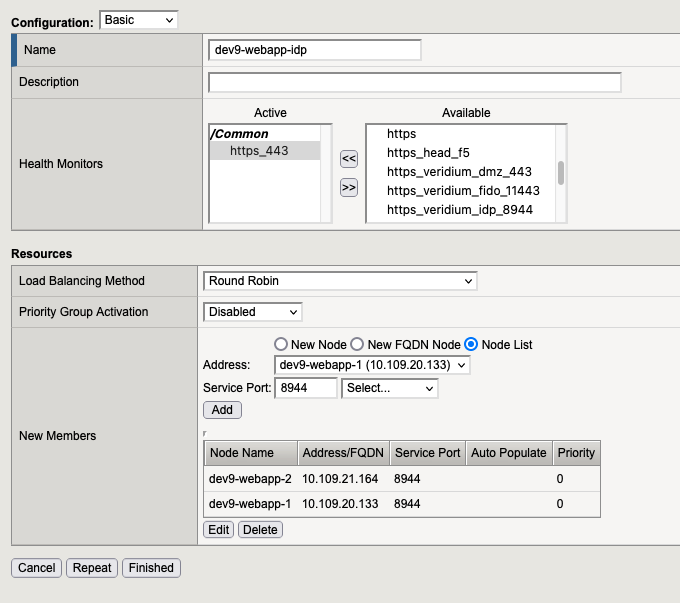
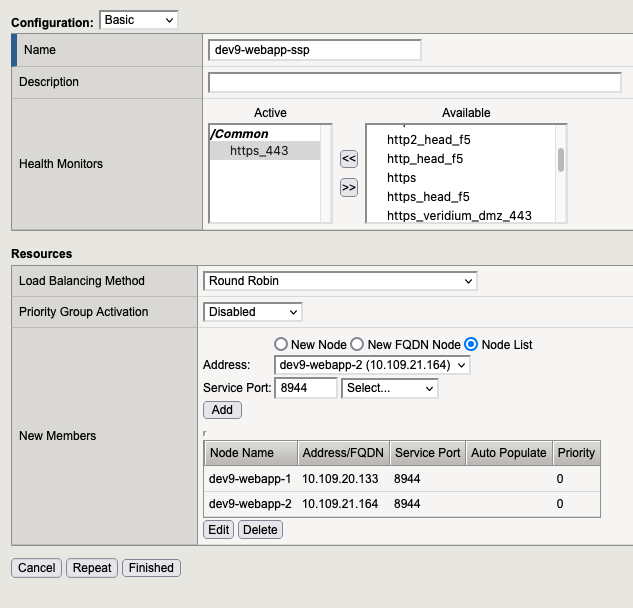
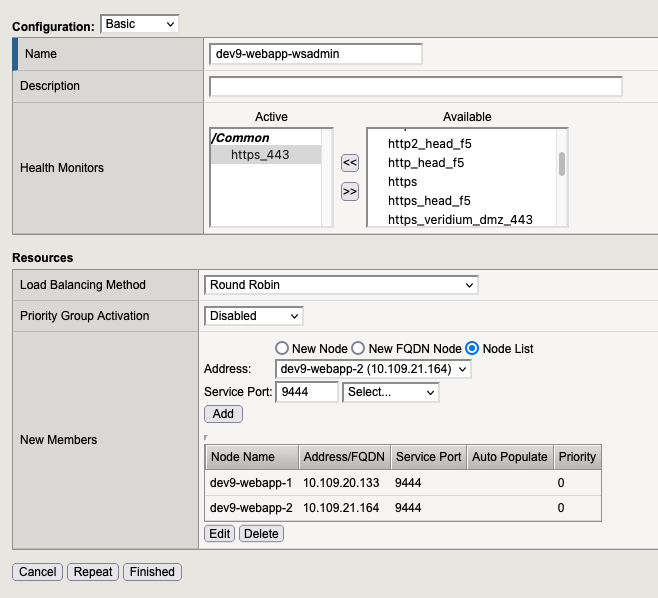
Each pool corresponds to a Veridium service.
2.1 Pool for bops
2.2. Pool for dmz
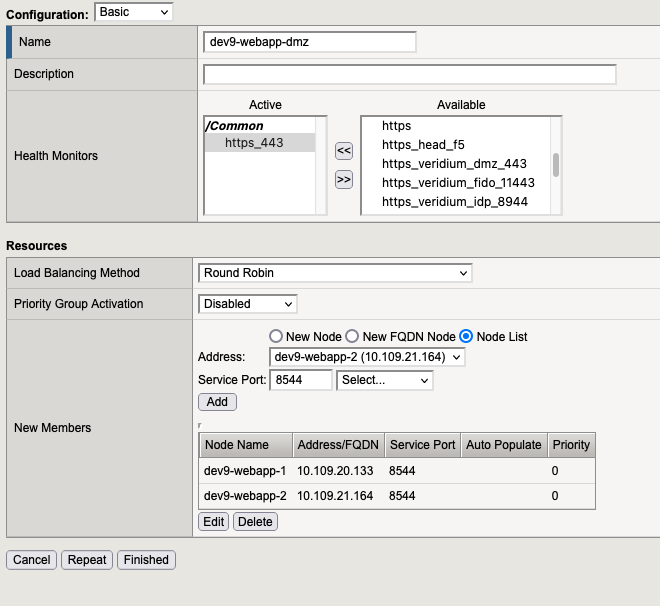
2.3. Pool for idp
2.3. Pool for ssp
2.3. Pool for websec admin
2.4. At the end we need to have

3. Create iRules
Before creating the iRules, retrieve the proxy secret from the Veridium server.
Location:
grep x-ssl-termination-proxy-secret /opt/veridiumid/haproxy/conf/haproxy.cfg | sort -u
Navigate to:
Local Traffic → iRules
Click Create.
3. Create two IRules
!!! Before we create the following rules we need to get the “x-ssl-termination-proxy-secret” from haproxy located the webapp. ( /etc/veridiumid/haproxy/haproxy.cfg ) , and we need to replace XXXXXXXXX with our x-ssl-termination-proxy-secret.
Go in “Local Traffic” → “iRules” and here press “create” button (located in the right side).
3.1 iRule 1 – Basic Header Injection
###Retrieve the client certificate DN
when CLIENTSSL_CLIENTHELLO {
    set dist_name ""
}
###Create the Headers to insert the proxy secret and the client certificate DN.
when HTTP_REQUEST {
    set dist_name [X509::subject [SSL::cert 0]]
    HTTP::header insert "x-ssl-termination-proxy-secret" "1111111111111"
    HTTP::header insert "X-SSL-Client-DN" $dist_name
     #log local0. "HERE START"
     #log local0. "$dist_name"
     #log local0. "HERE END"
}
3.2 iRule 2 – Certificate Validation + Session Persistence
###Retrieve the client certificate DN
when CLIENTSSL_CLIENTHELLO {
    set dist_name ""
}
when CLIENTSSL_CLIENTCERT {
    if {[SSL::cert count] > 0} {
        set dist_name [X509::subject [SSL::cert 0]]
        log local0. "$dist_name"
    }
}
###Create the Headers to insert the proxy secret and the client certificate DN.
when HTTP_REQUEST {
    log local0. "$dist_name"
    HTTP::header insert "x-ssl-termination-proxy-secret" "1111111111111"
    if { $dist_name != ""} {
        HTTP::header insert "X-SSL-Client-DN" $dist_name
    }
  if { [HTTP::cookie exists "JSESSIONID"] } {
    persist uie [HTTP::cookie "JSESSIONID"]
  }
}
when HTTP_RESPONSE {
  if { [HTTP::cookie exists "JSESSIONID"] } {
    persist add uie [HTTP::cookie "JSESSIONID"]
  }
}
4. Import Certificates
You must import the following certificates from the Veridium server.
|
Certificate |
Location |
|---|---|
|
Wildcard SSL Certificate |
|
|
Veridium Client CA |
|
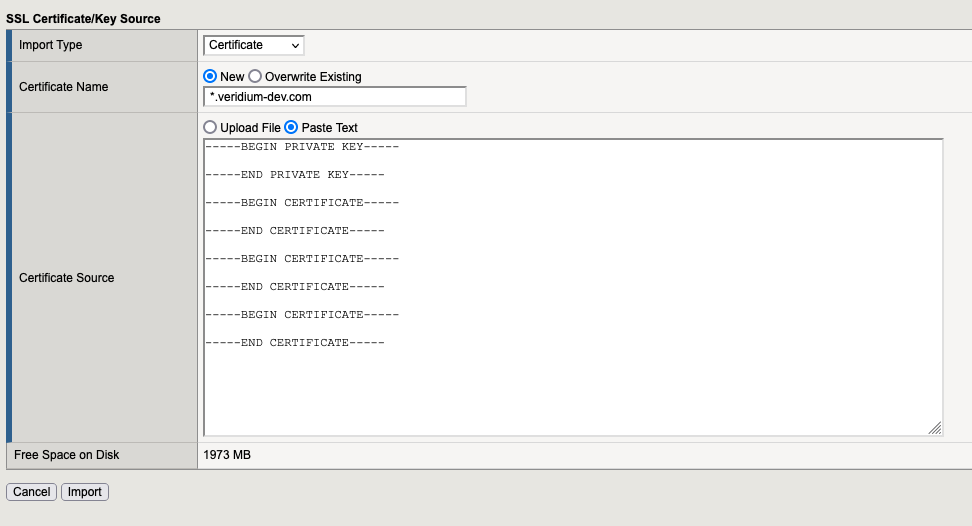
4.1 Import RSA Certificate & Key
Navigate to:
System → Certificate Management
→ Traffic Certificate Management
→ SSL Certificate List
Click Import.
Ensure the certificate file is in the required format.
4.2 Import Certificate Bundle (Client CA)
Import the Veridium client CA certificate.
Navigate to:
System → Certificate Management
→ Traffic Certificate Management
→ SSL Certificate List
Click Import.
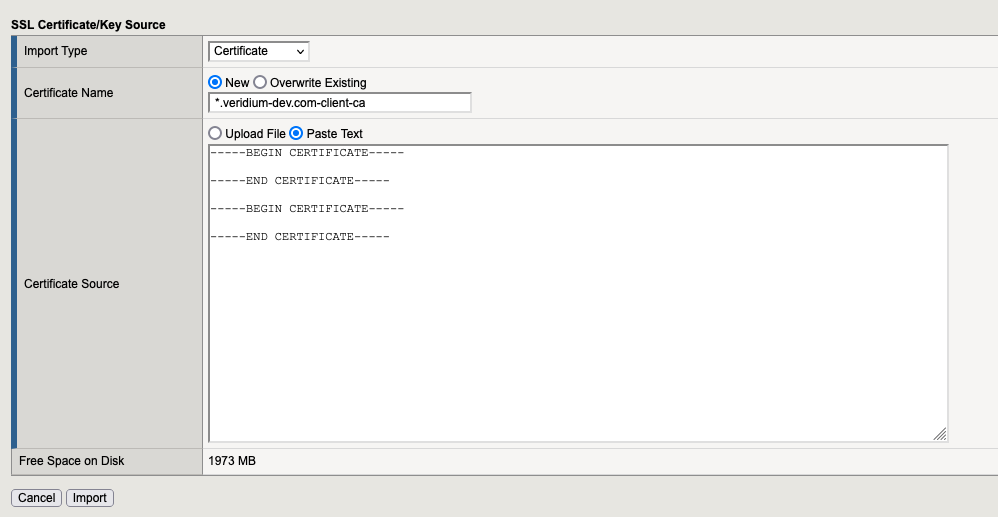
At the end we need to have something like this:

5. SSL Profiles
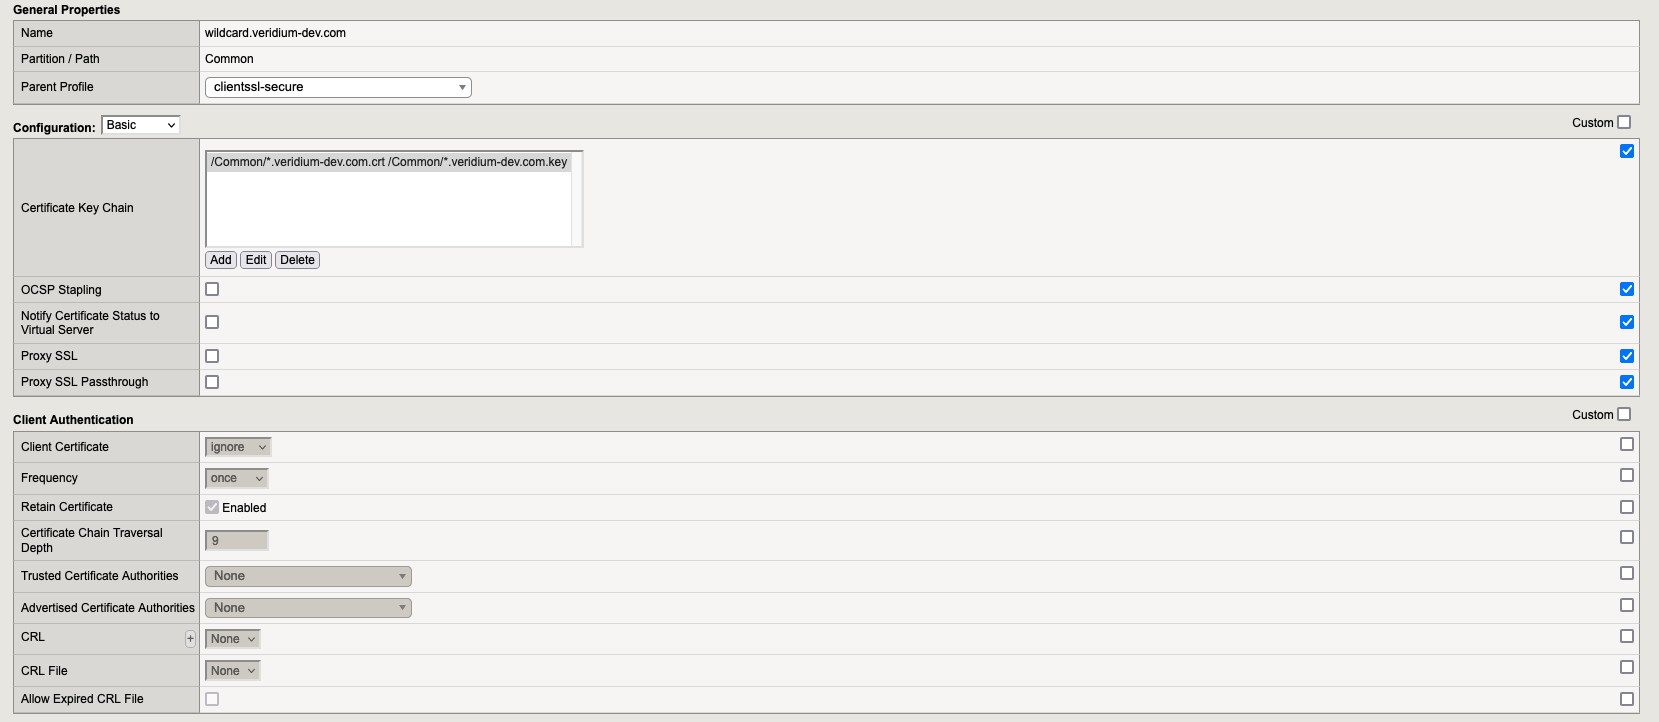
5.1 SSL Client Profiles
Navigate to:
Local Traffic → Profiles → SSL → Client
Create the following profiles.
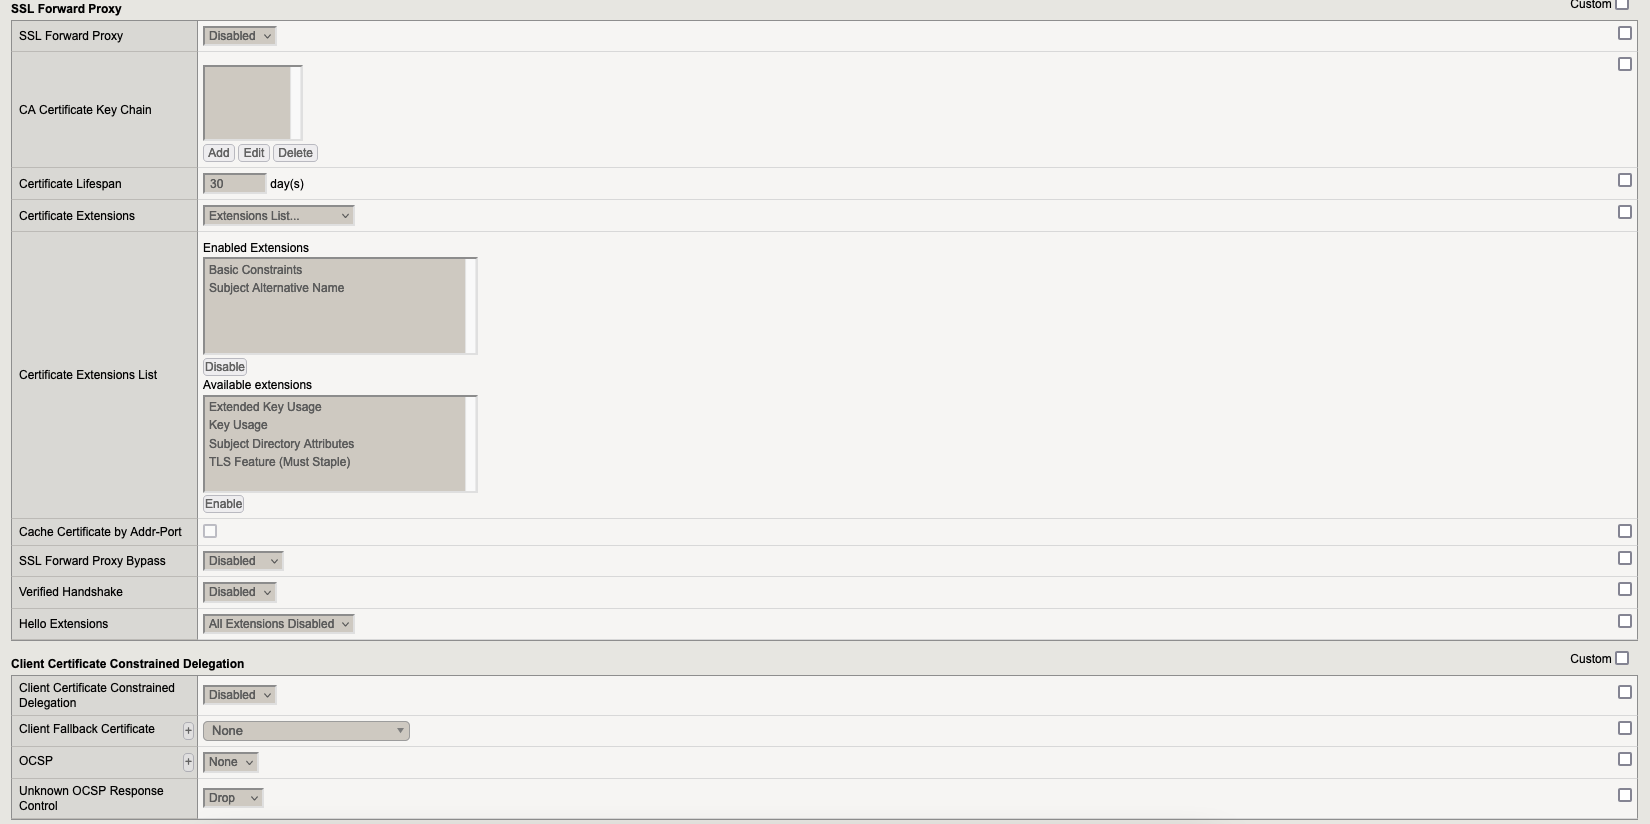
5.1.1 Profile
wildcard.veridium-dev.com

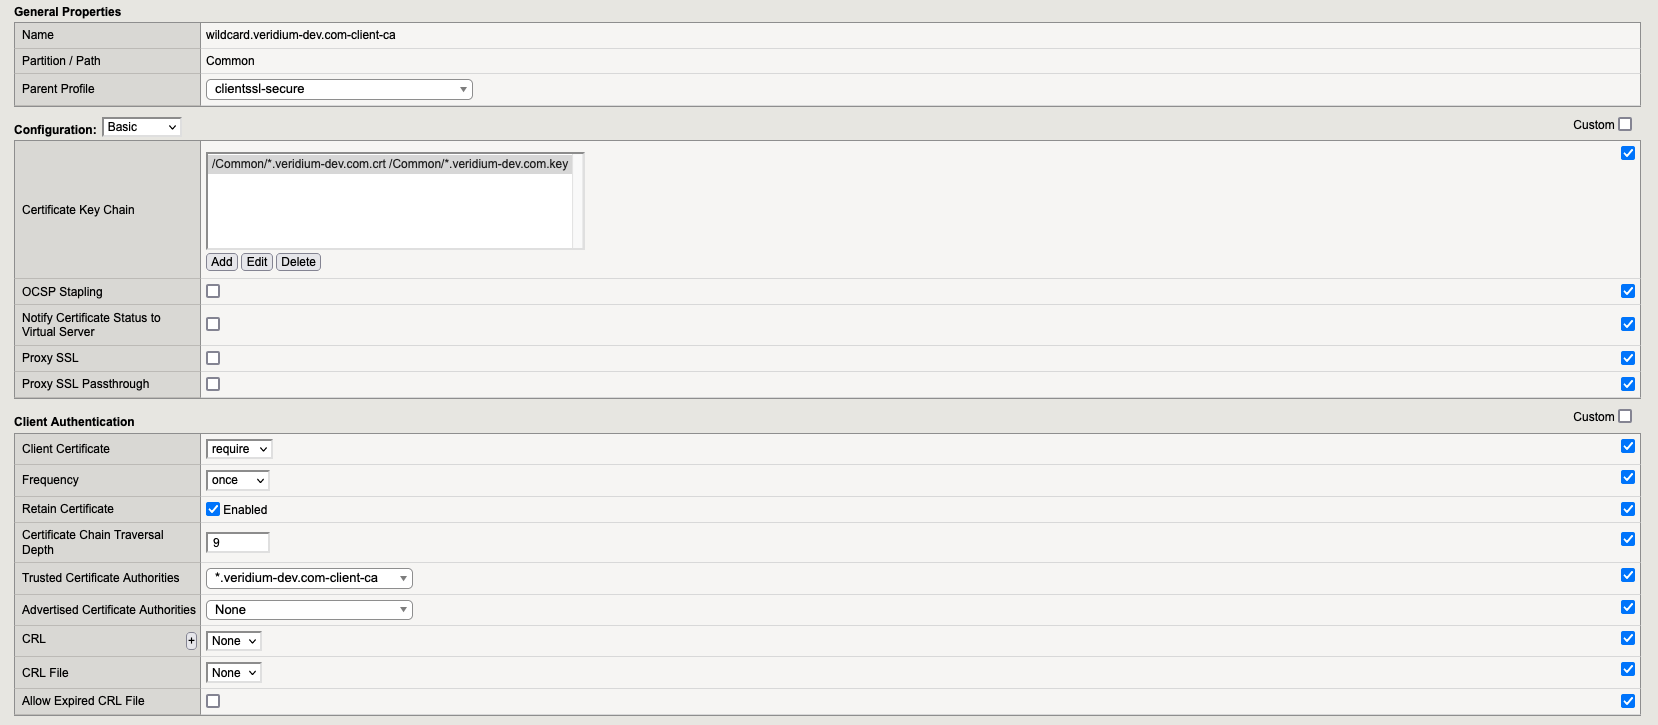
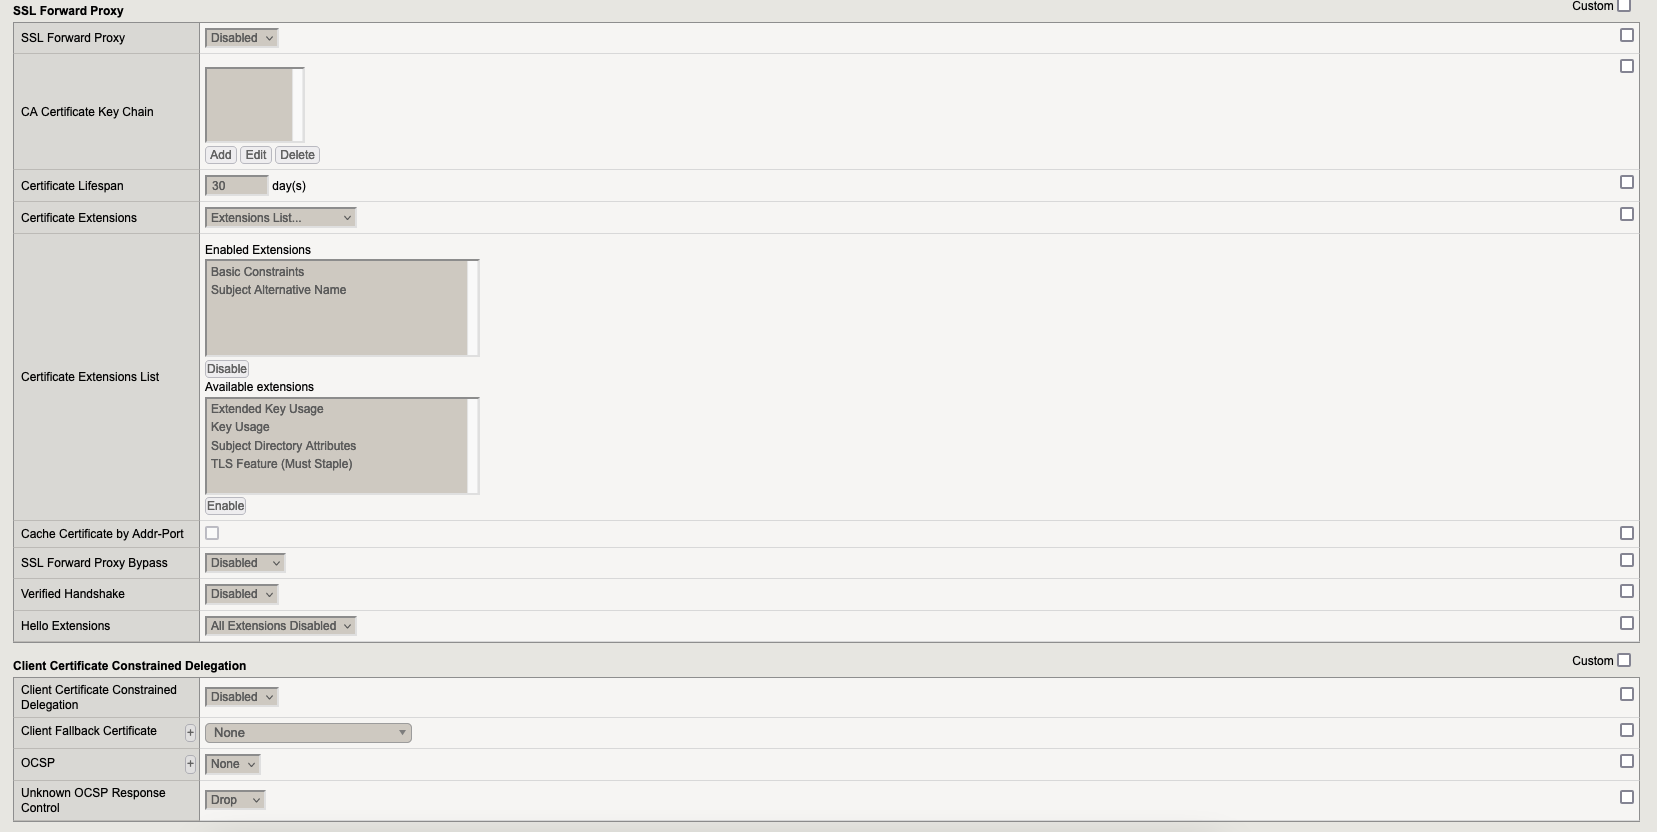
5.1.2 Profile
wildcard.veridium-dev.com-client-ca
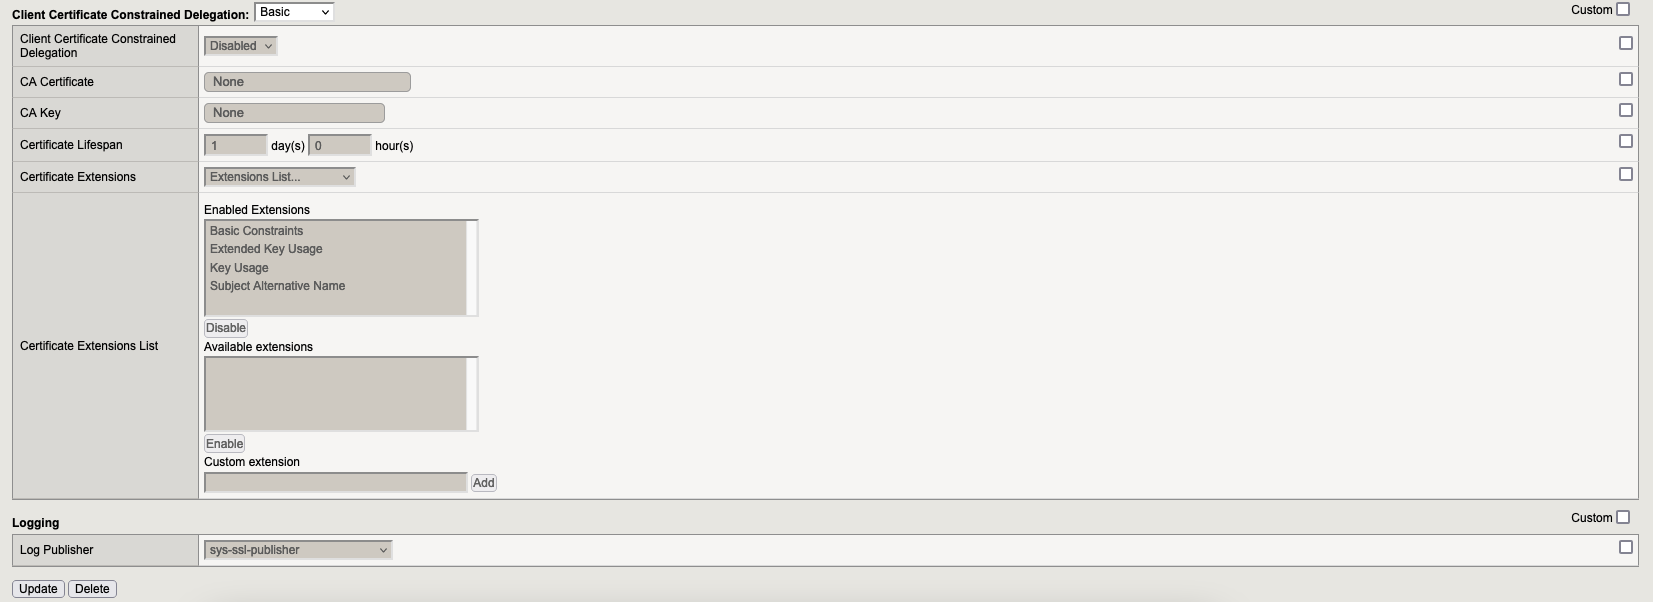
5.2 SSL Server Profile
Navigate to:
Local Traffic → Profiles → SSL → Server
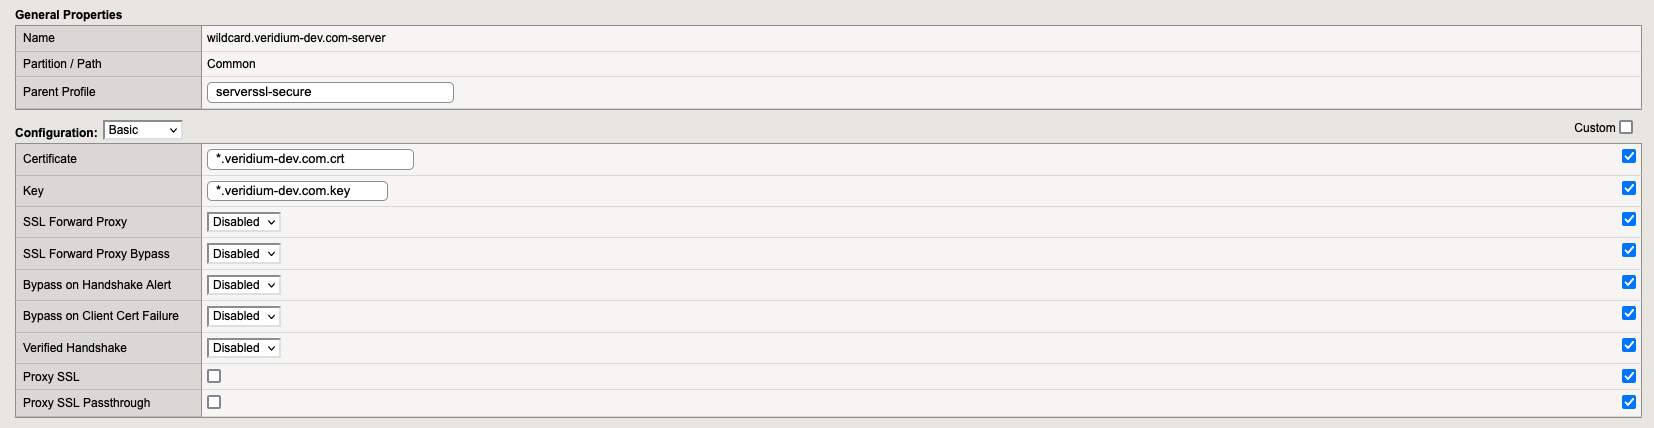
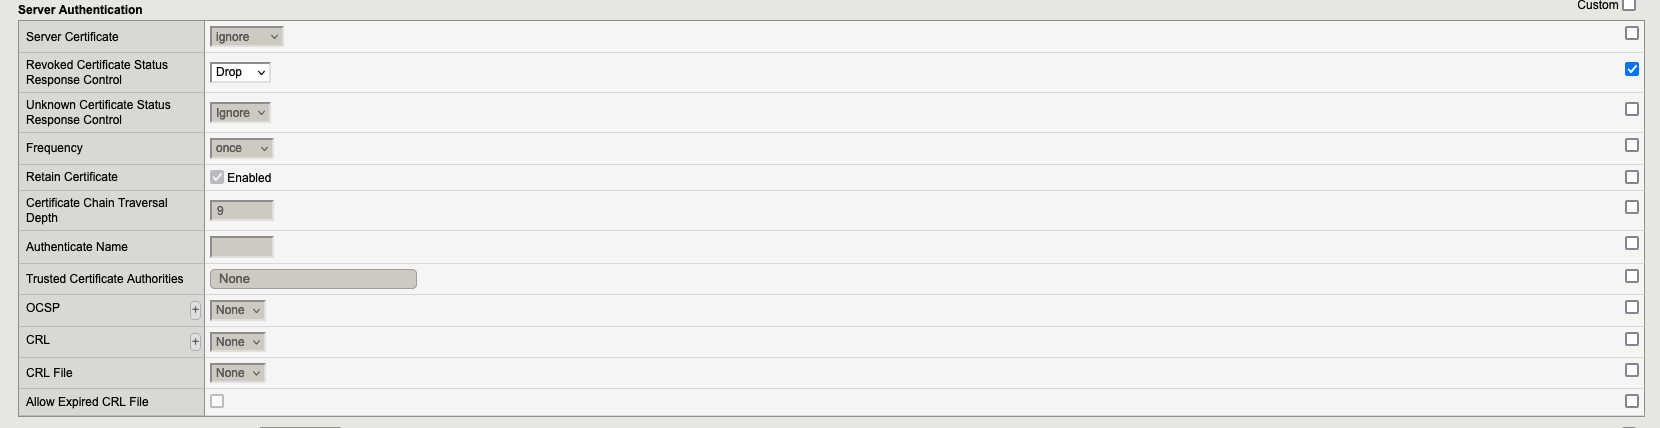
Create one server profile.
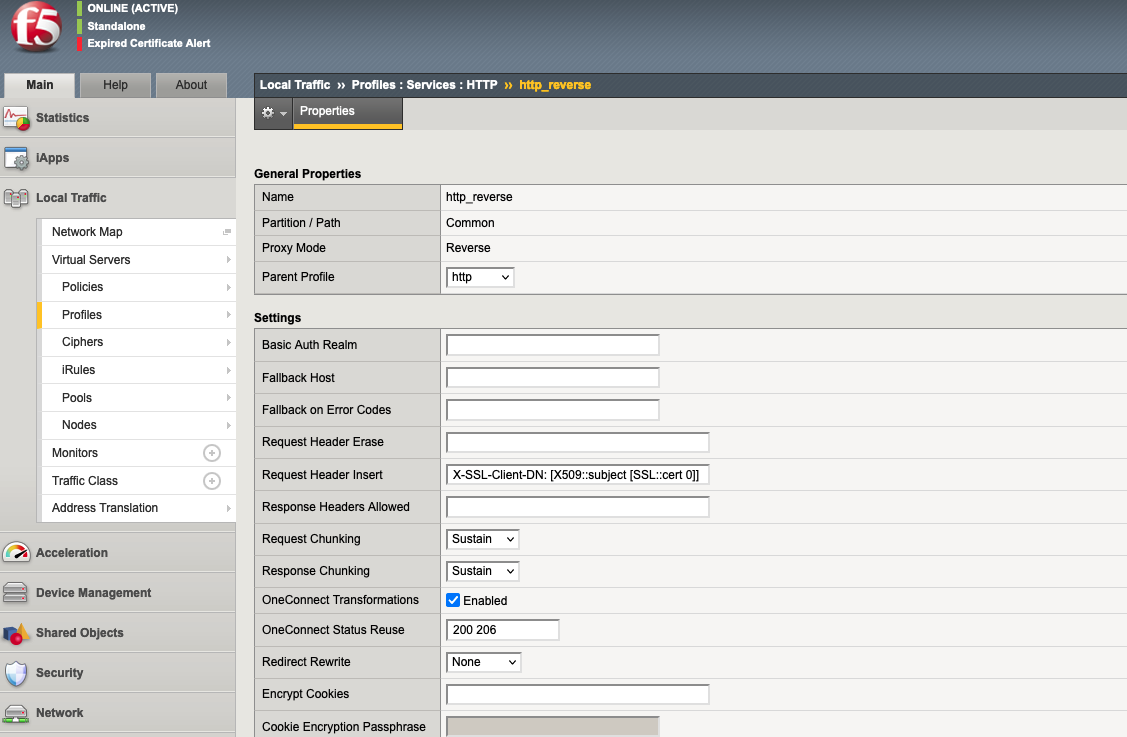
7. HTTP Profile
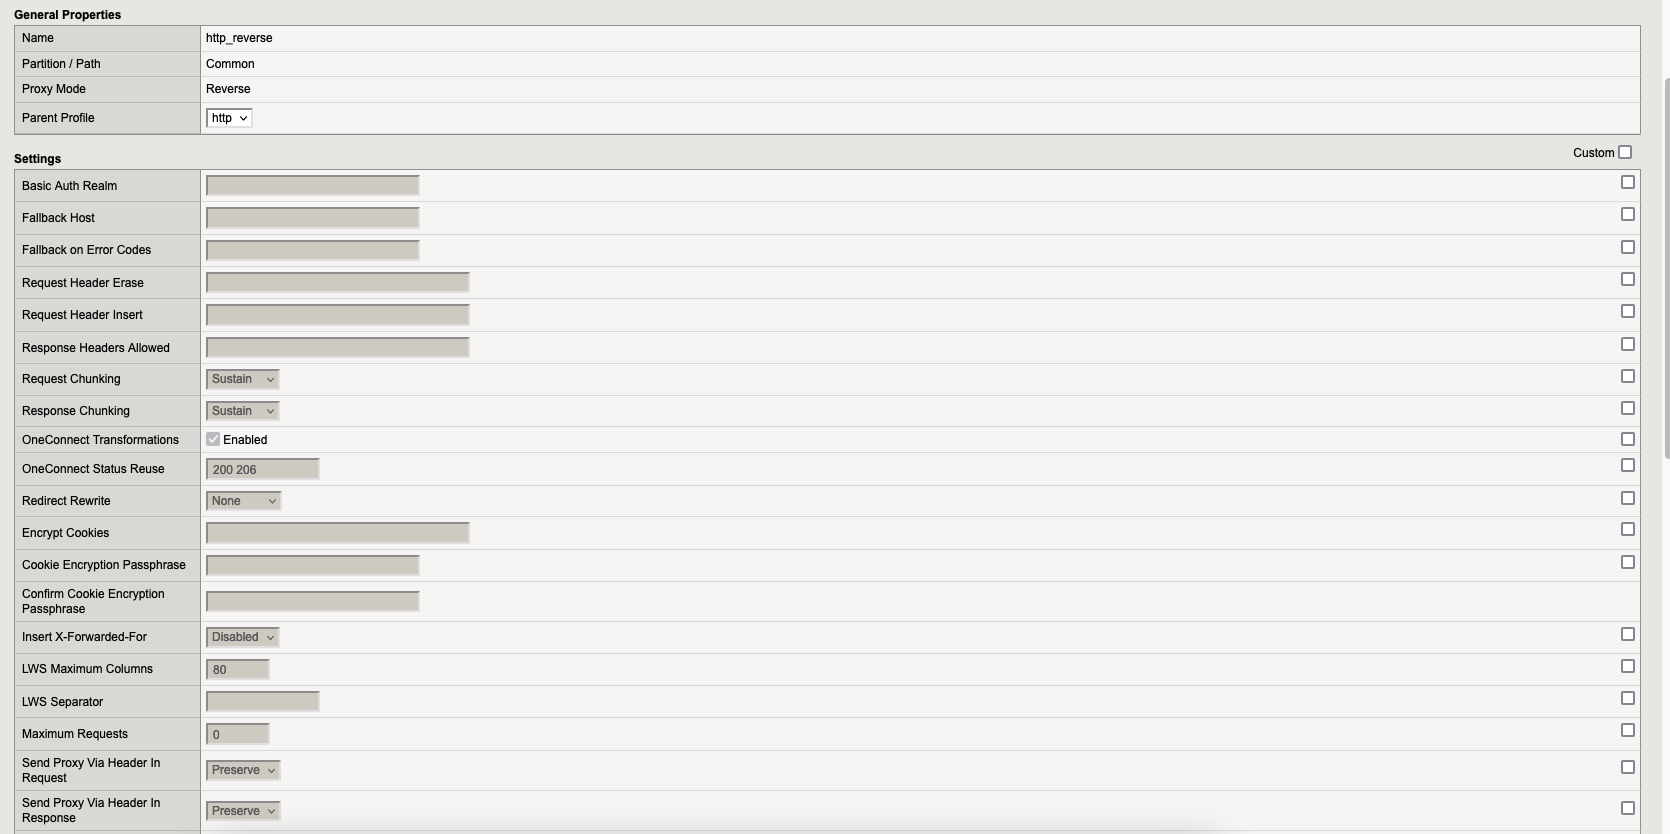
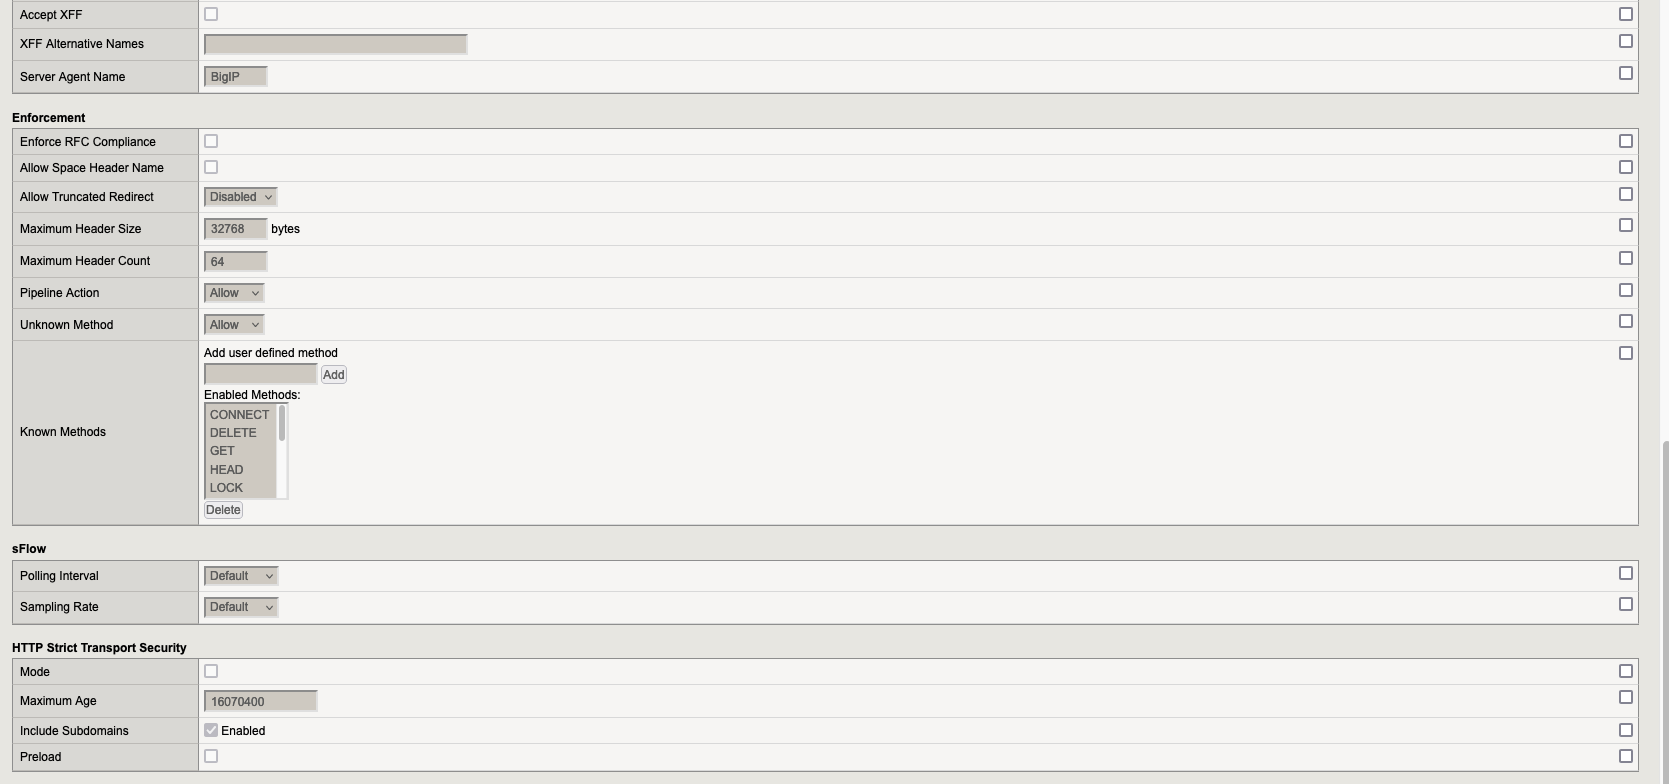
Navigate to:
Local Traffic → Profiles → Services
Create the profile:
http_reverse
8. Traffic Policies
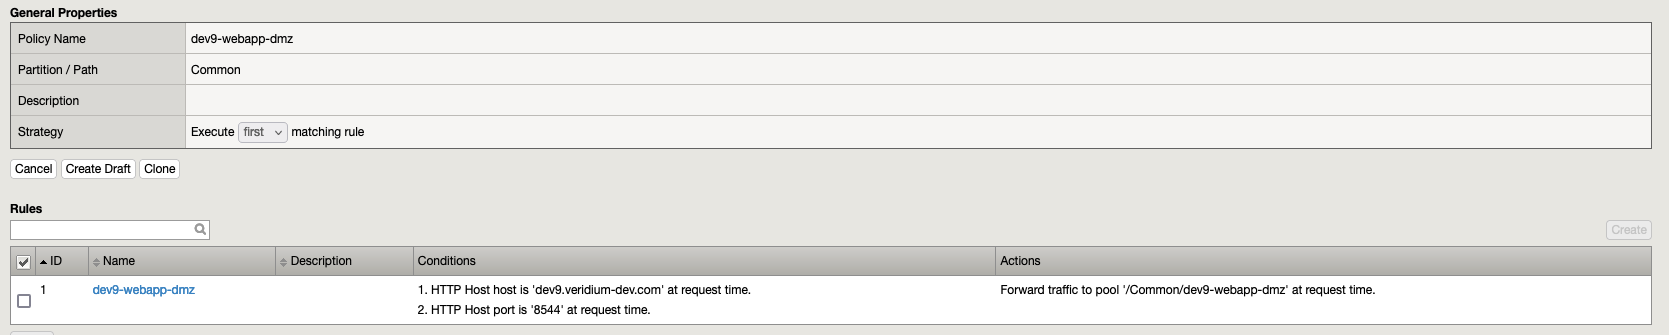
Navigate to:
Local Traffic → Policies → Policy List
Create the following policies.
8.1. Policy dev9-webapp-dmz
8.2. Policy dev9-webapp-idp
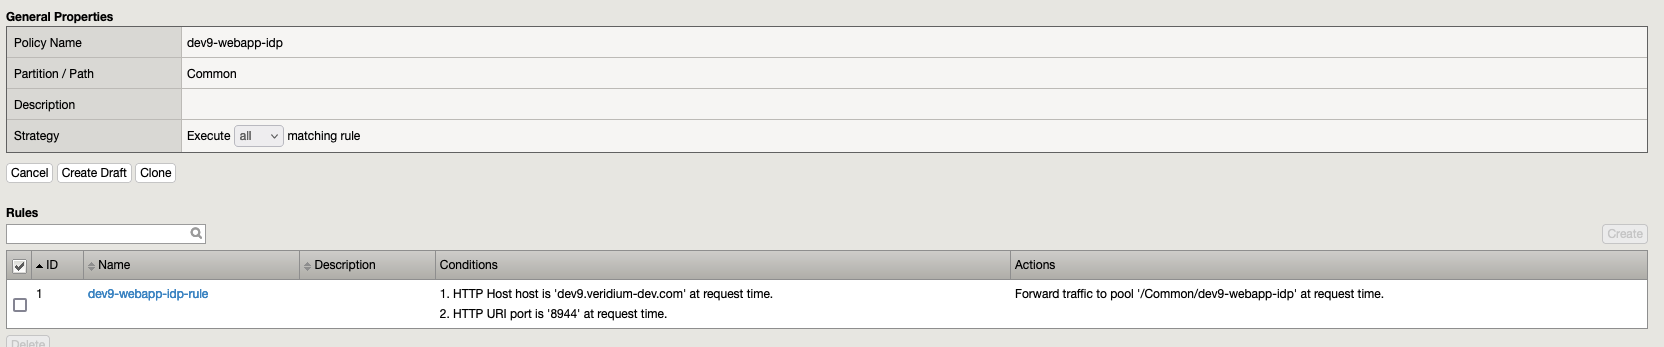
8.3. Policy dev9-webapp-ssp
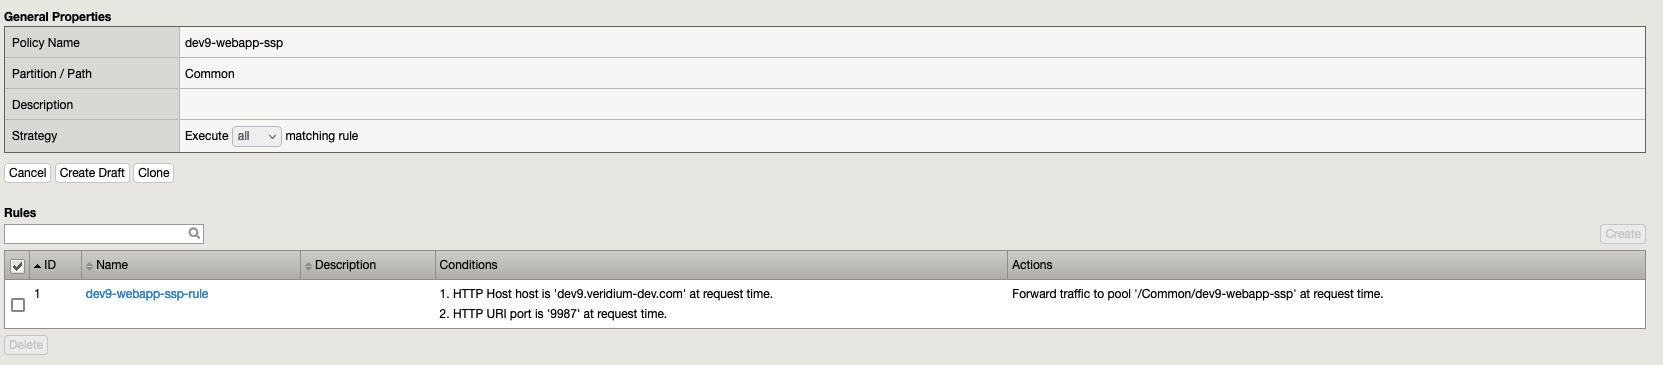
8.4. Policy dev9-webapp-websec-admin
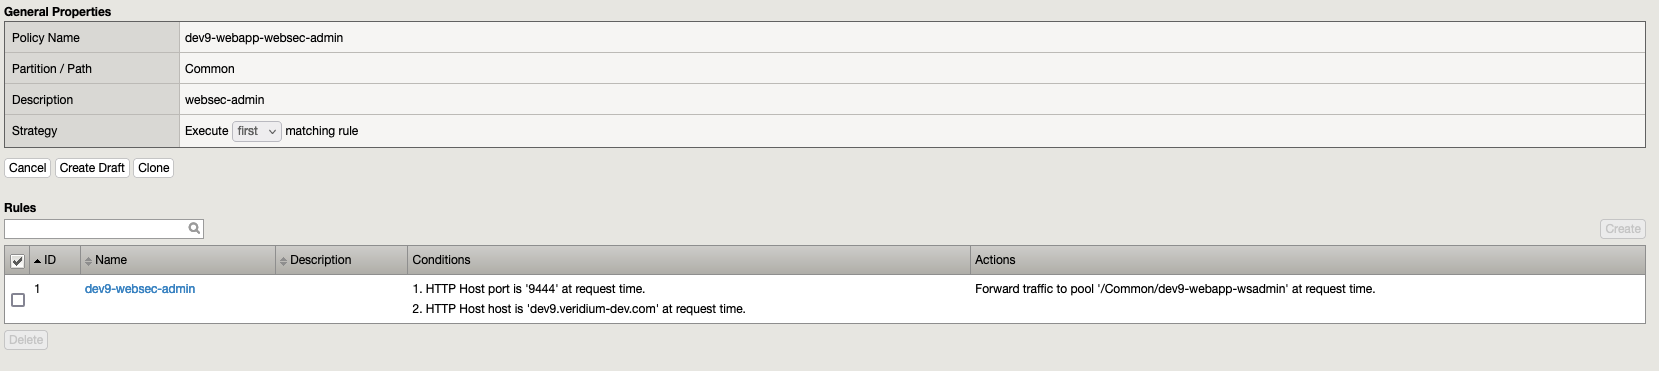
8.5. Policy dev9-webapp-host
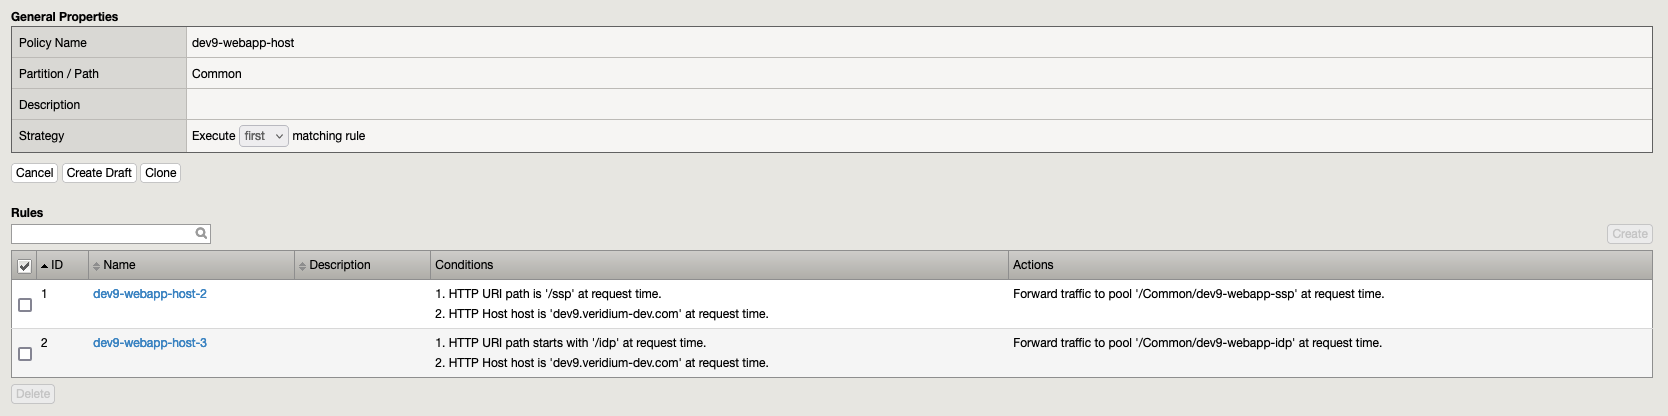
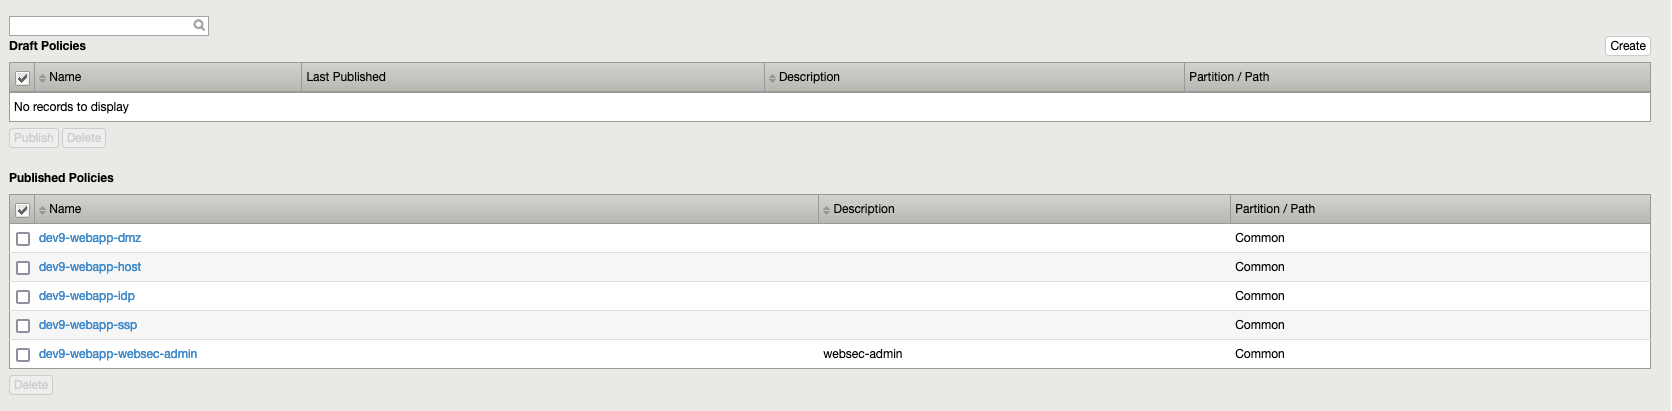
Publish Policies
After creating policies:
Navigate to:
Local Traffic → Policies → Draft Policies
Select the policies and click Publish.
Final result:
8. Create Virtual Servers
Navigate to:
Local Traffic → Virtual Servers
Create the following virtual servers.
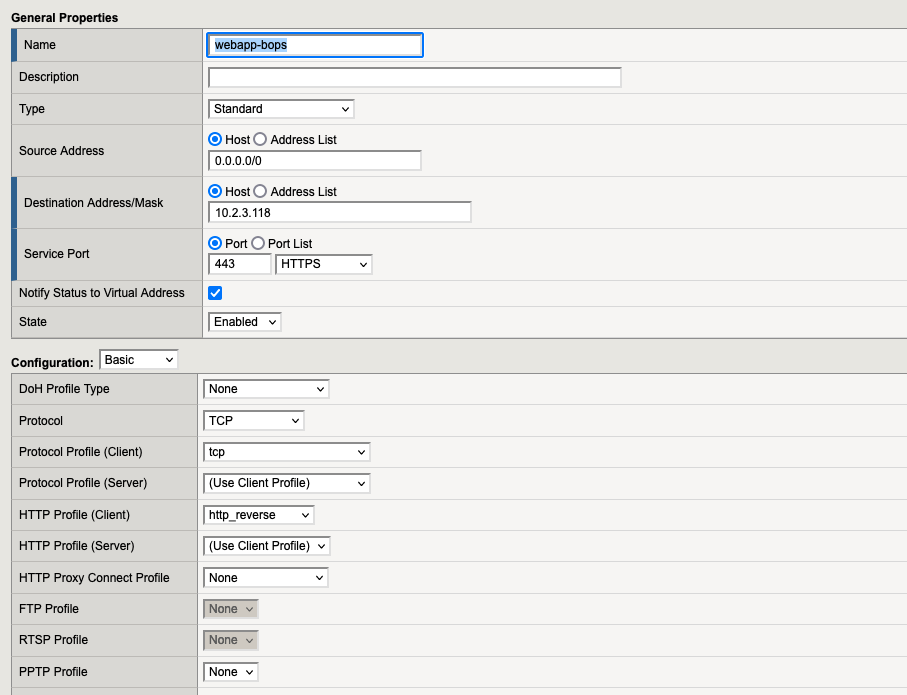
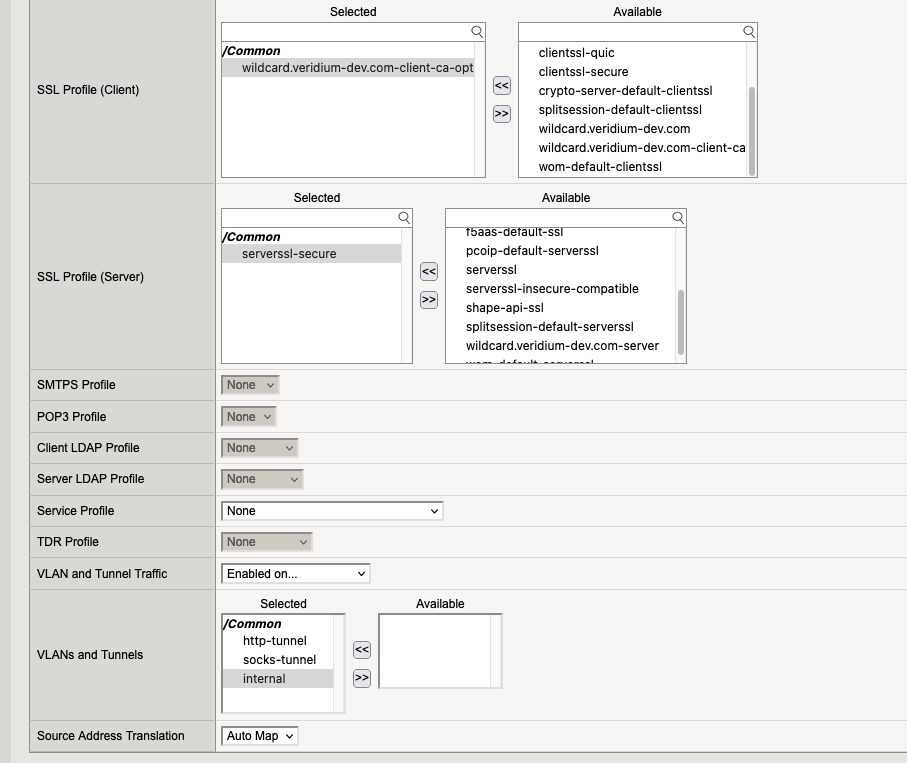
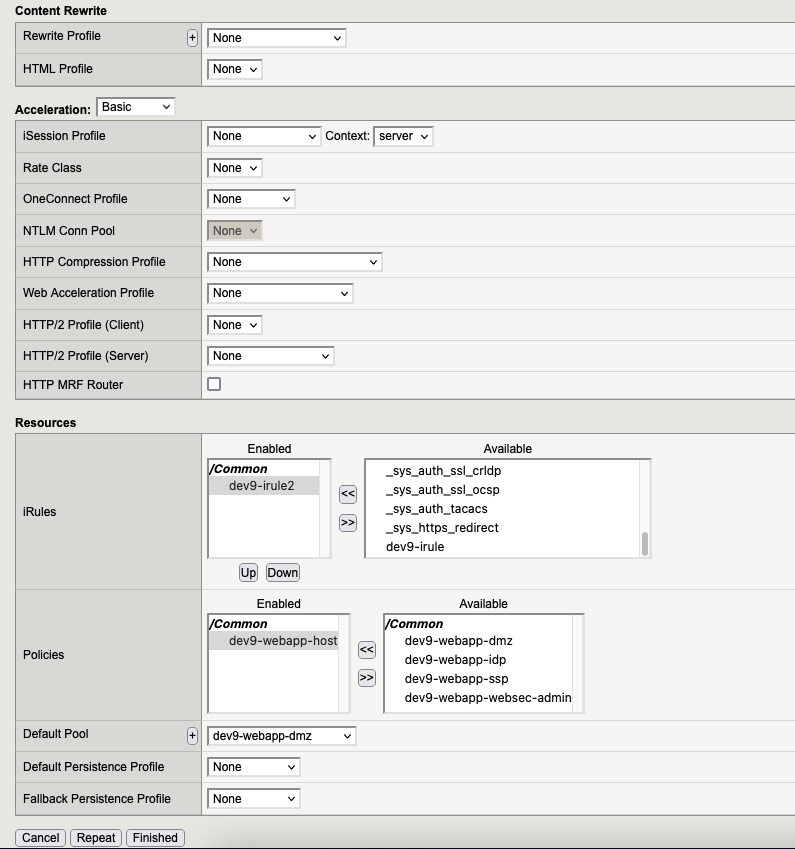
8.1. Virtual Server “webapp-bops“
8.2. Virtual Server “webapp-dmz“
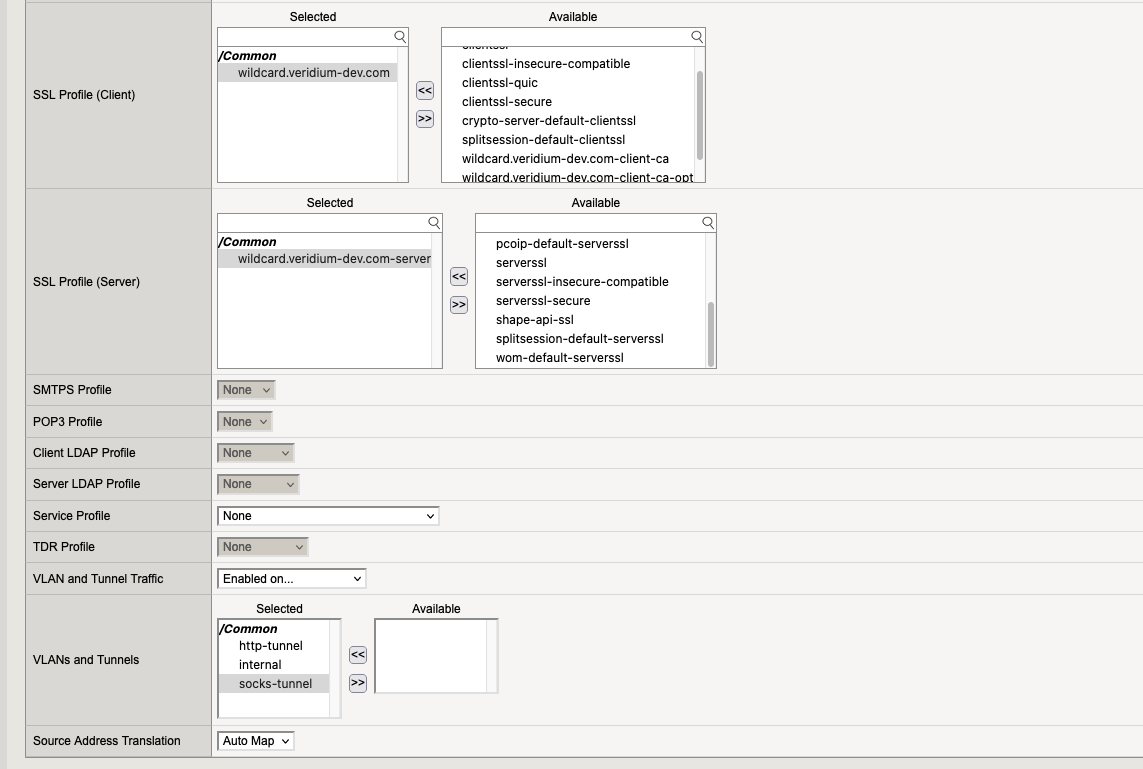
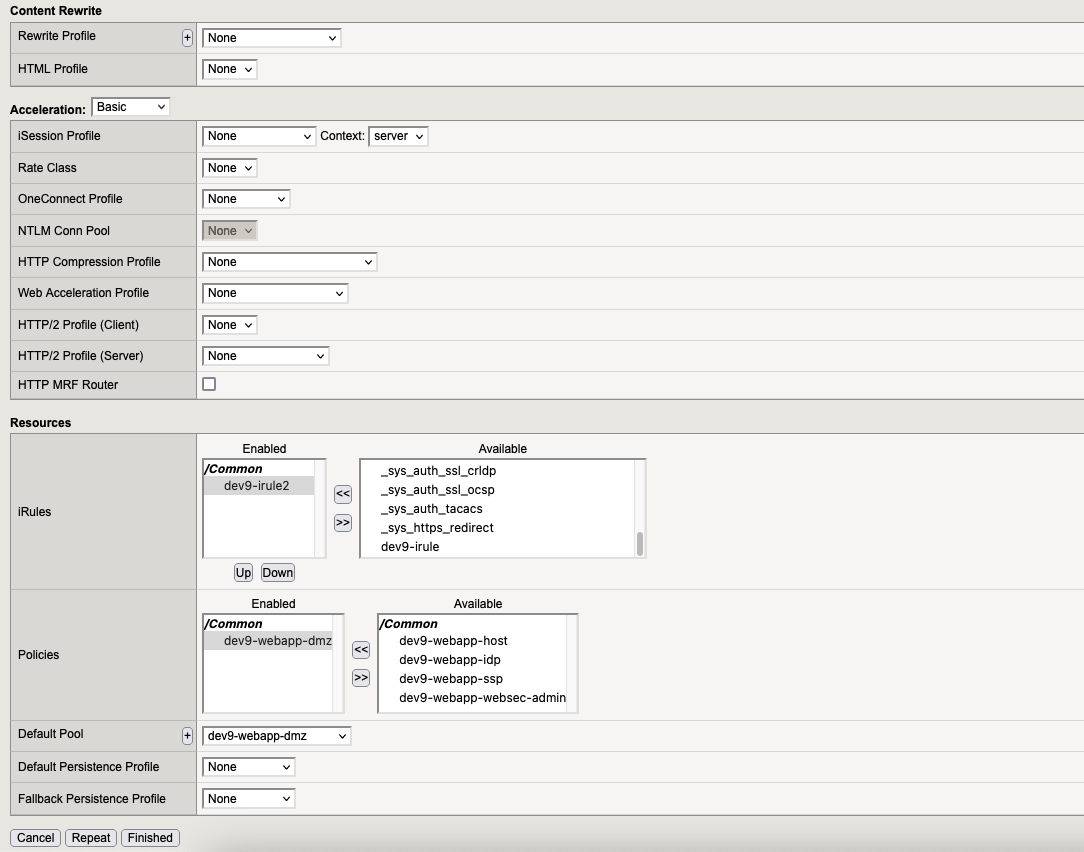
8.3. Virtual Server “webapp-idp“
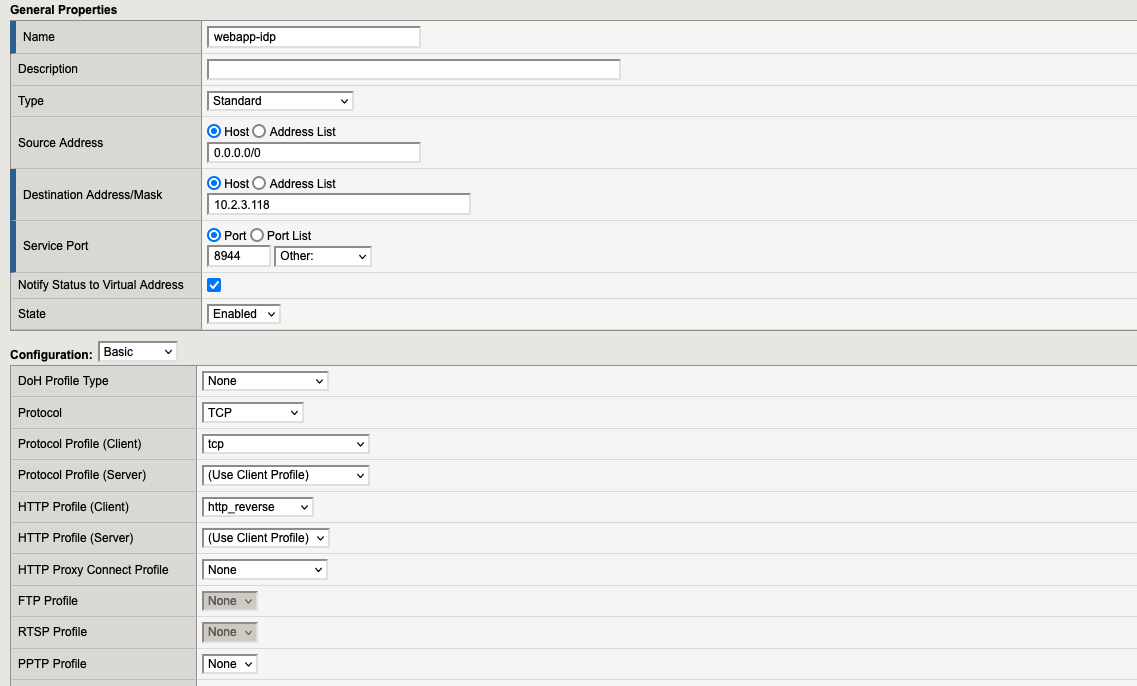
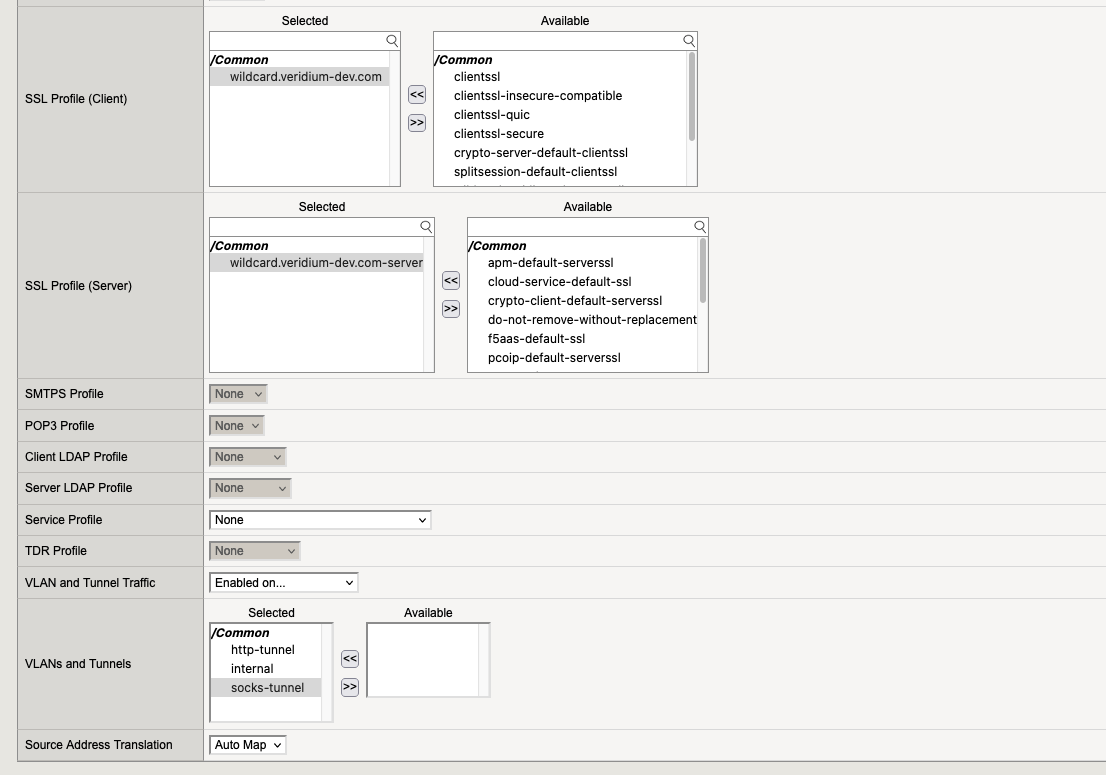
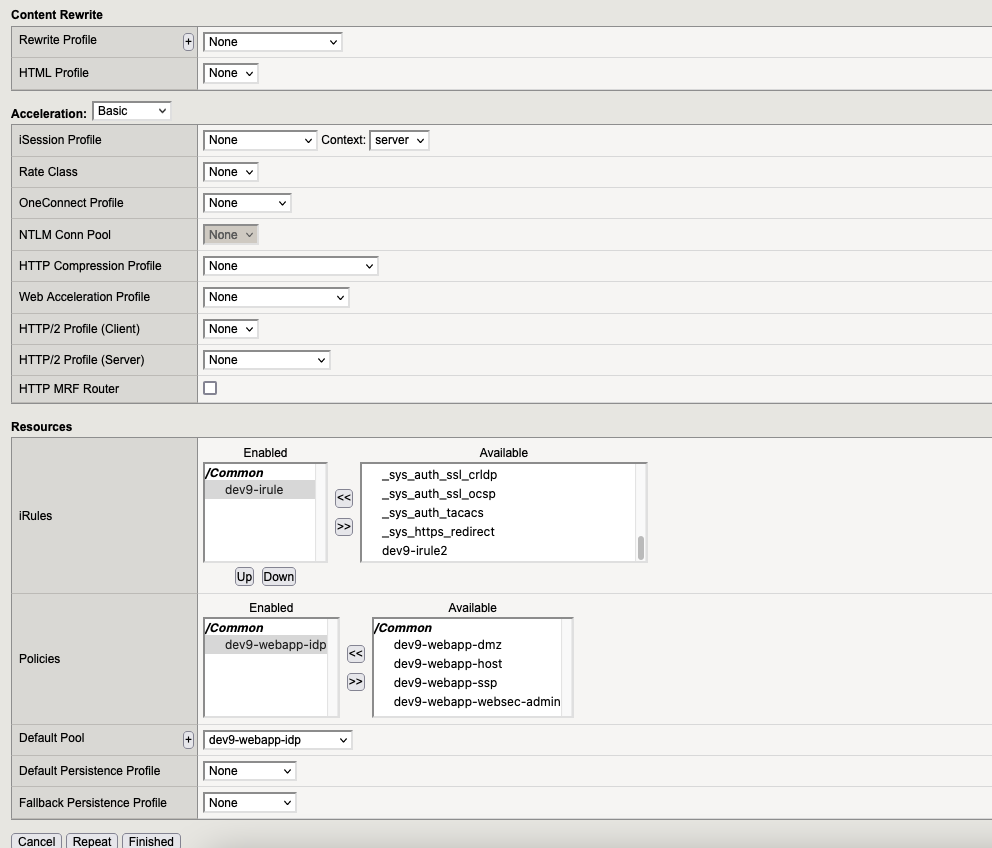
8.4. Virtual Server “webapp-ssp“
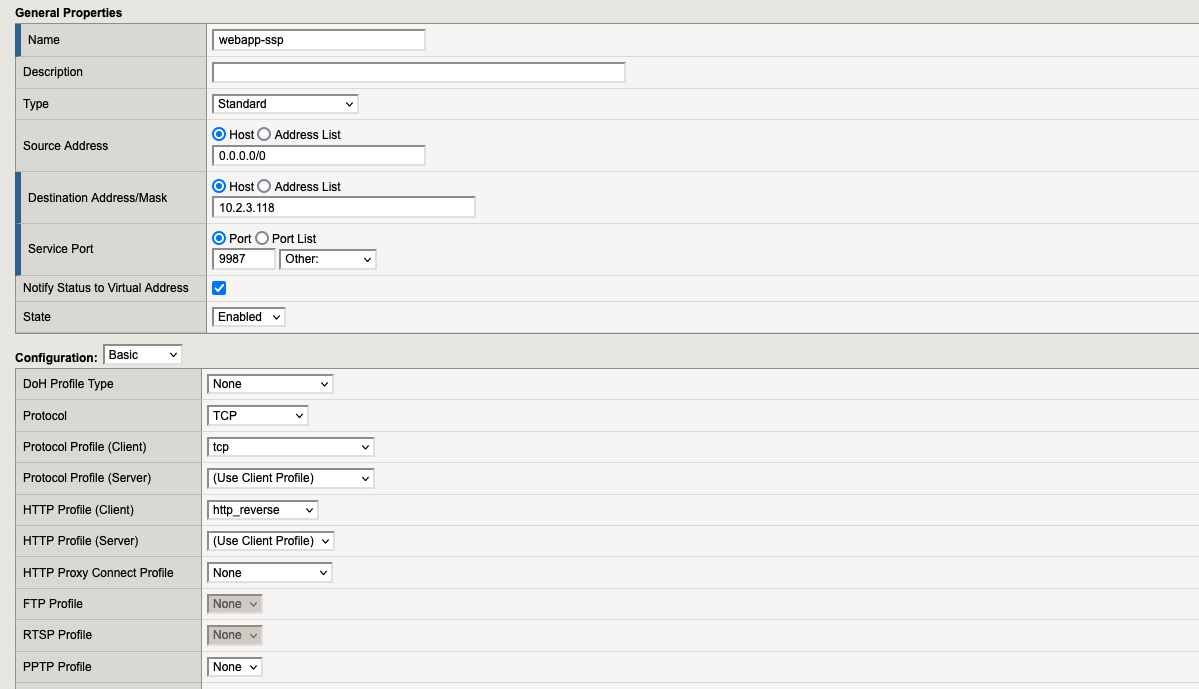
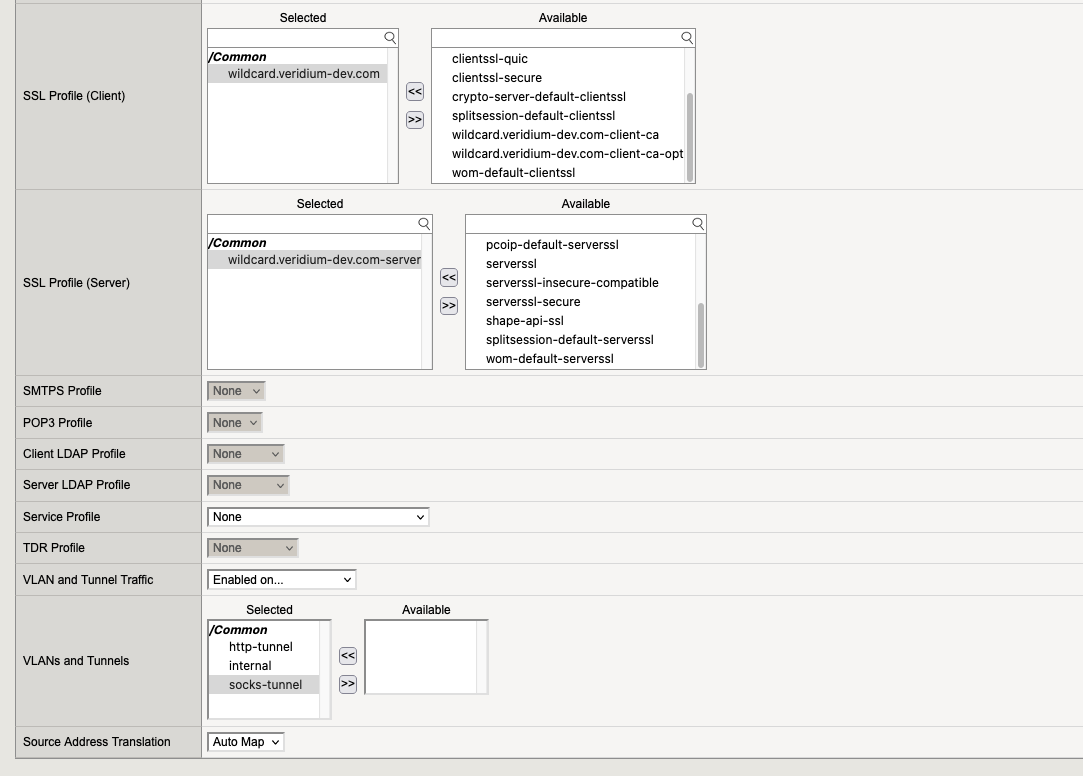
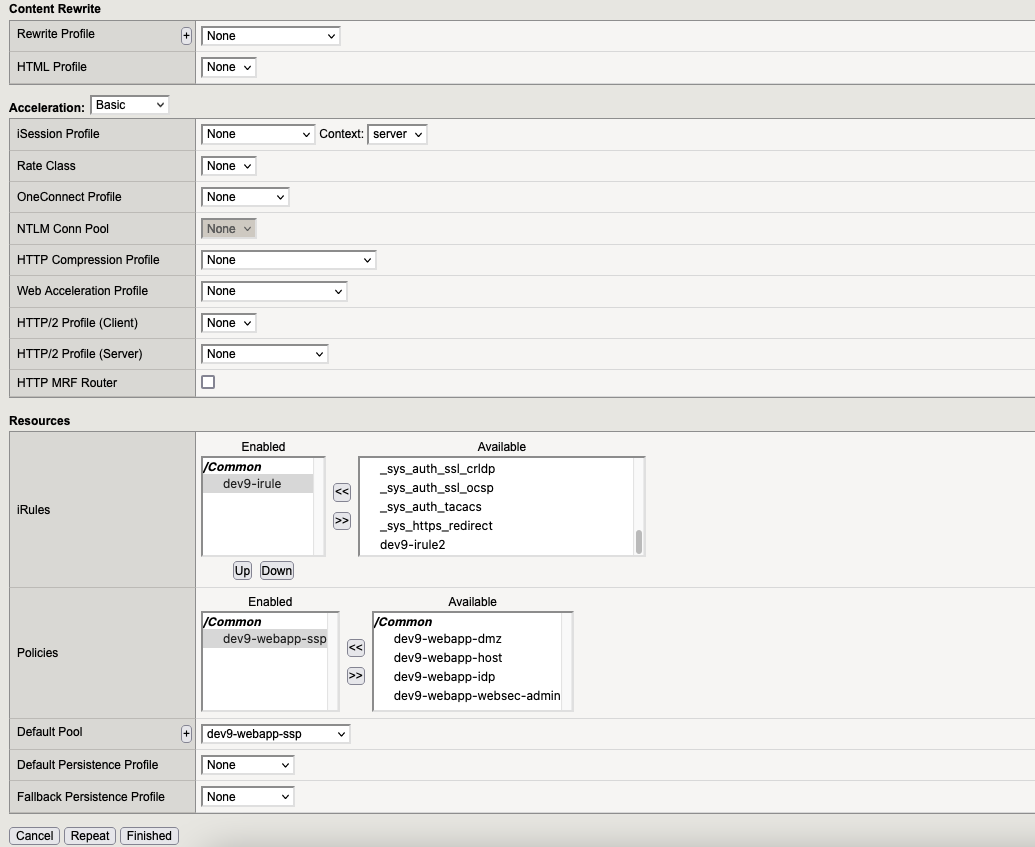
8.5. Virtual Server “webapp-websec-admin“
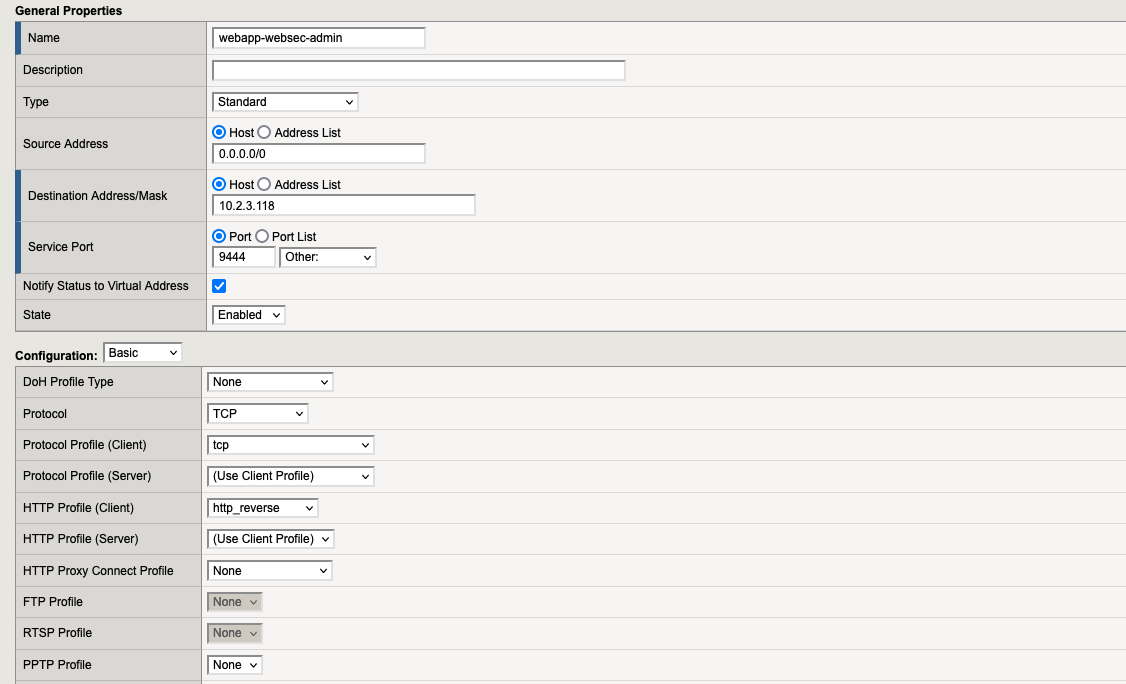
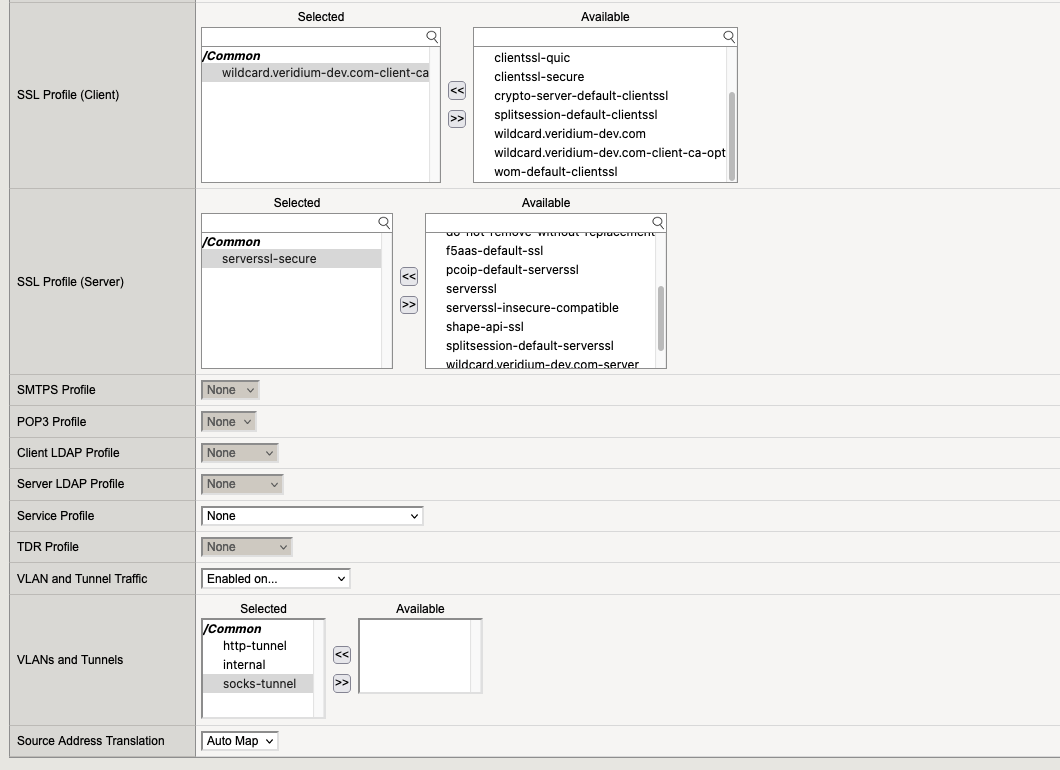
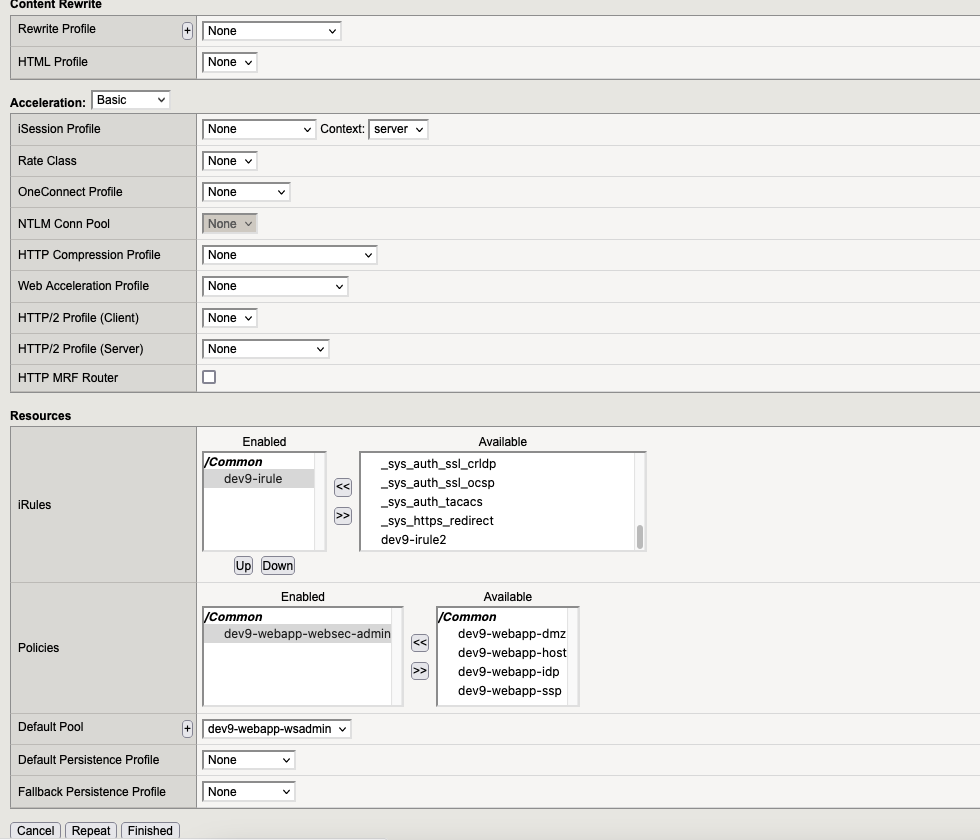
Final Virtual Server List
After completing the configuration, the Virtual Servers list should appear as:

If iRules are not allowed in F5, the following can be applied.
This is not recommended (it can be used if iRules can not be defined in F5) because only one header can be inserted (X-Forwarded-For can not be inserted).
Only one header can be added in this way (the application works also without the proxy secret, that is inserted in haproxy).
X-SSL-Client-DN: [X509::subject [SSL::cert 0]]