

Overview
FIDO is preconfigured during a fresh VeridiumID installation and is ready to use with the default deployment settings.
If your deployment requires a different FIDO Origin, follow the procedure described in this guide to update the configuration and propagate the changes to all components that participate in FIDO authentication.
Important
Changing the default FIDO Origin requires all users with existing FIDO enrollments to re-enroll their FIDO authenticators before they can authenticate using FIDO again.
Recommendation: Perform this procedure during a planned maintenance window.
Step 1 – Configure the FIDO Origin
Navigate to:
General → FIDO Settings
Enter the new FIDO Origin and click Save.
After saving:
-
You remain on the FIDO Settings page.
-
A new action panel appears.
-
The Go to FIDO Relying Parties button becomes available.
Click the button to continue with the configuration.
What Happens Behind the Scenes
At this stage, only the FIDO Settings configuration is updated.
The new FIDO Origin is not yet propagated to the other components of the system. This allows you to review the configuration before applying it.

Step 2 – Reinitialize the Default FIDO Relying Party
On the FIDO Relying Parties page, click:
(Re)Initialize Default FIDO Relying Party
This operation propagates the configured FIDO Origin and Allowed Origins to all components that require them.
What Happens Behind the Scenes
During initialization, VeridiumID automatically performs the following operations.
Update the Identity Provider
The configured FIDO Origin is copied to:
Identity Provider
    Configuration
        Authentication
            FIDO Origin
Update the Self Service Portal
The same FIDO Origin is copied to:
Services
    SSP
        FIDO Origin
This ensures that self-service enrollment uses the same trusted origin.
Update HAProxy
The Allowed Origins configured for the default FIDO Relying Party are exported to:
/opt/veridiumid/haproxy/conf/origins.json
The HAProxy configuration is then regenerated and applied.
Result
After the operation completes successfully:
-
FIDO Settings contains the new FIDO Origin.
-
Identity Provider uses the new FIDO Origin.
-
SSP uses the new FIDO Origin.
-
HAProxy trusts the configured Allowed Origins.
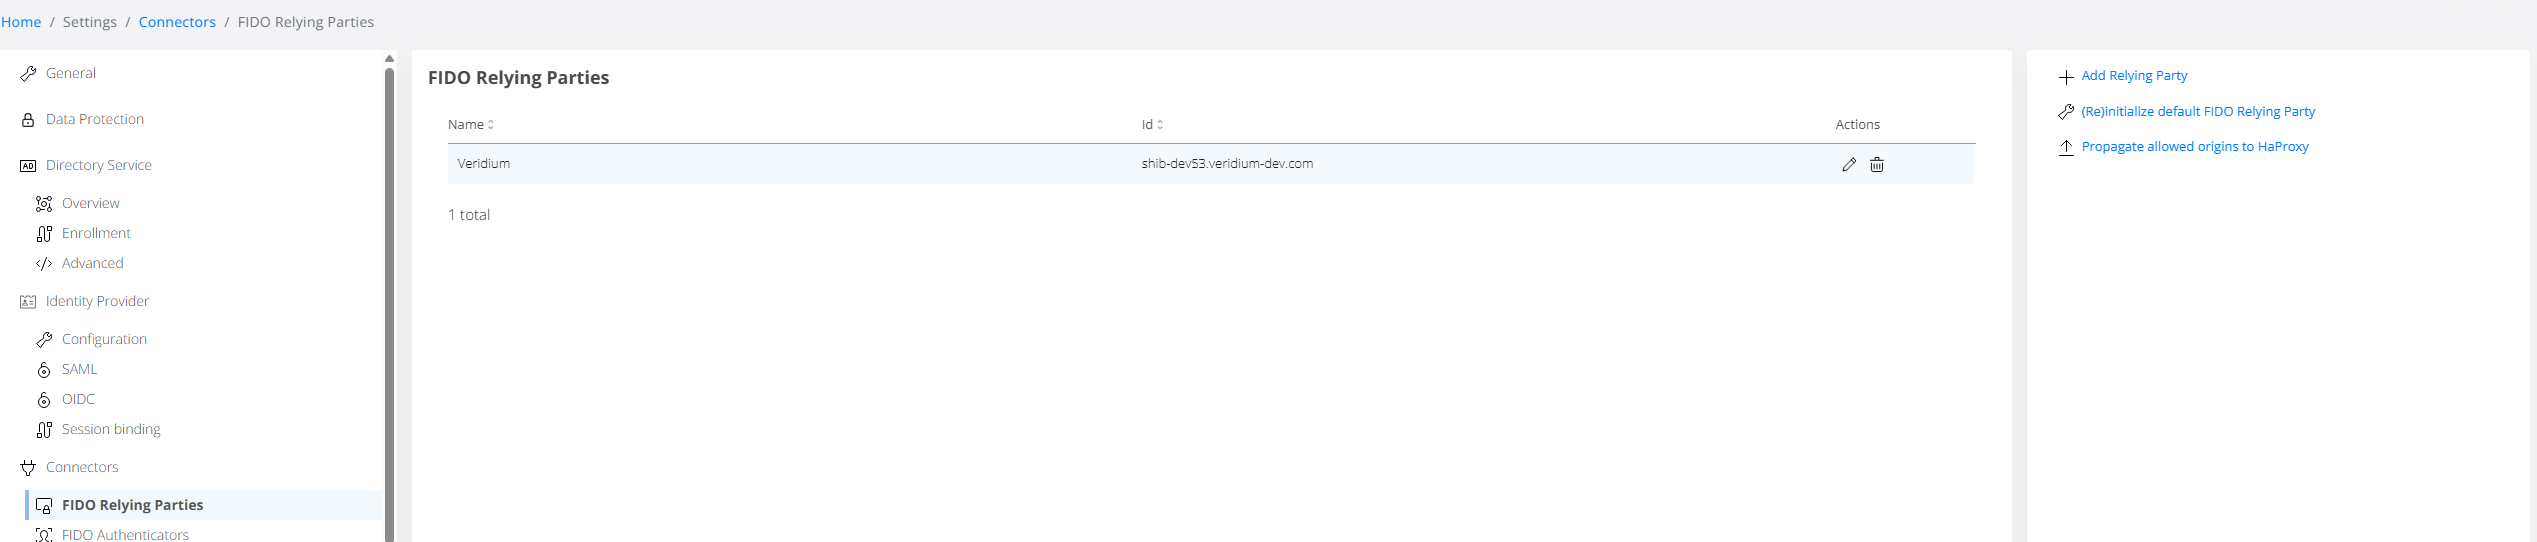
Step 3 – Modify Allowed Origins
If additional web applications must perform FIDO authentication, update the Allowed Origins list.
Navigate to:
General → FIDO Relying Parties
Edit the Allowed Origins field and save the changes.
At this point, the relying party configuration has been updated, but HAProxy is still using the previous Allowed Origins.
Step 4 – Propagate Allowed Origins to HAProxy
Click:
Propagate Origins to HAProxy
This updates the HAProxy configuration without requiring the default relying party to be reinitialized.
What Happens Behind the Scenes
VeridiumID performs the following actions:
-
Reads the current Allowed Origins.
-
Generates a new
origins.jsonfile. -
Regenerates the HAProxy configuration.
-
Applies the updated configuration.
After the operation completes successfully, HAProxy accepts requests originating from the updated list of Allowed Origins.
Verification
After completing the procedure:
-
Verify that the new FIDO Origin is displayed under General → FIDO Settings.
-
Verify that the Identity Provider and SSP display the same FIDO Origin.
-
Test FIDO enrollment from the new origin.
-
Test FIDO authentication from the new origin.
-
Ensure that existing users complete FIDO re-enrollment before attempting to authenticate.