

This is an authentication plugin for oracle. This plugin contains two components, one for the backend, the other for the web.
Download the OAM Archive from Veridium public repository:
|
Link |
SHA1/MD5 |
Description |
|---|---|---|
|
e34918a63b100f6fb0b02a6e542a32b25ae5f09e 2b16b6c91c0a58be018ee87ba2a23f3d |
OAM plugin without verdium dependencies (without websec-client.jar). |
|
|
84d85bd8fc779c6d91c41ac05576a67cdc54cc3d f2c7da1e4e7f9046ae5075132decde48 |
OAM plugin including veridium dependencies |
|
|
13a1cbaa573b881c93282243c4d41aca42de0833 df04447287cc02b4d6505fa1a26c03fd |
Custom page for OAM plugin. |
Backend
The plugin will use the Veridium client sdk to process and authenticate the user. In order to install, follow the below procedure.
The installation procedure can be done in two ways. Through the web interface or wlst commands. If it is chosen through the web interface, the drawback would be that it must be done in two steps as described below.
Install via wlst commands
In this case, you will need to download only the /oam-plugin/VeridiumAuthnOamPlugin.jar from nexus.
Connect via wlst to oam admin and go to domainRuntime().
 cd ${ORACLE_HOME}/oracle_common/common/bin
 run wlst.sh

 connect()
 'enter username, password, and server url'

 domainRuntime()

 oamCustomPluginInstallation(pluginName="VeridiumAuthnOamPlugin", sourcePath="'source_to_the_jar'")

 pluginName = The name of the plugin. It should be the same name as the .JAR file name.
 sourcePath = The path to the folder containing the plugin.
'source_to_the_jar' = /u01/oam-plugin/
In any case, installation via cli cannot be done directly. After running this command, it must be configured in the web interface as described below.
Please skip the steps 1, 2, 5.
Install via web interface
-
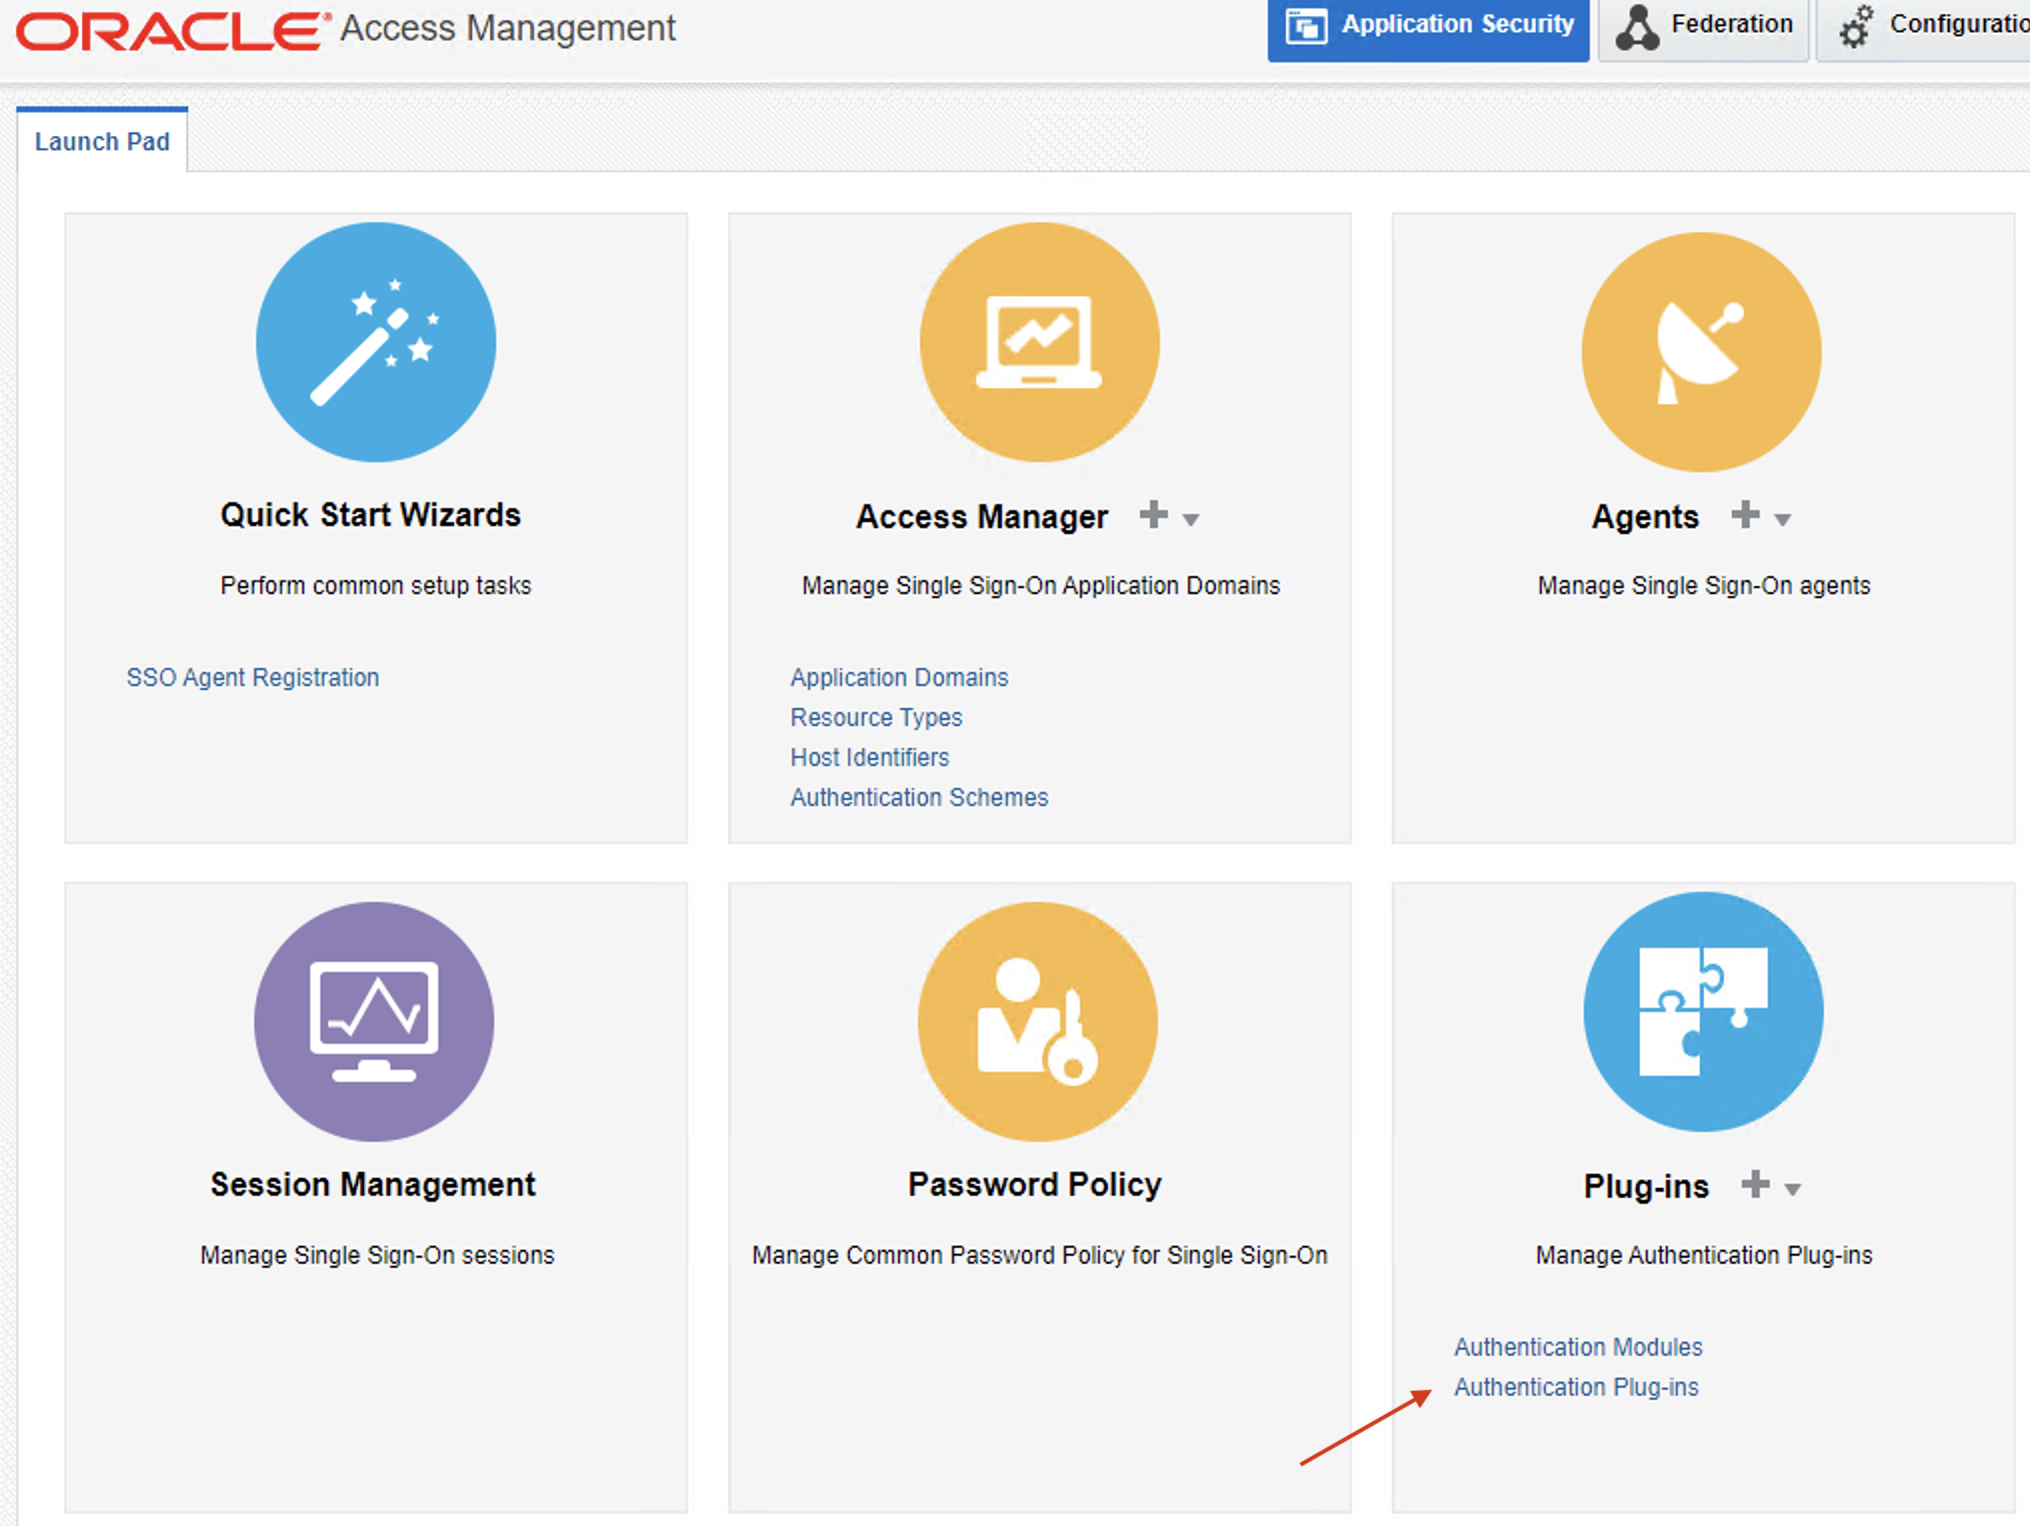
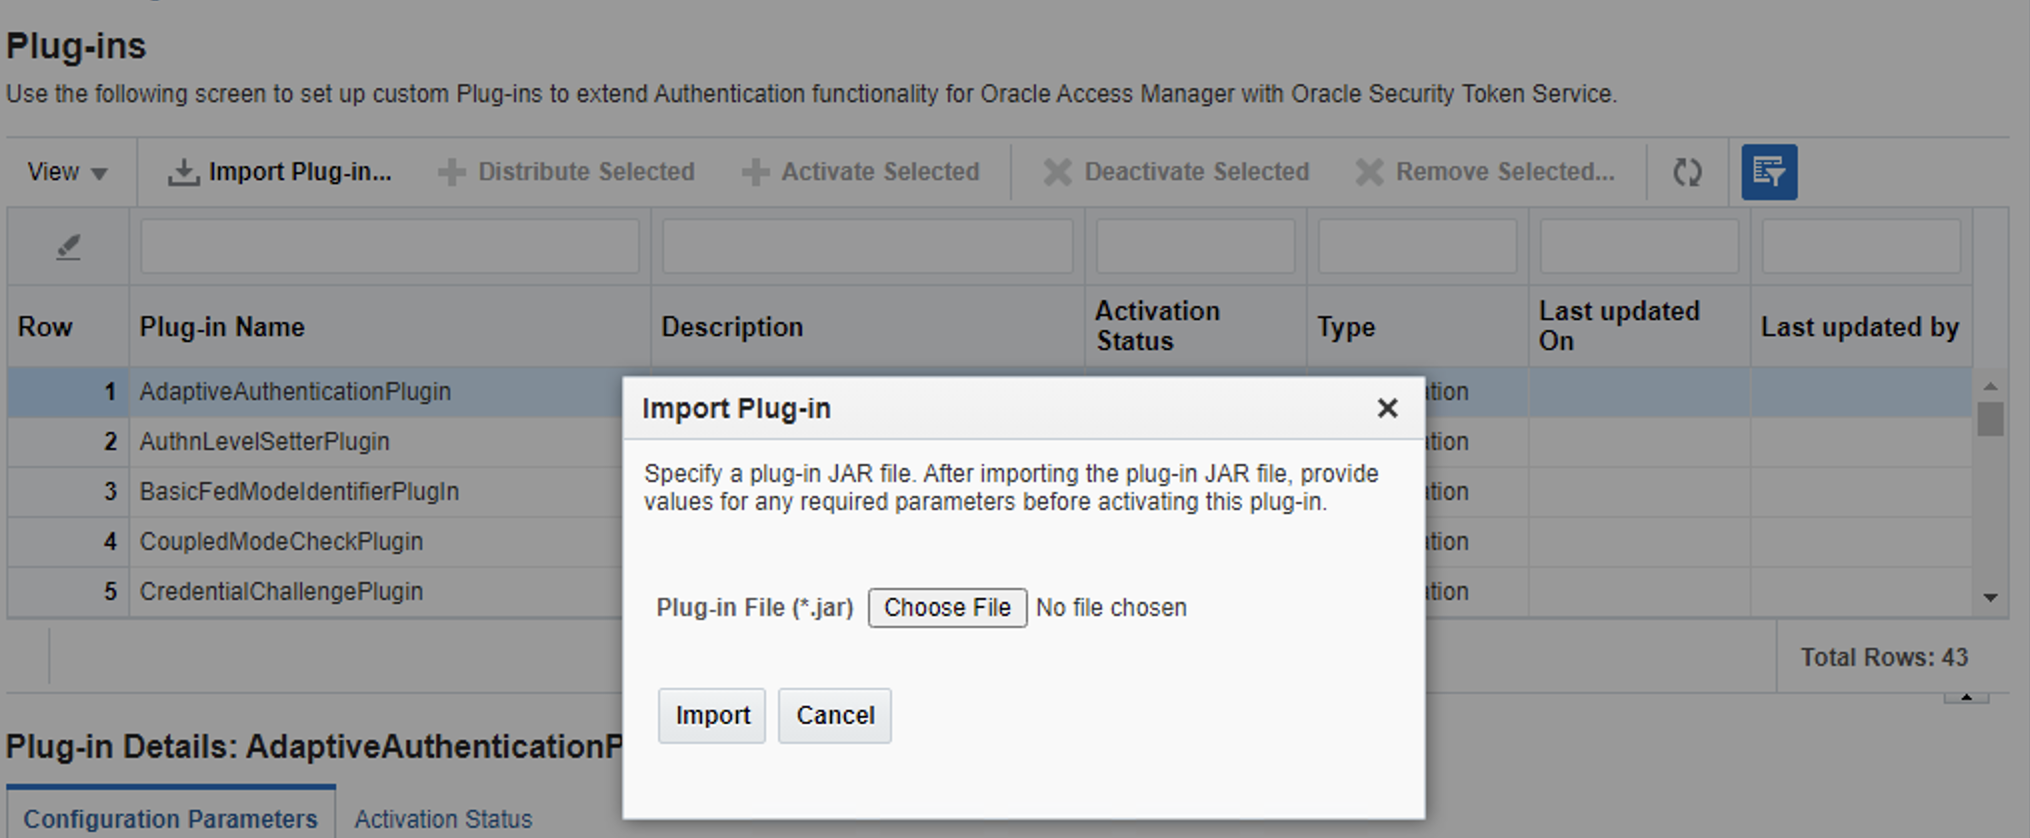
Go to Oracle Access management Console → Authentication plug-ins → Import Plug-in
-
Add the jar from archive on path /oam-plugin/dummy_jar/VeridiumAuthnOamPlugin.jar
-
Add necessary data needed by the plugin
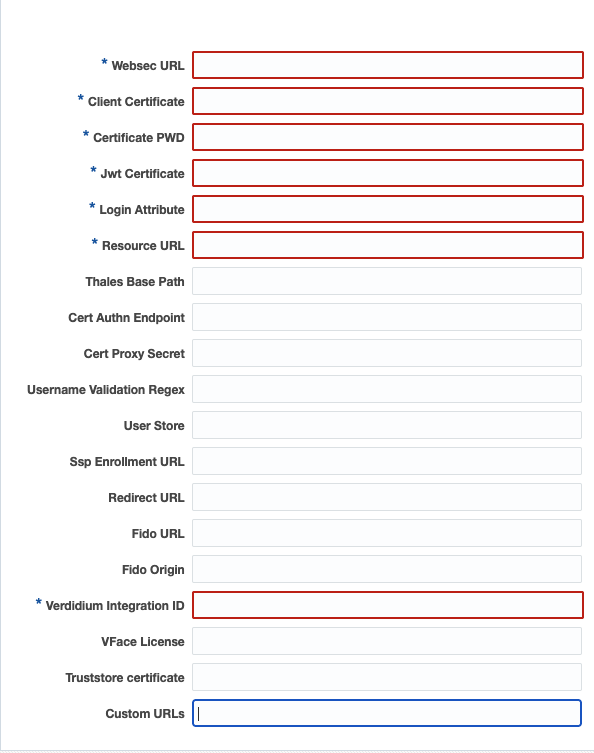
Configuration fields
Login Attribute
The LDAP attribute used to locate the user in the configured identity store.
Examples:
uid
mail
sAMAccountName
The selected attribute must exist in LDAP and uniquely identify the user whenever possible.
Resource URL
The base URL used by the plugin for session-status checks.
Example:
https://develop.dev.local:8945
The URL must be reachable from the OAM servers. HTTPS should be used in production environments.
User Store
The name of the identity store configured in Oracle Access Manager that the plugin should use when searching for users.
The value must exactly match the identity-store name defined in OAM.
Example:
UserIdentityStore1
Custom URLs
An optional list of links displayed on the authentication page, such as:
-
Documentation
-
Main page
-
Support portal
-
Help page
-
Privacy information
Each entry consists of:
Displayed name=URL
Multiple entries must be separated by a semicolon:
Documentation=https://docs.example.com;Main page=https://www.example.com;Support=https://support.example.com
In this example:
-
Documentationis displayed as the link text and openshttps://docs.example.com. -
Main pageis displayed as the link text and openshttps://www.example.com. -
Supportis displayed as the link text and openshttps://support.example.com.
The links are displayed in their configured order and open in a new browser tab.
Configuration rules:
-
Only absolute HTTP or HTTPS URLs are accepted.
-
HTTPS is recommended for production environments.
-
The displayed name and URL must be separated by
=. -
Individual entries must be separated by
;. -
The first
=is treated as the separator, so URLs may contain query parameters with additional=characters. -
A semicolon must not be used inside a displayed name or URL.
-
Empty or incorrectly formatted entries are ignored.
-
URLs using unsupported protocols, such as
javascript:, are ignored. -
If the same displayed name is configured more than once, only the first entry is retained.
Valid example:
Documentation=https://docs.example.com;Main page=https://example.com;Search=https://example.com/search?category=docs
Invalid entries:
Missing URL=
No separator
Unsafe link=javascript:alert(1)
The Custom URLs field is optional. When it is empty or contains no valid entries, no custom links are displayed.
-
In the plug-ins screen on oracle, press Distribute Selected, followed by Activate Selected
For now, this will be a workaround to make the plugin functional.
This step will attach websec sdk jar to the plugin, so you need to override the installed plugin jar in the previous step.
fatJar = /oam-plugin/VeridiumAuthnOamPlugin.jar
-
Go to OAM machine to ORACLE_HOME\user_projects\domains\oam_domain\config\fmwconfig\oam\plugins
and paste the fatJar
-
Go to OAM machine to ORACLE_HOME\user_projects\domains\oam_domain\oam\plugin_repository and paste the fatJar
-
Go to OAM machine to ORACLE_HOME\user_projects\domains\oam_domain\oam\plugins and paste the fatJar
This step will override the plugin on the disk, because oracle does not allow the import of a plugin, which contains another jar inside, and the veridium plugin needs Veridium_Client_Sdk
-
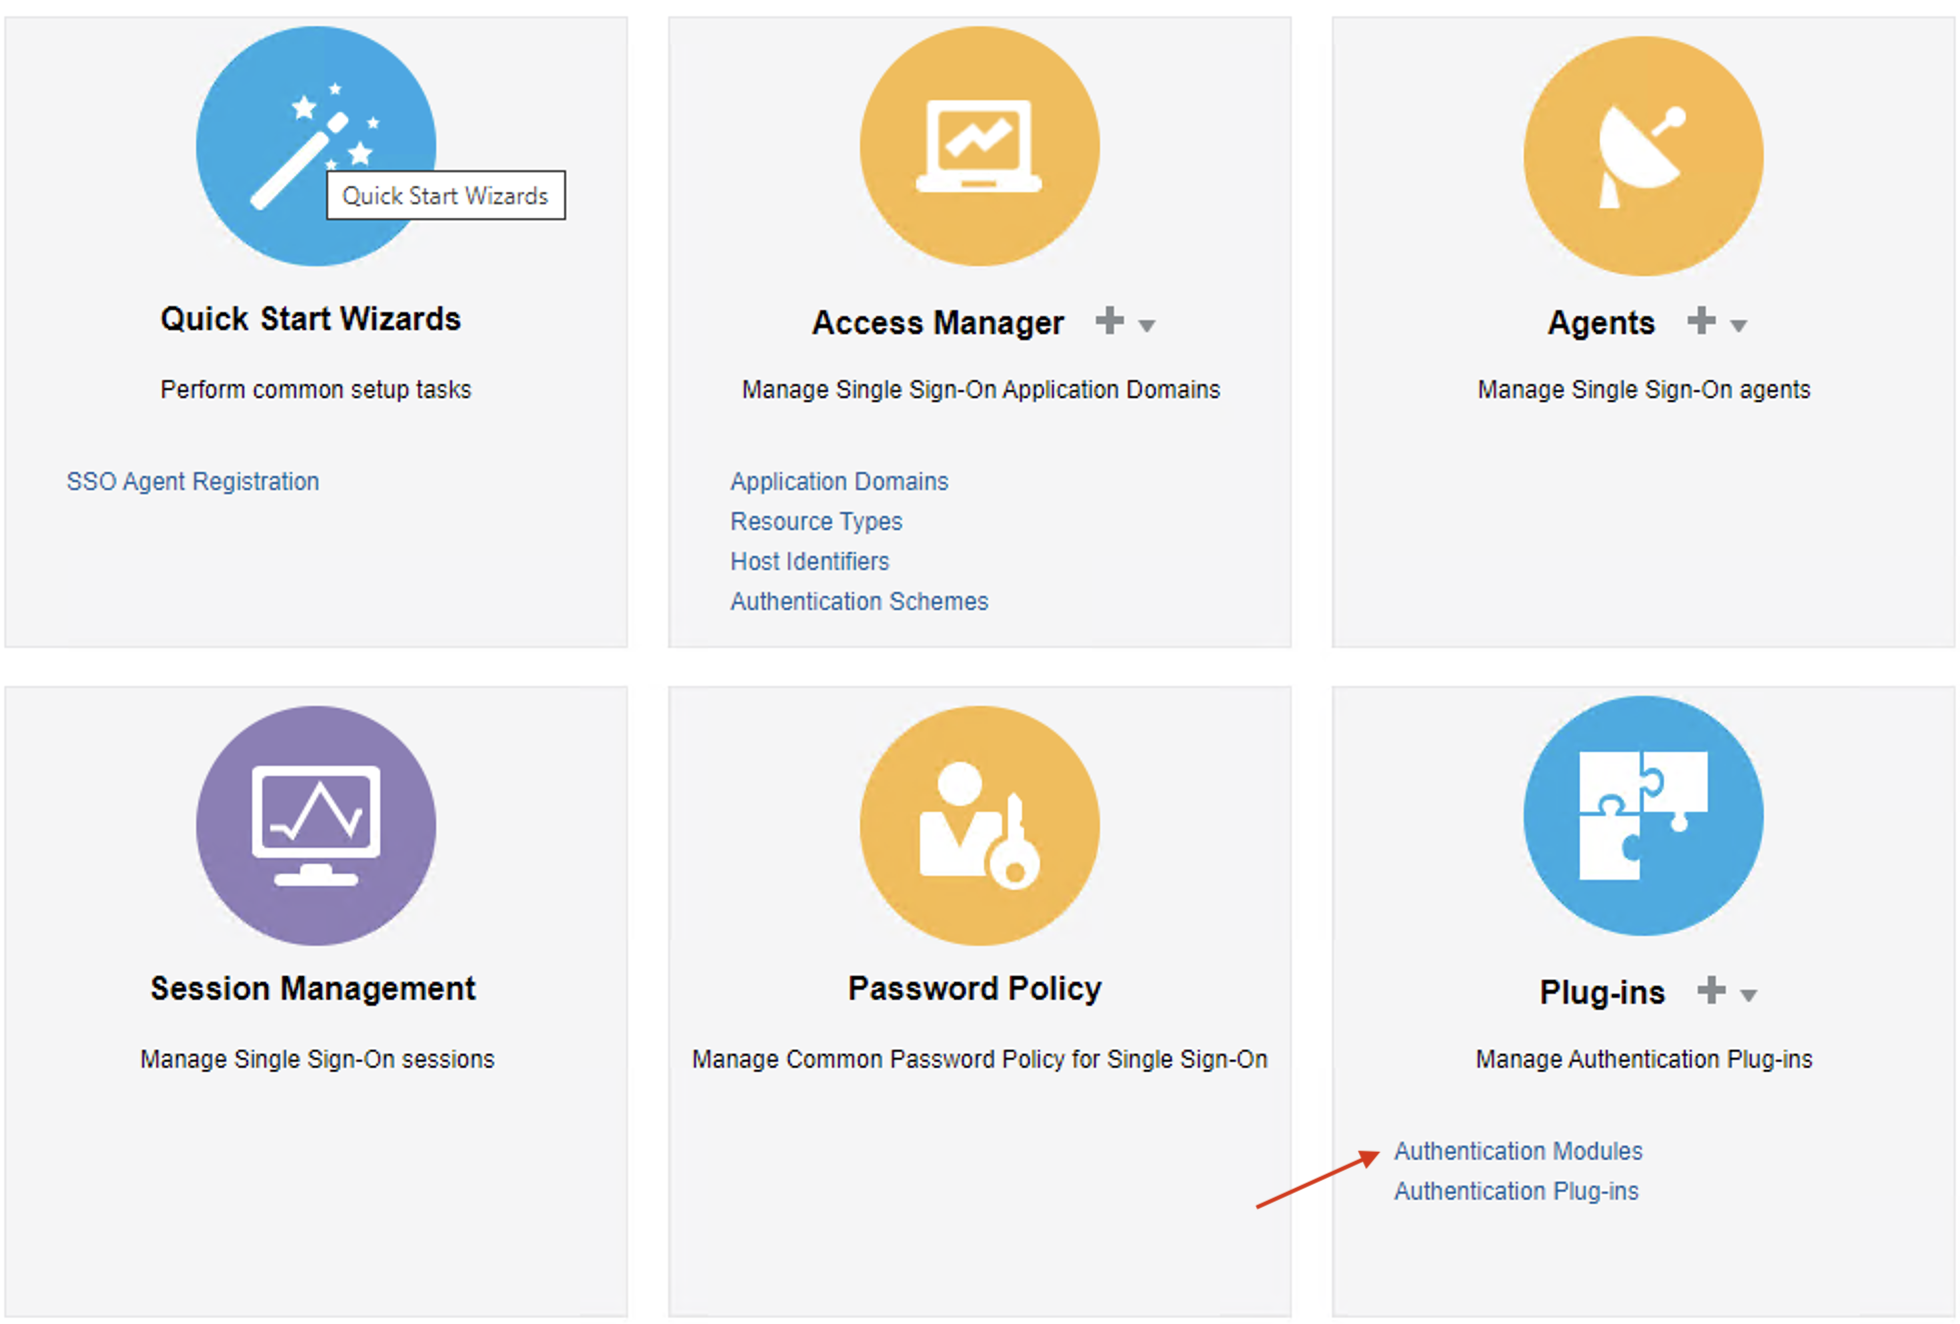
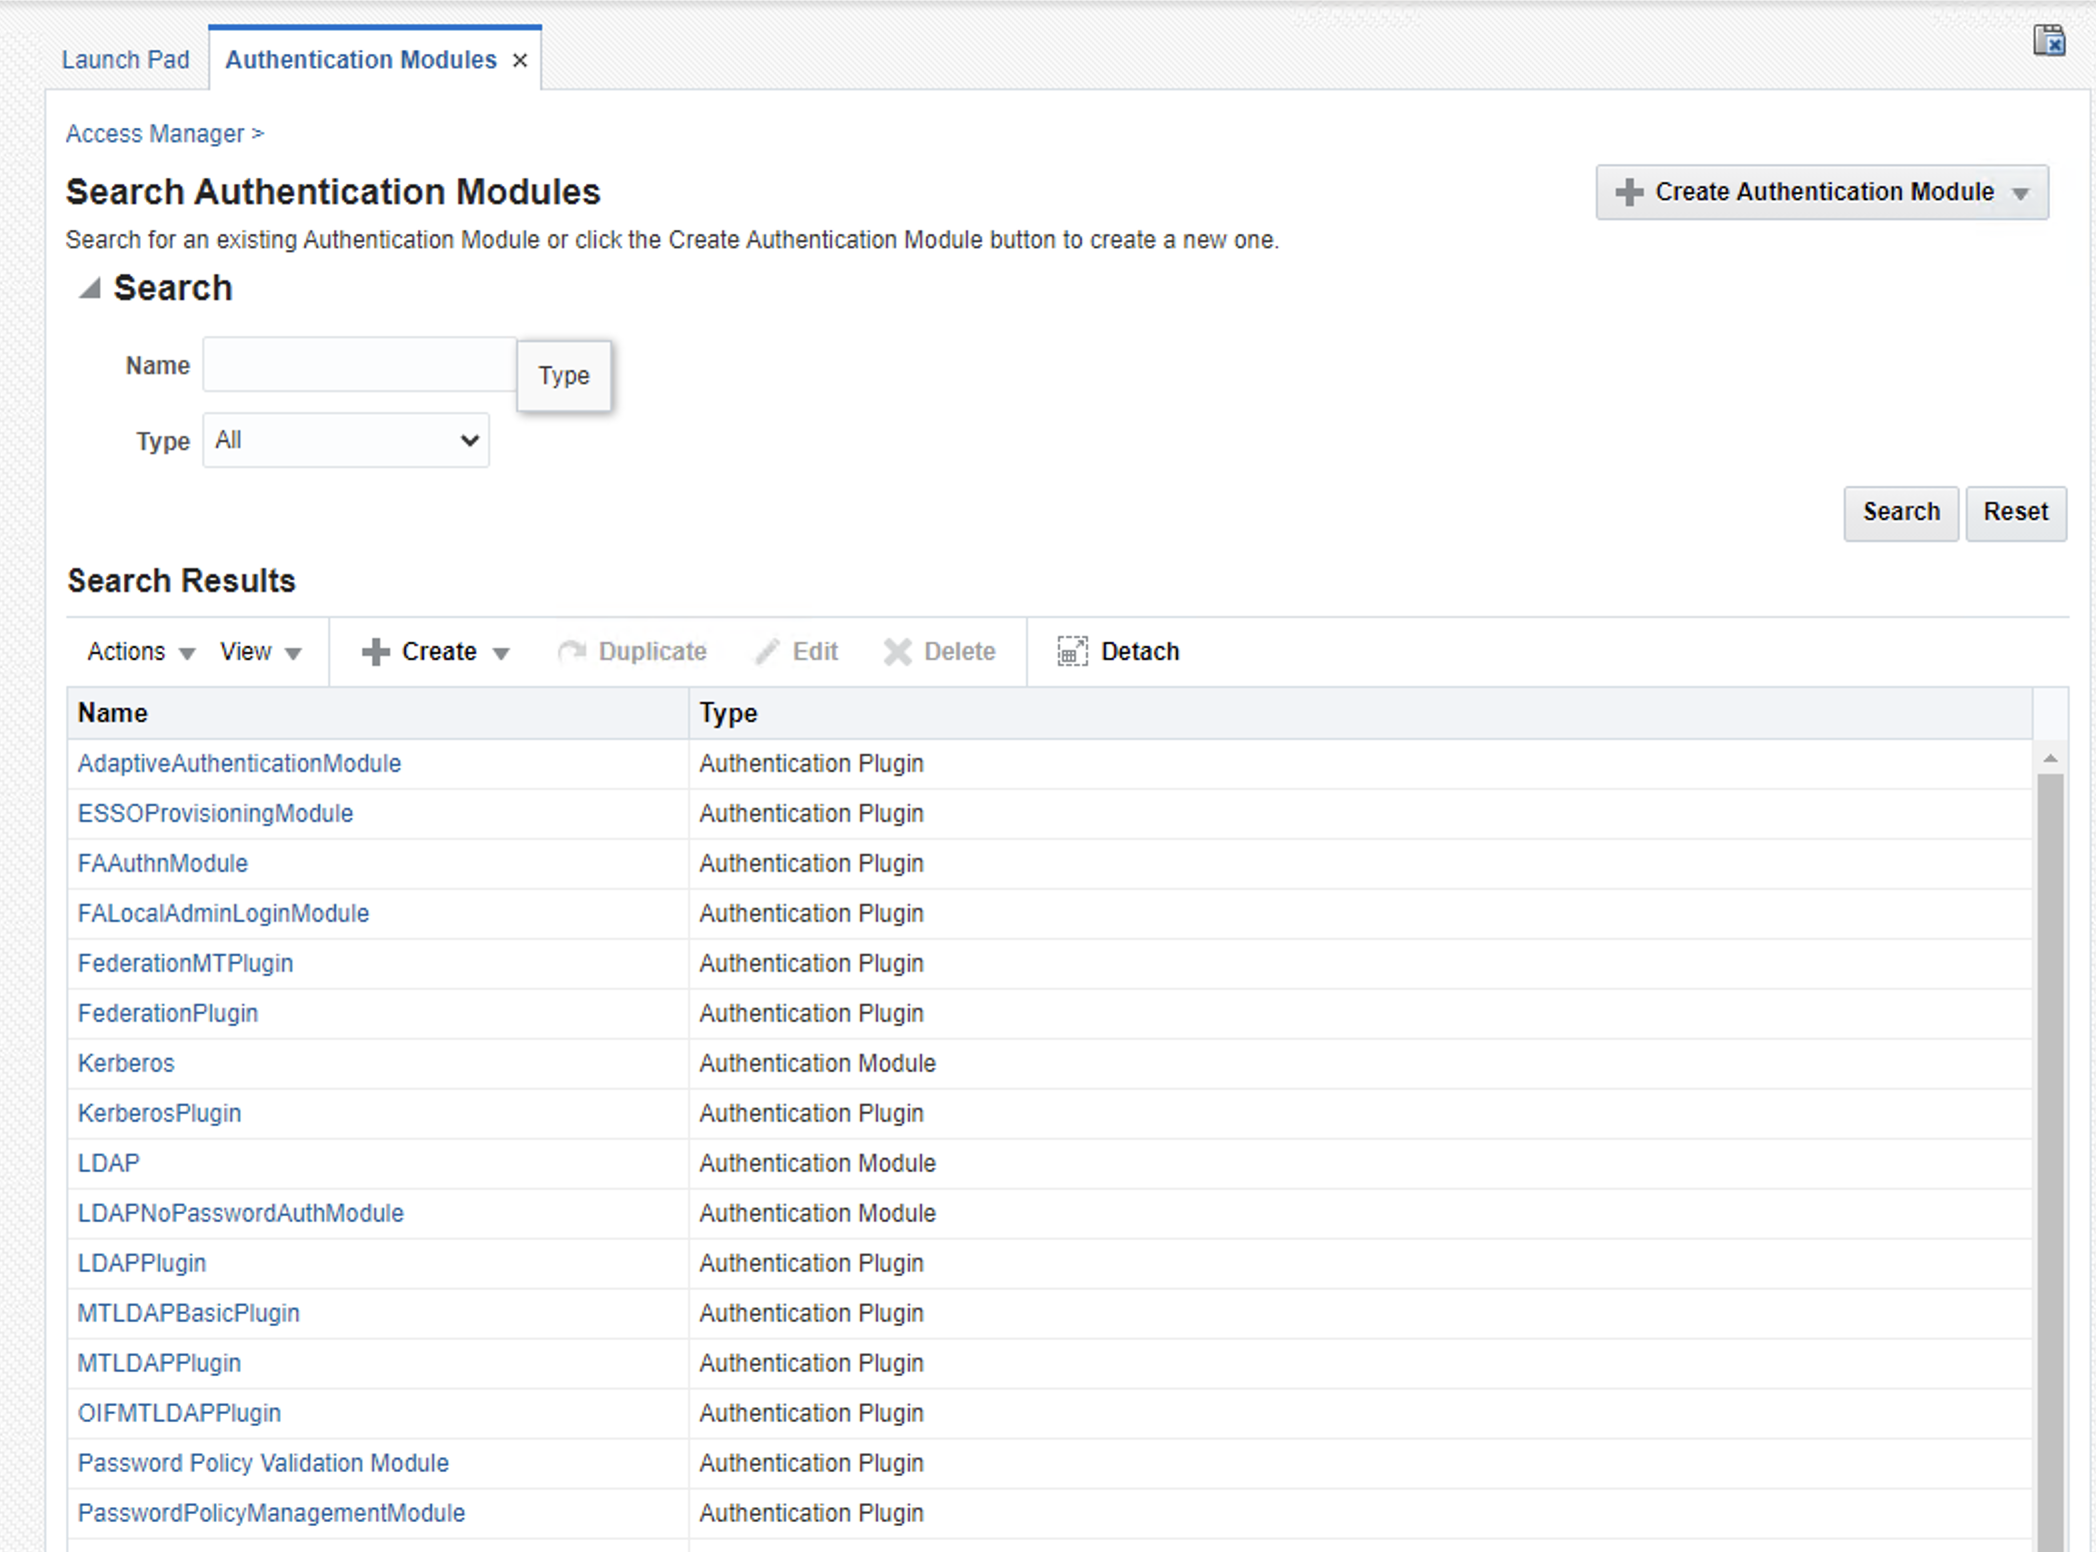
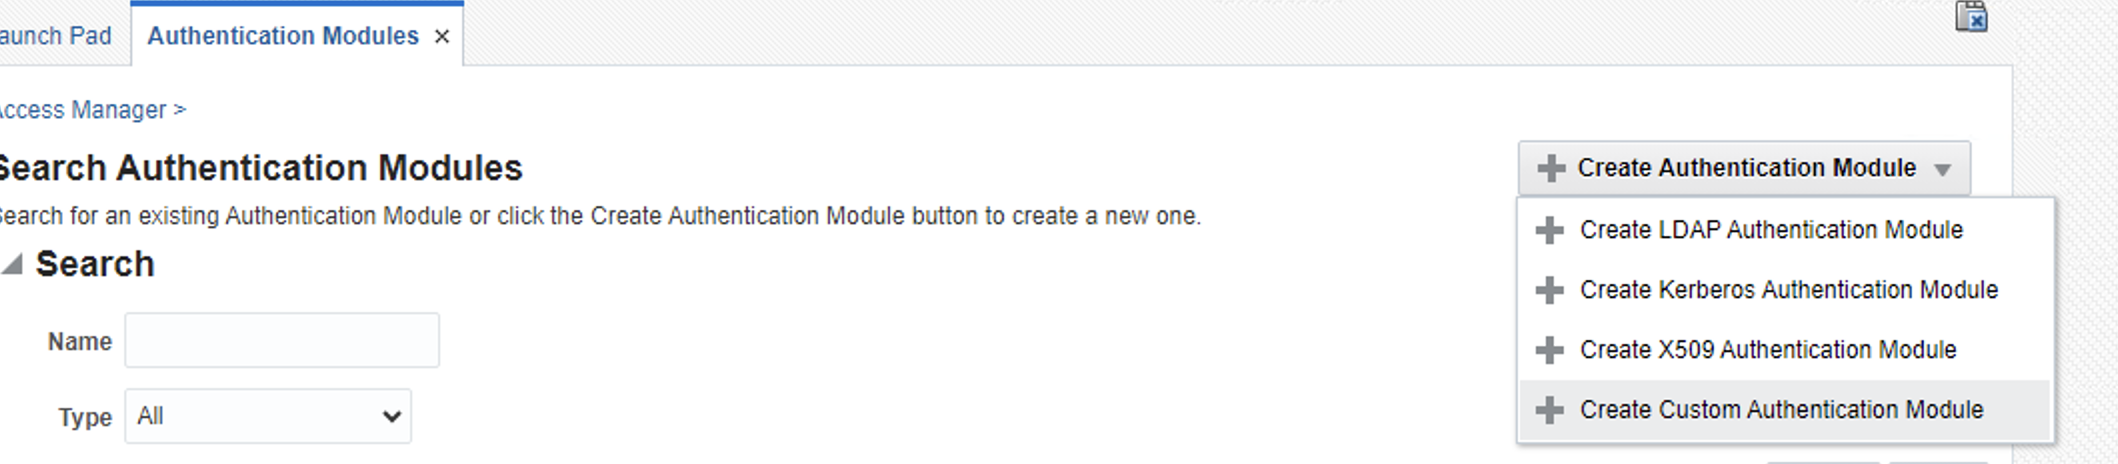
Go to Launch Pad and select Authentication Modules and create a new Authentication Module
-
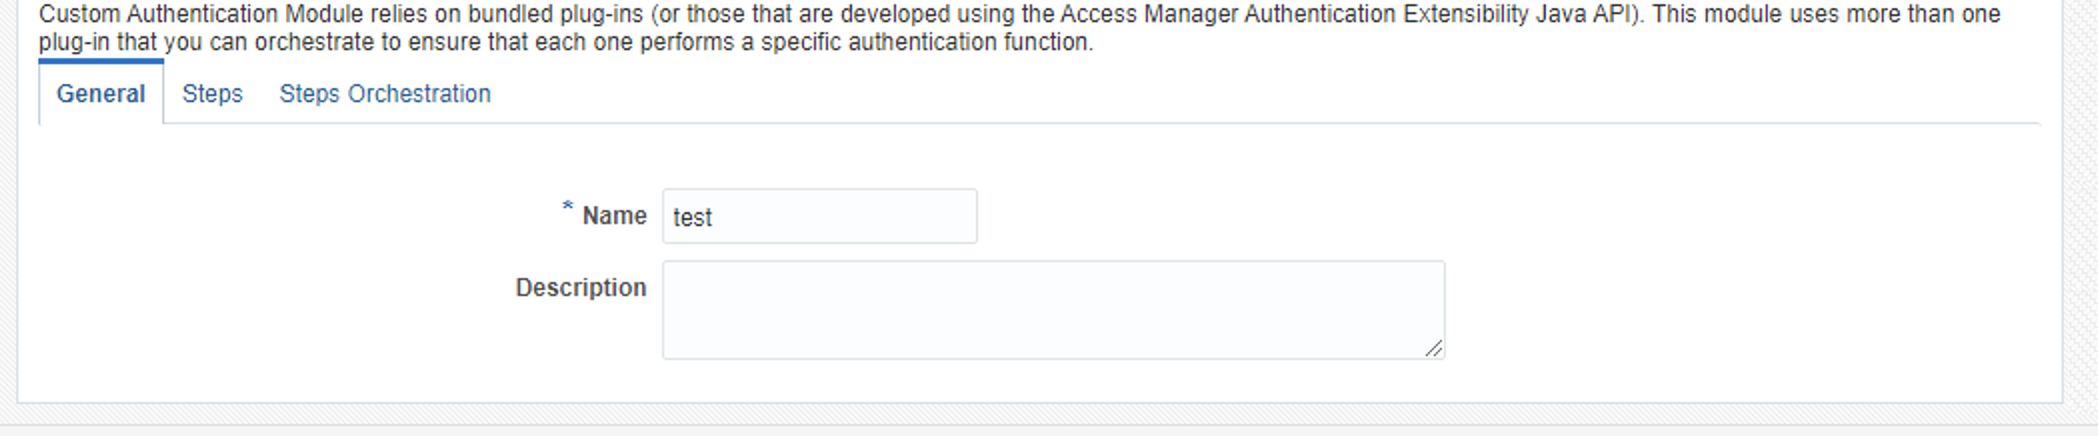
Fill the data
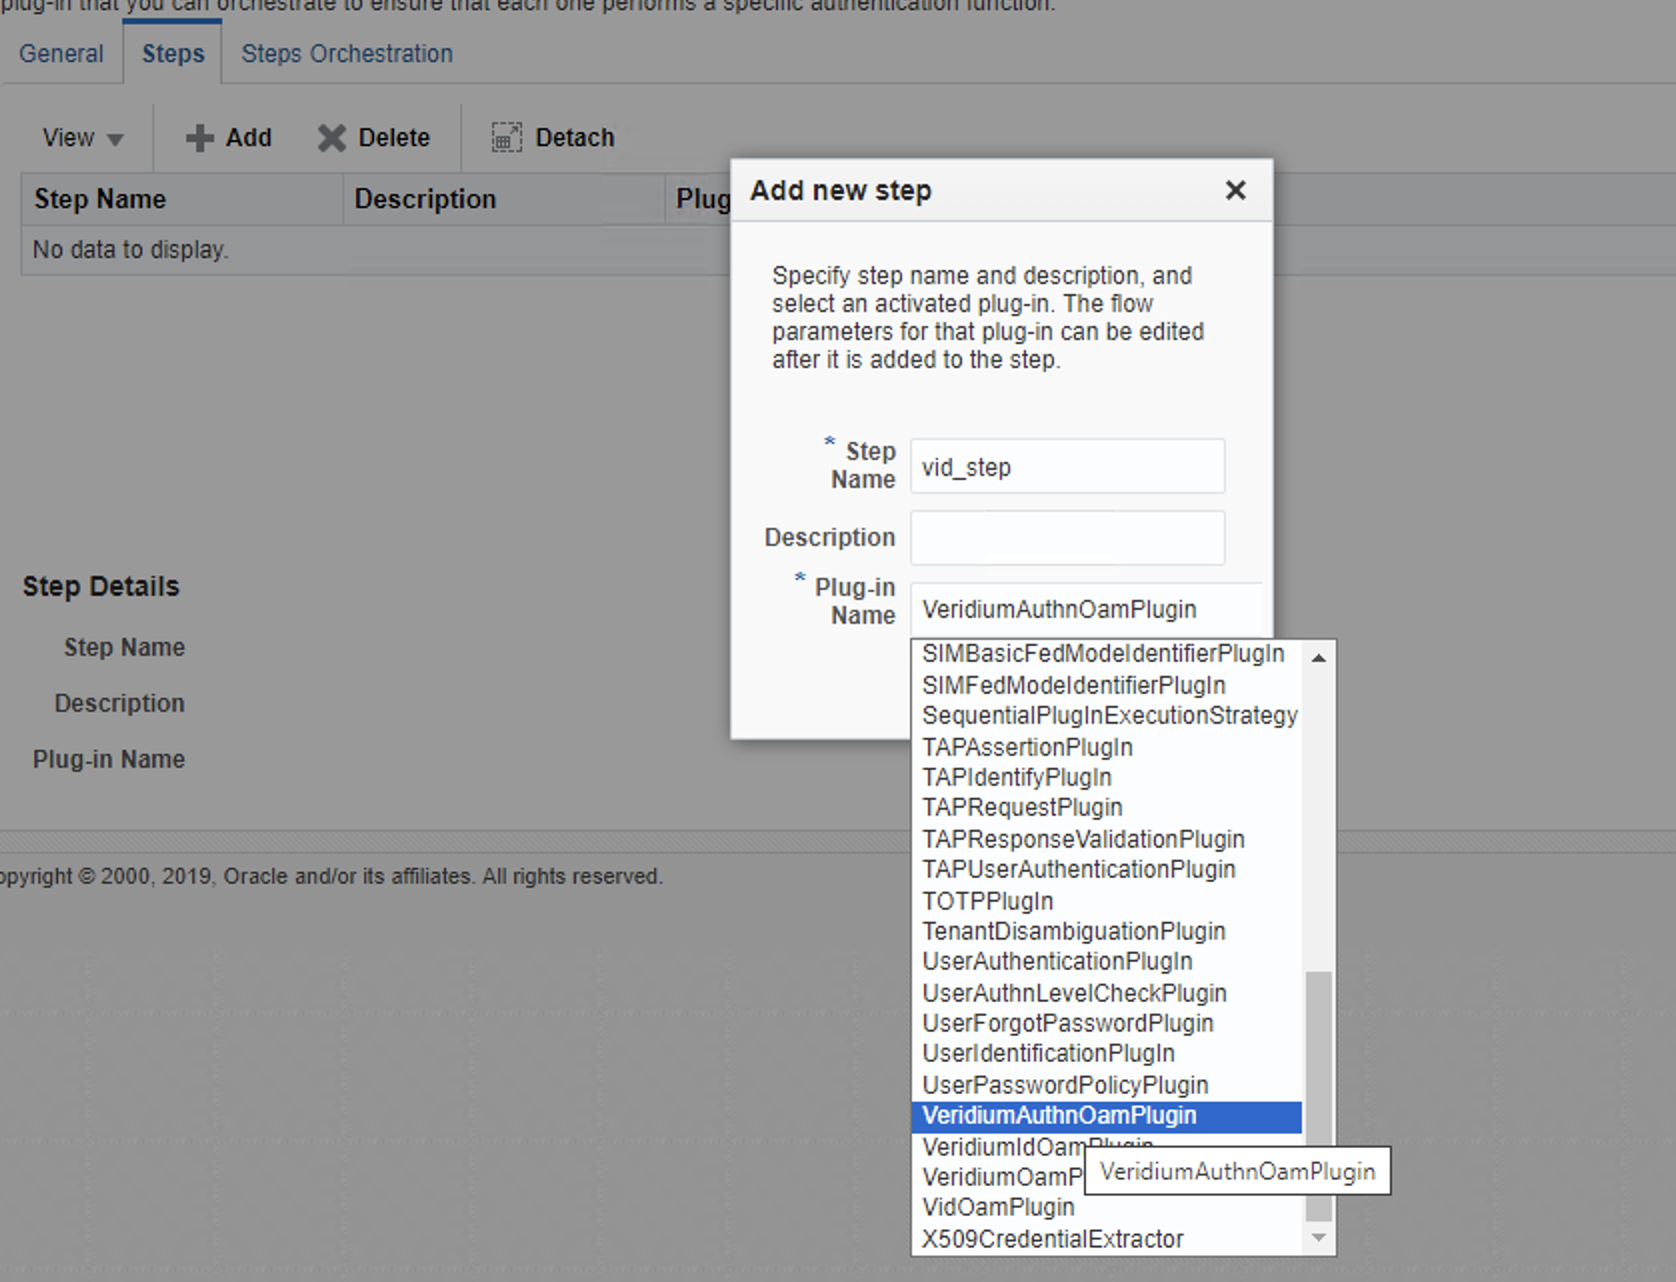
On the Steps tab, press Add and create a new step. Chose a name, and select the plugin we just imported.
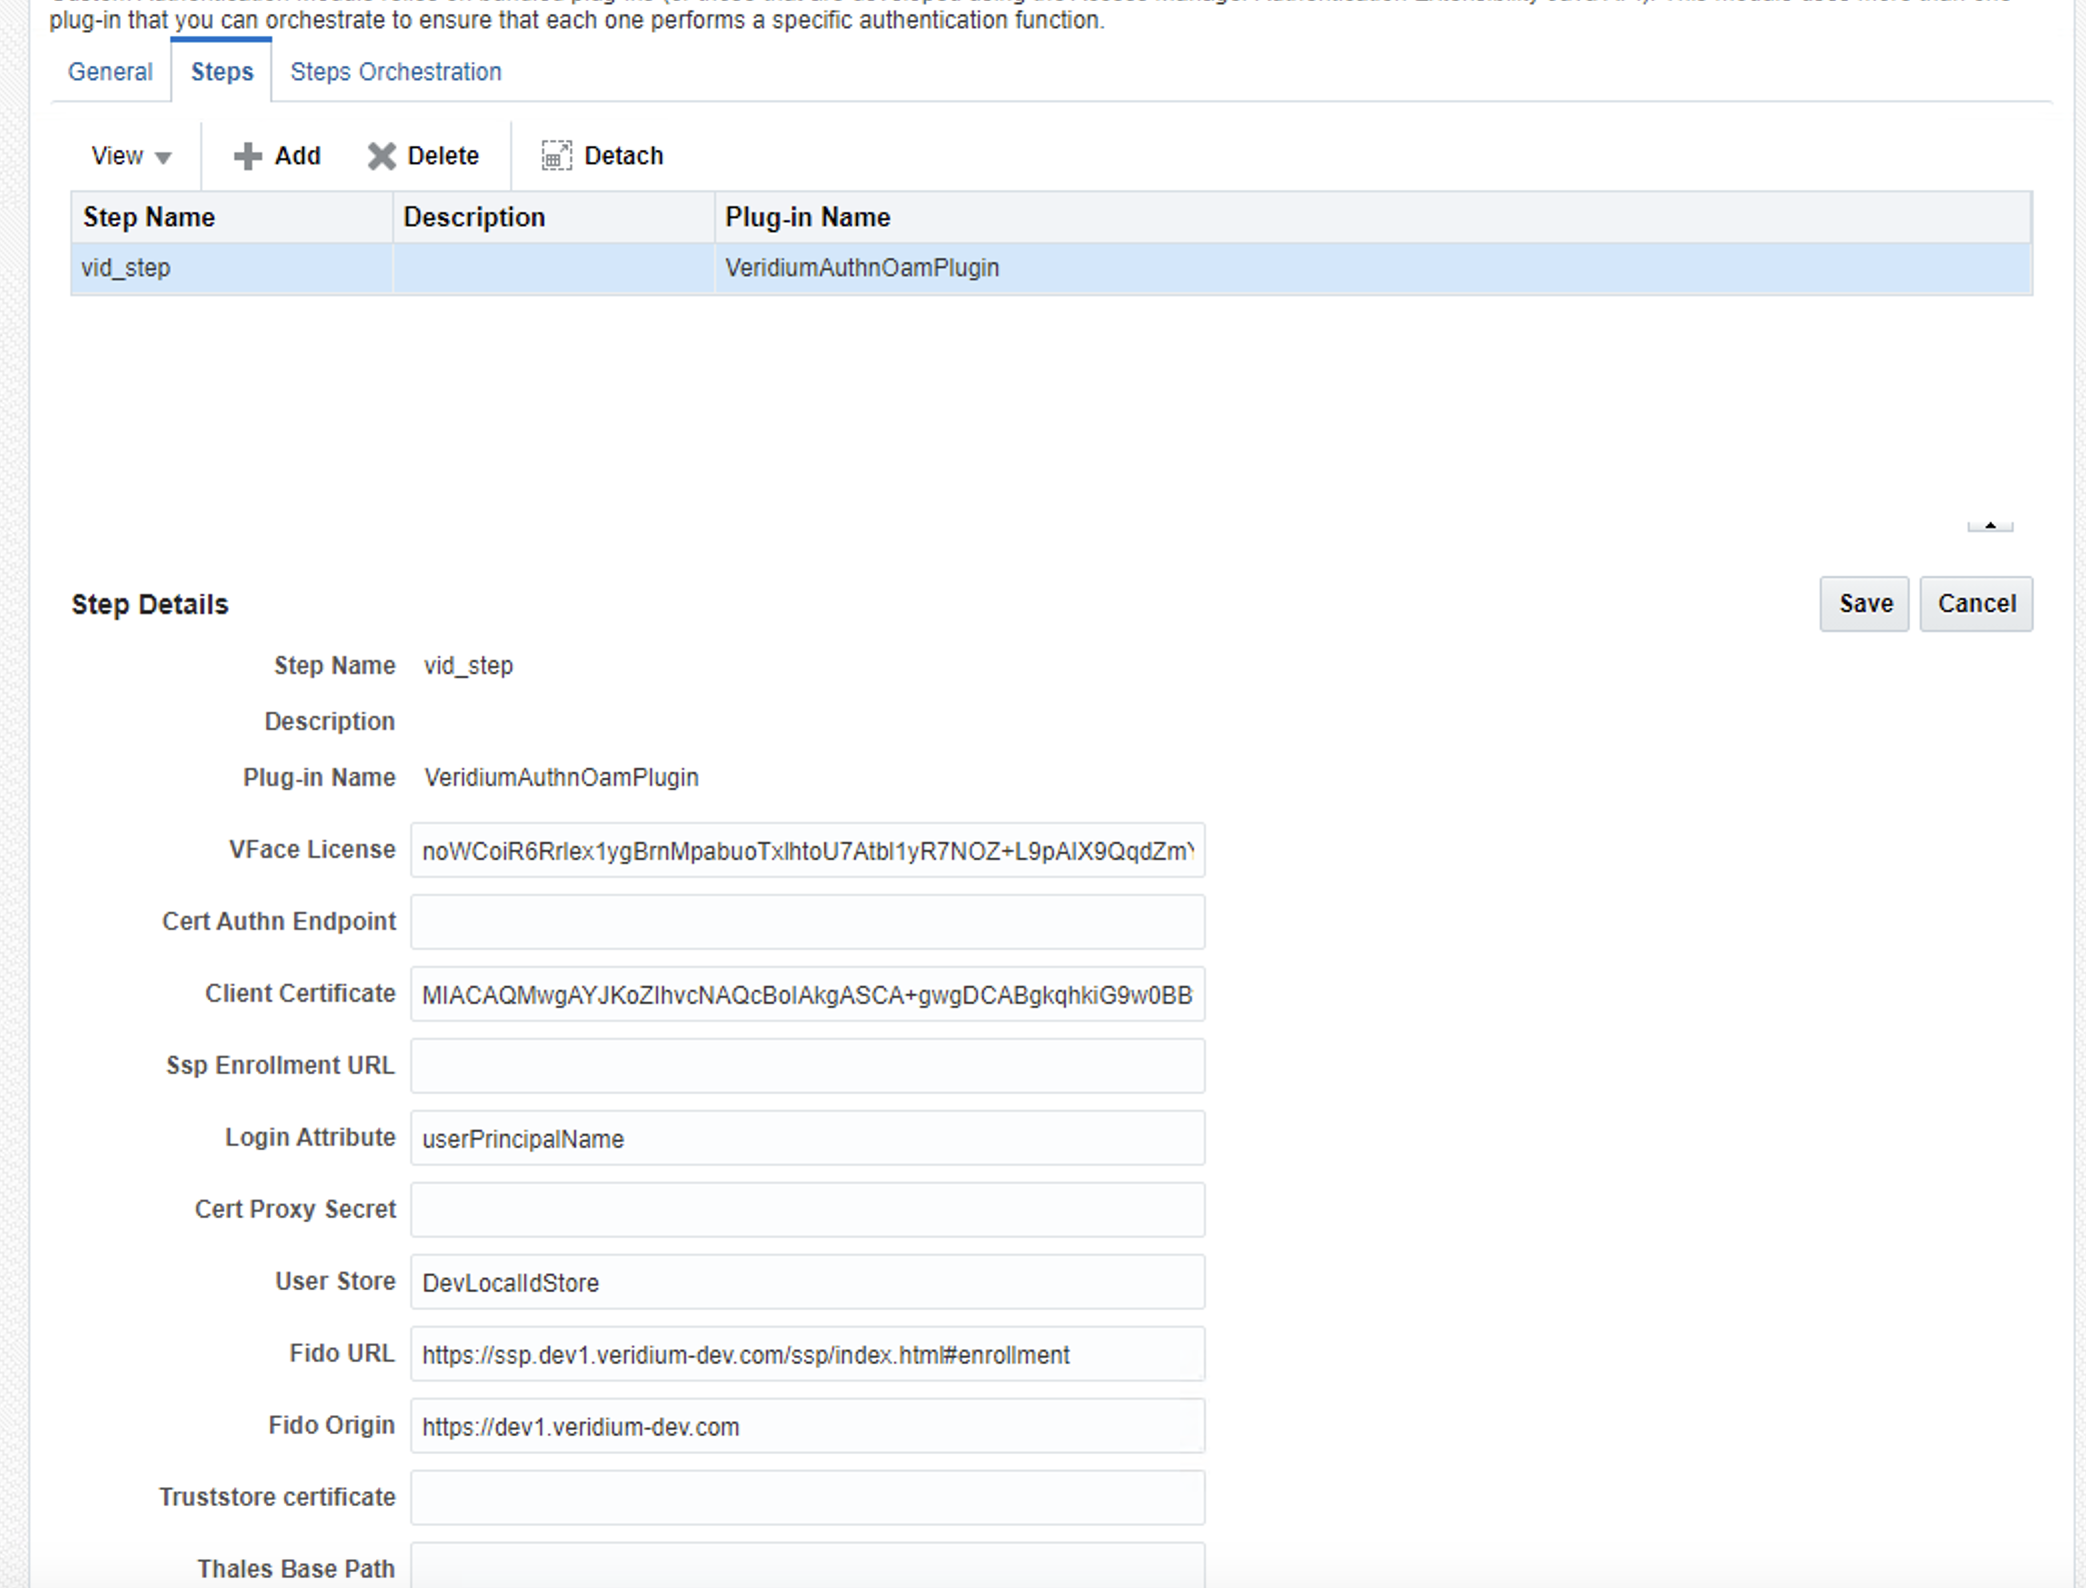
Make sure the Step Details tab contains the correct data
Go to Steps Orchestration tab and configure step that you want
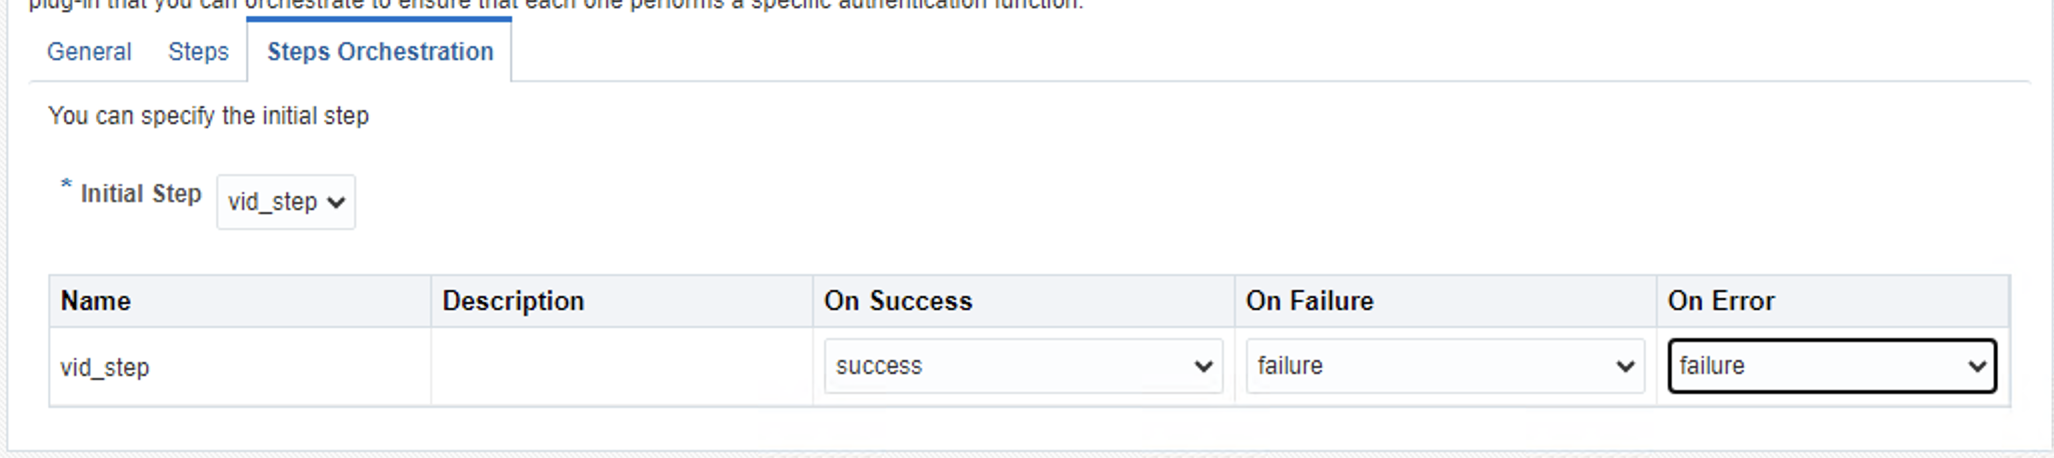
Finally, press Apply.
OAM plugin configuration fields can be customized separately for each authentication module. This allows each authentication module to use different configuration values based on its specific requirements.
-
Next, you have to create an Authentication Scheme. From Launch Pad go to Authentication Schemes
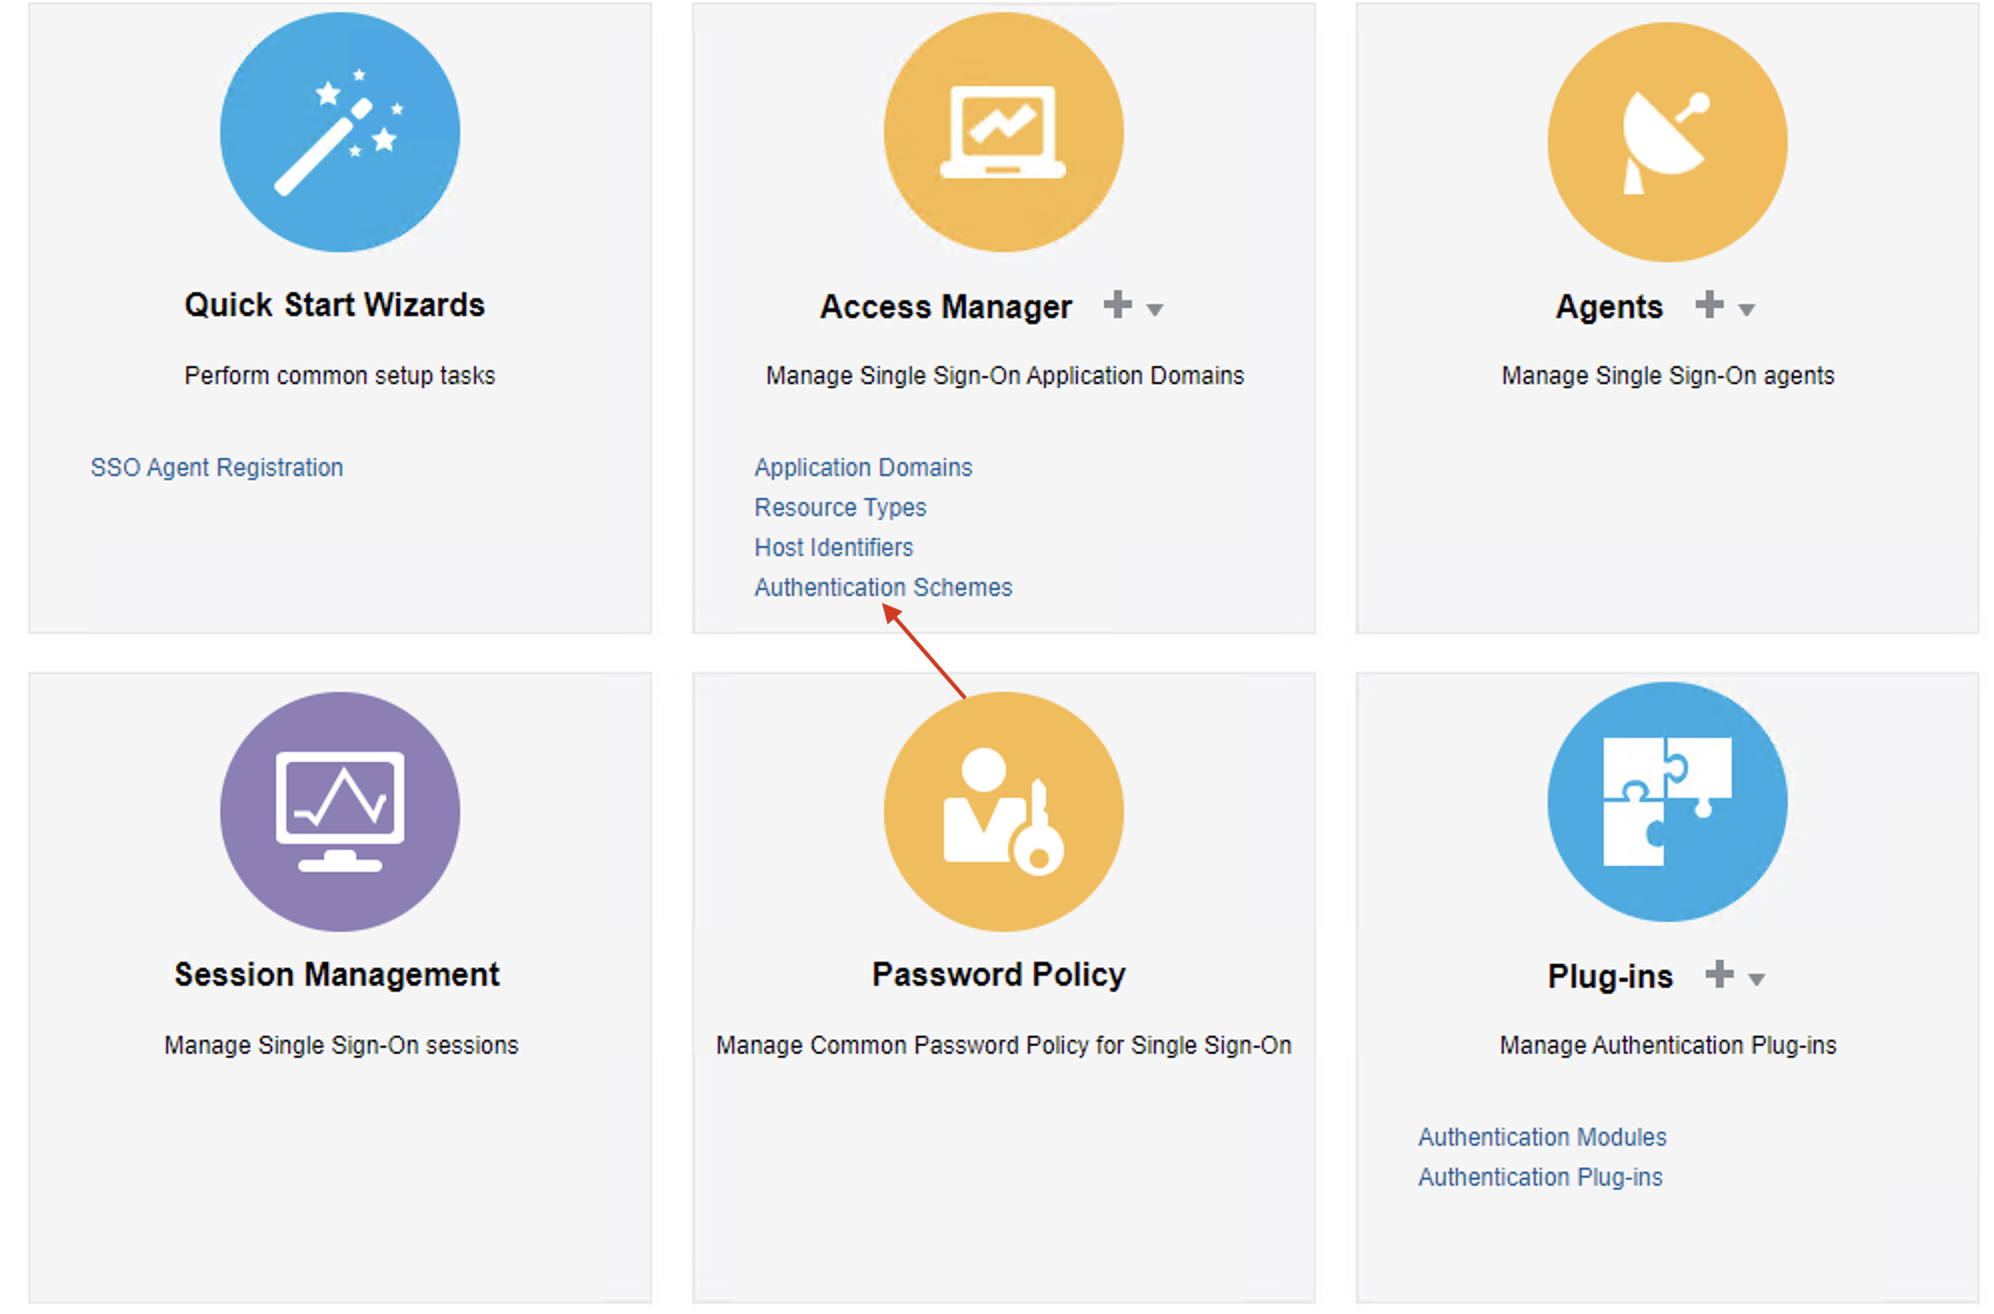
-
Create new scheme

.png?cb=a17f44b9b8bfb5de65d5f709f38d7b79)
Where service_id is the application id, and service_friendly_name is the application name. Those are used for orchestration.
As you can see, we are using the Authentication Scheme that we just created. On Challenge Method chose FORM, challengeUrl is the relative path to our custom login page, Context Type is customWar because we have a custom interface and Context Value is WAR file name (we will cover the generation of this WAR in later steps)
Press Apply.
-
Next, from Launch Pad go to Application Domain
-20240607-114533.png?cb=4eadec4ee552a20768ccc233fe9de5cd)
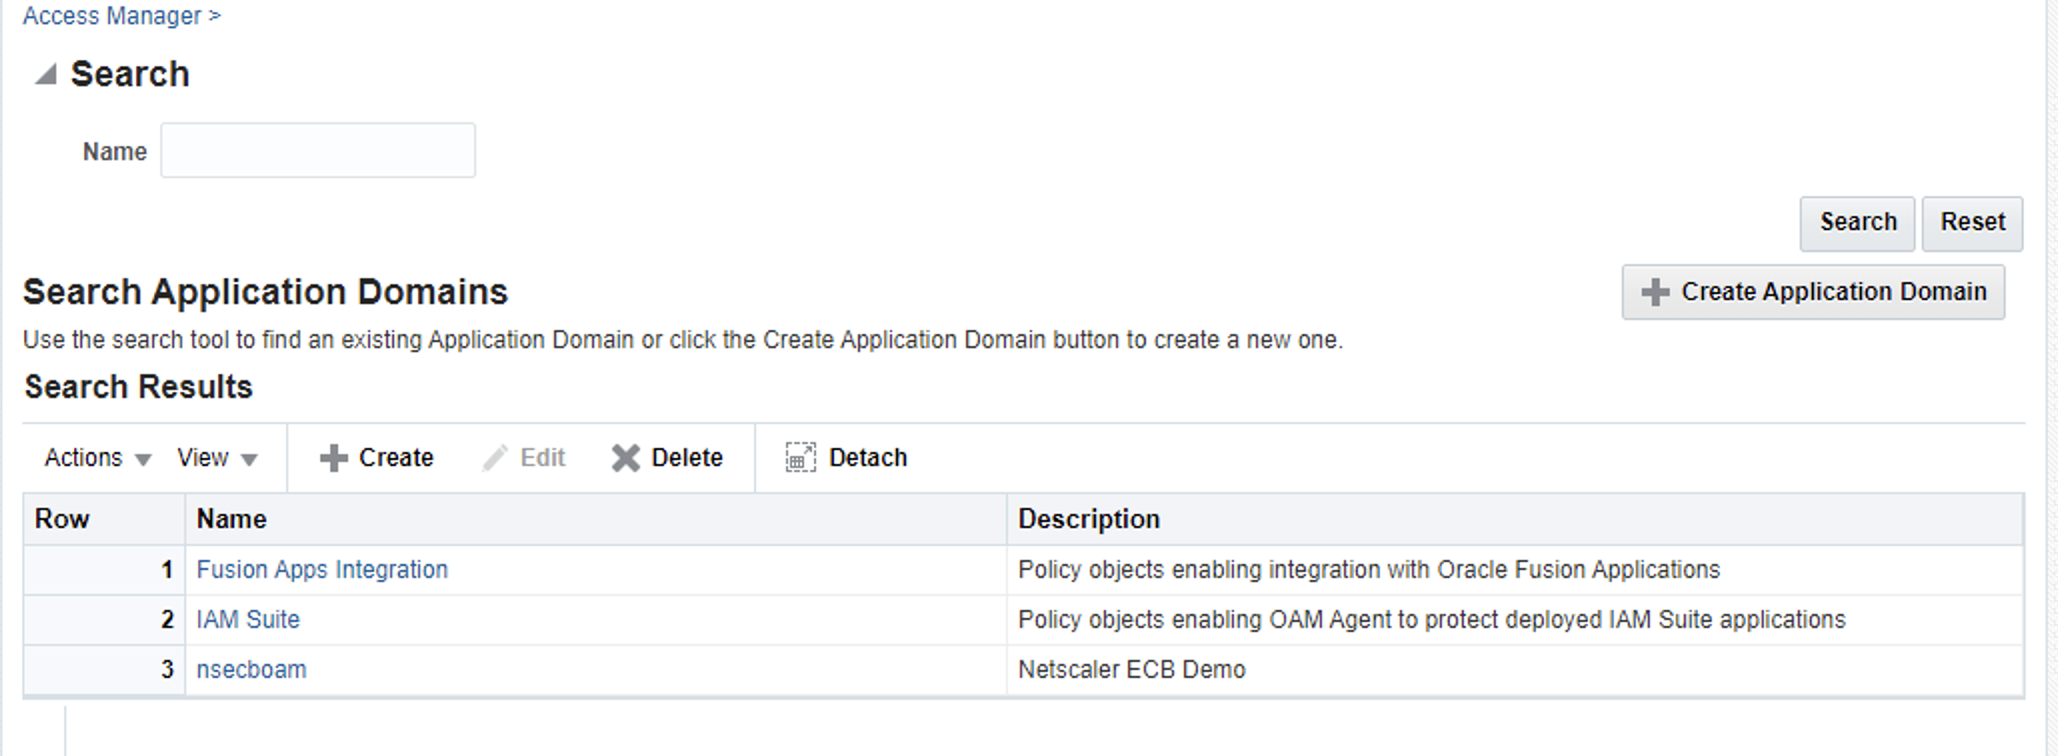
You can create a new domain. I created nsecboam domain. After you create the domain, go to domain details
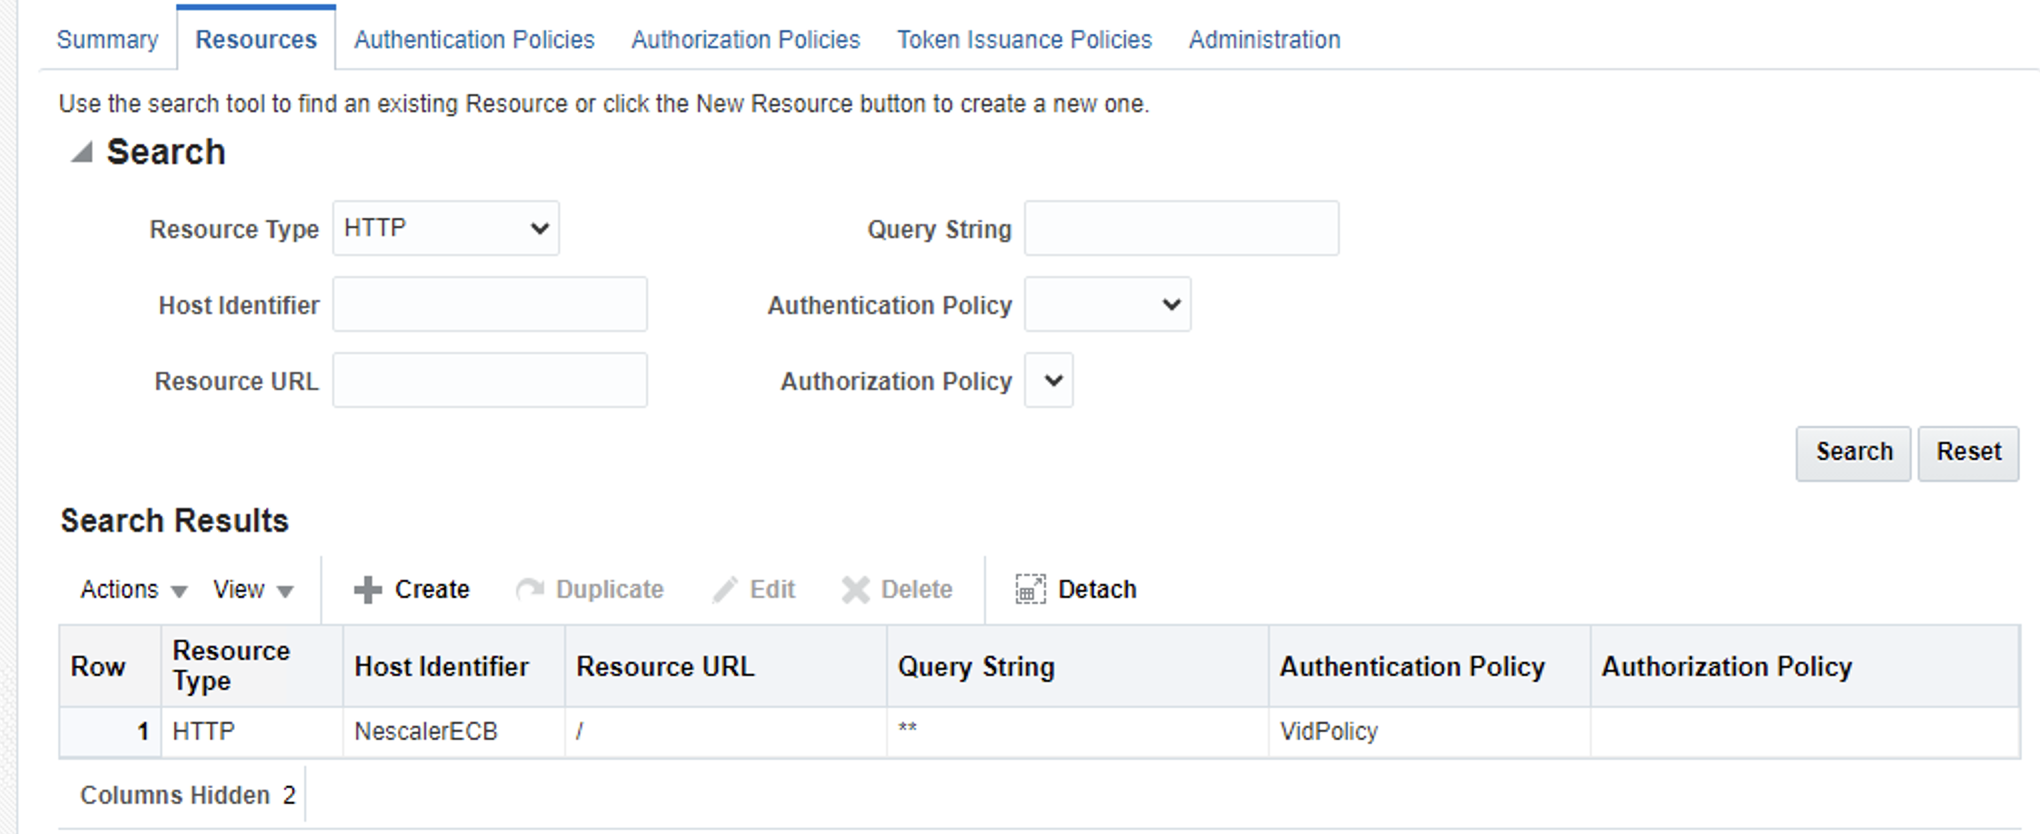
Go to Authentication Policies and create a new policy.
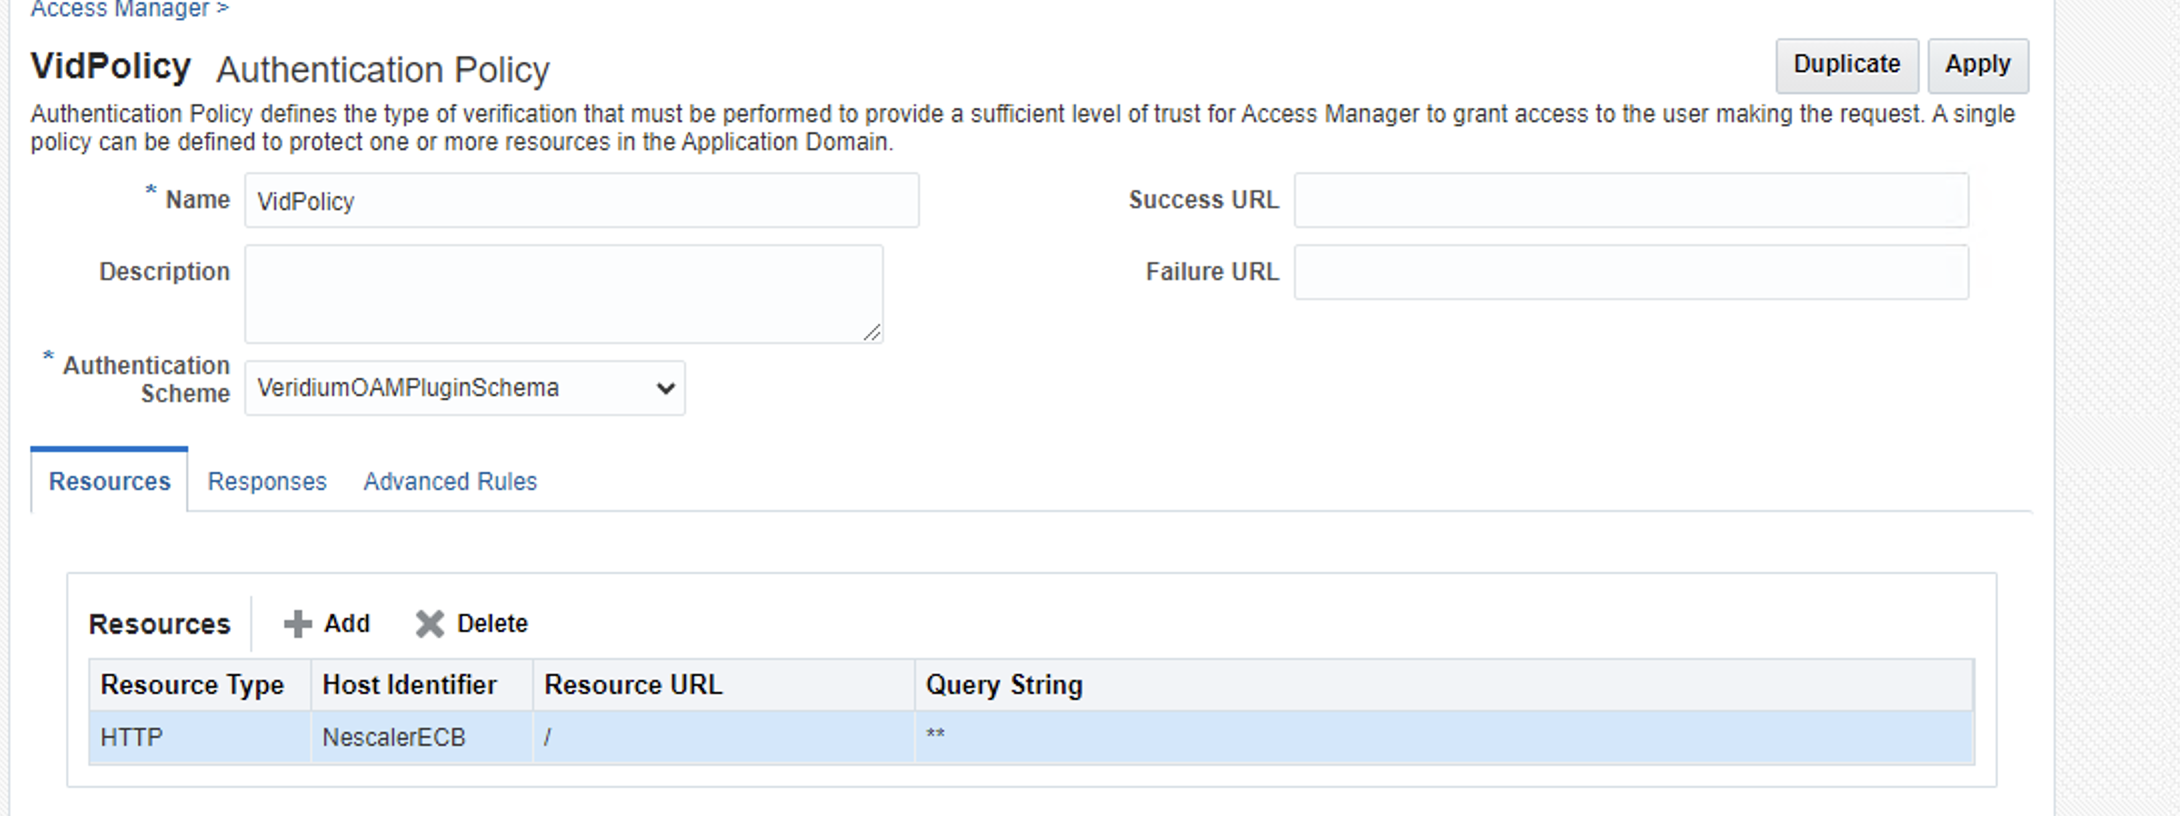
For the backend plugin, that's it.
Frontend
-
Go to OAM Archive
-
Take the .war file from /oam-plugin/vidoam.war
-
Go Oracle WebLogic Server

-
Go to Deployments, click Lock & Edit and Install
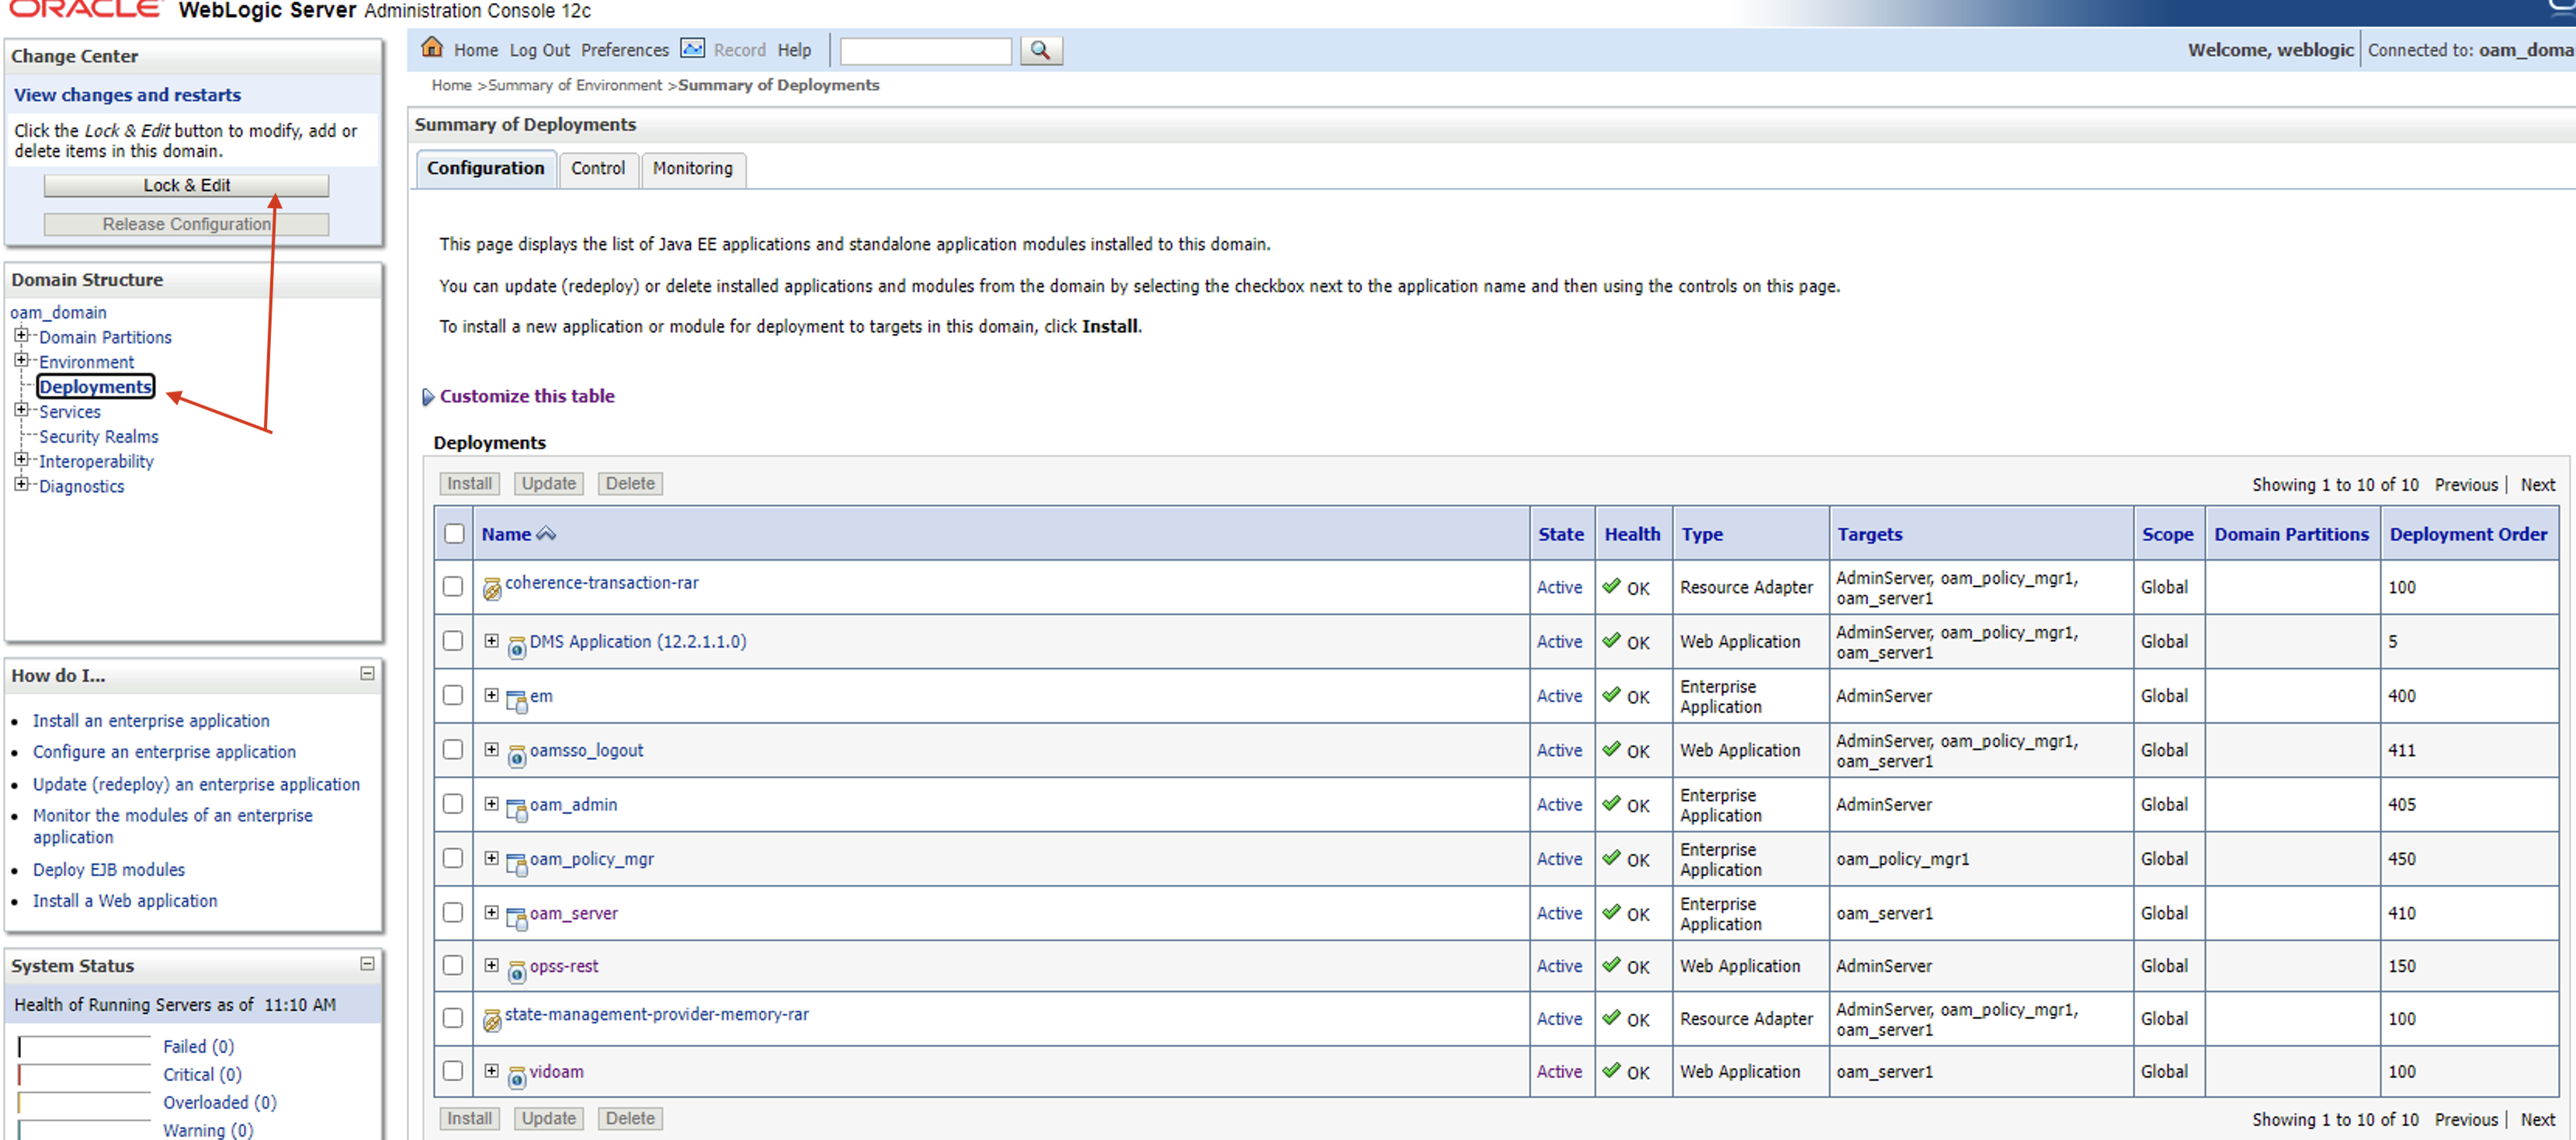
-
Complete the install wizzard
-
Go to Path where you saved the .war file and select the file
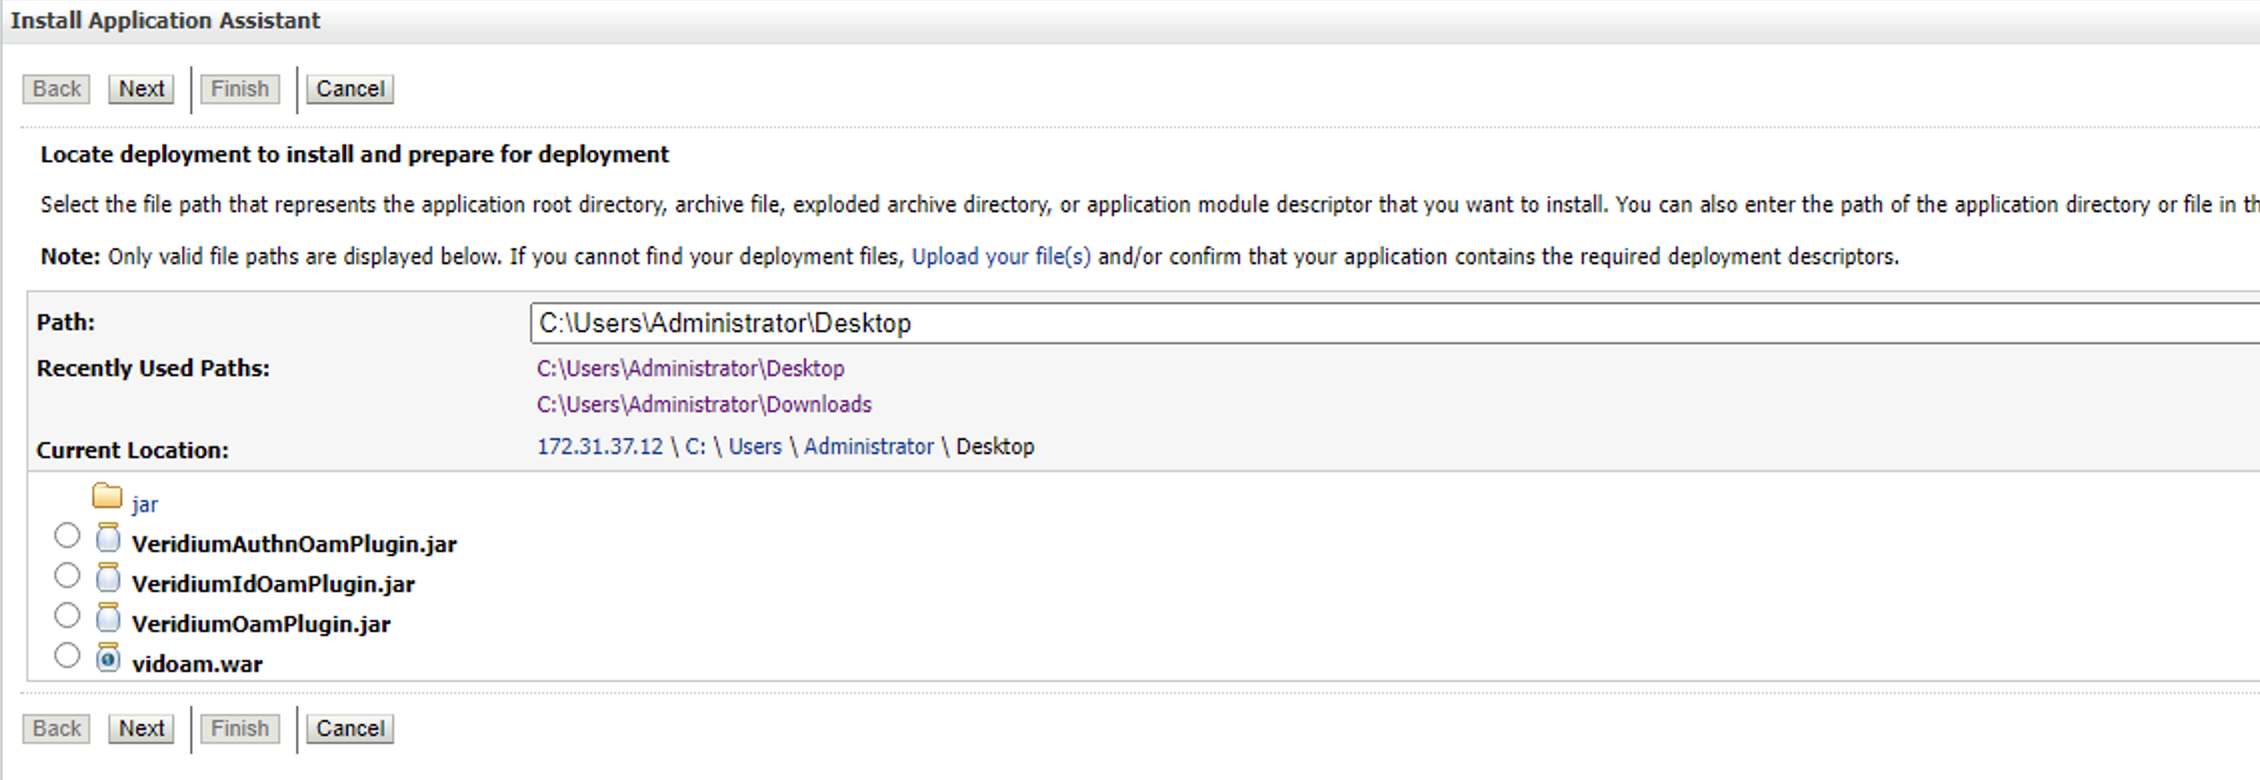
-
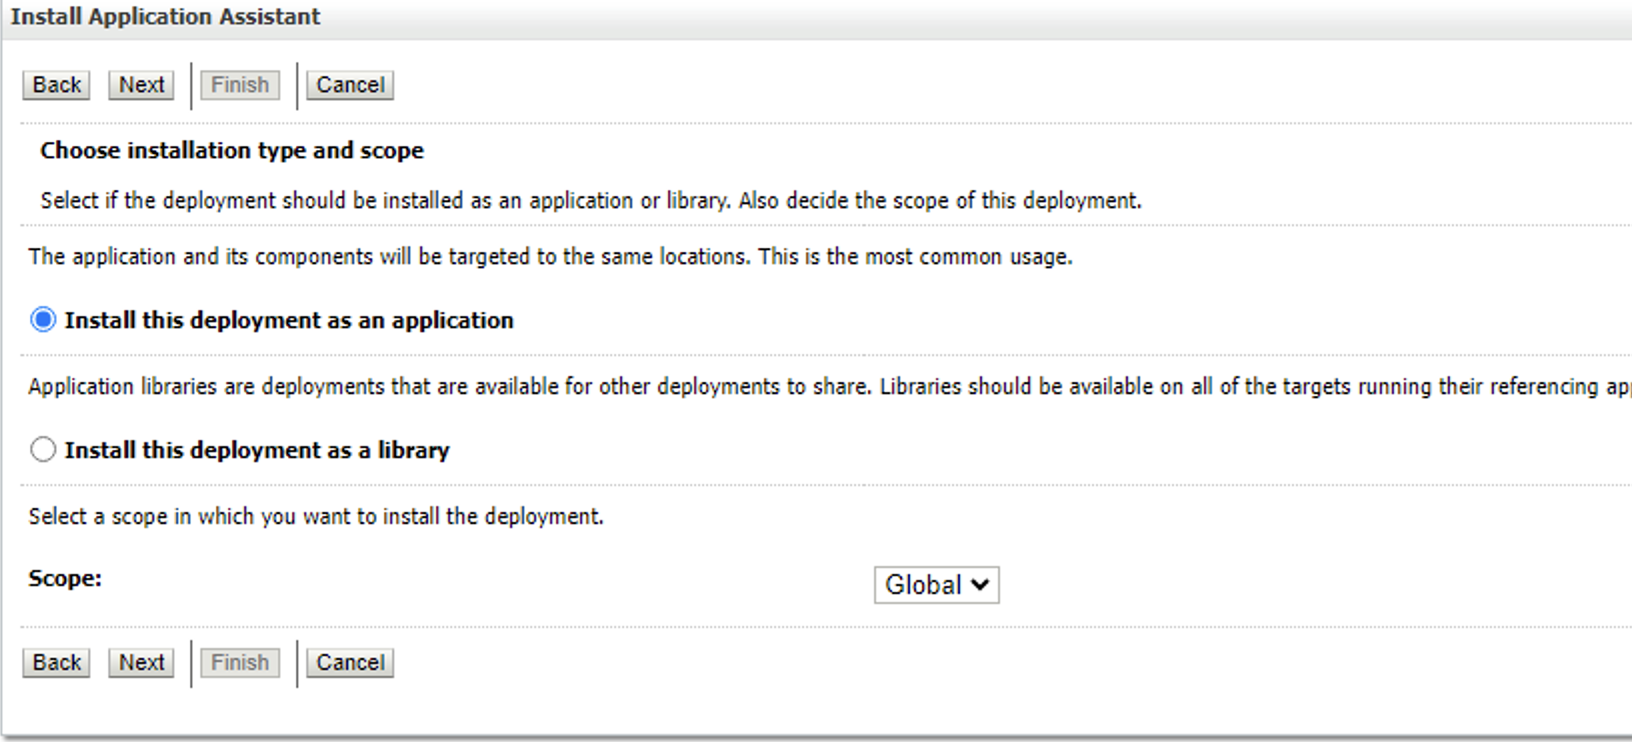
Select Install this deployment as an application and press Next
-
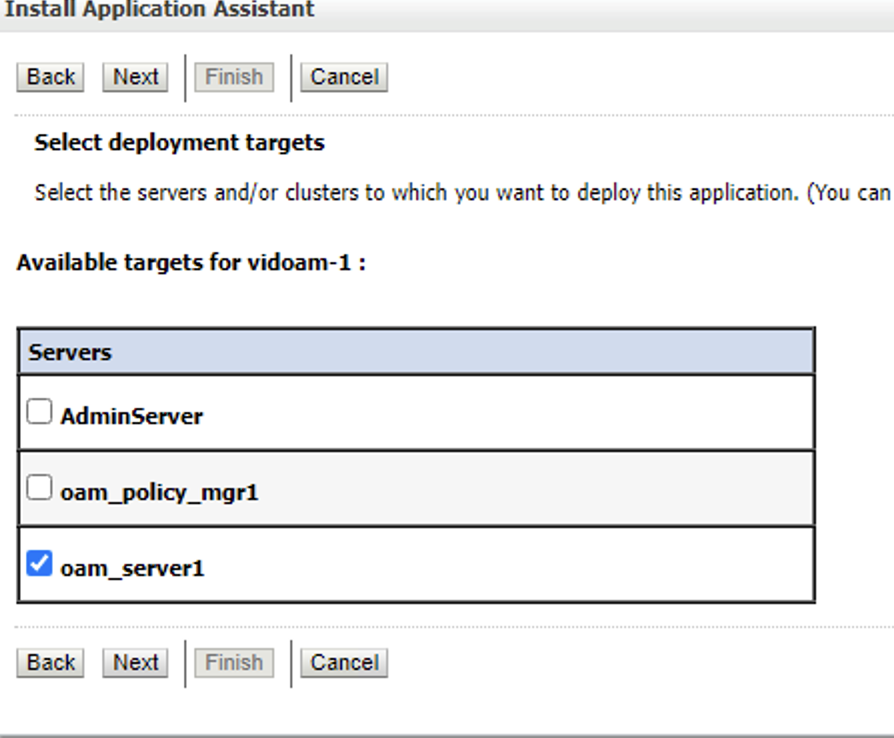
Select the server that you want to install
-
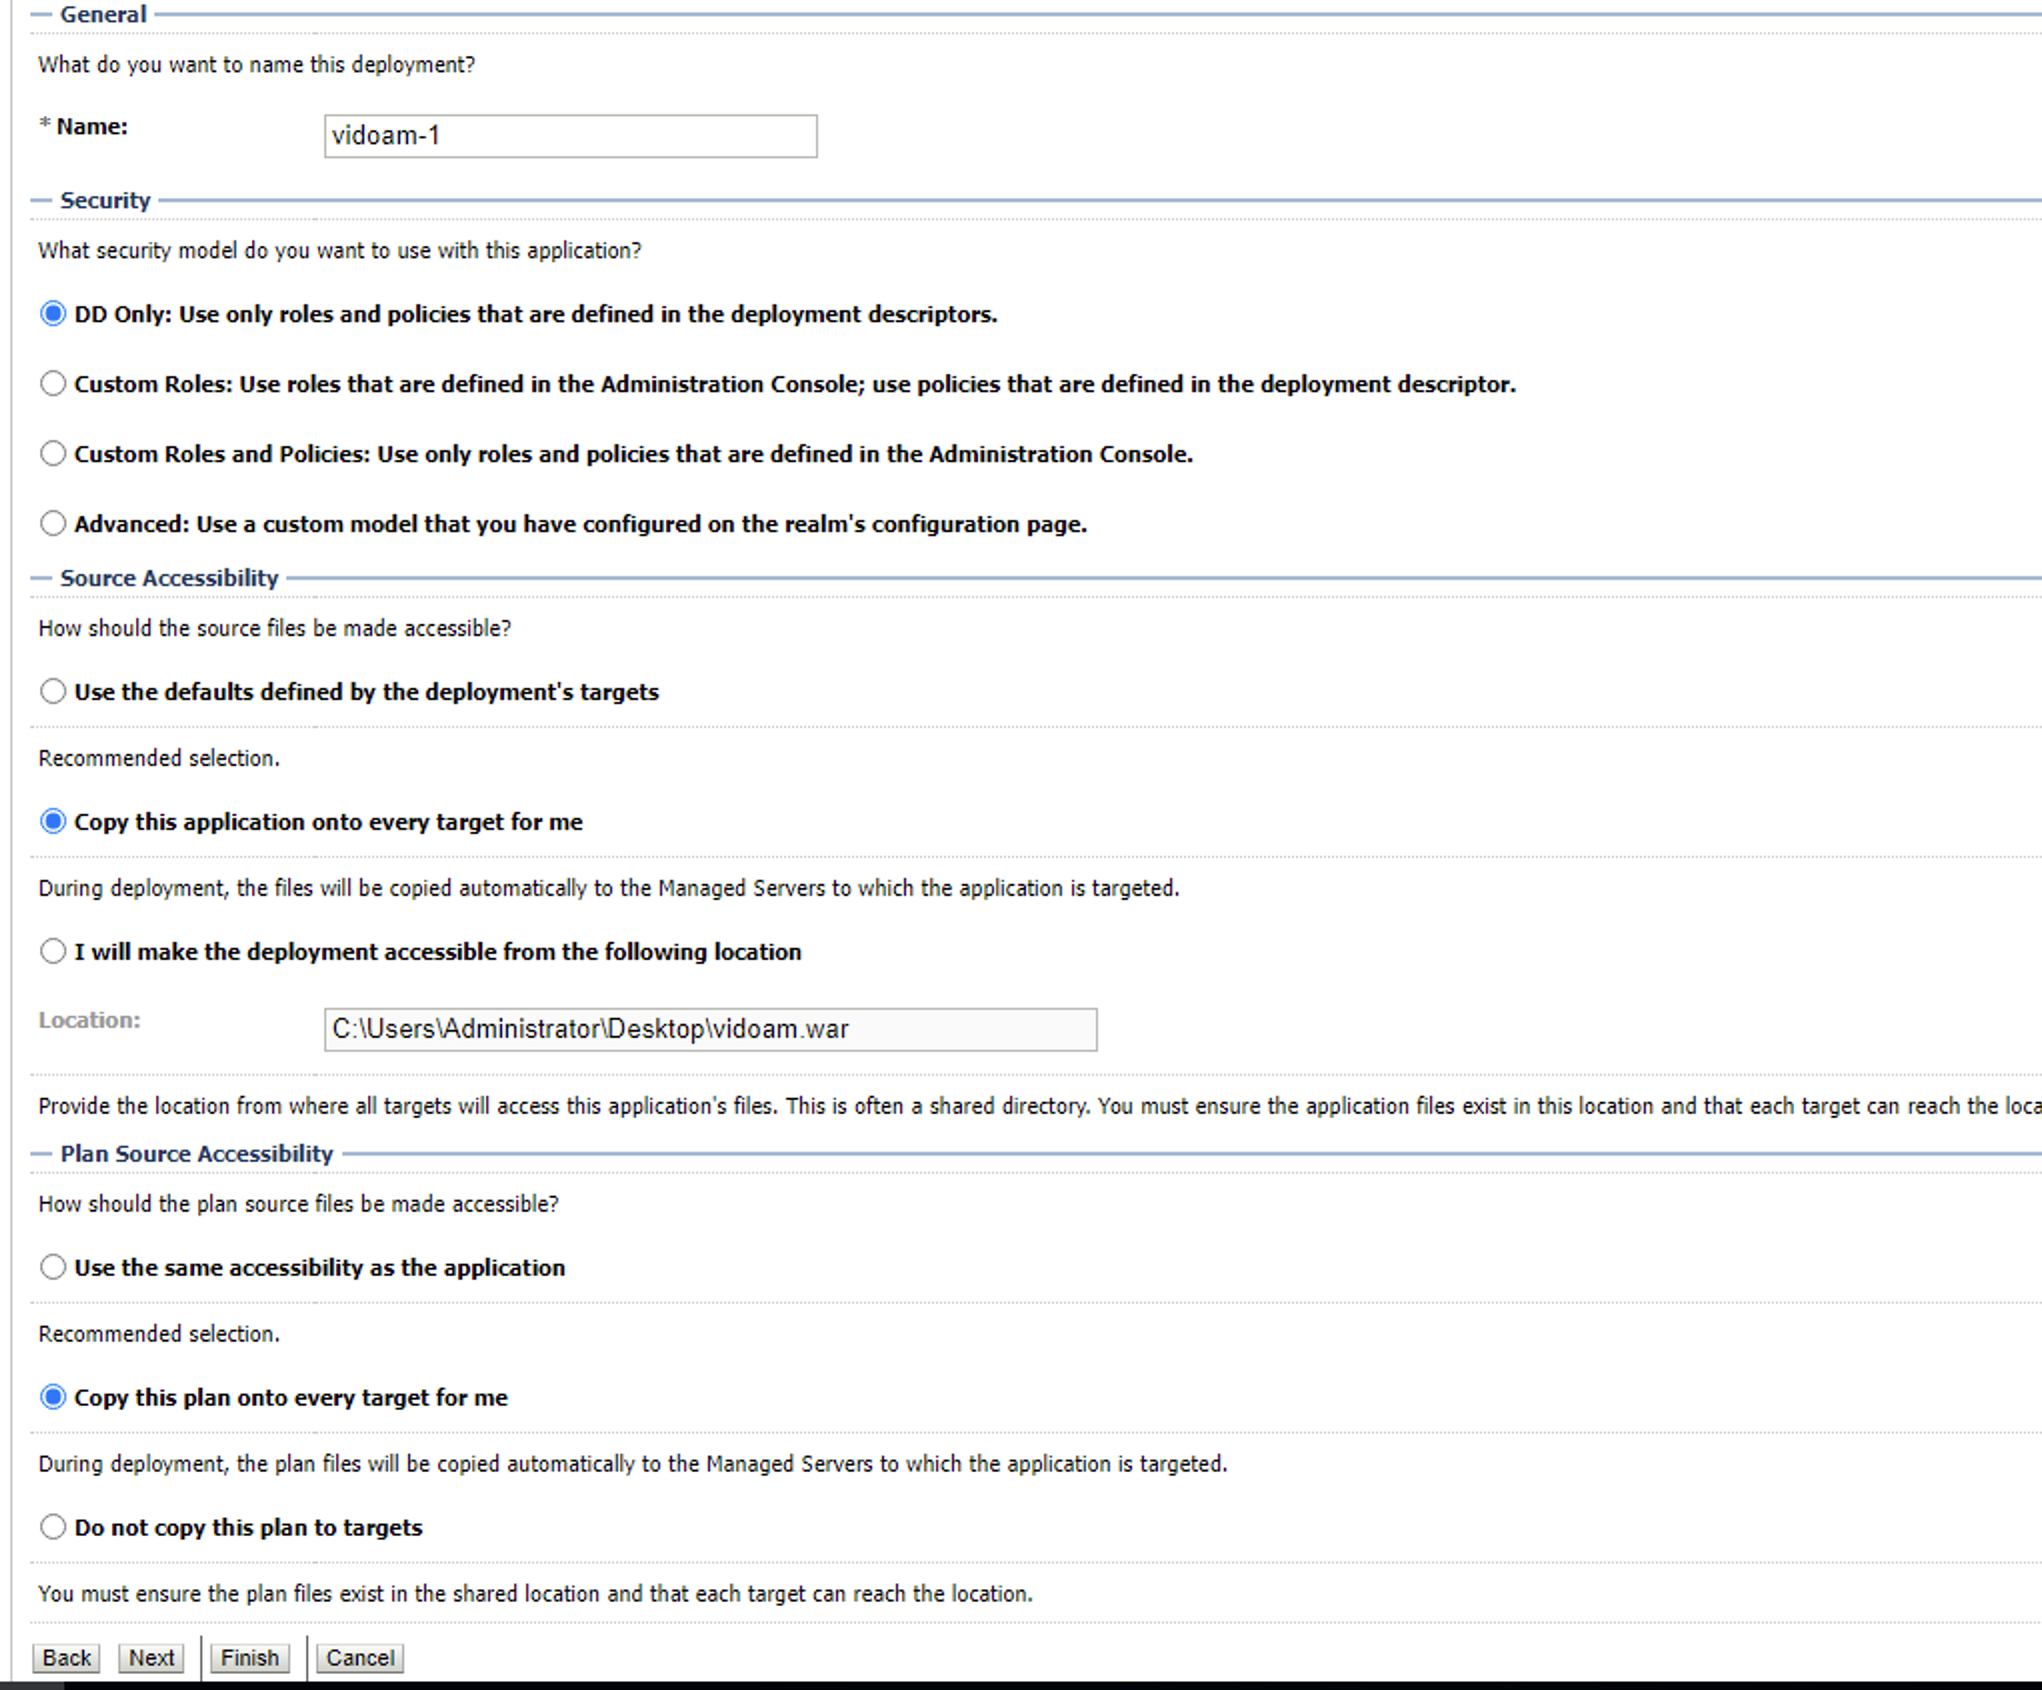
In Source accessibility select Copy this application onto every target for me and in the Plan source accessibility select Copy this plan onto every target for me and you can click Finish
-
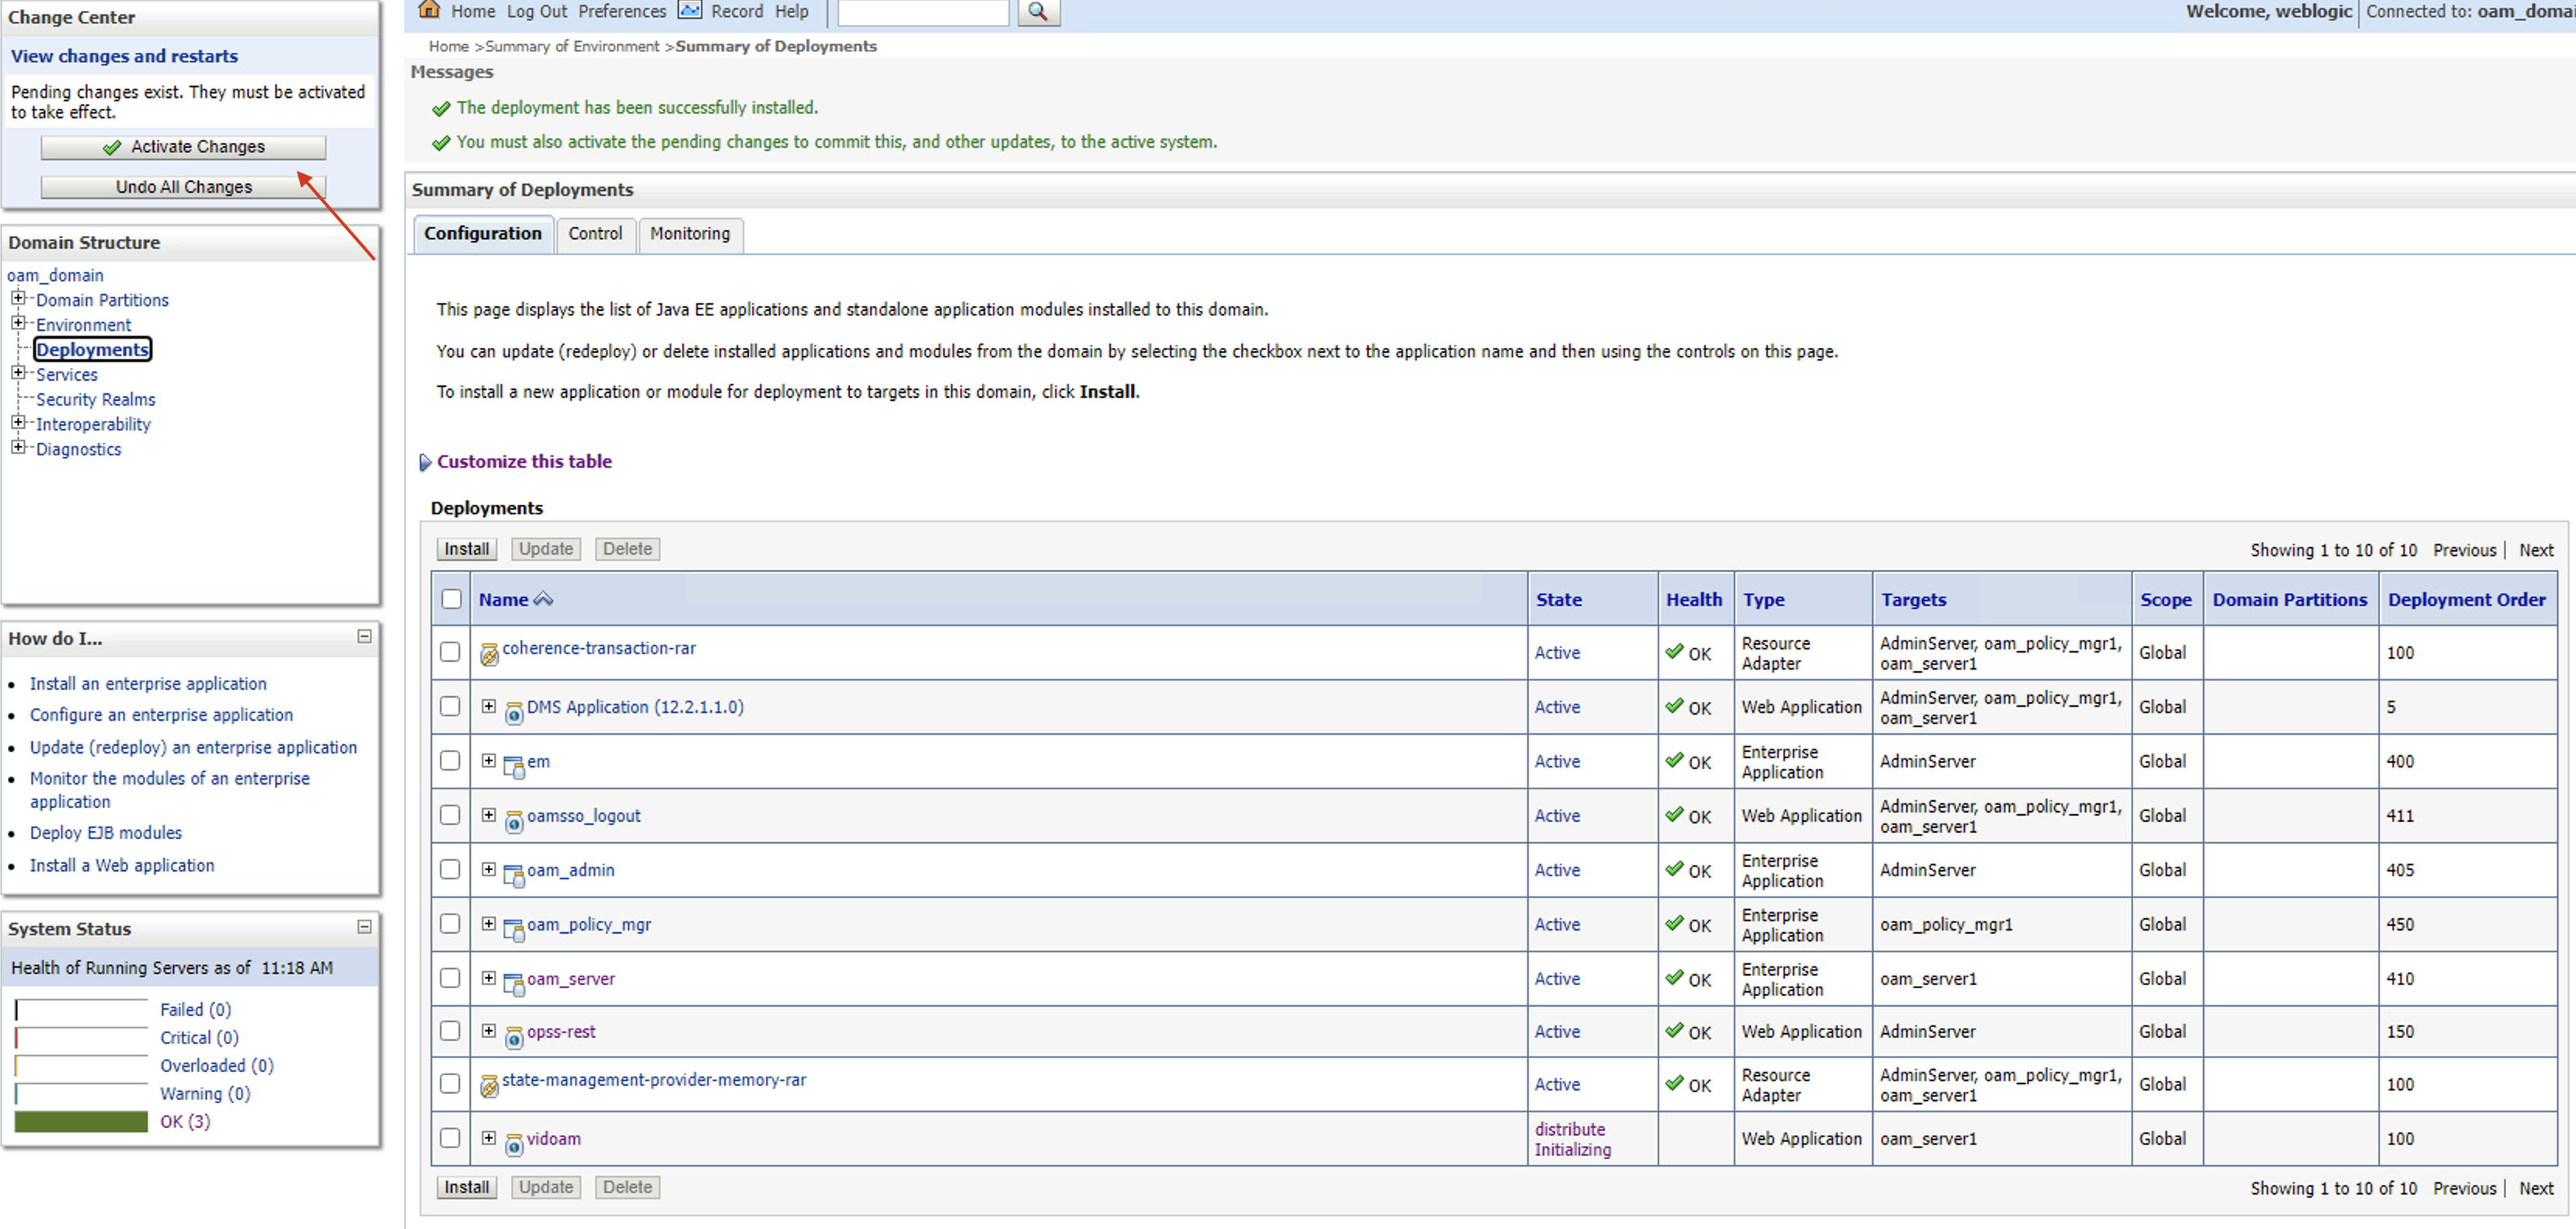
Click on Activate Changes
-
Go to Control tab and start the deployment
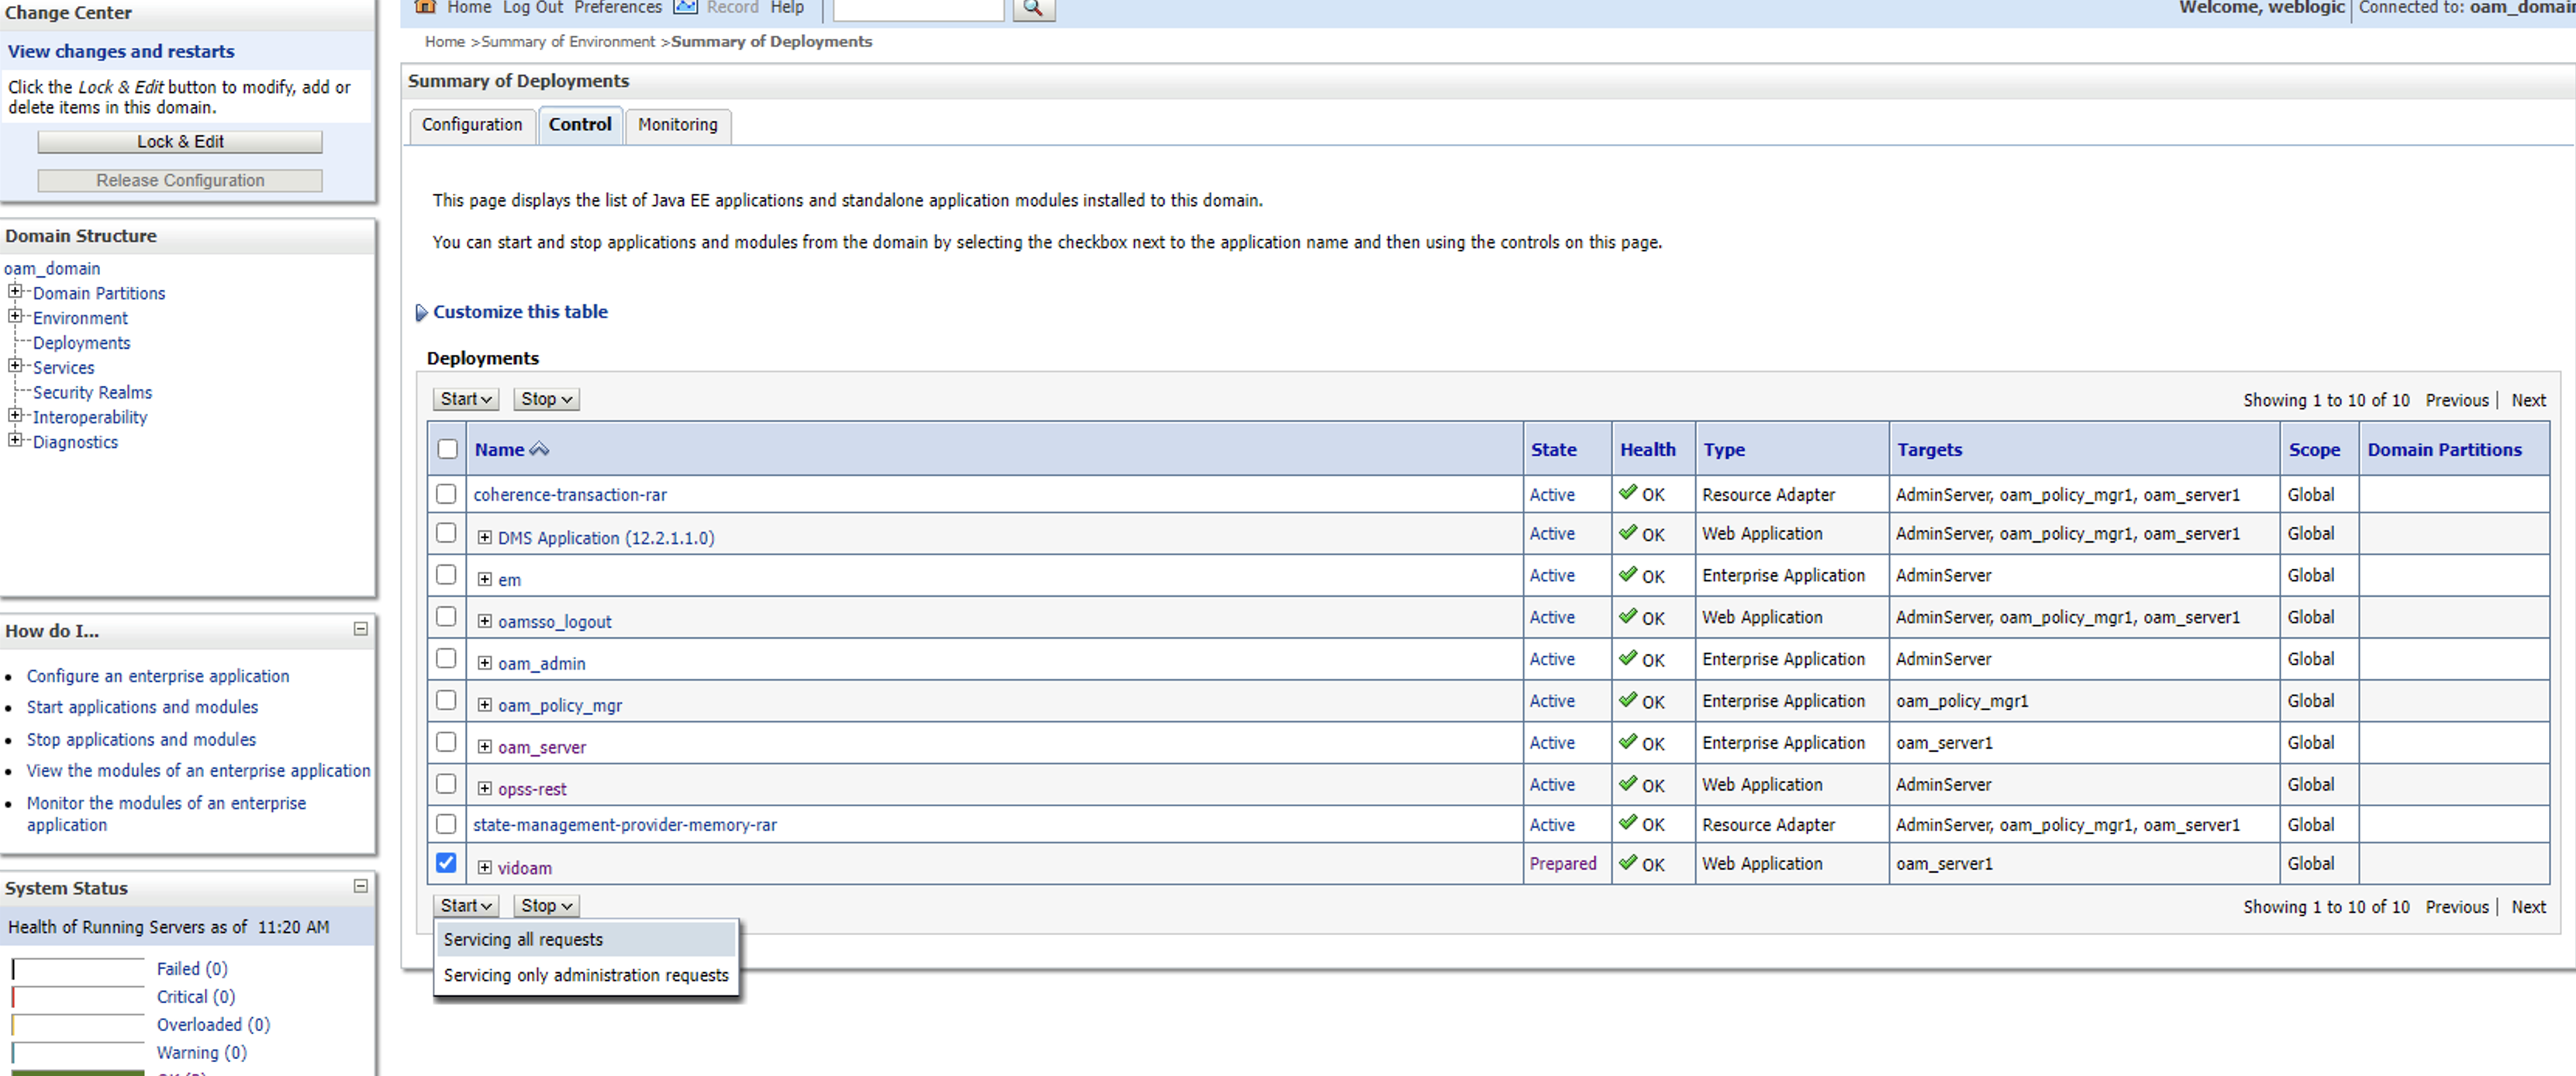
Press Yes
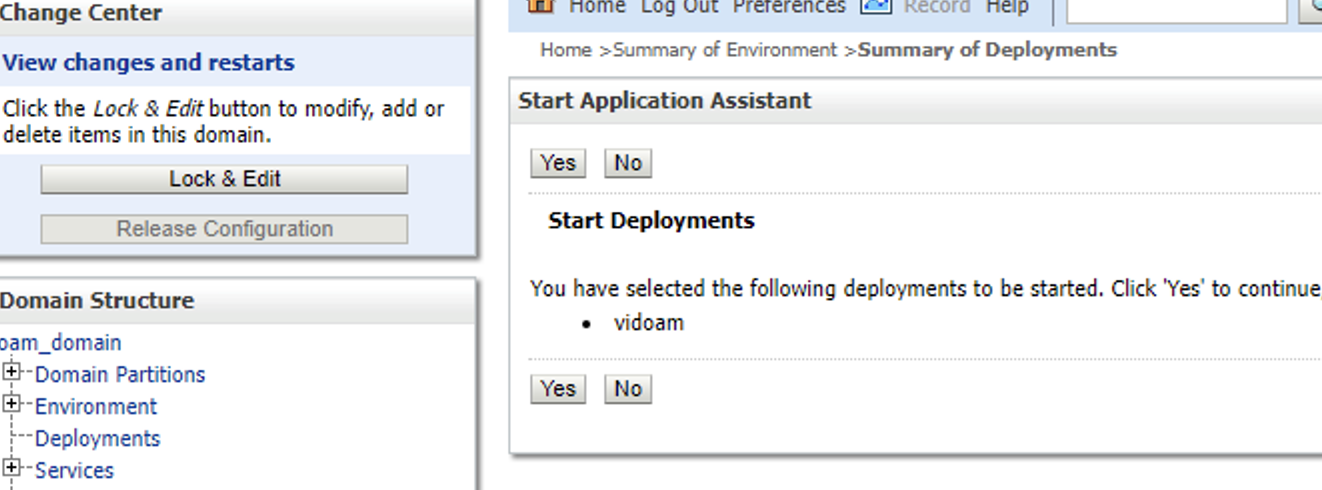
The status of the deployment should be Active

-
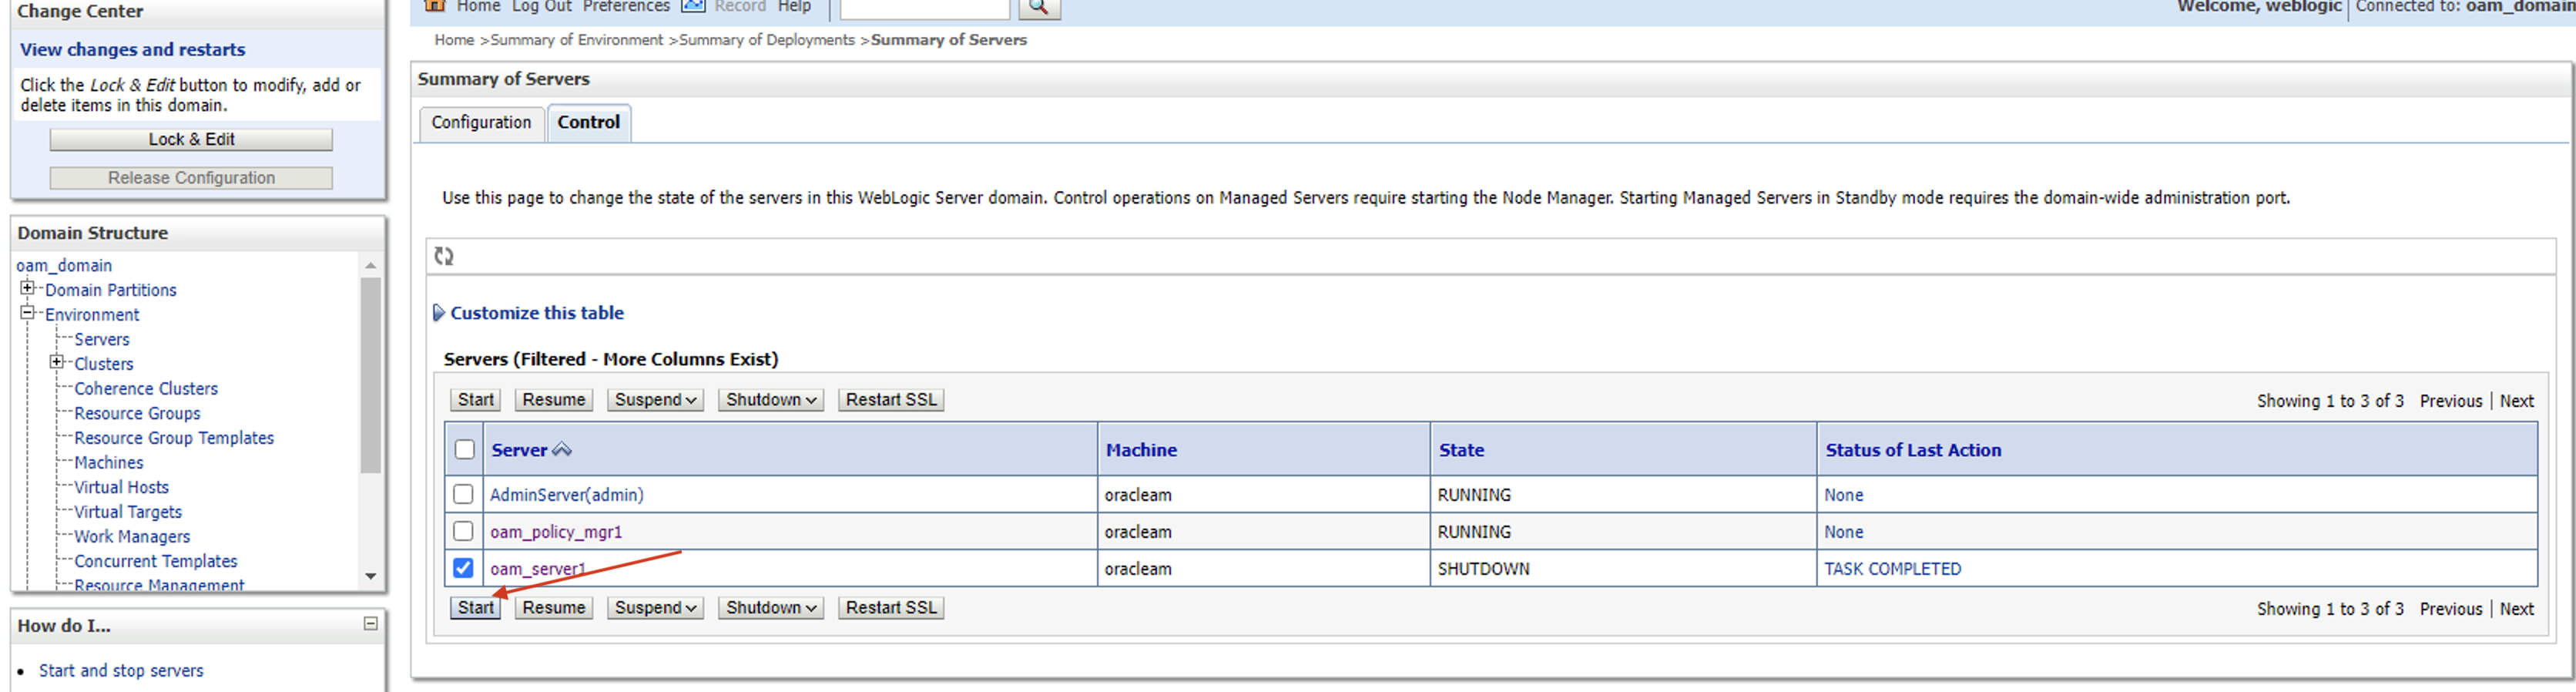
Go to Environment → Servers → Control and shut down the oam server
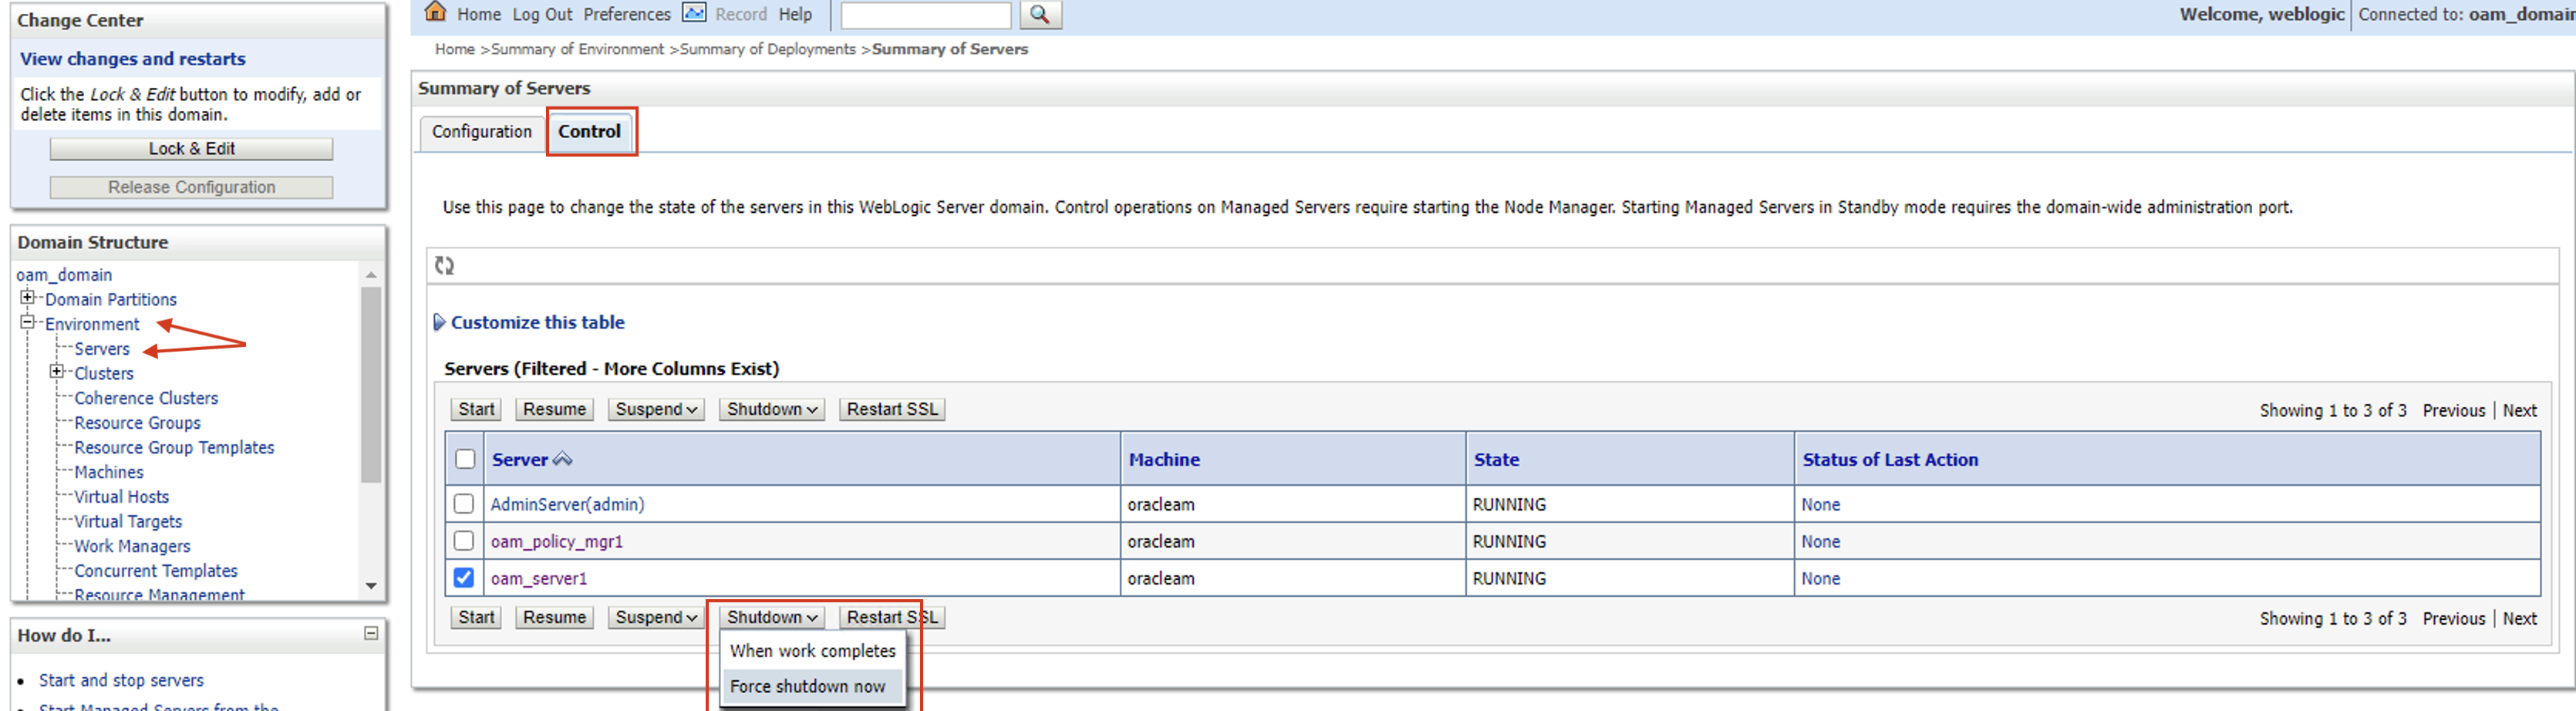
Press Yes
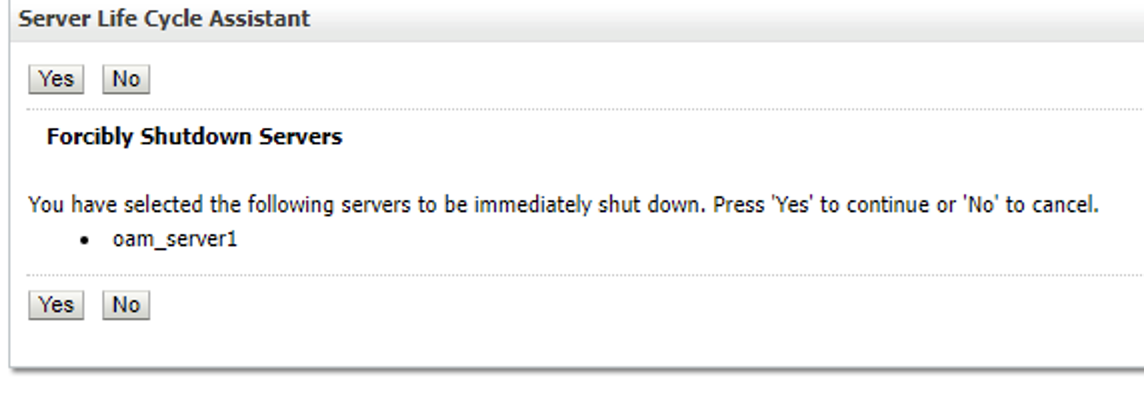
Wait until you see status TASK_COMPLETE

-
Now press on Start button
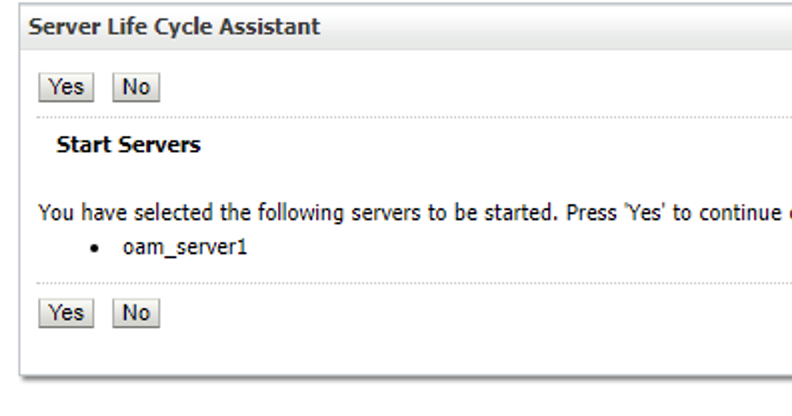
Press Yes
Wait until the Status is TASK_COMPLETE and the State is RUNNING
