AWS Workspaces SAML integration and single sign-on
This document will present a step-by-step procedure for configuring SAML authentication provided by VeridiumID in AWS Workspaces. Unlike other AWS services which offer the possibility to configure SAML authentication, the implementation chosen for AWS Workspaces is different: it uses idp initiated sign-on and the RelayState parameter, which in Shibboleth terms translates to using the Unsolicited/SSO endpoint and a combination between the providerId and target parameters. This ensures that the series of redirects between AWS Workspaces and the idp is working properly, regardless if the workspace is accessed via web or locally installed client.
In order to achieve this integration, you must perform the following steps:
Create a Workspace Directory
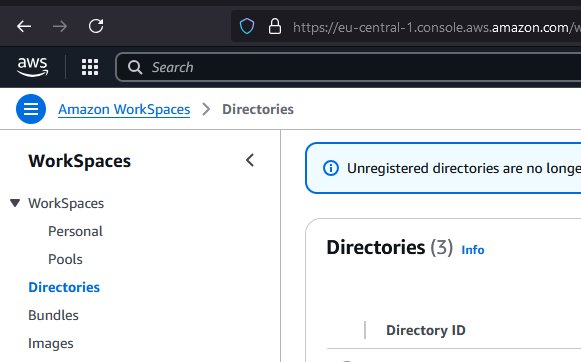
Access AWS Console and navigate to the Workspaces section, then select Directories:
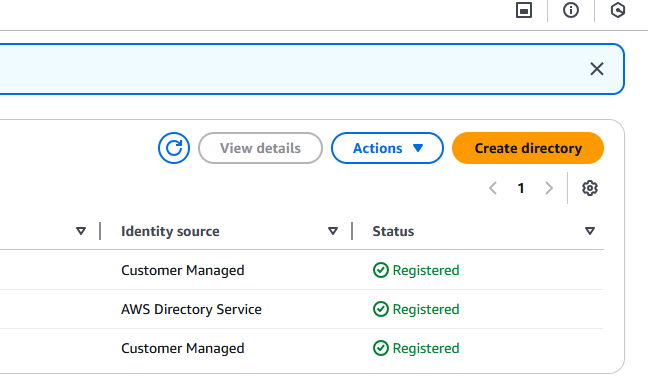
Click on Create directory to configure a new directory:
In the next window you can choose between Personal (persistent workspace assigned to one user) or Pool (non-persistent workspaces). In this example we have chosen Personal and, for Workspaces device management, we’ve configured AWS Directory Service:
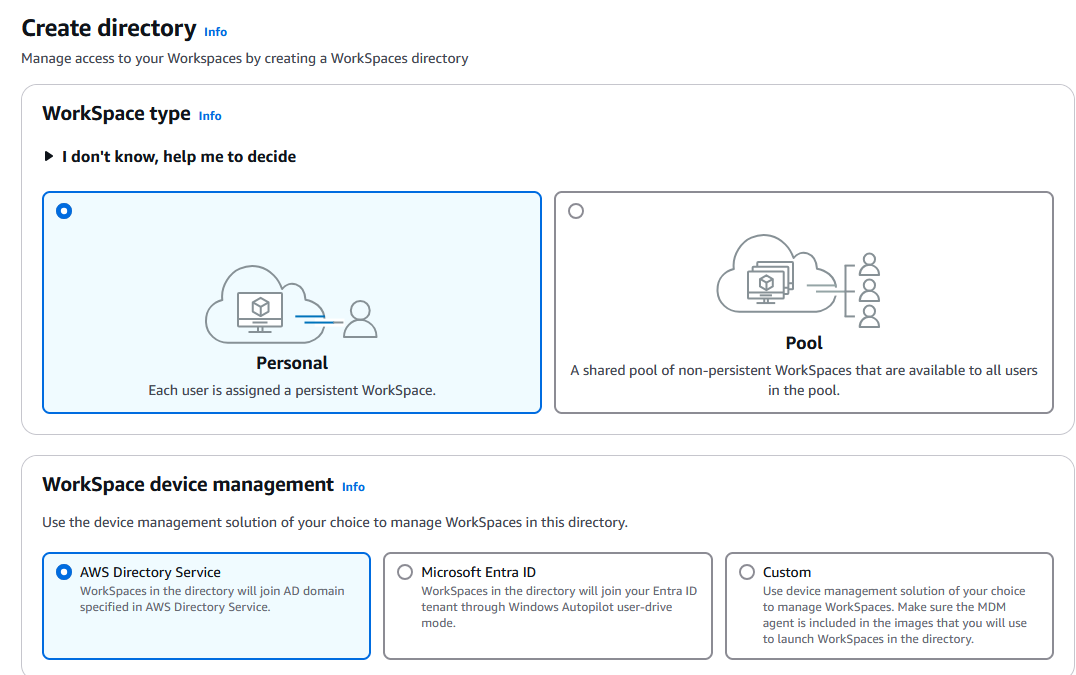
Scroll down and click on Create Directory:

In the next window you can select between AWS Managed Microsoft AD or AD Connector. First one offers a generic directory, the second one connects to a Microsoft active directory. In this example we’ve chosen the second one, as it is most likely to be used in corporate environments. After selecting the desired option click on Next:
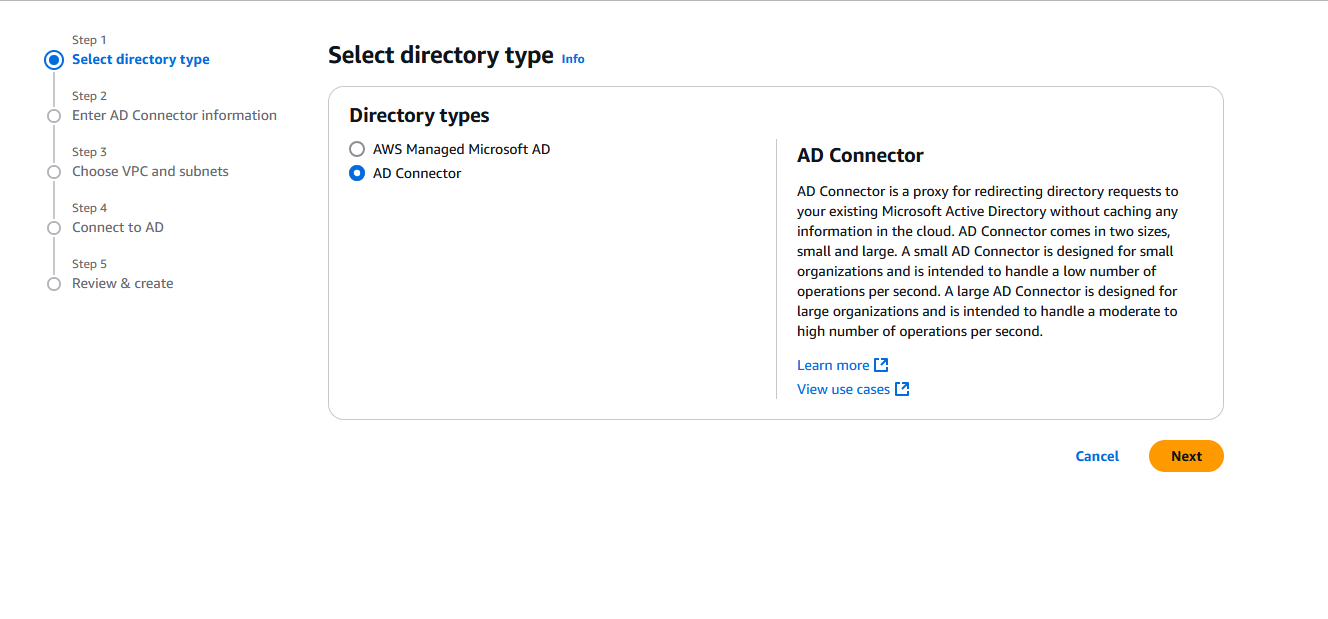
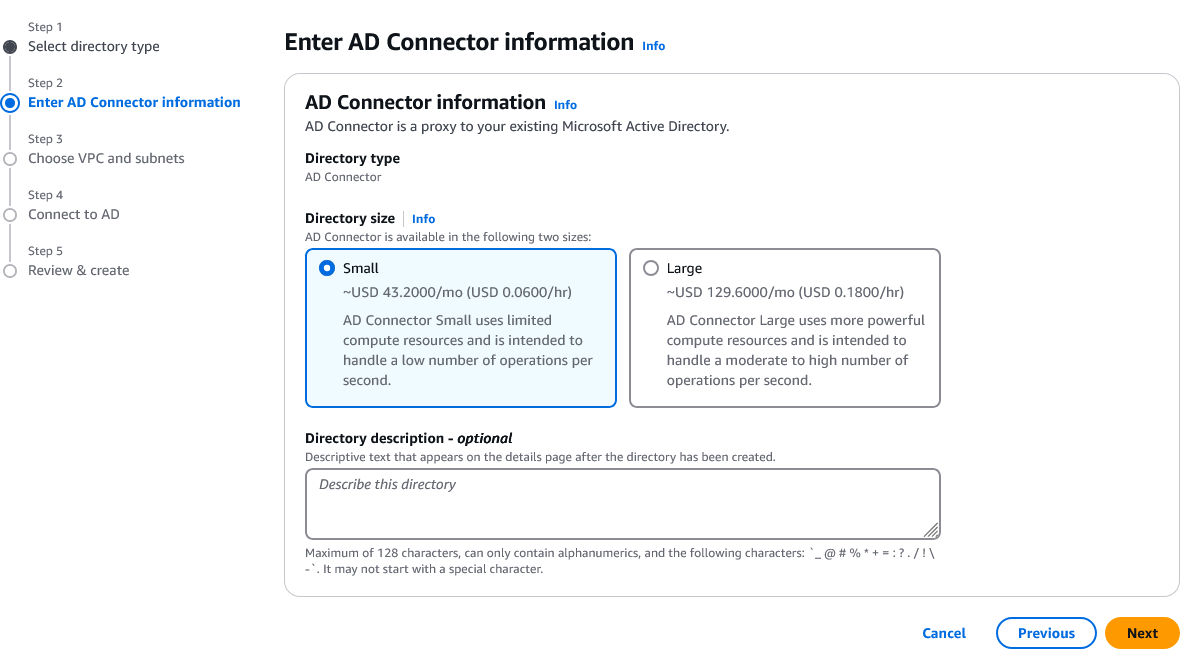
Choose the Directory size that suits your needs then click on Next:
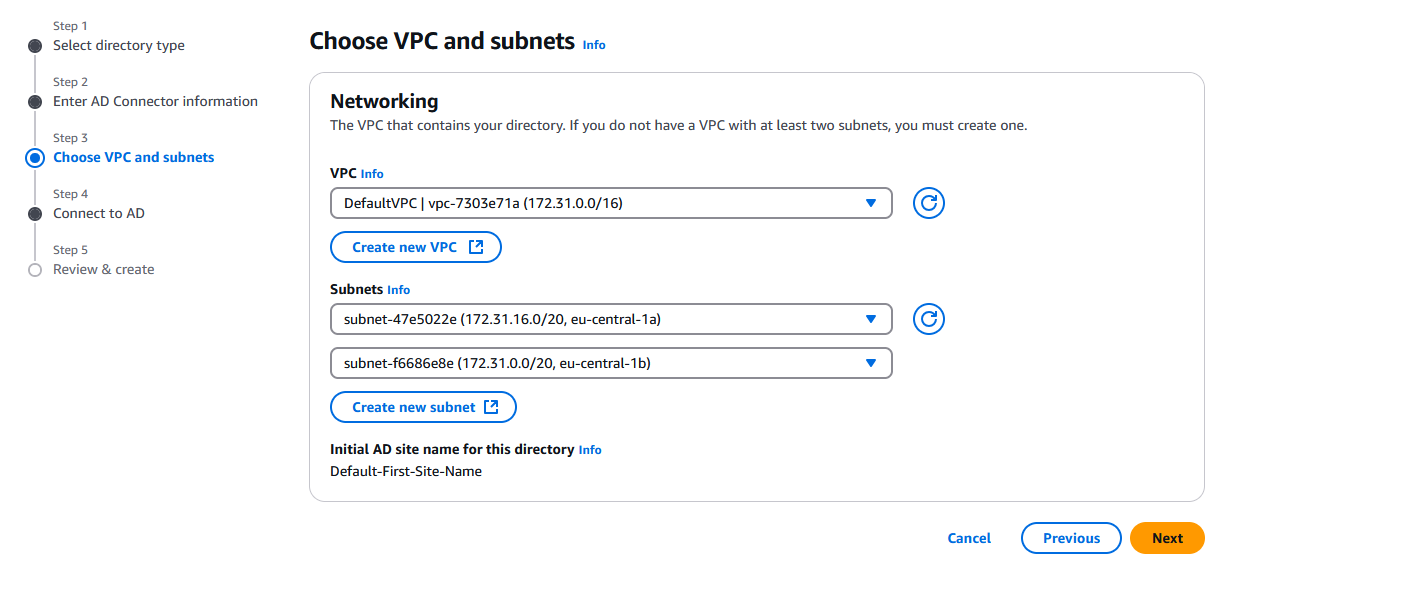
Choose the VPC in which you want the directory to be and then select two subnets. After that click on Next:
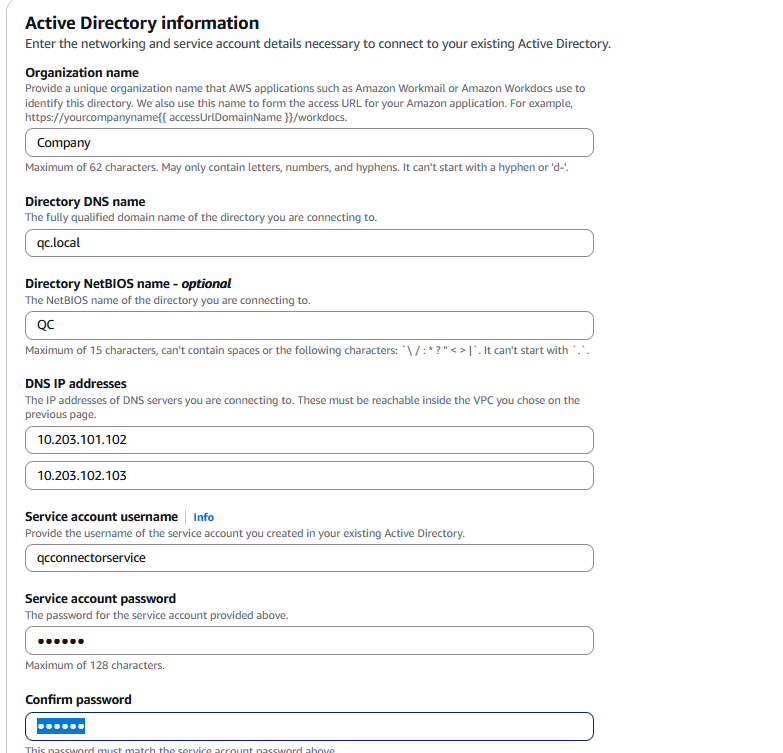
Fill in the required information, then click on
In the Review & create page, click on Create directory:

Wait for the directory to be created and then it will appear in the directories list.
Define VeridiumID as IDP in AWS IAM
Download the VeridiumID Shibboleth metadata from the VeridiumID manager. For this, access Settings, then SAML and click on Download External SAML Metadata:

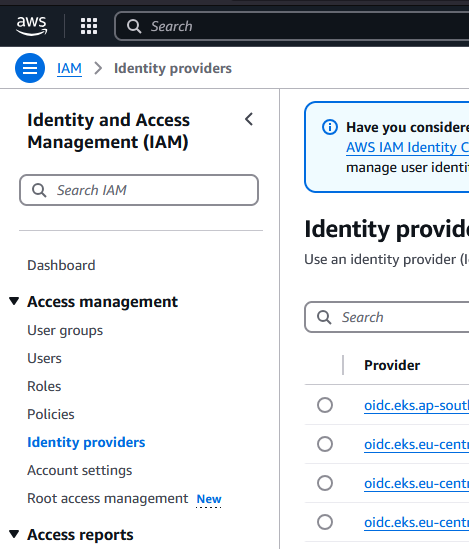
In the AWS console, access IAM, then Identity providers:
In the Identity providers section, click on Add provider:

Set a Name for the idp, then, in the Metadata document section, click on Choose file and add the metadata downloaded from the VeridiumID manager:
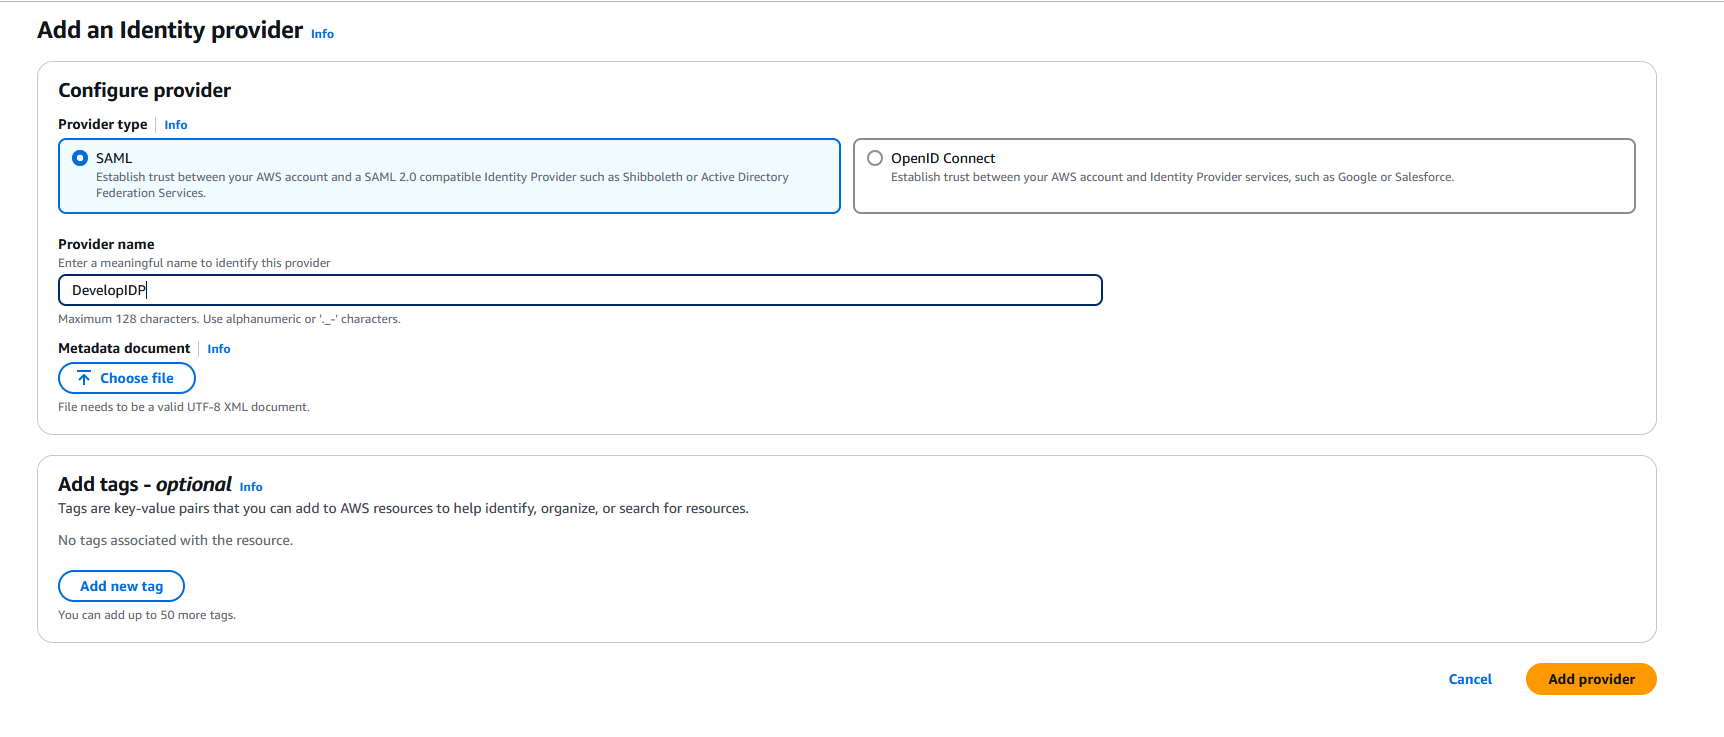
Click on Add provider to add the idp.
Create a SAML 2.0 federation IAM role
Access the IAM Console, under Acces management click on Roles:
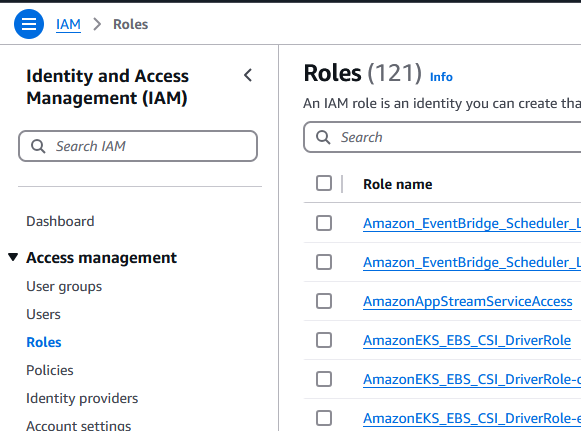
Click on Create role:
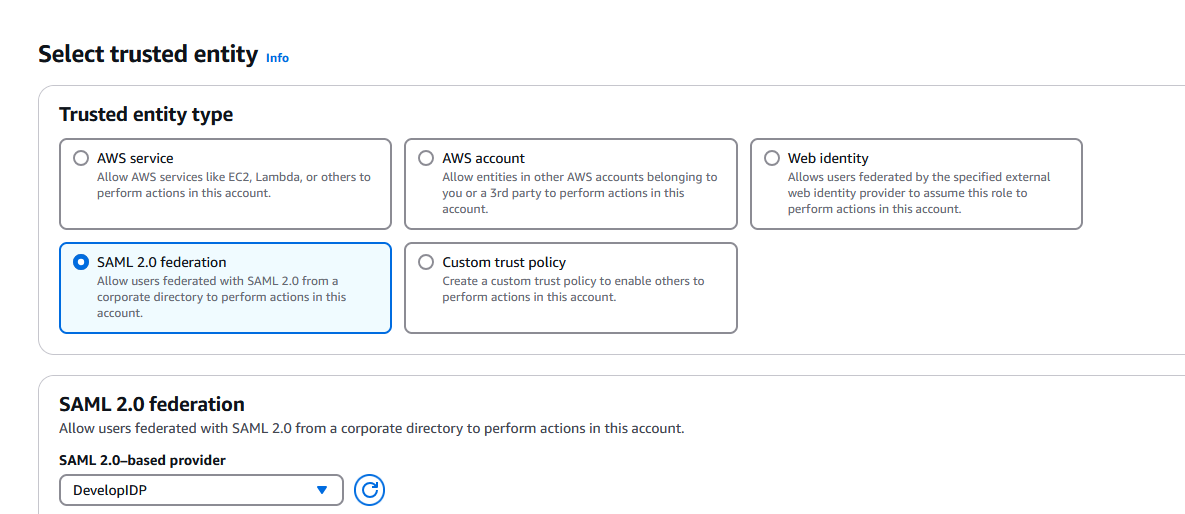
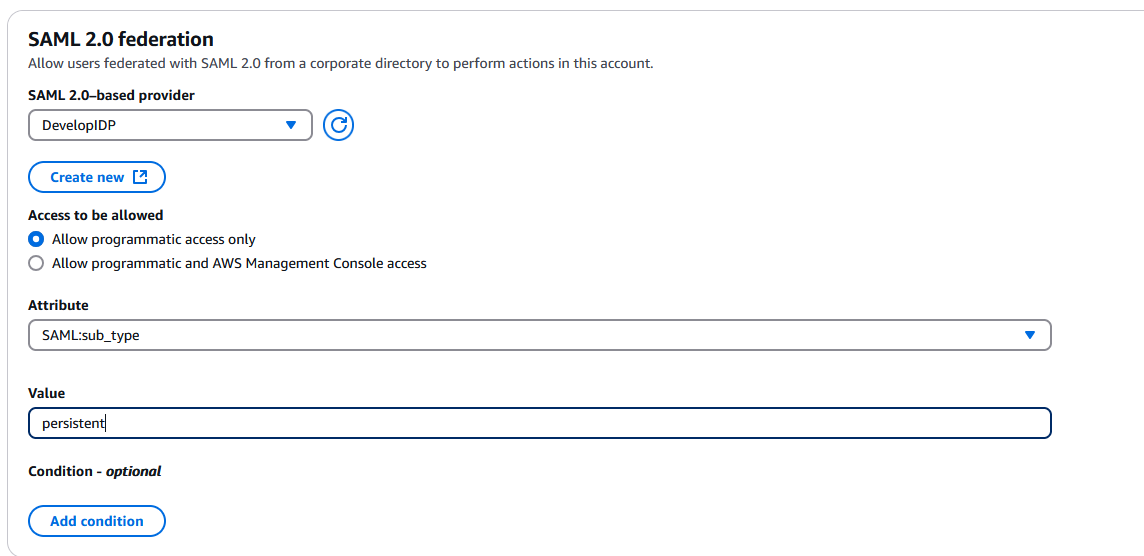
In the next page click on SAML 2.0 federation, then, in the SAML 2.0-based provider select the Veridium idp previously created:
Select Allow programatic access only, then in the Attribute field select SAML:sub_type and then set the Value field to persistent and click Next:
In the Add permissions page click Next.
In the Name,review and create page type in a name then click on Create role:
Click on the newly created role, then select the Trust relationship tab:
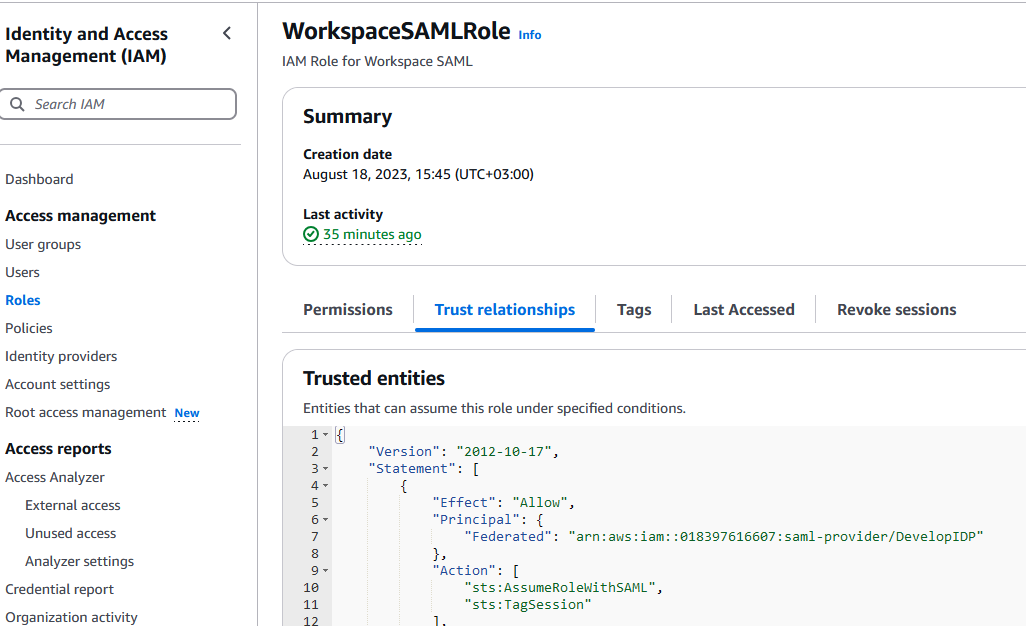
In this window click on Editr trust policy:

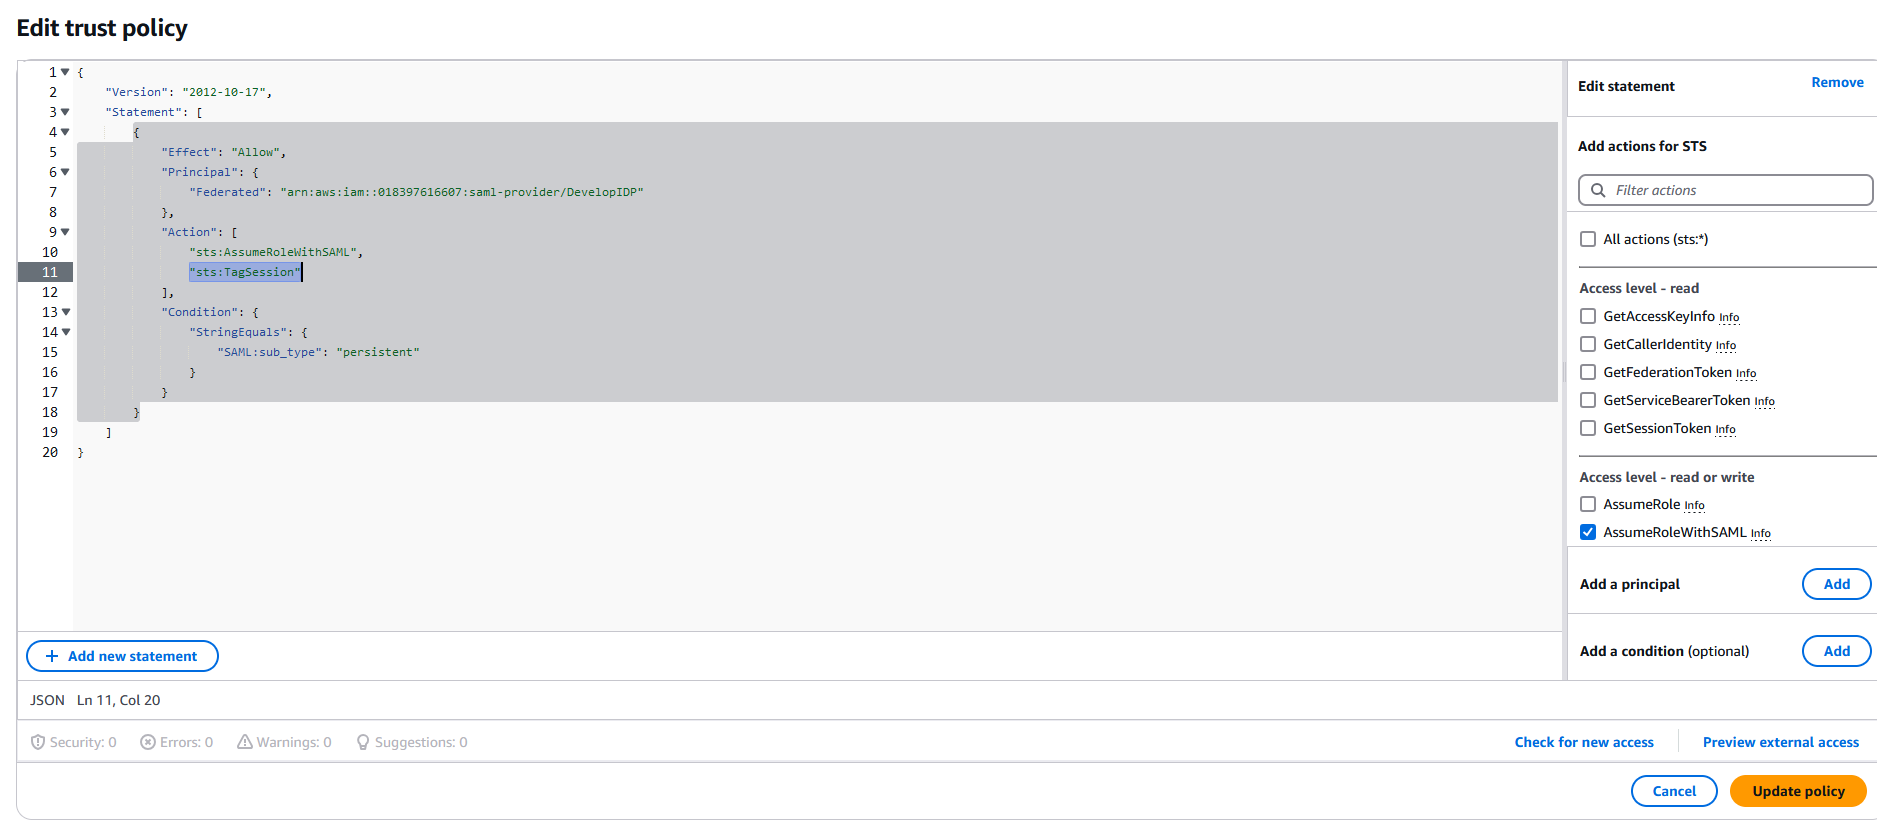
Under the Action section, add sts:TagSession, replace ACCOUNT-ID-WITHOUT-HYPHENS with your AWS account id and IDENTITY-PROVIDER with the name of the idp previously created, then click on Update policy:
Nest select the Permissions tab, then click on Add permission and then on Create inline policy:

In the Specify permissions page, click on JSON button:

Create a policy similar to this one, replacing REGION-CODE with the region code of your workspaces, ACCOUNT-ID-WITHOUT-HYPHENS with your AWS account id and DIRECTORY-ID with the name of the workspaces directory previously created:
{
"Version": "2012-10-17",
"Statement": [
{
"Effect": "Allow",
"Action": "workspaces:Stream",
"Resource": "arn:aws:workspaces:REGION-CODE:ACCOUNT-ID-WITHOUT-HYPHENS:directory/DIRECTORY-ID",
"Condition": {
"StringEquals": {
"workspaces:userId": "${saml:sub}"
}
}
}
]
}Click on Next, review the settings.
In the end click on Save.
Enable and configure SAML authentication for the directory
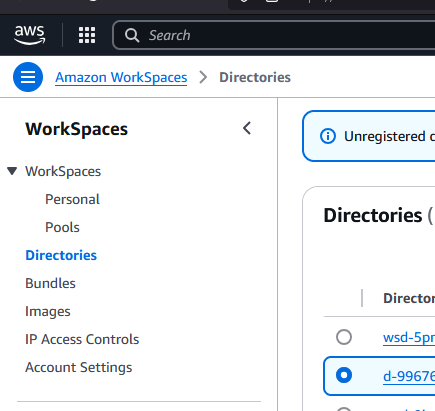
In the Workspaces console, click on Directories and select the newly created directory:
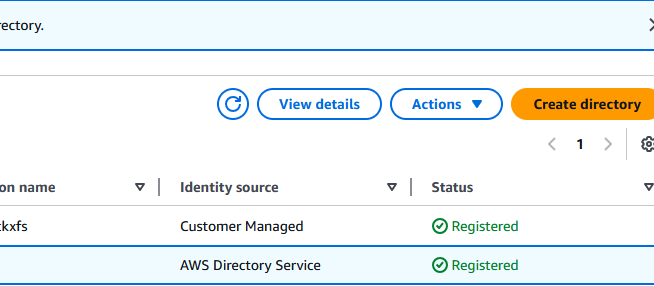
On the right side of the page click on View details:
Scroll down to the Authentication section and click on Edit:

In the SAML 2.0 Identity Provider section click on Edit SAML 2.0 Identity Provider:

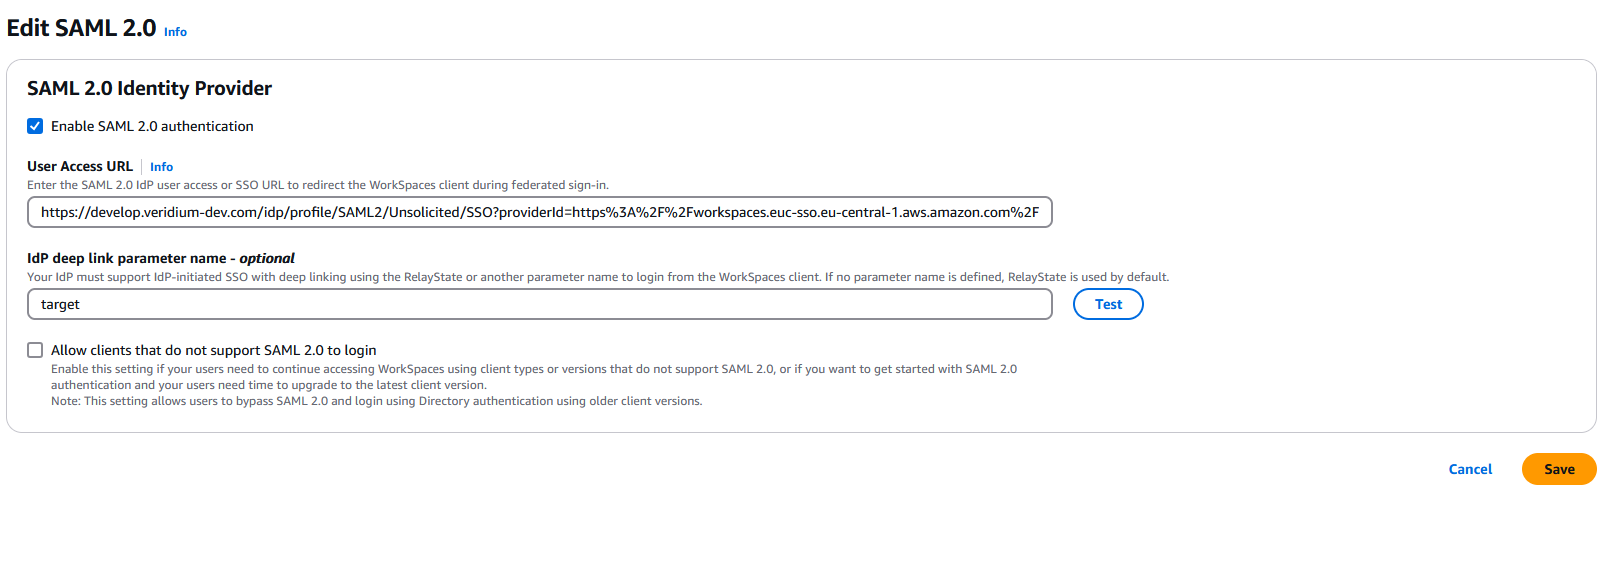
This step is a bit more complex. You need to construct the User Access URL and specify the IdP deep link parameter name. Even though it is specified as optional, SAML authentication will now work without it.
The User Access URL consists of two elements:
First part represents the Unsolicited/SSO endpoint of the VeridiumID server (https://develop.veridium-dev.com/idp/profile/SAML2/Unsolicited/SSO)
Second part represents the entityId of the AWS Workspaces endpoint. This is passed along to the Unsolicited/SSO endpoint via the providerId parameter and has to be in encoded url format (e.g. https%3A%2F%2Fworkspaces.euc-sso.eu-central-1.aws.amazon.com%2Fsso-idp%3FregistrationCode=wsfra%2B8W5D8Z).
The value for the AWS Workspaces endpoint entityId can be constructed by concatenating the RelayState endpoint from the region in which the Workspace has been created (the list is available here:Set up SAML 2.0 for WorkSpaces Personal - Amazon WorkSpaces) (followed by /sso-idp) with the registration code from the directory properties.
In this example, we have created the directory and workspace in Frankfurt, therefore the endpoint is workspaces.euc-sso.eu-central-1.aws.amazon.com (followed by /sso-idp) and the registration code is wsfra+8W5D8Z:
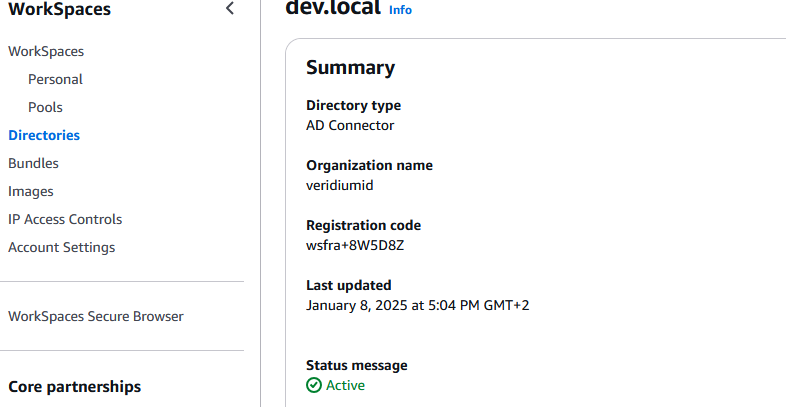
So the second part will look like https://workspaces.euc-sso.eu-central-1.aws.amazon.com/sso-idp?registrationCode=wsfra+8W5D8Z . Note that the registration code is passed along in the URL using “?registrationCode=” . The actual value needs to be encoded, so the final one will look like this
https%3A%2F%2Fworkspaces.euc-sso.eu-central-1.aws.amazon.com%2Fsso-idp%3FregistrationCode%3Dwsfra%2B8W5D8Z
To summarize, the final url that needs to be configured in the User Access URL will have this format:
In the IdP deep link parameter name field, you must specify the target parameter. This ensures all parameters will be sent correctly and the request will succeed. After the confguration is done, click on Save:
Configure VeridiumID SAML attributes and application
First we need to define all the attributes required for AWS Workspaces SAML application. For this, go to Veridium Manager interface, click on Settings, then, under Identity Provider click on Configuration and select SUBJECT DERIVED ATTRIBUTES:
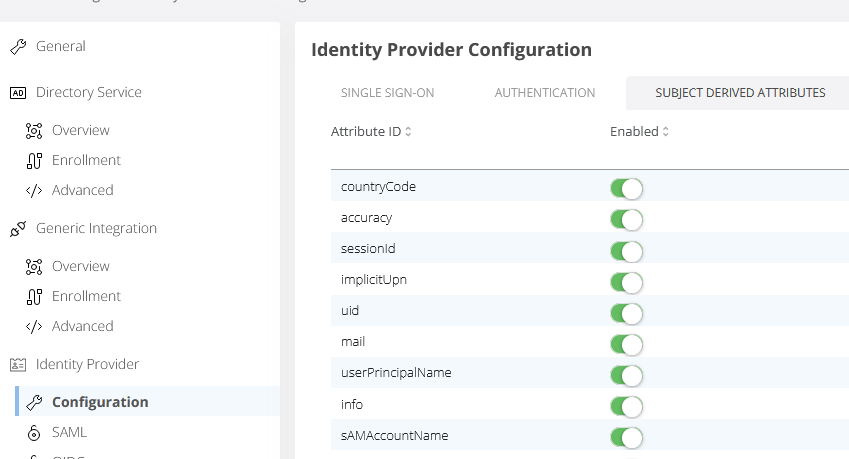
Here we need to add the following attributes:
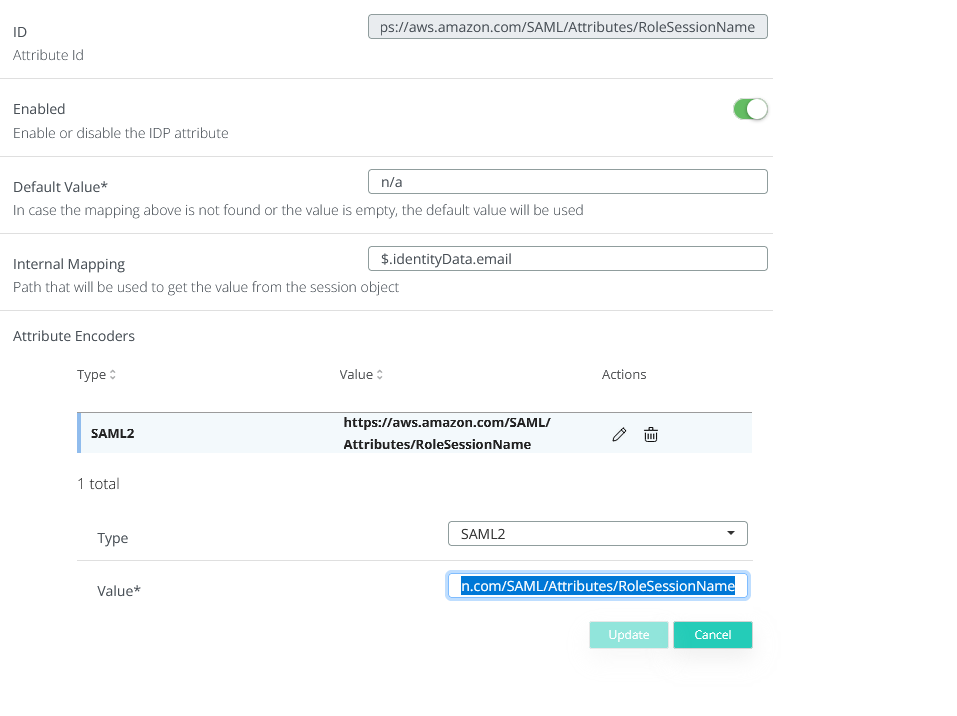
ID : https://aws.amazon.com/SAML/Attributes/RoleSessionName
Internal mapping : $.identityData.email
Attribute encoder : Type - SAML2, Value - https://aws.amazon.com/SAML/Attributes/RoleSessionName
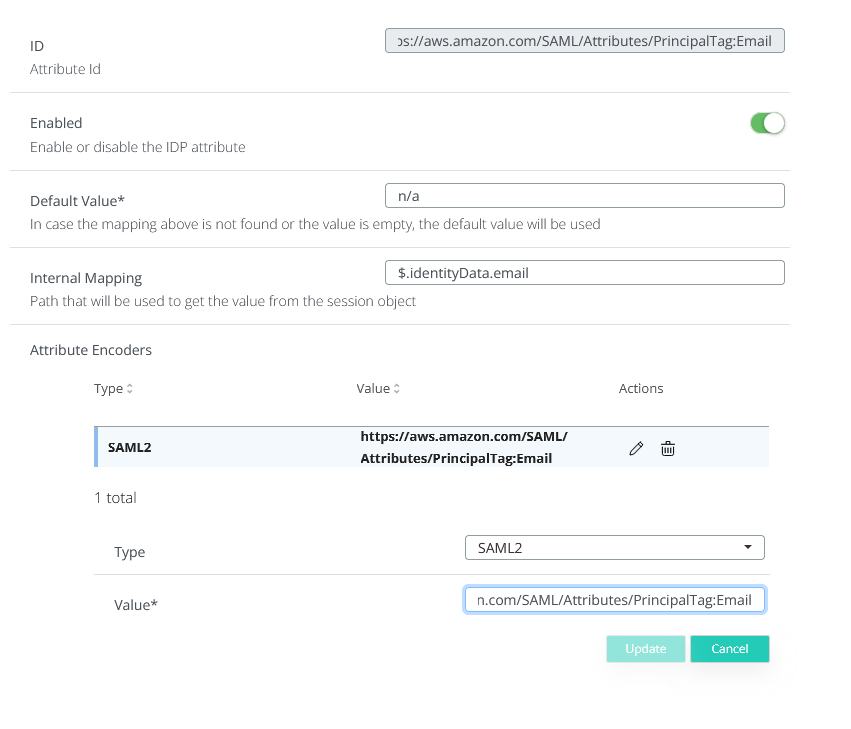
ID : https://aws.amazon.com/SAML/Attributes/PrincipalTag:Email
Internal mapping : $.identityData.email
Attribute encoder : Type - SAML2, Value - https://aws.amazon.com/SAML/Attributes/PrincipalTag:Email
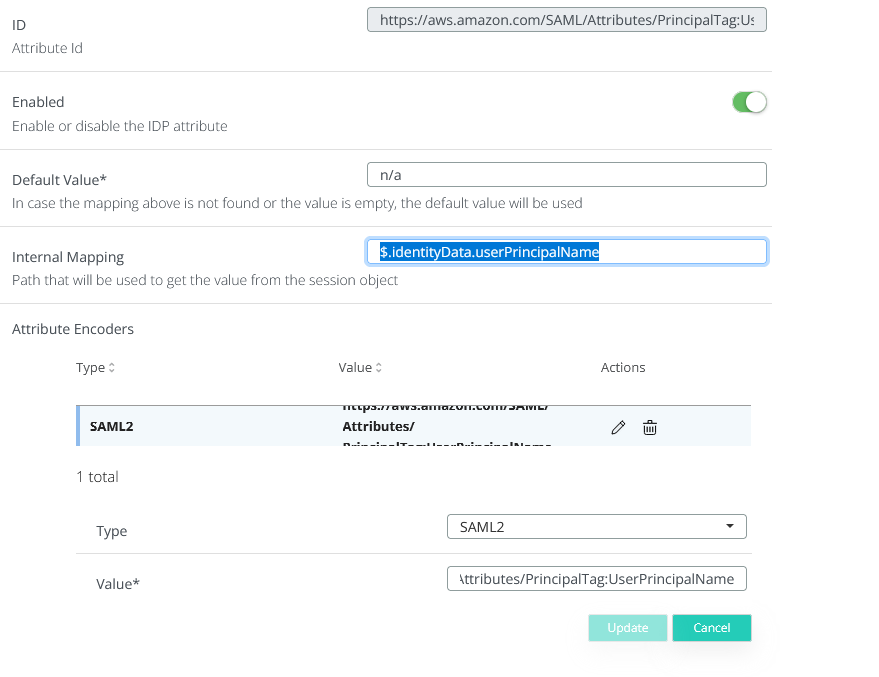
ID : https://aws.amazon.com/SAML/Attributes/PrincipalTag:UserPrincipalName
Internal mapping : $.identityData.userPrincipalName
Attribute Encoder : Type - SAML2, Value - https://aws.amazon.com/SAML/Attributes/PrincipalTag:UserPrincipalName
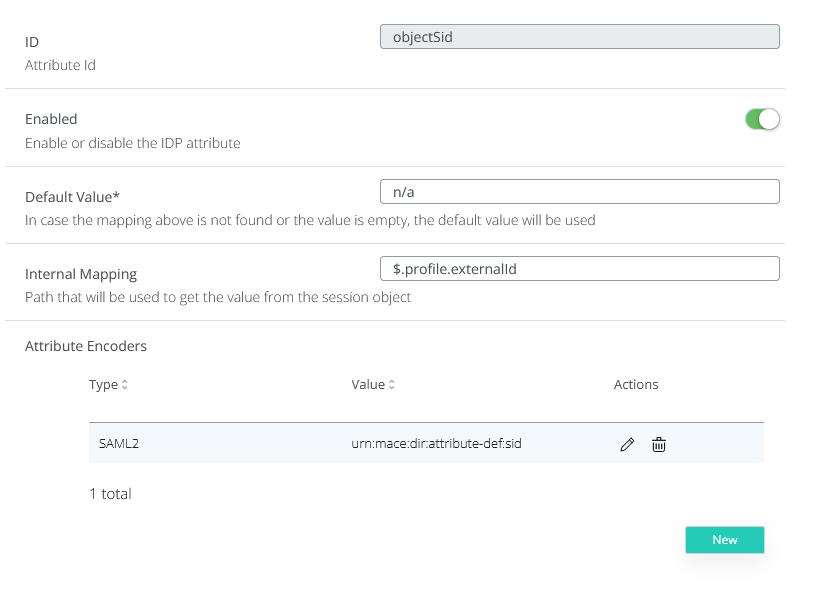
objectSid
ID : objectSid
Internal mapping : $.profile.externalId
Attribute Encoder: Type - SAML2, Value - urn:mace:dir:attribute-def:sid
Save these attributes and then click on CUSTOM ATTRIBUTES. Here, you must create the following simple atrributes:
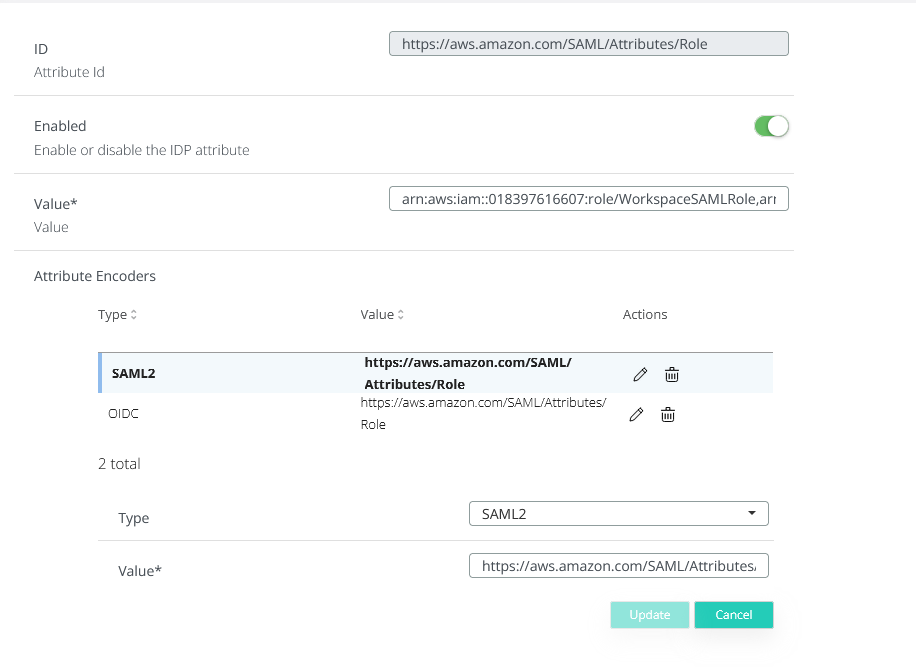
ID : https://aws.amazon.com/SAML/Attributes/Role
Value ; Must contain the arn of the IAM role previosly created and the arn of the idp, separated by a comma - e.g. arn:aws:iam::ACCOUNTNUMBER:role/ROLENAME,arn:aws:iam::ACCOUNTNUMBER:saml-provider/PROVIDERNAME
Attribute Encoder: SAML2, with the value https://aws.amazon.com/SAML/Attributes/Role
ID : https://aws.amazon.com/SAML/Attributes/PrincipalTag:Domain
Value : dev.local (the active directory domain name to which the AWS directory is connected)
Attribute Encoder : Type - SAML2, Value - https://aws.amazon.com/SAML/Attributes/PrincipalTag:Domain
Next we need to create a SAML application for AWS Workspaces. For this we need a metadata for AWS as a service provider. AWS documentation states that this metadata should be used : signin.aws.amazon.com/static/saml-metadata.xml . However, using it as is will not work. We need to modify the entityID to the unencoded one of the second part of the User Access URL (in our example https://workspaces.euc-sso.eu-central-1.aws.amazon.com/sso-idp?registrationCode=wsfra+8W5D8Z ). The resulted metadata should look like this :
<?xml version="1.0" encoding="UTF-8"?><md:EntityDescriptor xmlns:md="urn:oasis:names:tc:SAML:2.0:metadata" entityID="urn:amazon:cognito:sp:eu-central-1_CUngVMbIl">
<md:SPSSODescriptor AuthnRequestsSigned="false" WantAssertionsSigned="true" protocolSupportEnumeration="urn:oasis:names:tc:SAML:2.0:protocol">
<md:KeyDescriptor use="signing">
<ds:KeyInfo xmlns:ds="http://www.w3.org/2000/09/xmldsig#">
<ds:X509Data>
<ds:X509Certificate>MIICwzCCAaugAwIBAgIJAMn5XZ90PZ4IMA0GCSqGSIb3DQEBCwUAMCExHzAdBgNVBAMMFmV1LWNlbnRyYWwtMV9DVW5nVk1iSWwwHhcNMjUwMTA4MTQzNzM0WhcNMzUwMTA5MDA0OTM0WjAhMR8wHQYDVQQDDBZldS1jZW50cmFsLTFfQ1VuZ1ZNYklsMIIBIjANBgkqhkiG9w0BAQEFAAOCAQ8AMIIBCgKCAQEA037b3QPnrlawUYXPRvBswOWBulX/xgUuCSRKPEWTdd4saQegcIqCHaY3OoPGny9hVNzNG1bp+Z3/ONrKFzAD6LXVIm/BvIwNDYxxqxoRRcMzCnb0PyE4XGwNPgq+1BlCn2hiQ2Sjs3bj6R4gWaNzz6ajXnL/G4IwgoWLTQV7viWWQPFeSbp9AwHG+MZVhiCD+KxpQbLL2fFBTI4MX8okZ/J8cFvpSXf/WBuqR5D3aVHClk45qPj0/MGxuK46VUofmgbyLRI41WKeeynIEUzxTnNZGzupIY9JqSKgzHbrIukptnf2IamyU0EFKhdH4D37odt6pSIOq+6YQ1OokfF8qQIDAQABMA0GCSqGSIb3DQEBCwUAA4IBAQAPHiqLm17T/8WgebhEy4RnMOO14kl2cMiSqhU5CB0A4eA0uD1u6bJT/hoDPALCdqAU8hF8MpWH+fxSYIpe4AOt49f0BI/cNcRWiI3IhCqPQr9X4E303H6UtbkXzkMOeTc/GRWawraBUHngMdAQsvbjp9uOq1NWsqcZl6FFc4DG/UQgUdCiMxNnKqUKtAW6I5qdN+K23PLodpOczq3i035Mhgpm1cUHA2w9ieDMtKoXtCQ/MiSP19VkZCyhU3PsJ+n7vyYBvnTtDTSWIB4XfpgyNmMz6Yvvm3W/3FNSAuKa8qfu3zIvBVEE0wH4Z/A+Bap4xZLgy+i7YdLSZR3AcfzV</ds:X509Certificate>
</ds:X509Data>
</ds:KeyInfo>
</md:KeyDescriptor>
<md:KeyDescriptor use="encryption">
<ds:KeyInfo xmlns:ds="http://www.w3.org/2000/09/xmldsig#">
<ds:X509Data>
<ds:X509Certificate>MIICwjCCAaqgAwIBAgIIag+mYYHn7oIwDQYJKoZIhvcNAQELBQAwITEfMB0GA1UEAwwWZXUtY2VudHJhbC0xX0NVbmdWTWJJbDAeFw0yNTAxMDgxNDM3MzRaFw0zNTAxMDkwMDQ5MzRaMCExHzAdBgNVBAMMFmV1LWNlbnRyYWwtMV9DVW5nVk1iSWwwggEiMA0GCSqGSIb3DQEBAQUAA4IBDwAwggEKAoIBAQDDCANvLAIwrLMo0qNNUmAvtBcyCDzXW5SHMpNBAP9YesDi2NcolkRZo4rmJl8haWRTf6sl7r2fNZ52uSpvnS+Ig21rdG4DJn8Oe3ZpaYIX9N7GEKYIzbzCdX1GqNNfBXBJI6+P/VmjtMNGu0uIgN7uhpqi23383GfnvF/zj9fMx+0/mIXuqmN3uk8EfAaTKhmoi+Cu9VRvKzF3BA4Gh+8v9ipOCdB9N2gWT1l25ZFZooYqjXEfiyxLHTNNnziinNjSReWcxDThhzAzVhtouMX7IHKHqoRBz90PxClZUJtYKL7/sVD4b6BcEe+Tu6hglPxaIMxI1UQdGNJjTkF53rXTAgMBAAEwDQYJKoZIhvcNAQELBQADggEBAMFuRlknCUfGuTPrL2m/ywJHAP7Mk8ozGsljYYIWfuTR4ahJwDRjTccAq3ZQYHV1kX40ggnrtKCGcvenTYtLRe0v1VQ6ZXzNI8wBbyJr4TiNoERXcApN34KBwsSevml5DVVedlm/iAPlfQvp+0tHqKYjind89V2ex2HnY+uoBXkx9Tr+3uk62FlmPACiGUlgmq4AJYPcY0lp6aaFr8C9OOW9kzs9N1GJwLDTiE743TkN7MnFjhkE0zLXEc4oF5mggpFUDb97AdPRGaxPgbo0fdAk4LLNPwJ/gZF2CKOhsiEymiij66ILBbPFRJDuURYUkvwLWVi/P6ncE/2knSqaenw=</ds:X509Certificate>
</ds:X509Data>
</ds:KeyInfo>
</md:KeyDescriptor>
<md:AssertionConsumerService Binding="urn:oasis:names:tc:SAML:2.0:bindings:HTTP-POST" Location="https://de916ec8-61ec-4bc4-9fe7-0541956addb2.auth.eu-central-1.amazoncognito.com/saml2/idpresponse" index="0" isDefault="true"/>
<md:NameIDFormat>urn:oasis:names:tc:SAML:1.1:nameid-format:unspecified</md:NameIDFormat>
<md:SingleLogoutService Binding="urn:oasis:names:tc:SAML:2.0:bindings:HTTP-POST" Location="https://de916ec8-61ec-4bc4-9fe7-0541956addb2.auth.eu-central-1.amazoncognito.com/saml2/logout"/>
<md:SingleLogoutService Binding="urn:oasis:names:tc:SAML:2.0:bindings:HTTP-Redirect" Location="https://de916ec8-61ec-4bc4-9fe7-0541956addb2.workspaces-web.com"/>
<md:IdPInitRelayState>redirect_uri=https%3A%2F%2Fde916ec8-61ec-4bc4-9fe7-0541956addb2.workspaces-web.com%2Fsso&response_type=code&client_id=1c64ena9f9vomhon3d9u63pmmj&identity_provider=Identity-Provider</md:IdPInitRelayState>
</md:SPSSODescriptor>
</md:EntityDescriptor>Create a new SAML application using the modified metadata,
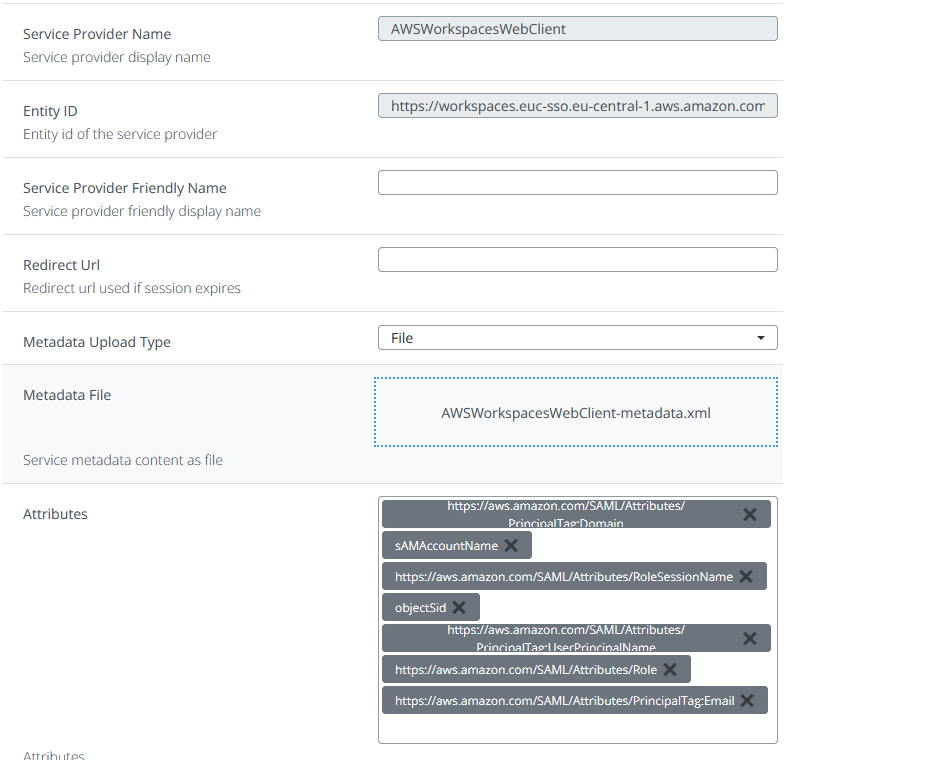
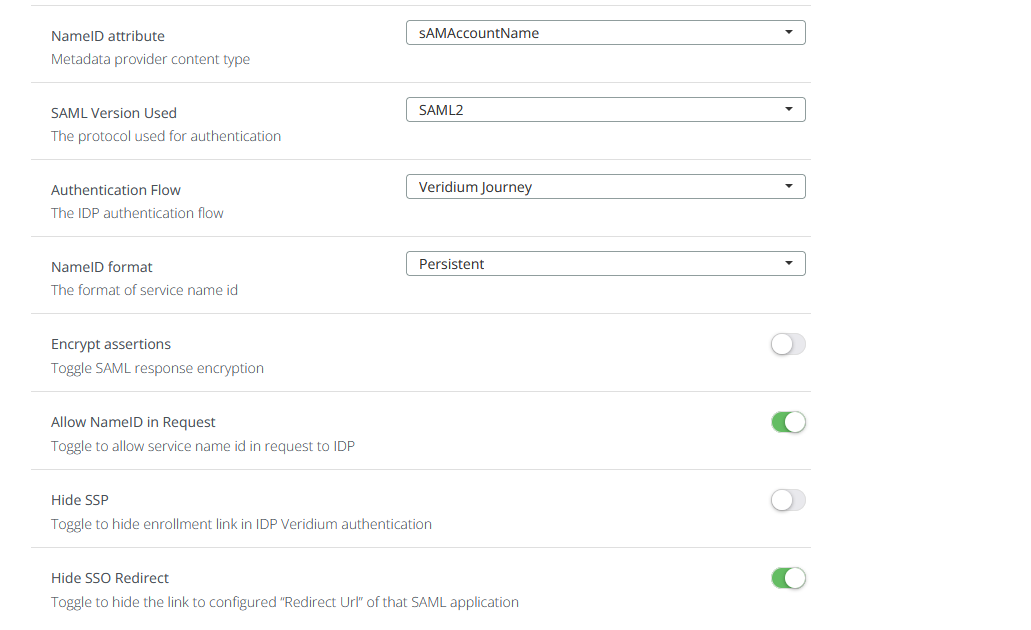
Select the previously created attributes along with sAMAccountName, set the NameID attribute to sAMAccountName and the NameID format to Persistent and save the configuration.
Create a personal workspace assign to a specific user
Access the workspaces portal, then click on Personal, then on Create Workspaces:

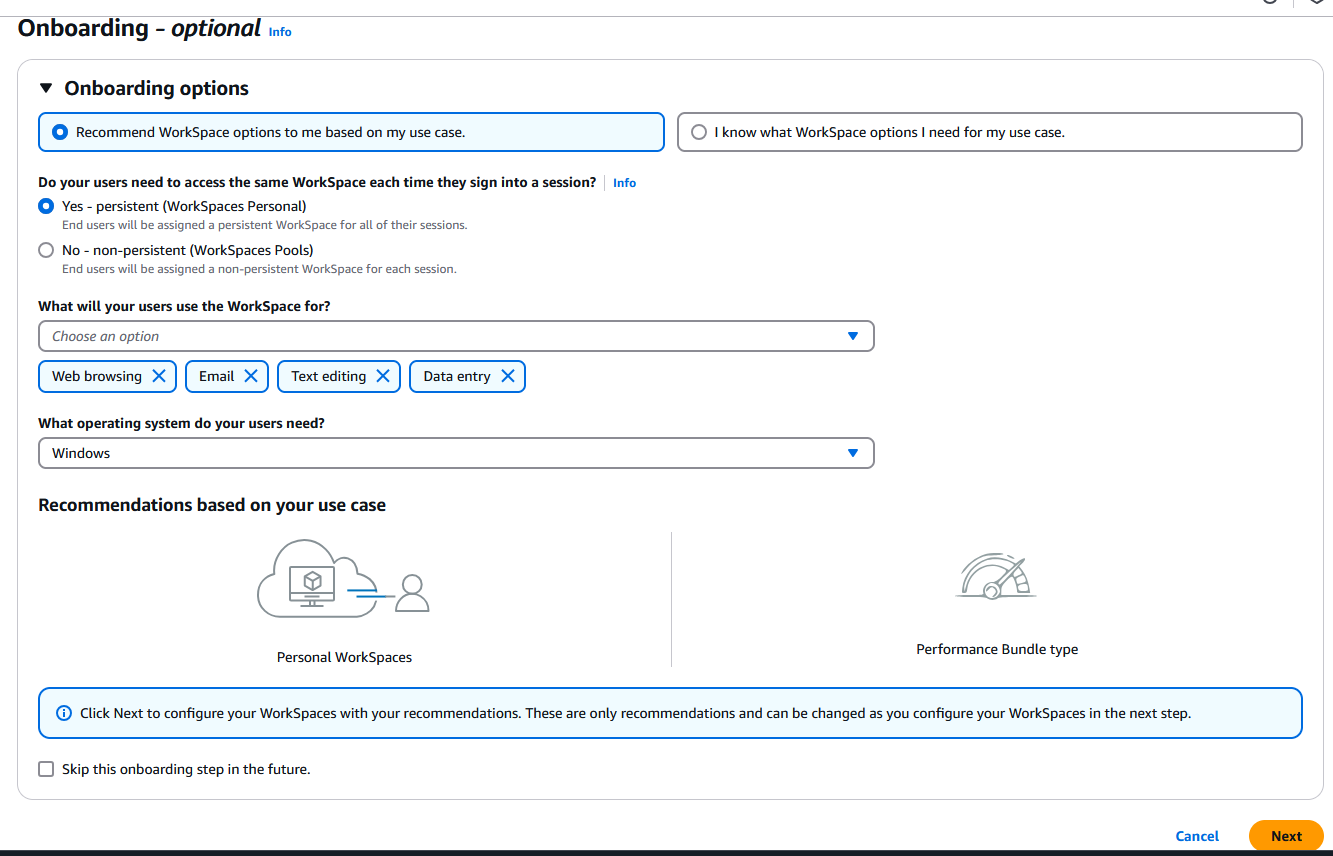
On the Onboarding page select Recommend Workspace options to me based on my use case, then select Yes - persistent. Choose General from the drop-down list in the What will your users use the WorkSpace for ? section, then select Windows as operating system. Click Next to continue:
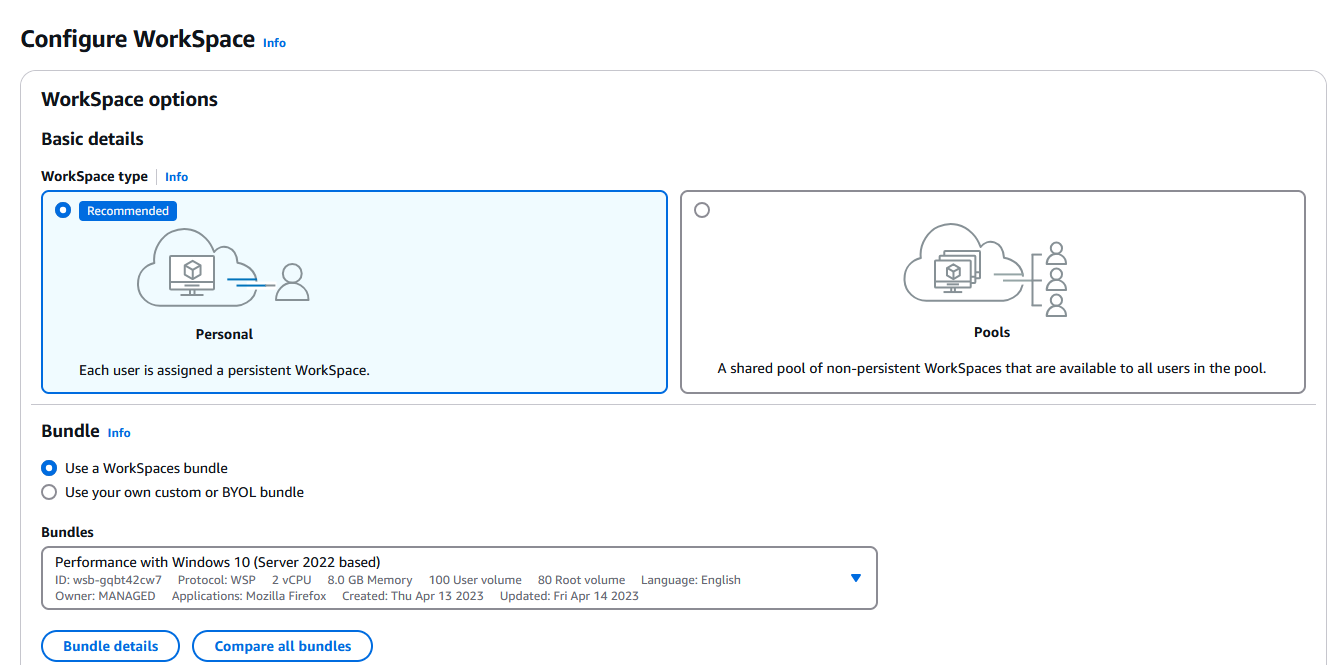
In the Configure WorkSpace page select Personal under Basic details, then click on Use a WorkSpaces bundle and select Performance with Windows 10 from the drop-down list:
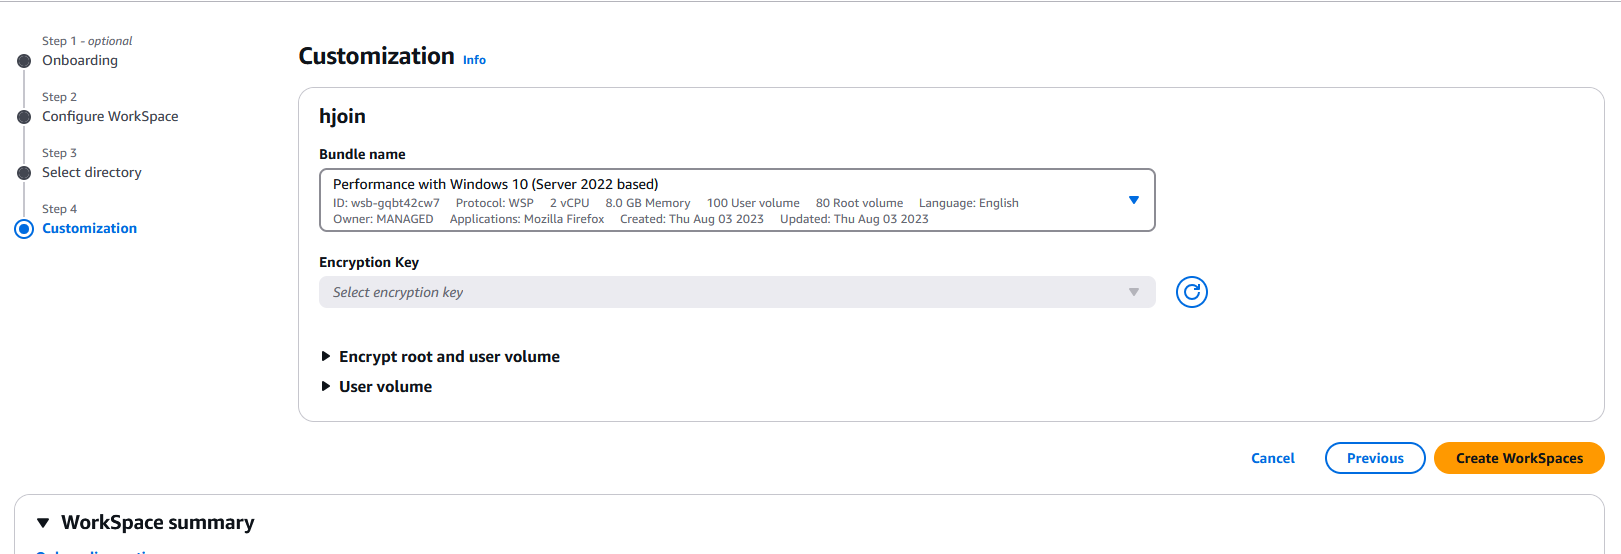
Scroll down and set the Running mode to Auto stop, then choose the number of hours after which the WorkSpace will be automatically stopped. Click on Next to continue:

In the next page, select the directory you previously created:

In the Select users from directory section type in a user name and select it so that the WorkSpace will be assigned, then click Next:

In the next page review the chosen settings then click on Create WorkSpaces:
At this point you should have a working AWS Workspaces SAML integration. In order to test it, you have two options:
from a web browser - you need to open the second part of the User Access URL
from the AWS Workspaces client available here: Amazon WorkSpaces Client Download - For this method, you must add the registration code form the directory created for the Workspace.
When configuring SAML authentication, when the workspace is being launched, the user gets prompted with a login window in which he has to type in the password. This is by design. However, you can achieve full SSO experience if you enable and configure Certificate Based Authentication, as described here How to configure certificate-based authentication for Amazon WorkSpaces | Desktop and Application Streaming
Note: The following SAML attributes have to be configured in the WorkSpaces SAML application:
https://aws.amazon.com/SAML/Attributes/PrincipalTag:UserPrincipalNamehttps://aws.amazon.com/SAML/Attributes/PrincipalTag:ObjectSid
These have been specified in the Configure VeridiumID SAML attributes and application section. However, if you choose not to enable certificate based authentication, then you can omit these attributes.
