
The purpose of this document is to provide a list of required settings to be performed after replacing the Windows PKI Certification Authority. The below procedure reflects the changes that need to be performed at PKI, RAEP and at the client level.
PKI level
After successfully replacing the previous certification authority, you must verify the following:
-
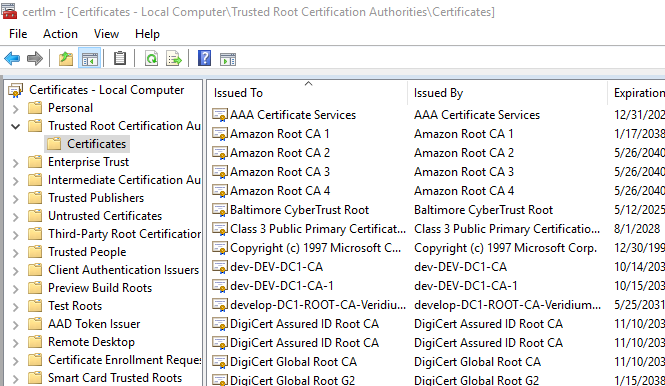
The new CA is present in the Trusted Certification authority folder under certlm.msc (local machine certificates) both on domain controllers as well as client computers:
-
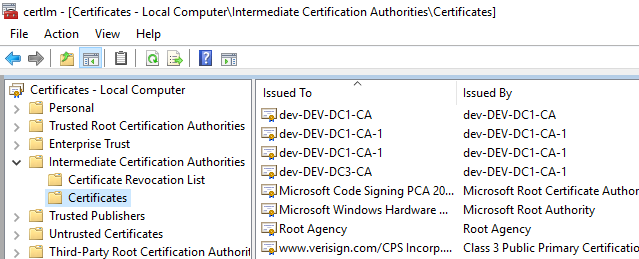
If the new CA is an intermediate CA, it must be present in the Intermediate Certification Authorities folder (in certlm.msc) both on domain controllers as well as client computers:
-
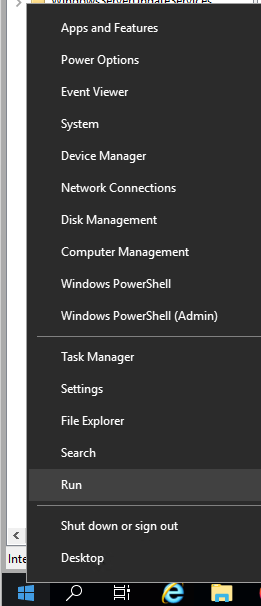
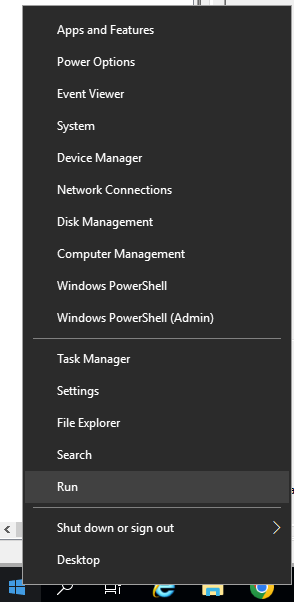
The new CA (or sub-CA) is present in the NtAuth store. On the PKI machine, right click on Start Menu, then click on Run:
-
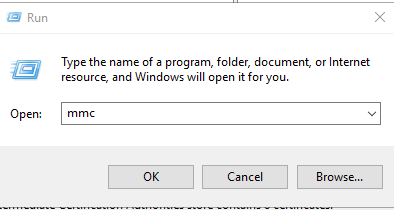
Type in mmc, then click on OK:
-
Click on File, then Add/Remove Snap-in…:
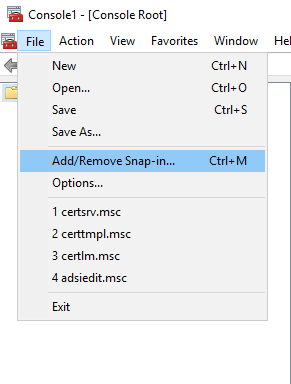
-
Select Enterprise PKI, click on Add, then OK:
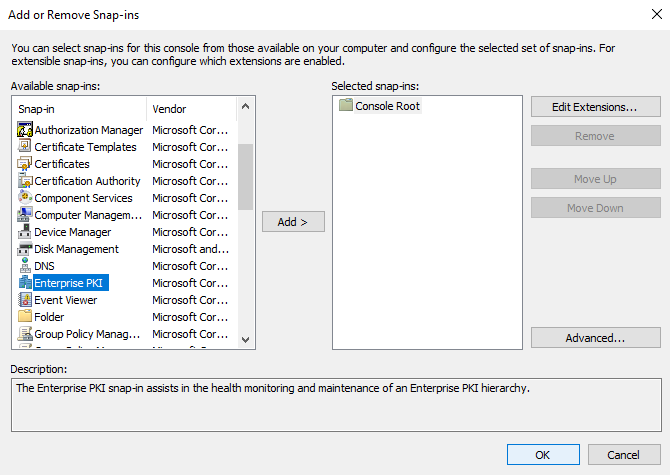
-
In the next window right-click on Enterprise PKI, then click on Manage AD Containers:
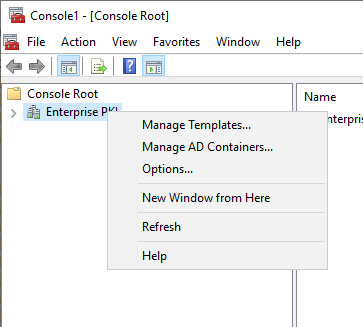
-
Click the NTAuthCertificates tab and make sure the CA (or sub-CA) is present here. If it isn’t, click on Add to add it:
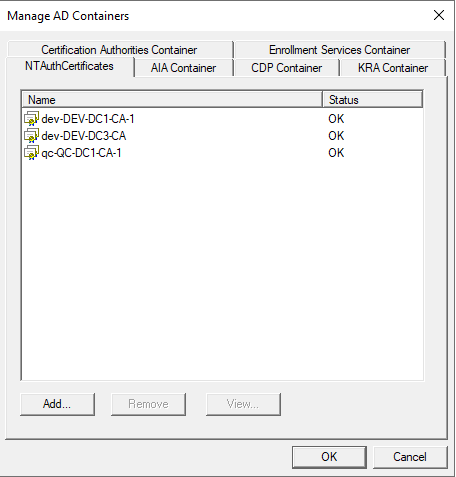
-
Next you should ensure that the certificate templates required by the RAEP server are available on the newly deployed CA. For this, on the PKI machine, open the Certification Authority snap-in by clicking on Start, then type Certification and select Certification Authority:
-
Expand the CA object, click on Certificate Templates and check if the templates used by RAEP are present (usually BopsUser, BopsUserMSKSP and BopsRSA):
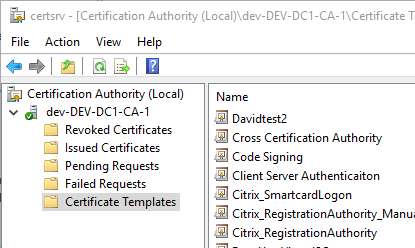
-
If they arent’t present here, you need to add them, as they are just not available for the newly created CA. Right click on Certificate Templates and click on Nuew->Certificate Template to Issue:
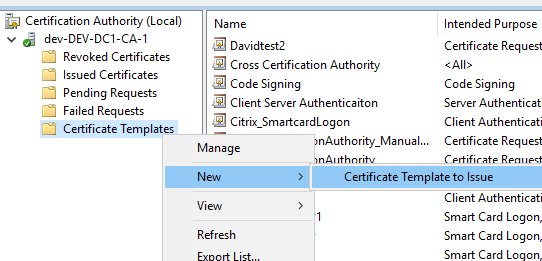
-
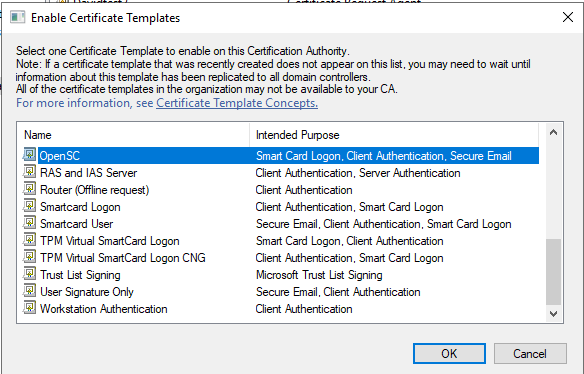
Select the templates mentioned at step 10, then click OK:
-
Next you should verify if the machine account of the RAEP server has Read and Enroll permissions on the templates mentioned at step 10. For this, right click on Certificate Templates, then click on Manage:
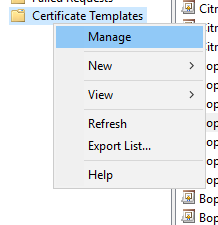
-
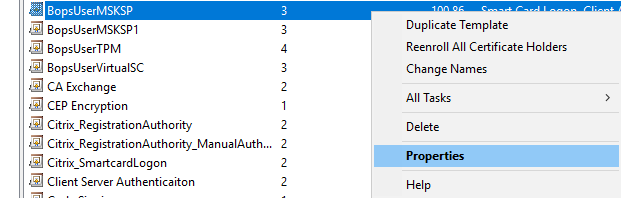
Right click on each of the desired templates and select Properties:
-
in the next window go to the Security tab and check if the machine account of the RAEP server is present. If not, click on Add, set the object type to Computers, type in the name of the RAEP server, then click on Check Names to validate it:
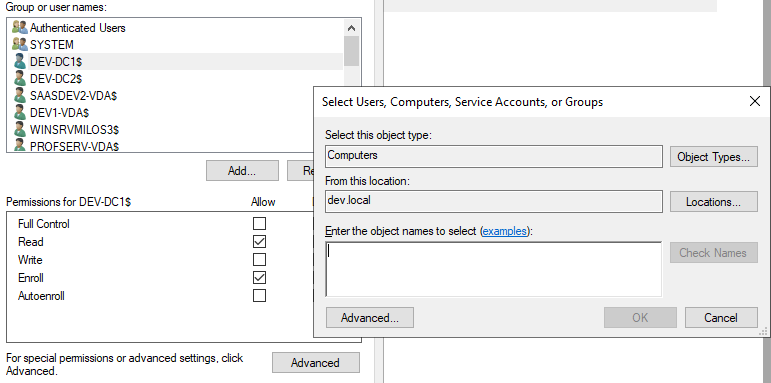
-
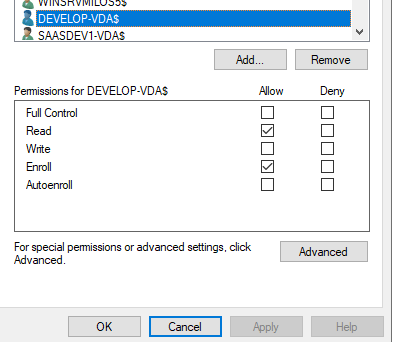
Select Read and Enroll permissions for the machine account then click on OK:
-
Repeat this step for each of the templates used by VeridiumID.
RAEP level
Since the CA has been replaced, the previous certificate generated from the BopsRSA template must be replaced with one from the new CA and configured in Registration Authority. Also, the Registration Authority must be configured with the new CA. In order to achieve this, you must perform the following steps:
-
On the RAEP machine, open the local machine certificate store. Right-click on Start, then select Run:
-
Type in certlm.msc, then click on OK:
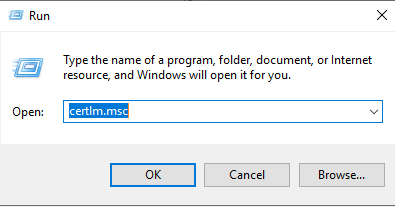
-
In the next window expand Personal, then right click on Certificates, click on All Tasks and select Request New Certificate:
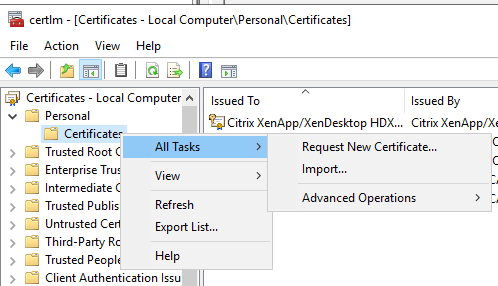
-
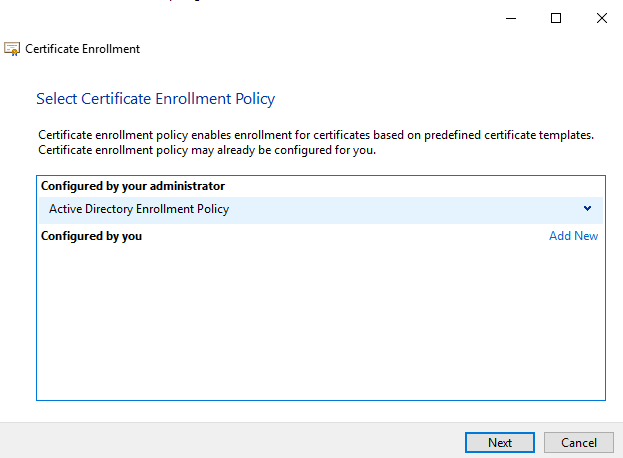
In the Certificate Enrollment window click on Next:
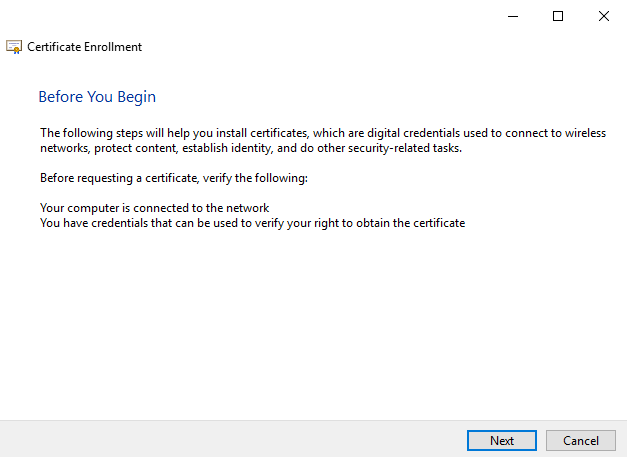
-
In the Select Enrollment Policy wndow click on Next:
-
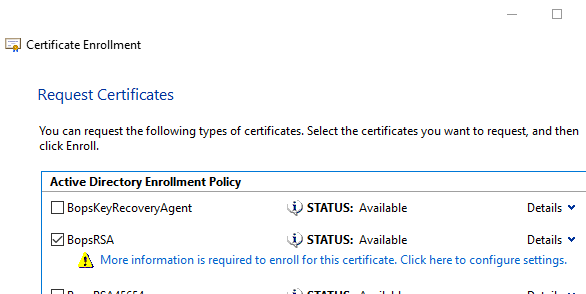
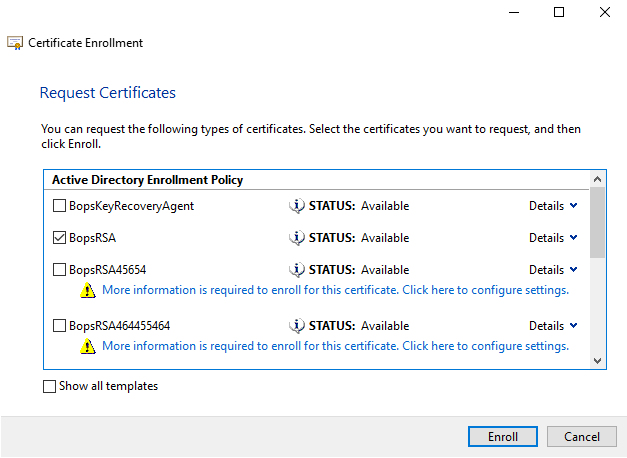
In the Request Certificates window select the BopsRSA template, then click on More information is required…:
-
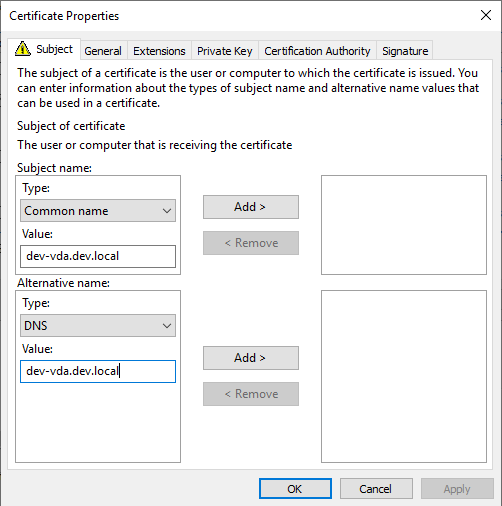
In the Certificate Properties window, under the Subject name section select Common name, set it to the fqdn of the RAEP machine then click on Add. In the Alternative name section select DNS, set it to the fqdn of the RAEP machine then click on Add:
-
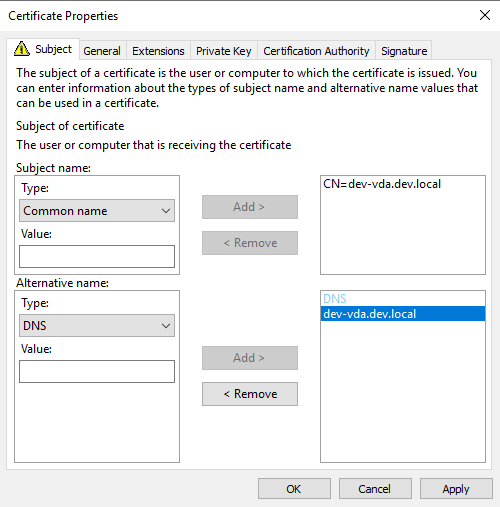
In the end, the config should look like this:
-
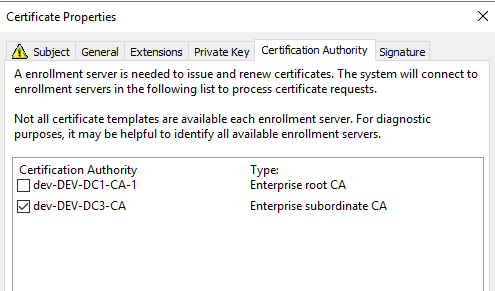
Go to Certification Authority tab and make sure you select only the newly deployed CA, then click on Apply, then on OK.
-
In the
-
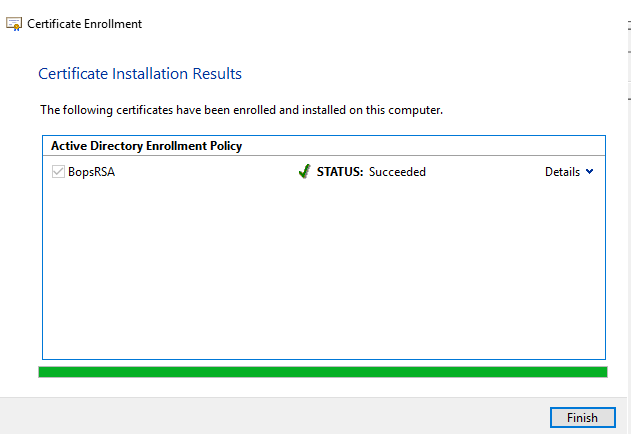
Upon successful enrollment, you should see this window:
-
Click on Finish.
-
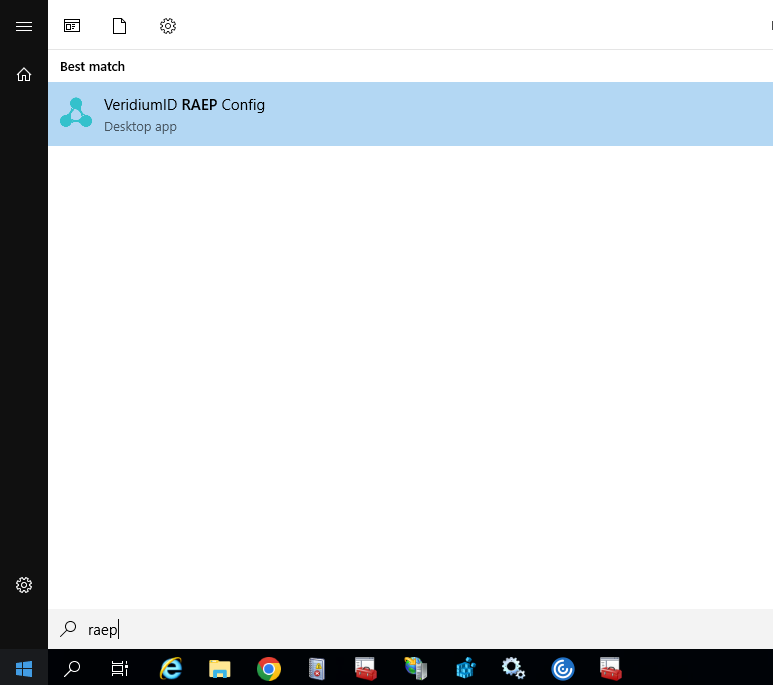
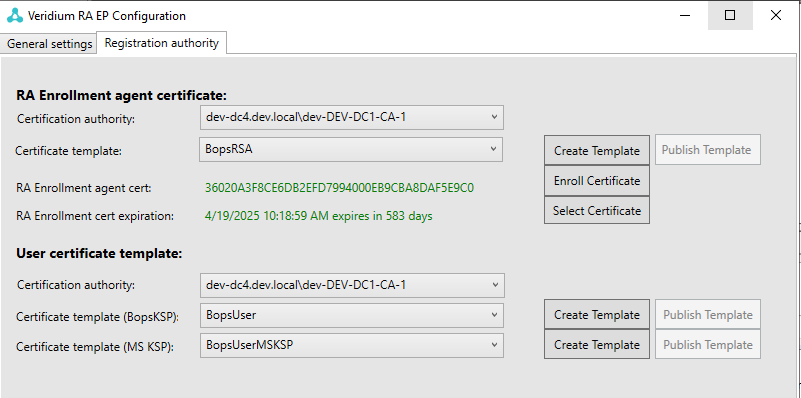
Next the RA must be reconfigured to use the new CA and certifcates. For this, go to the RAEP machine, click on Start, type in RAEP and press Enter to open to configuration tool:
-
Go to Registration authority tab and, in both RA Enrorollment agent certificate and User certificate template, in the Certification authority field make sure that the newly deployed CA is selected from the drop-down list:
-
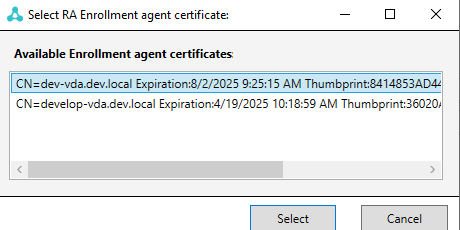
In the RA Enrollment agent certificate section, click on Select Certificate and choose the previously created certificate from the BopsRSA template:
-
Click Select to finish, then click Close to exit the VeridiumID RAEP Config utility.
Client level
On client computers you must restart the bops logon service, or, if it is more convenient, reboot the machine.
Note: For cleaning purposes, you can delete the user certificate generated from the old CA - open certmgr.msc(user certificate store) and delete the certificate from Personal->Certificates.