
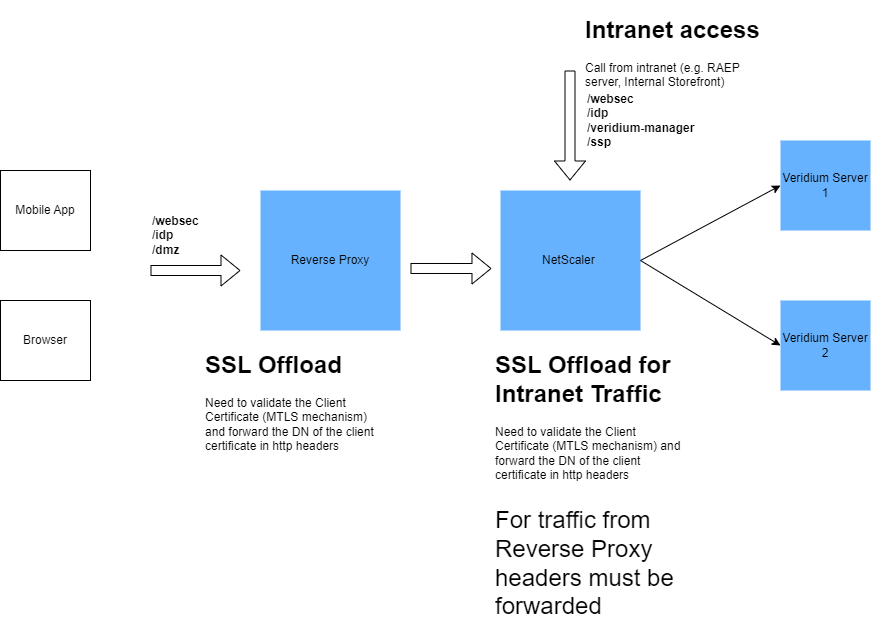
The purpose of this document is to provide a procedure for configuring a NetScaler load balancer placed in front of a VeridiumID server.
NetScaler can be configured as follow:
-
Layer 4 - there should be defined in NetScaler a port for each application.
-
Layer 7 with SSL offload: validate client certificate with veridium CA - The traffic arrives in load balancer on the port 443 and, depending on the path (/admin, /websec, etc), is being redirected to the appropriate service and port (/admin → :9444/veridium-manager).
Layer7 SSL Offload implementation:
|
Service |
incoming/outgoing port (based on client implementation) |
URL based |
SSL offload |
Assign Client CA / Add Headers |
Sticky session |
Exposure |
|---|---|---|---|---|---|---|
|
SSP |
443/9987 |
/ssp |
Y |
no |
no |
Intranet (optional internet) |
|
WEBSEC |
443/443 |
/websec |
Y |
yes X-SSL-Client-DN x-ssl-termination-proxy-secret |
no |
Intranet + Internet |
|
WEBSECADMIN |
443/9443 |
/websecadmin /veridium-manager /legacy /admin /swagger-resources /v2 |
Y |
yes X-SSL-Client-DN x-ssl-termination-proxy-secret |
no |
Intranet |
|
SHIBBOLETH |
443/8944 |
/idp |
Y |
no |
yes |
Intranet + Internet |
|
DMZWEBSEC |
443/ |
/dmzwebsec |
Y |
yes X-SSL-Client-DN x-ssl-termination-proxy-secret |
no |
Internet |
*x-ssl-termination-proxy-secret - take the value from /opt/veridiumid/haproxy/conf/haproxy.cfg or from websecadmin.
*X-SSL-Client-DN: it should be extracted from the certificate presented by application/request. The certificate is checked against the CA/sub-CA configured in veridium (it can be found here: /opt/veridiumid/haproxy/conf/client-ca.pem).
Summary:
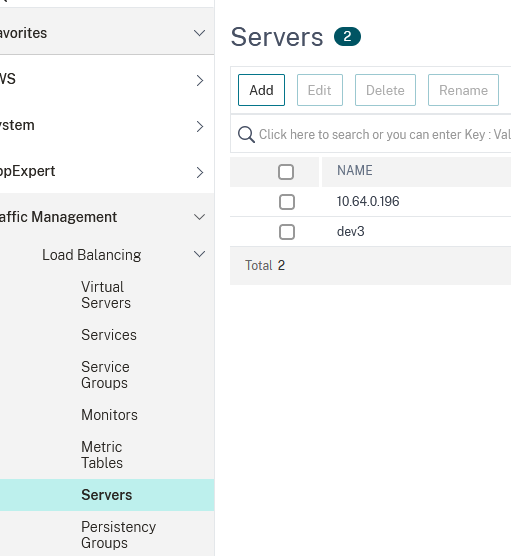
Define application servers - each veridium webapp node.
Define application balancer certificate and CA used for SSL termination.
Create rewrite action and create policy in order to add header X-SSL-Client-DN
Create load balancer virtual servers for Veridium services
Assign client CA for specific Veridium services
Assign rewrite policy for specific services
Apply content switching based on specific path
Define application servers - each veridium webapp node.
-
Define the VeridiumID webapp node in Netscaler. For this, go to Traffic Management → Load Balancing → Servers and click on Add:
-
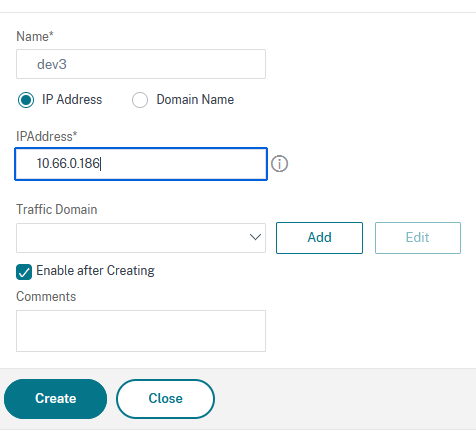
Type in a name and enter the server’s internal ip address, then click on Create:
Define application balancer certificate and CA used for SSL termination.
-
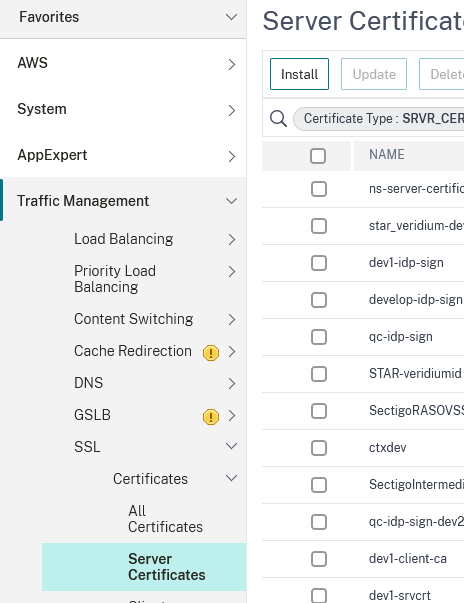
Import the server certificate. For this, you must extract from /etc/veridiumid/haproxy/server.pem file the certificate chain, save it in a file with crt or cer extension, then extract the private key part and save it into a .key file. After this, go to Traffic Management → SSL → Certificates → Server Certificates and click on Install:
-
In the Install Certificate window, type in a name for the Certificate Key Pair, then click on the down arrow next to Choose file and select local:
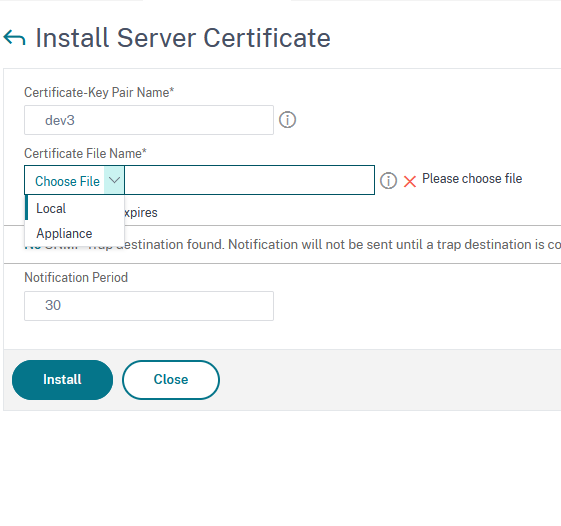
-
Browse to the location where you saved the certificate chain extracted from the VeridiumID server certificate and select it. Repeat this step in order to select the private key and, at the end, click on Install.
-
Repeat this step for the client CA file (obtained from /etc/veridiumid/haproxy/client-ca.pem) , but this time go to Traffic Management → SSL → Certificates → CA Certificates and import it here.
Create rewrite action and create policy in order to add header X-SSL-Client-DN
-
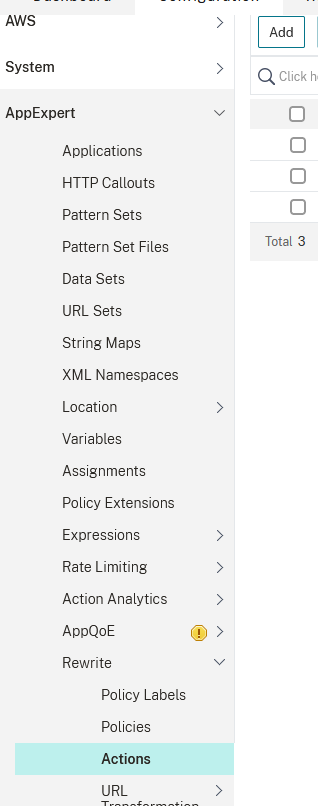
Create a rewrite rule. This will allow the client certificate to be passed from the load balancer to the server behind it. Go to App Expert → Rewrite → Actions and click on Add:
-
Type in a name, make sure you select INSERT_HTTP_HEADER as the type. Header name should be X-SSL-CLIENT-DN and expression should be client.SSL.CLIENT_CERT.SUBJECT:
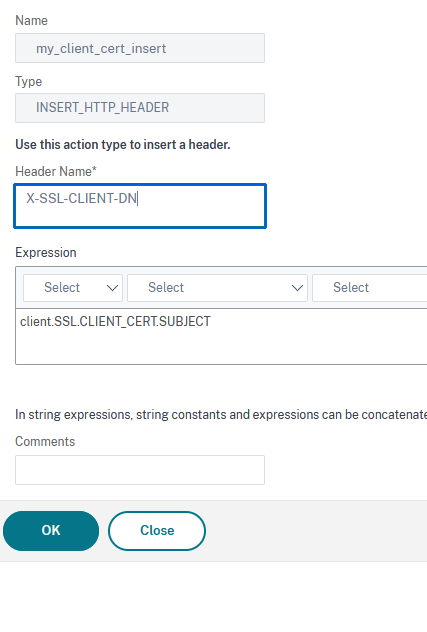
-
Click on OK to finish.
-
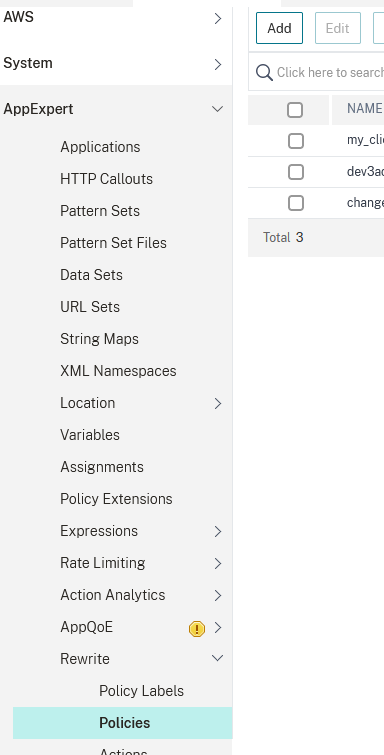
Create the policy that will use this action. Go to App Expert → Rewrite → Policies and click on Add:
-
Type in a name, unde Action select the action previously defined and, under Expression, type HTTP.REQ.HEADER("X-SSL-CLIENT-DN").EXISTS.NOT:
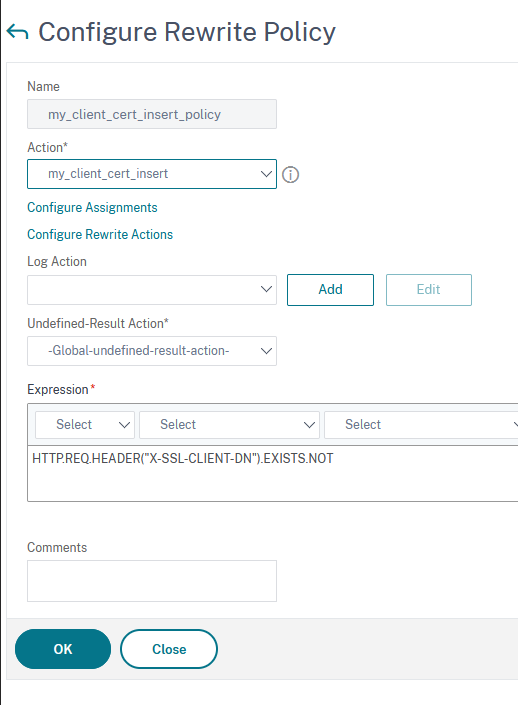
This expression ensures that the header will be added only if it doesn’t exist.
-
Click on OK to finish.
Create load balancer virtual servers for Veridium services
-
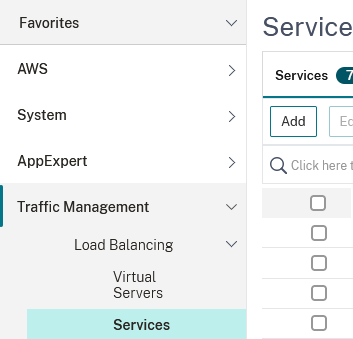
Define Load Balancing Services. For this, go to Traffic Management → Load Balancing → Services and click on Add:
-
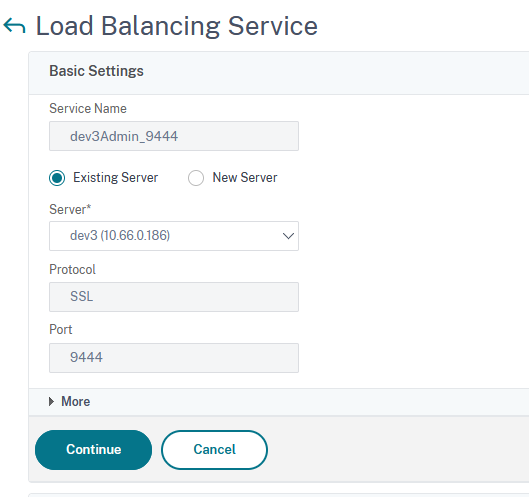
Type in a name, select an existing server (the one defined at step 2), set the protocol to SSL and the port to the corresponding service port (in this example, since we are defining veridium-manager service, we have the port 9444):
-
Click on Continue and then on Done.
-
Repeat this step and fill in accordingly to define all VeridiumID services. In the end, the Load balancing services section should look like this:

-
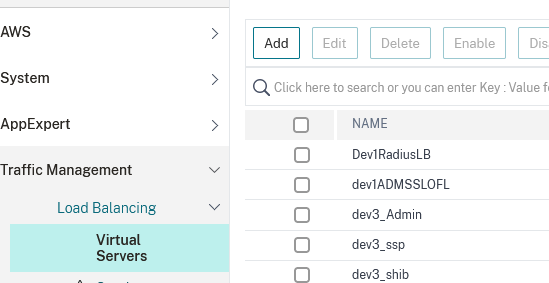
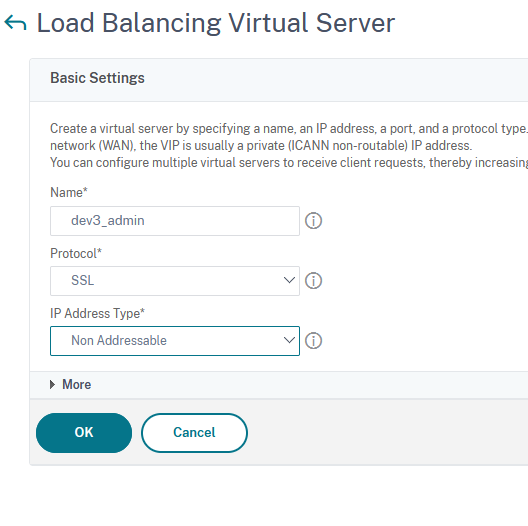
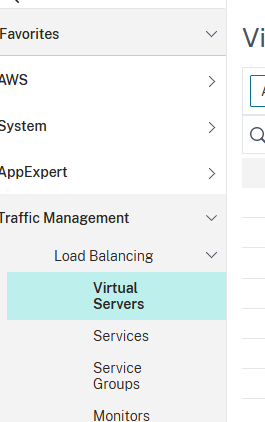
Define virtual servers for each service previously created. For this, go to Traffic Management → Load Balancing → Virtual Servers and click on Add:
-
In this example we’ll create the virtual server for the Veridium Manager service. Type in an appropriate name for the virtual server, set the protocol to SSL and Ip Address Type to Non-addressable. In the end click on OK:
-
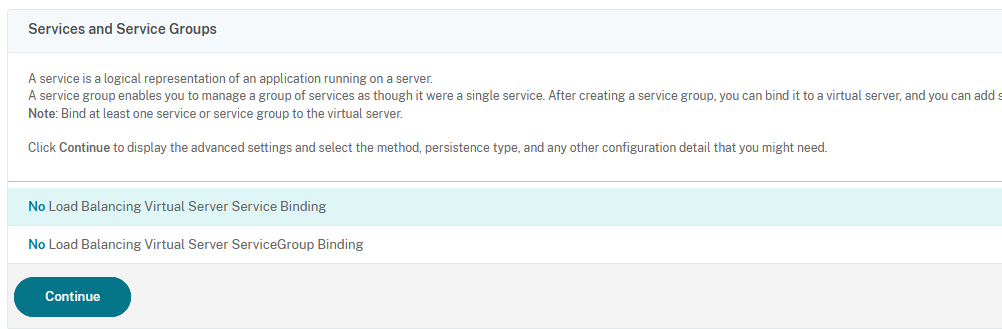
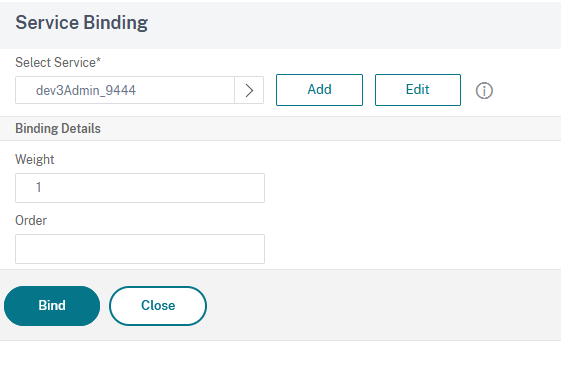
For the next step, click on No Load Balancing Virtual Server Service Binding:
-
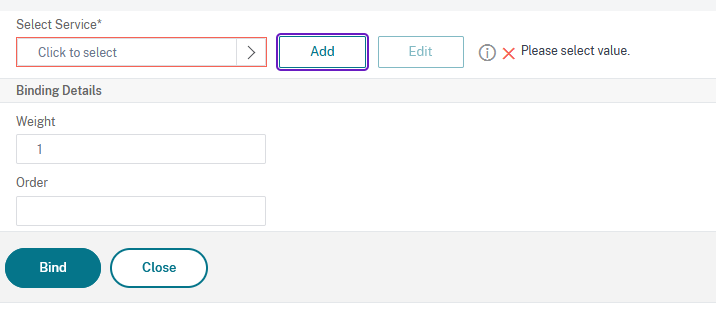
In the next window click on Click to Select field:
-
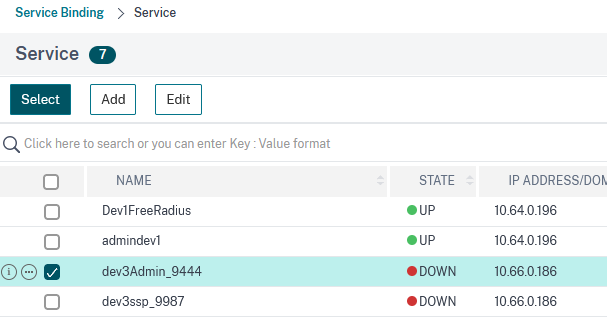
Then choose the appropriate service (dev3_Admin_9444) and click on Select:
-
In the next window click on Bind:
-
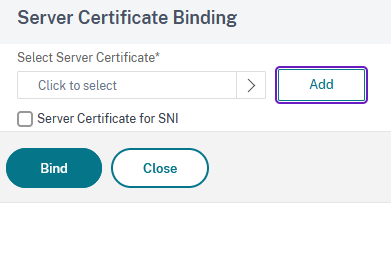
Click on Continue then on No Server Certificate.
-
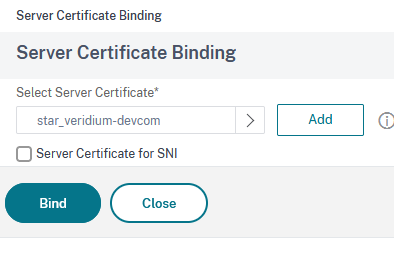
Click on Click to Select field:
-
Then select the server certificate imported in step3 and click on Bind:
Assign client CA for specific Veridium services
-
Repeat the process for the client-ca certificate by clicking on No CA Certificate and selecting the client ca-certificate imported in Step 6. In the end click on Continue to advance.
-
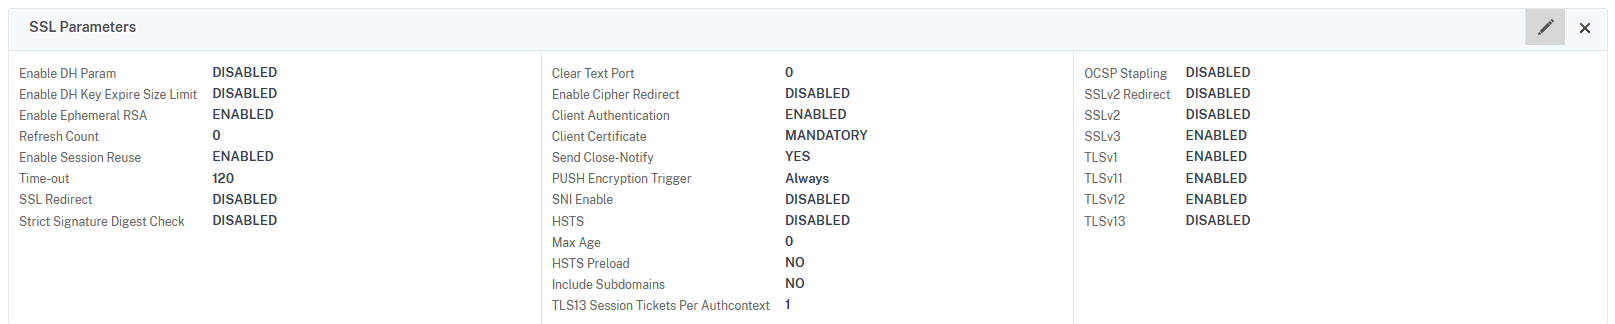
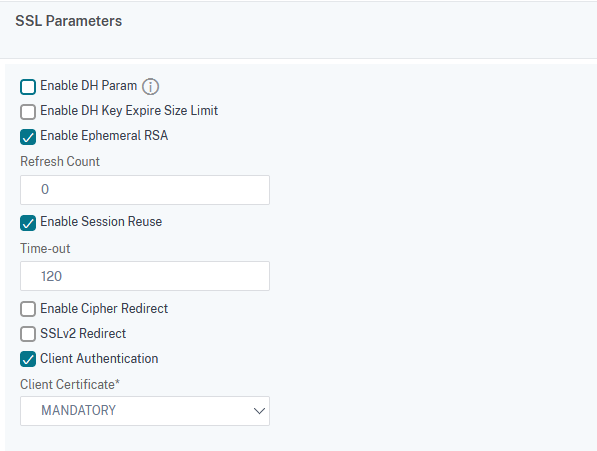
Since Veridium Manager is a service that requires client certificate authentication, this must be enabled in the Virtual Server settings. For this click on the pen icon from the SSL Parameters section to edit:
-
Select Client Authentication and set the Client Certificate field to MANDATORY. Click on OK to save:
Assign rewrite policy for specific services
-
Next we’ll need to assign a rewrite policy in order to pass the client certificate. For this click on + Policies in the right side of the window. The Policies section should now be available in the main window. Click on the plus sign to assign a policy:

-
In the Choose Type window, select Rewrite under Choose Policy and Request under Choose Type:

-
Click on Click to Select field and choose the policy defined in step 10:

-
Click on Select, then on Bind:

-
Click on Done to finish. Repeat these steps until you define all the virtual servers needed for the VeridiumID services. In the end, a complete list should look like this:

Note: You should enable client authentication only for dmzwebsec, websec and veridium-manager services !
Apply content switching based on specific path
-
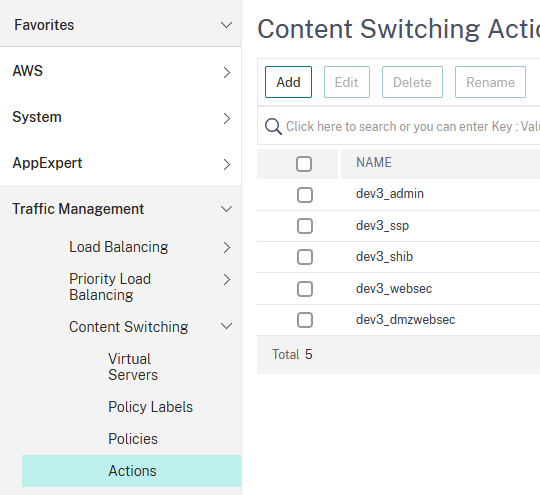
Next we’ll define the content switching part. This will allow us to route the traffic based on the accessed path (/veridium-manager, /dmzwebsec) and redirect it to the appropriate VeridiumID endpoint (:9444/veridium-manager, :8544/dmzwebsec). For this we must first define an action for each service. In this example we’ll define an action for Veridium Manager. Go to Traffic Management → Content Switching → Actions and click on Add:
-
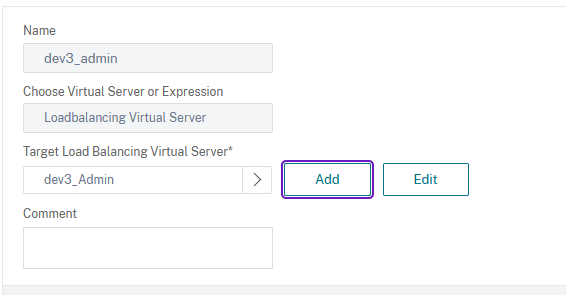
Type in a name, select the load balancing virtual server created in step 18 and then click on Create:
-
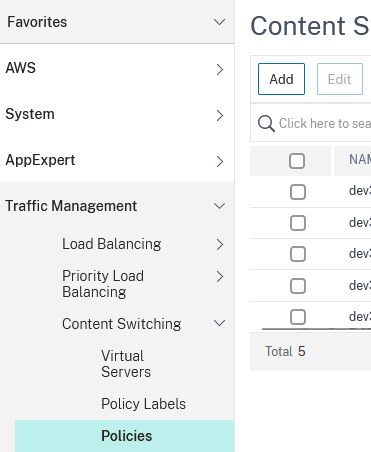
Next we have to create a policy that will use this action. For this, you must go to Traffic Management → Content Switching → Policies and click on Add:
-
Type in a name, select the action(previously defined) corresponding to the Veridium-manager service and, under the Expression field type HTTP.REQ.URL.PATH_AND_QUERY.CONTAINS("/veridium-manager") || HTTP.REQ.URL.PATH_AND_QUERY.CONTAINS("/websecadmin") || HTTP.REQ.URL.PATH_AND_QUERY.CONTAINS("/admin") || HTTP.REQ.URL.PATH_AND_QUERY.CONTAINS("/legacy") || HTTP.REQ.URL.PATH_AND_QUERY.CONTAINS("/swagger-resources") || HTTP.REQ.URL.PATH_AND_QUERY.CONTAINS("/v2")
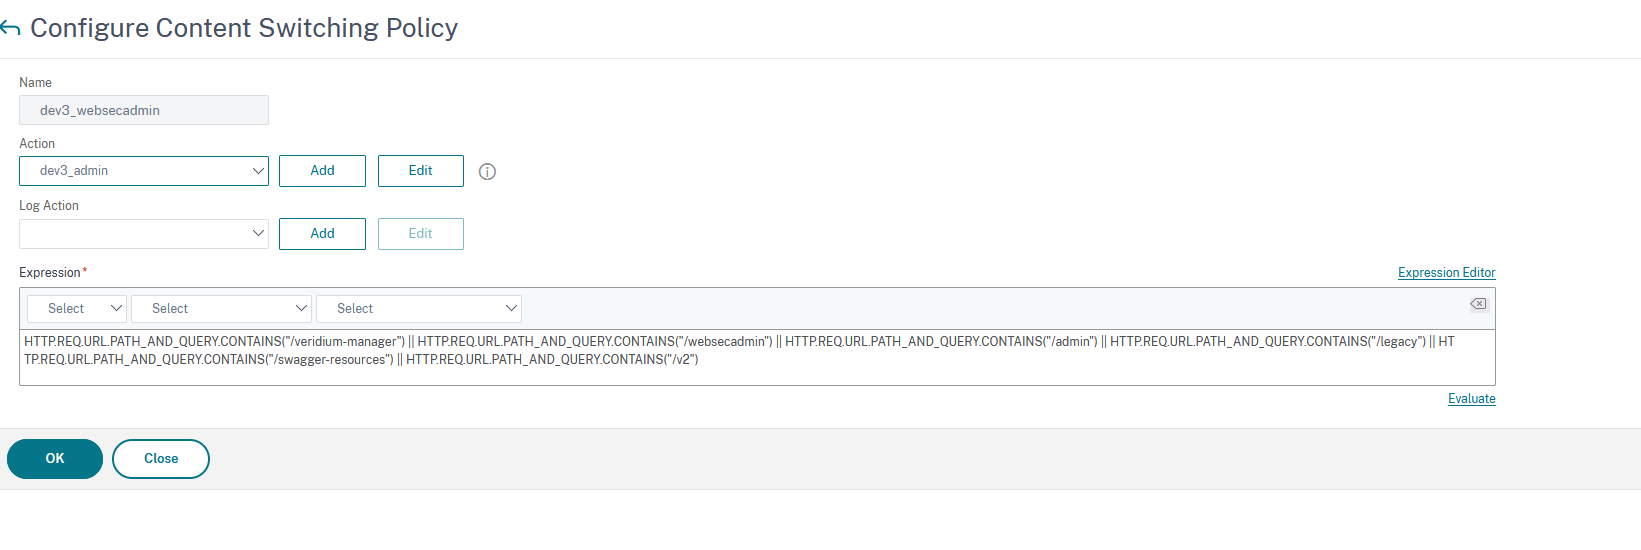
Note: The expression is this complex since Veridium Manager makes calls to different paths as listed. For othe services, an expression would look like HTTP.REQ.URL.PATH_AND_QUERY.CONTAINS("/ssp")
-
Click on Create to finish.
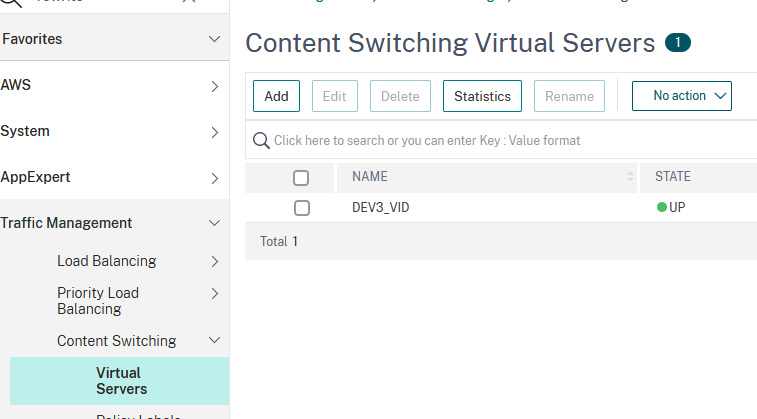
-
Next, we’ll need to create the Content Switching Virtual Server and assign all the content switching policies to it. For this go to Traffic Management → Content Switching → Virtual Servers and click on Add:
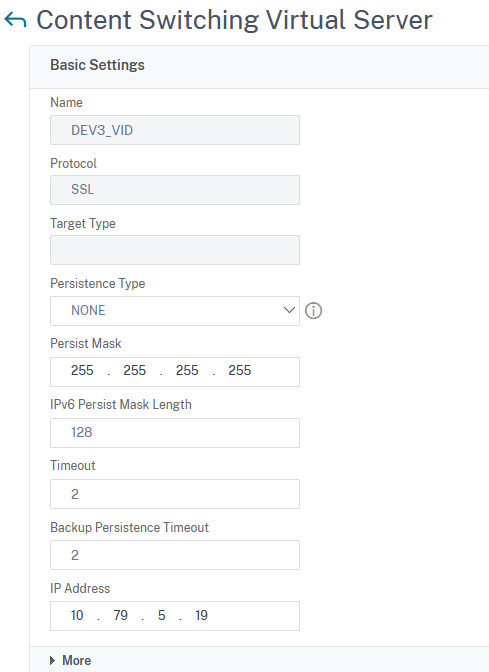
-
Type in a name, set the Protocol to SSL, Persistence Type to None, and fill in the IP Address field:
-
Click on Continue.
-
Assign the server certificate and CA certificate imported in step 3.
-
Edit the SSL Parameters section. Enable Client Authentication and set Client Certificate OPTIONAL for websec and dmzwebsec - OPTIONAL and for, websecadmin - MANDATORY:

-
In the Content Switching Virtual Server configuration window click on the + Policies to make the Policies section available:

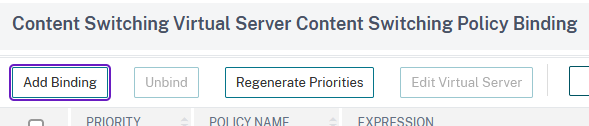
-
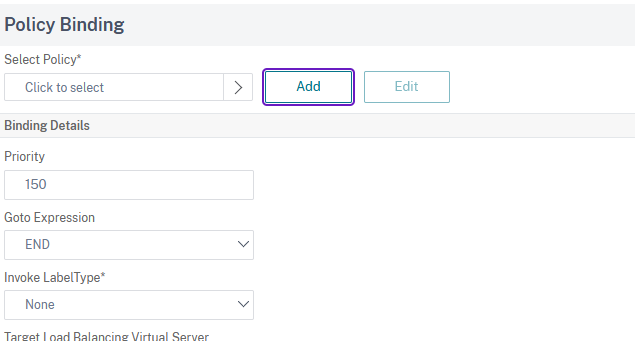
Under Content Switching Policy Binding, select the policies defined according to instructions at step 36. Click on Add Binding:
-
Select the policy by clicking on Click to Select:
-
Choose the appropriate policy and then click on Select:
-
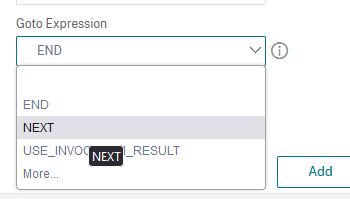
Under Goto Expression select either NEXT if it is not the last policy or END for the last one:
-
Click on Bind to assign the policy:

-
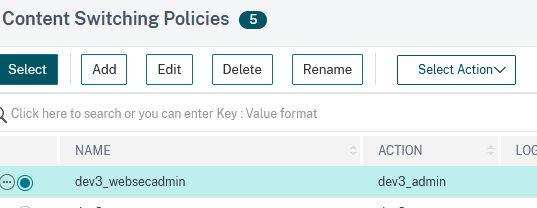
Repeat the Content Switching Policy Binding for every VeridiumID service. In the end, you should have at least 5 content policies:

-
Click on Done to finish.
Enable sticky session for virtual server
-
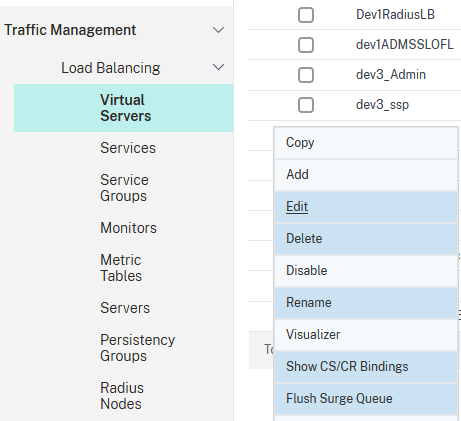
Go to Traffic Management → Load Balancing → Virtual Servers
-
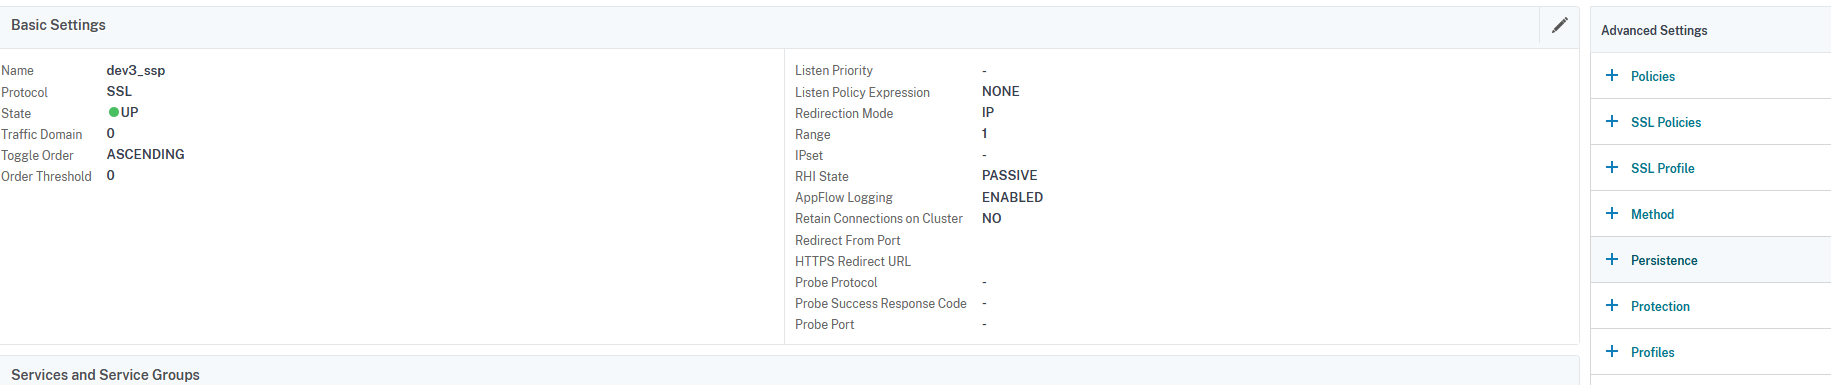
Select the appropriate virtual server and click on Edit:
-
In the next window, click on the plus sign next to Persistence:
-
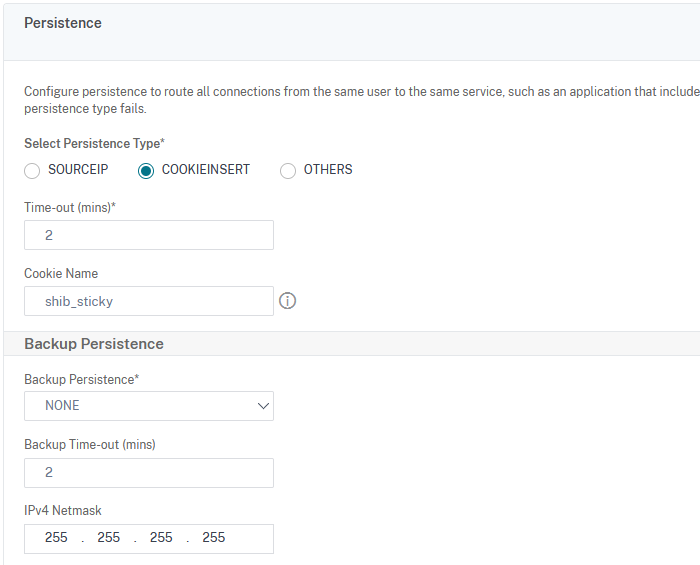
Select COOKIEINSERT and type in a name for the cookie:
-
Click on Ok, then save and commit changes.
-
For this setup, the following modifications have been performed in VeridiumID:
-
change shibboleth metadata - port 443
-
change /opt/veridiumid/tomcat/conf/server.xml - proxyPort="443"
-
change haproxy.cfg -> in frontend bops:
# in case of SSP needed on port 443
acl is_ssp path_beg -i /ssp
use_backend backend-ssp-http if is_ssp
-
modify ssp -> saml configuration to point to port 443
-
delete ssp application
-
download ssp metadata
-
register ssp one more time
-
download zookeeper (migration.sh -d SSPZK)
-
modify everywhere 9987 with 443
-
upload zookeeper (migration.sh -u SSPZK)
-
-
Set the dns to point to this content switching virtual server and test VeridiumID services access.