
Create a virtual server for the Store you want to access
-
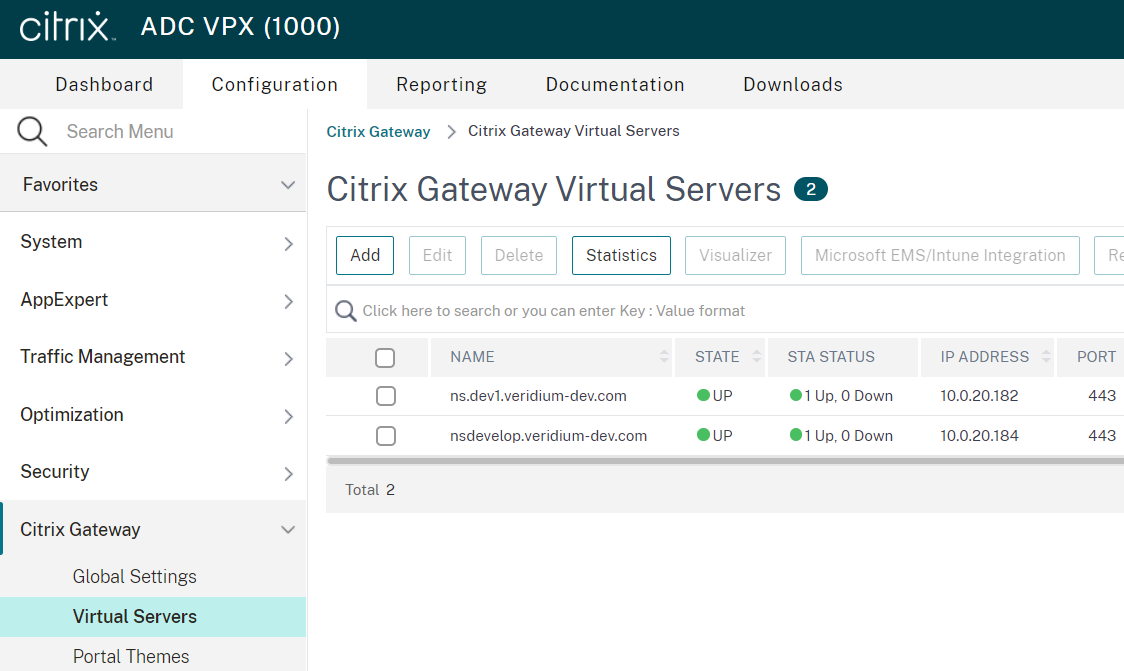
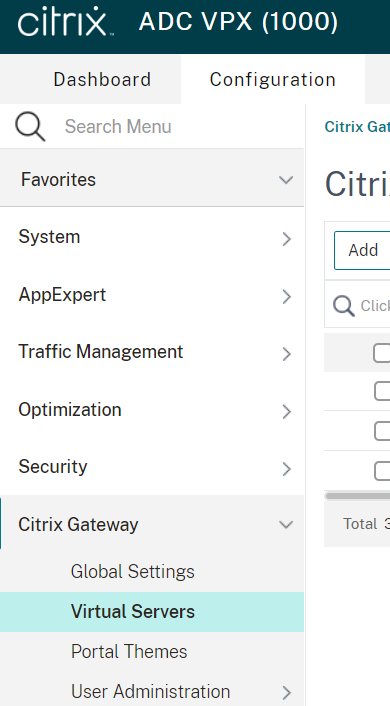
Access the Netscaler administrative interface and click on Configuration->Citrix Gateway->Virtual Servers then select Add:
-
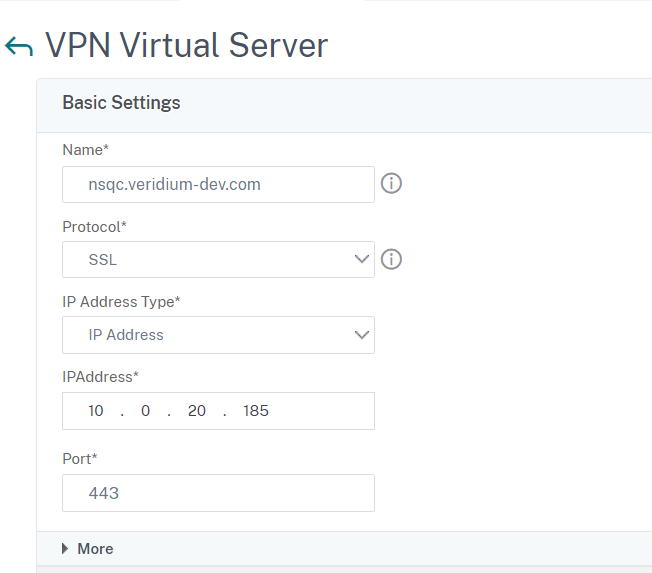
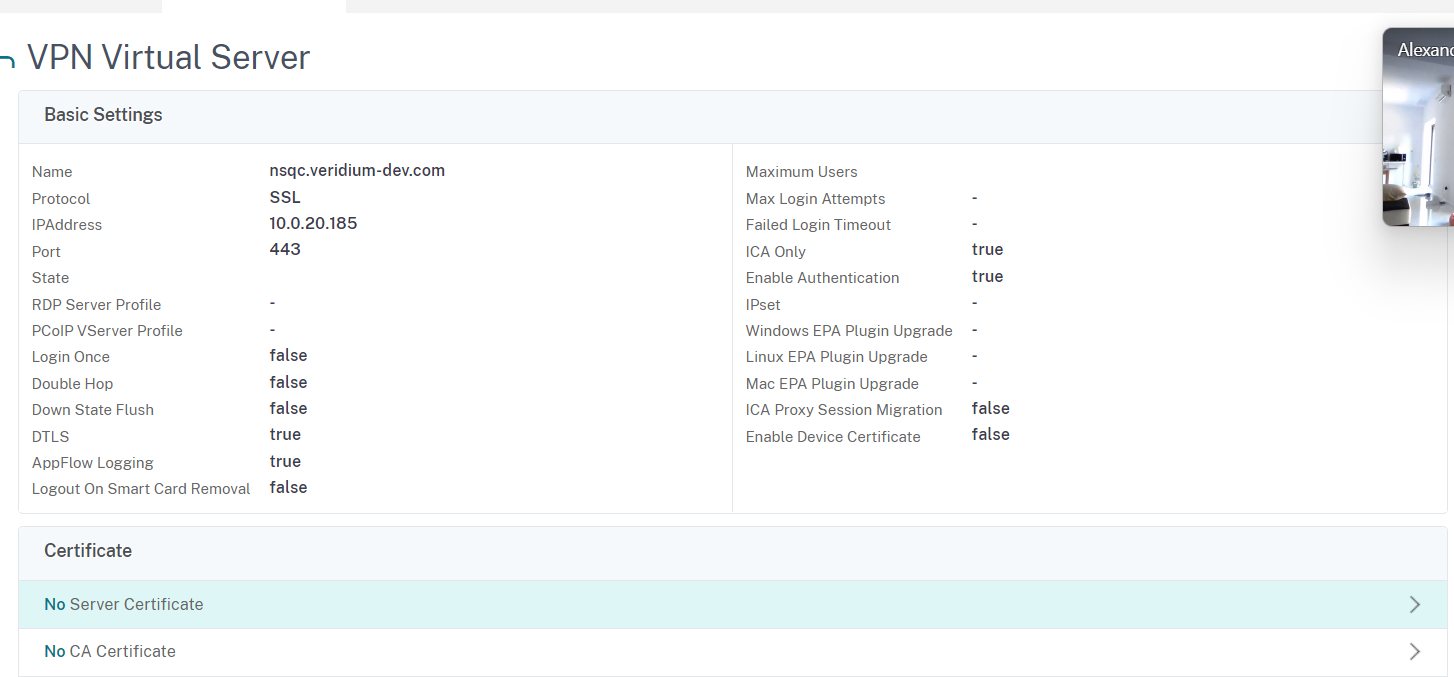
Enter a Name, Protocol,IP Address Type, IPAddress and Port, then click on More:
-
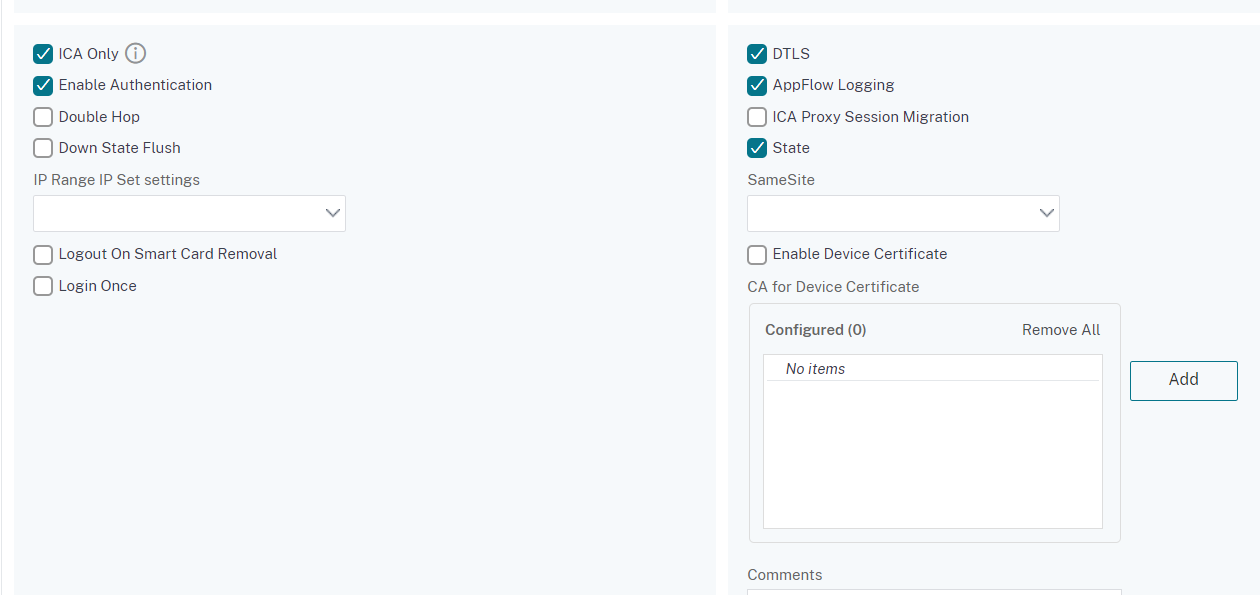
In the new section make sure the option ICA Only is selected to allow both Workspace and browser access, then click on OK:
-
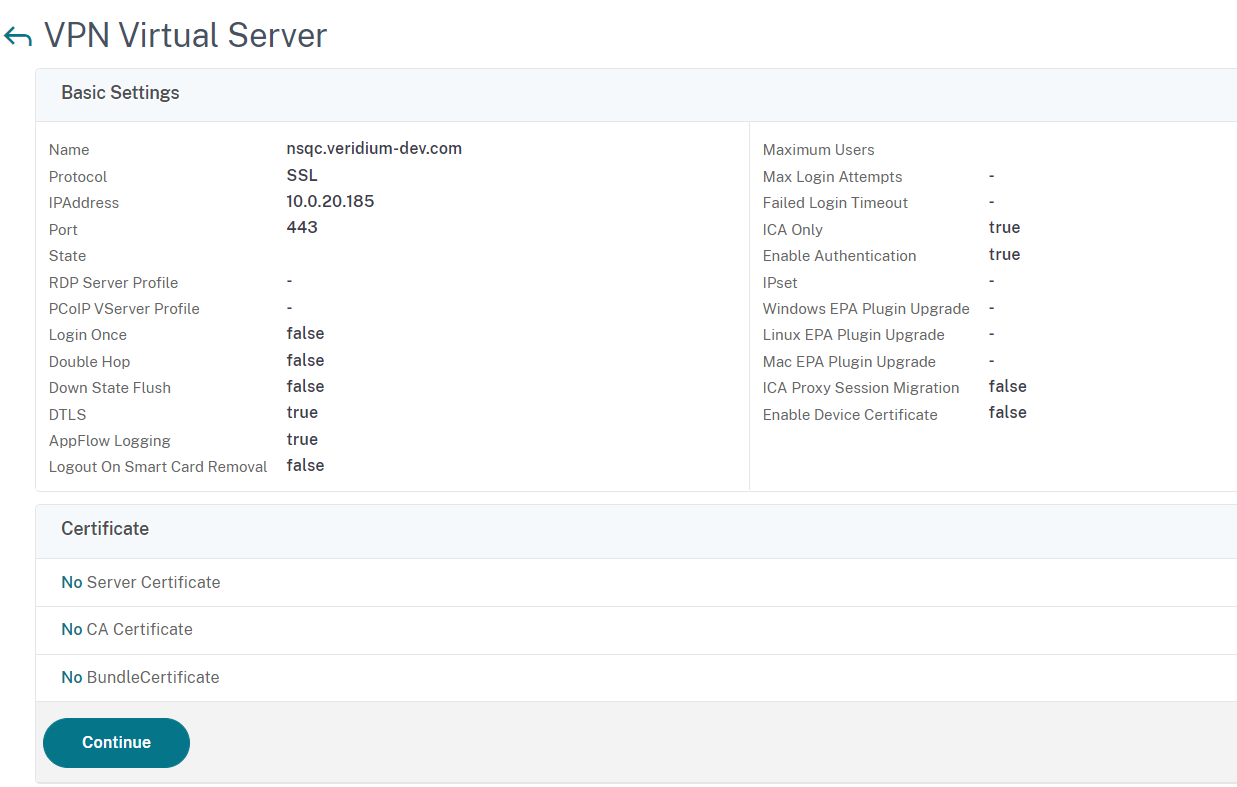
In the next window click on Continue:
-
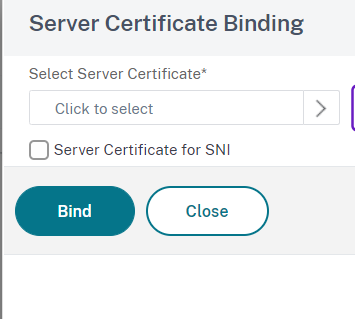
Click on the arrow sign next to No Server Certificate in order to add a ssl certificate for the virtual server:
-
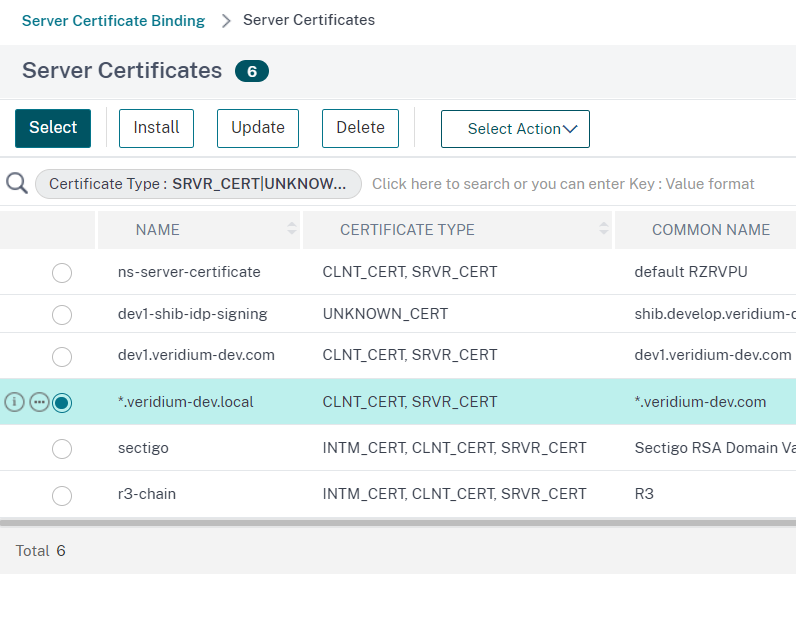
In this example we have used a wildcard certificate for veridium-dev.com domain which was previously imported into the appliance. In this case we only need to select it by selecting the Click to select option:
-
Tick the wildcard certificate (*.veridium-dev.com in this case), then click on Select:
-
In the next window click on Bind to finish setting the server certificate:

-
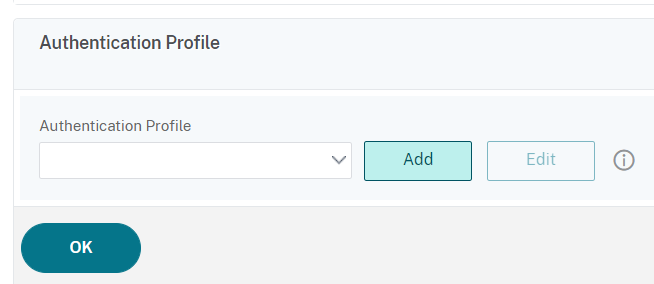
For the next step we need to add an Authentication Profile. For this, in the VPN Virtual Server window, click on + Authentication Profile:

-
Click Add to configure the profile:
-
In the Create Authentication Profile window click on Add to add a new Authentication Virtual Server:
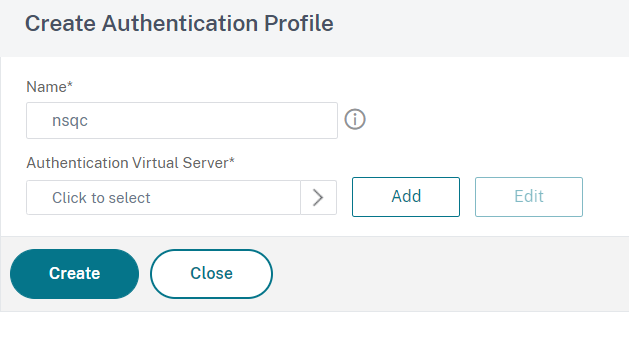
-
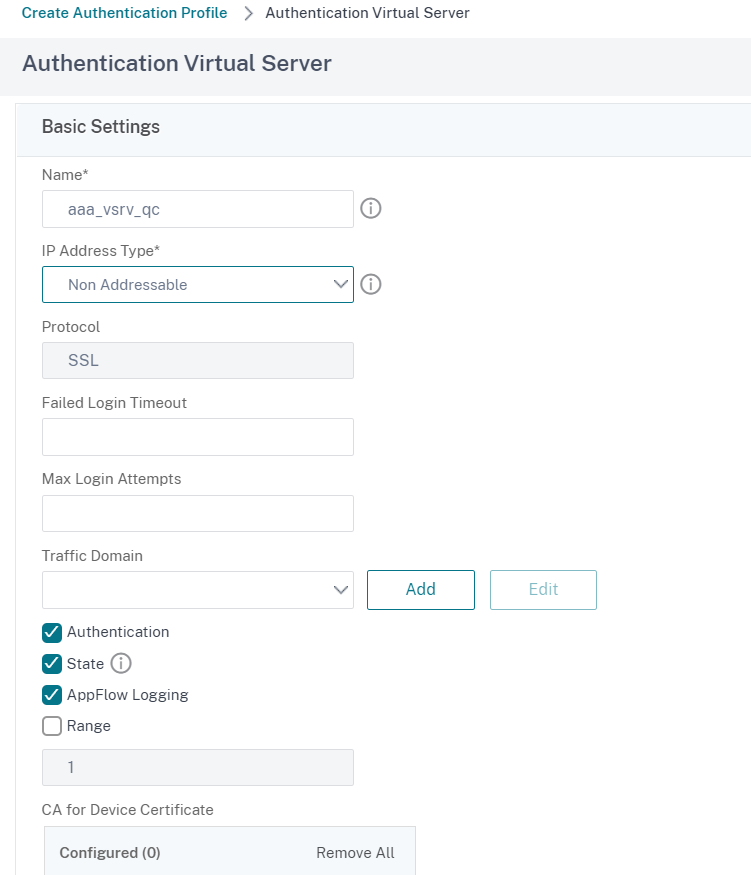
Set a Name and, under IP Address Type, select Non-addressable:
-
Click OK to continue.
-
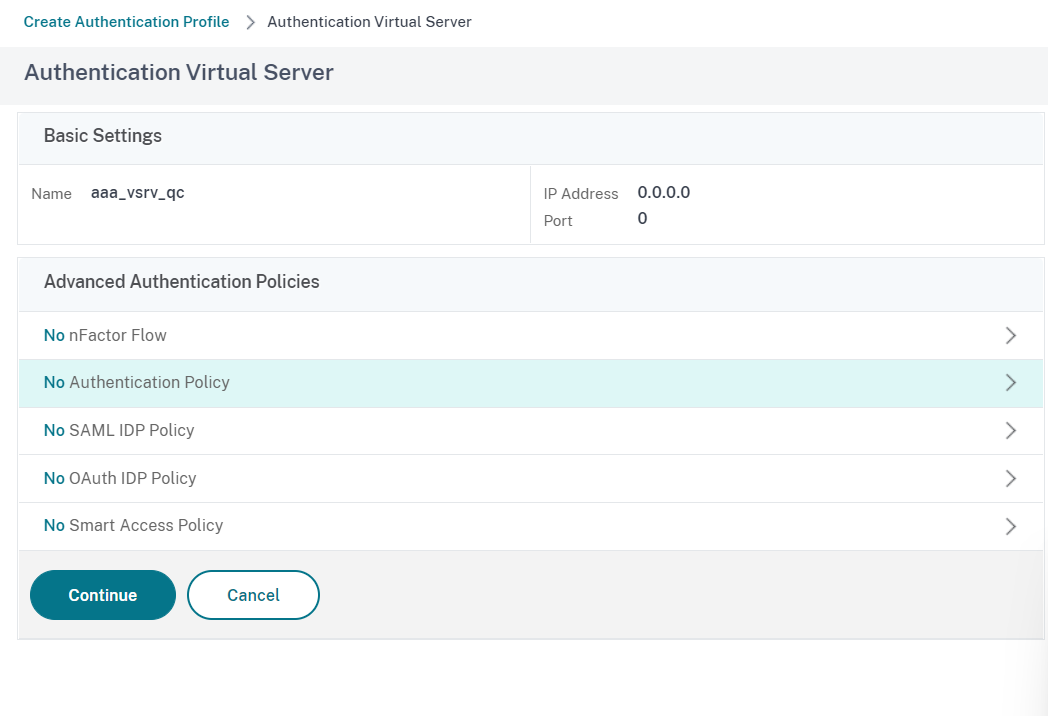
Next we need to create and assign an authentication policy to the Authentication Virtual Server. In order to achieve this, click in the greater sign next to No Authentication Policy:
-
In the Policy Binding window, click on Add button next to Select policy section:
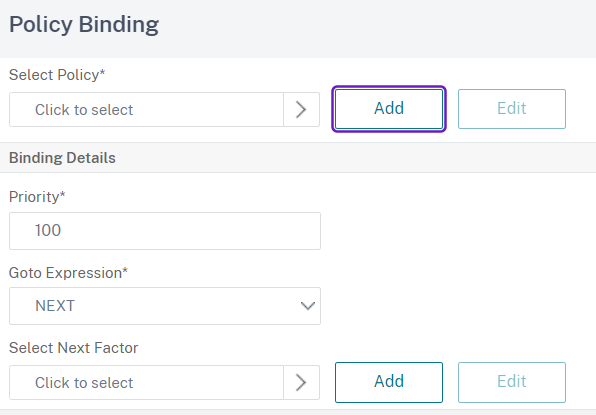
-
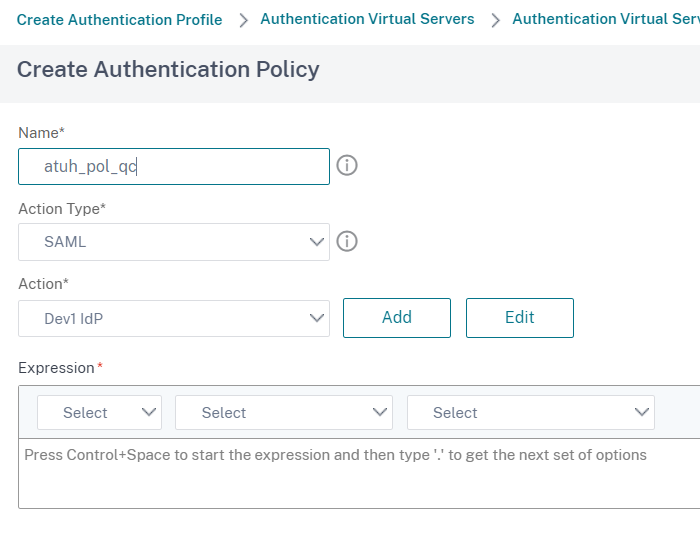
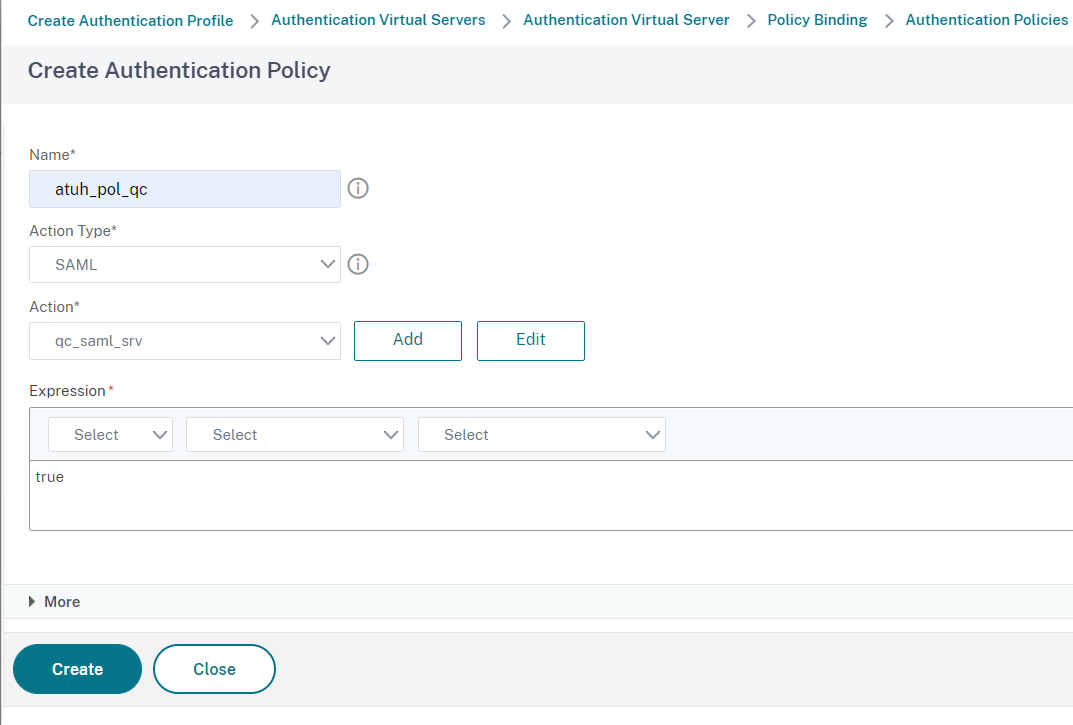
Set a Name, then under Action Type select SAML and under Action click on Add:
-
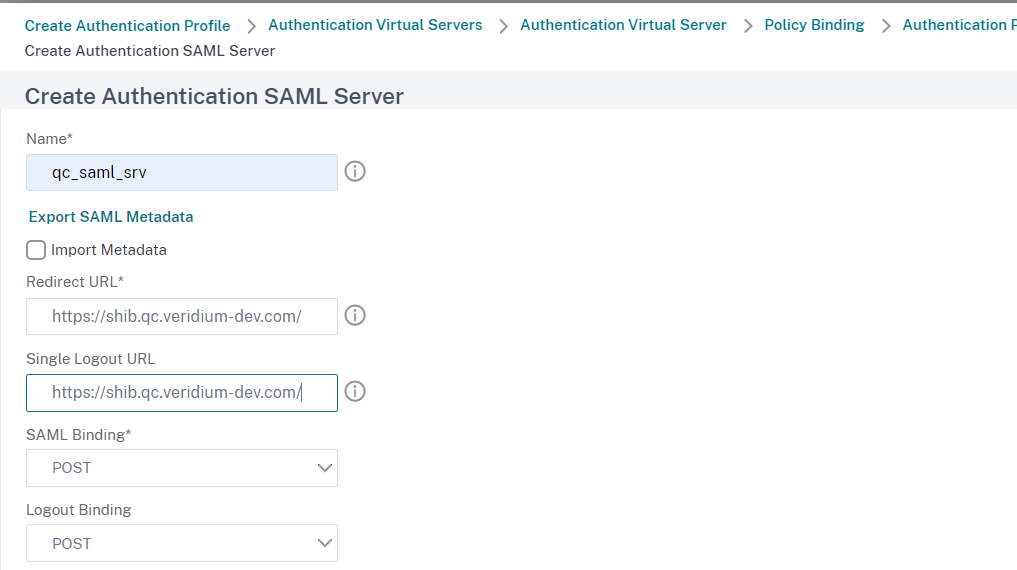
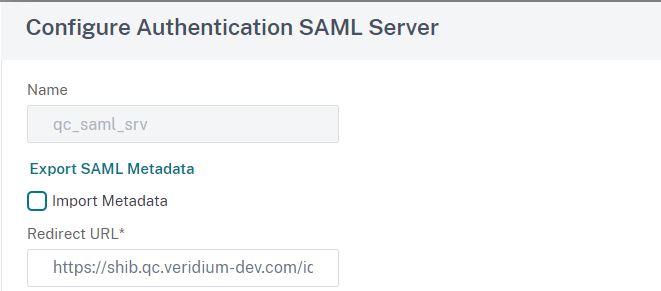
In the Create Authentication SAML Server page, set a Name, deselect Import Metadata, fill in Redirect URL and Single Logout URL(type the POST endpoint from the VeridiumID metadata), set SAML Binding and Logout Binding to POST:
-
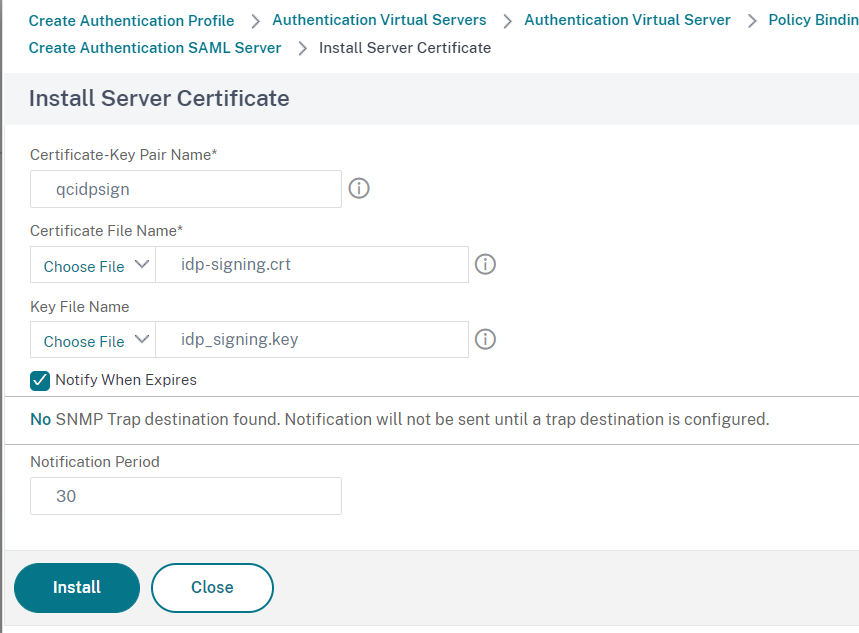
Import the idp signing certificate by clicking Add in the IDP Certificate Name section:

-
In the Install Server Certificate window set a Certificate Key-Pair Name, select the certificate and the private key by clicking on Choose File then click on Install to finish the process:
-
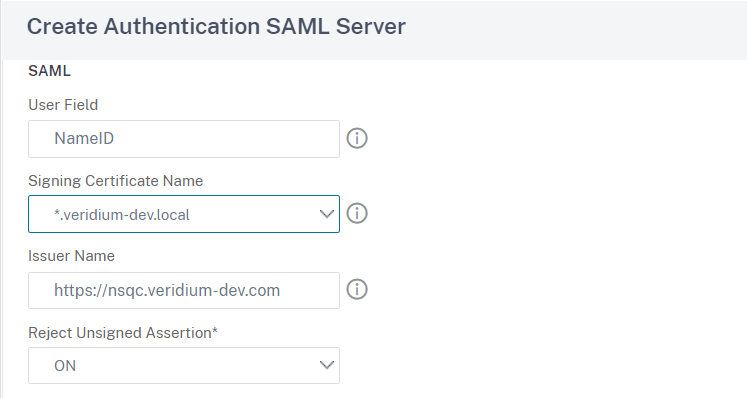
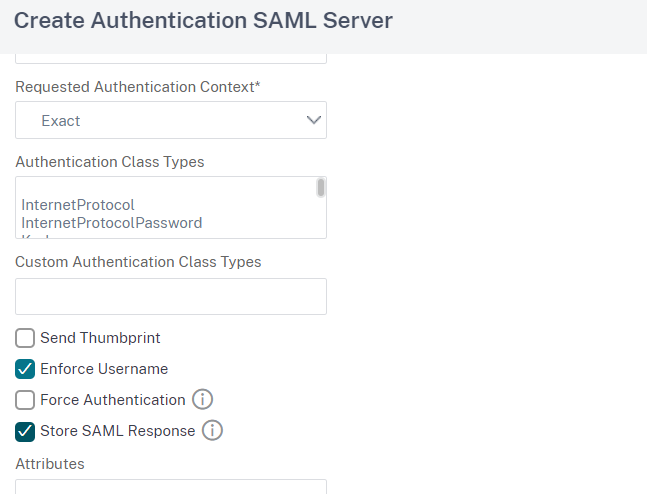
Back in the Create Authentication SAML Server window, add NameID to User Field, in the Signing Certificate Name select the wildcard certificate from the drop-down list. Issuer Name should be the same as the virtual server name and make sure to set the Reject Unsigned Assertion to ON:
-
Scroll down and click on More:
-
In this section tick the Enforce Username and Store SAML Response options:
-
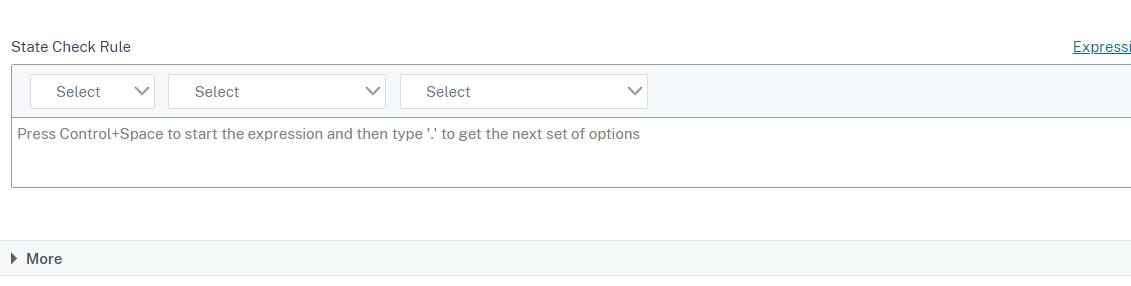
Click on Create to finish, then in the Create Authentication Policy window enter the value true in the Expression section:
-
Click on OK then on Select.
-
To finish click on Bind and then Done.
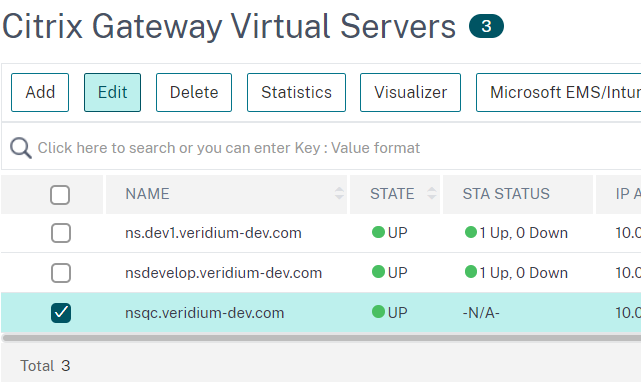
Configure a session policy to instruct Netscaler which store to connect to
-
From the Netscaler admin interface, access Configuration, Citrix Gateway, Virtual Servers:
-
Select the appropriate virtual server and click on Edit:
-
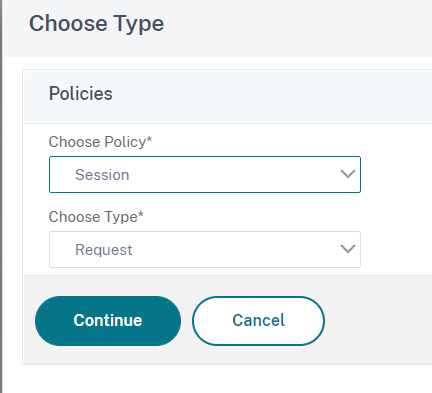
Scroll down to the Policies section and click on the + sign:

-
Inn the Choose Type window, select Session in the Choose policy field:
-
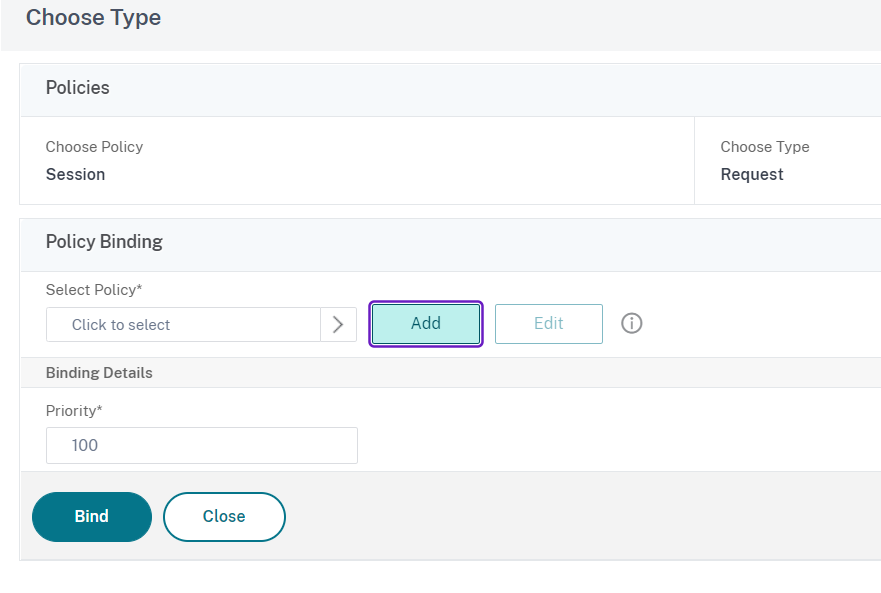
In the Policy Binding section click on Add:
-
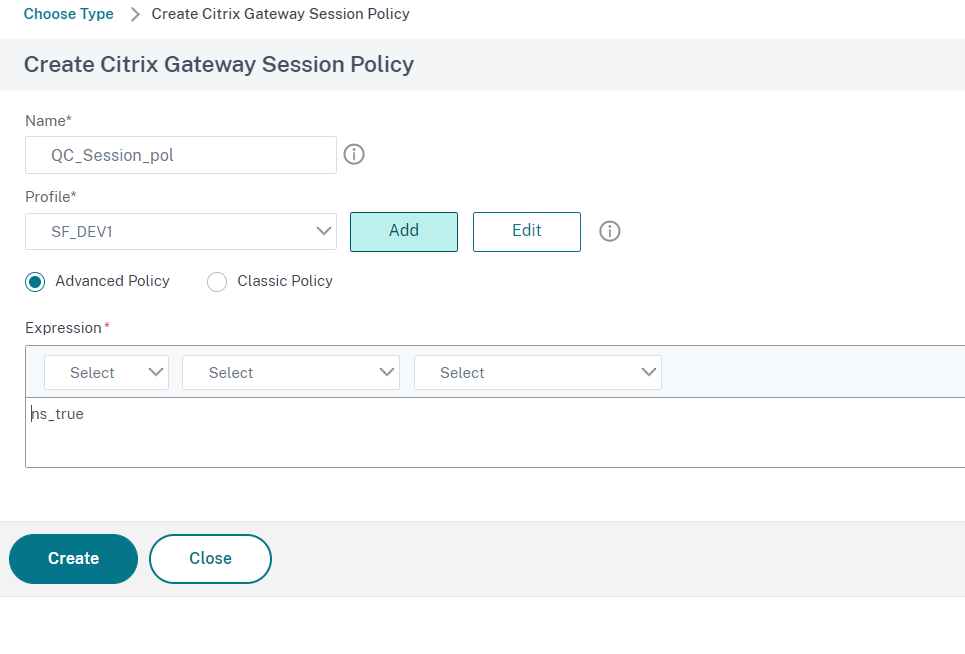
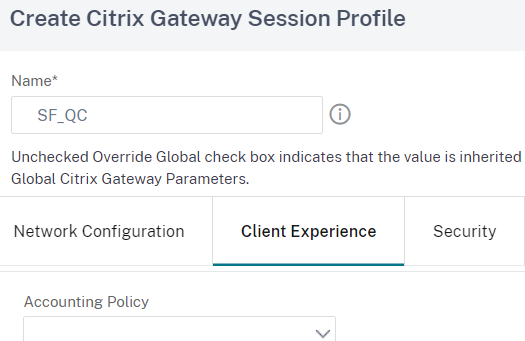
Configure a Name, type ns_true in the Expression field and then click on Add to add a new profile:
-
Type in a Name, then click on Client Experience:
-
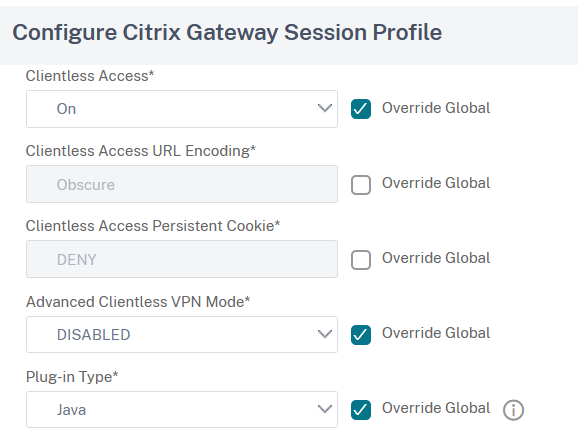
Scroll down and tick Override global for Clientless Access(Set this to ON), Advanced Clientless VPN Mode(Set to Disabled) and Plugin Type(Set to Java):
-
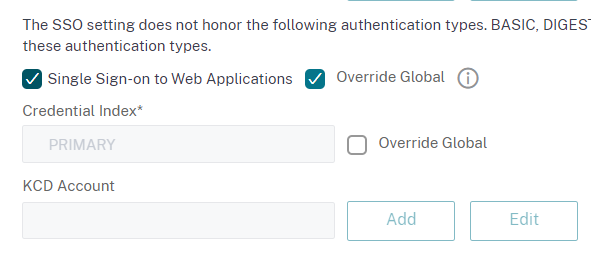
Scroll down and enable Override Global and Single Sign-on to Web Applications:
-
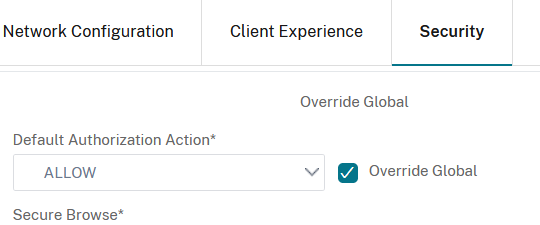
In the Security tab, enable Override Global for the Default Authorization Action and set it to Allow:
-
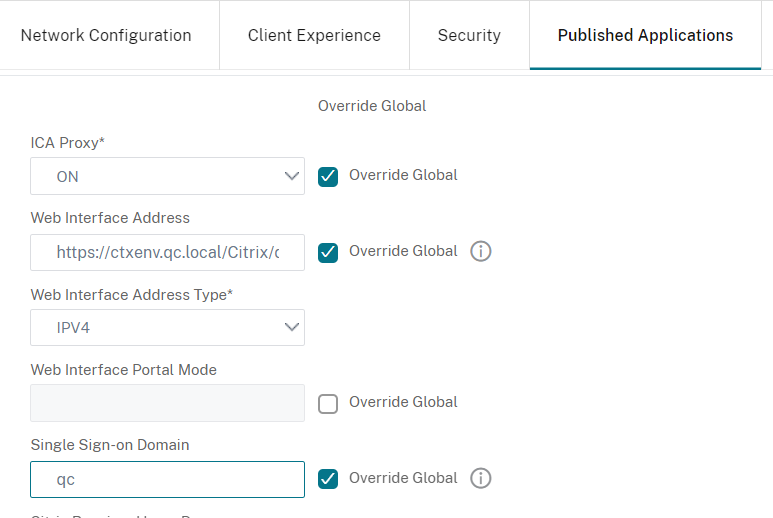
In the Published Applications tab enable Override Global option for ICA Proxy(Set it to ON), Web Interface Address(set it to the Receiver for Websites address of the store you want to access - this case https://ctxenv.qc.local/Citrix/qcfaslessWeb) and Single Sign-on Domain(Set it to the domain the Store is part of -this case qc):
-
Click on Create to finish creating the session policy, then one more time on Create, then Bind and Done.
Configure STA server address for the virtual server
-
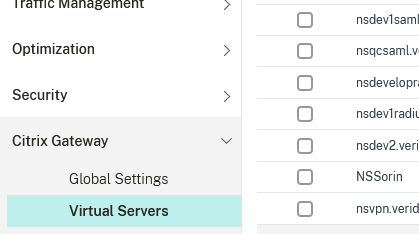
In the Netscaler web interface, access the virtual server settings by clicking on Citrix Gateway → Virtual Servers, then click on the previously created virtual server:
-
In the next window, in the Advanced Settings section, click on Published Appllications:

-
In the Published Applications config section, click on No STA Server:

-
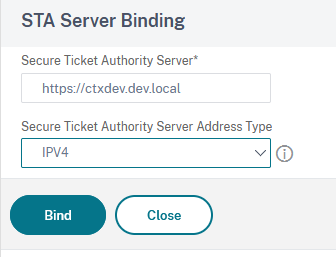
Set the Secure Ticket Authority Server Address Type to IPV4, fill in the FQDN of the delivery controller in the Secure Ticket Authority Server field, then click on Bind:
-
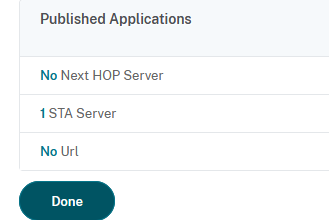
Click on Done to finish:
Extract Netscaler metadata and create a service provider in VeridiumID dashboard
-
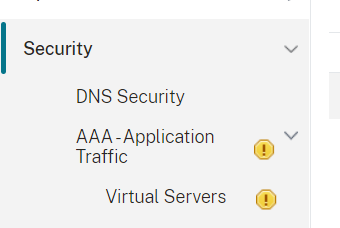
In the Netscaler administrative interface, access Security, then Application Traffic menu:
-
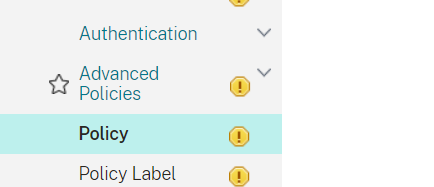
Click on Authentication, Advanced Policies and then on Policies:
-
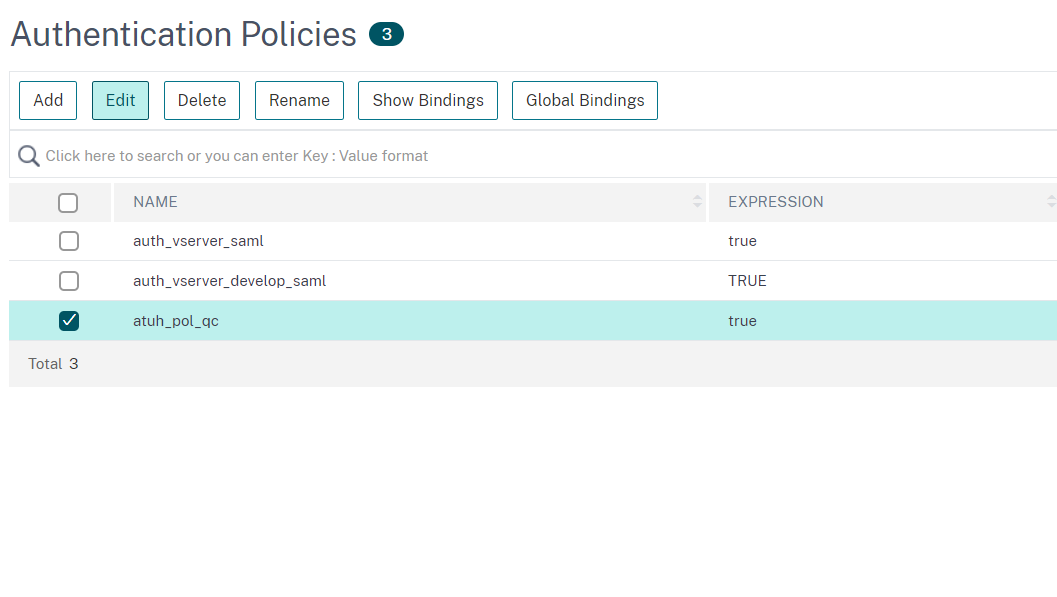
In the Authentication Policies window, select the appropriate policy for your virtual server and click on Edit:
-
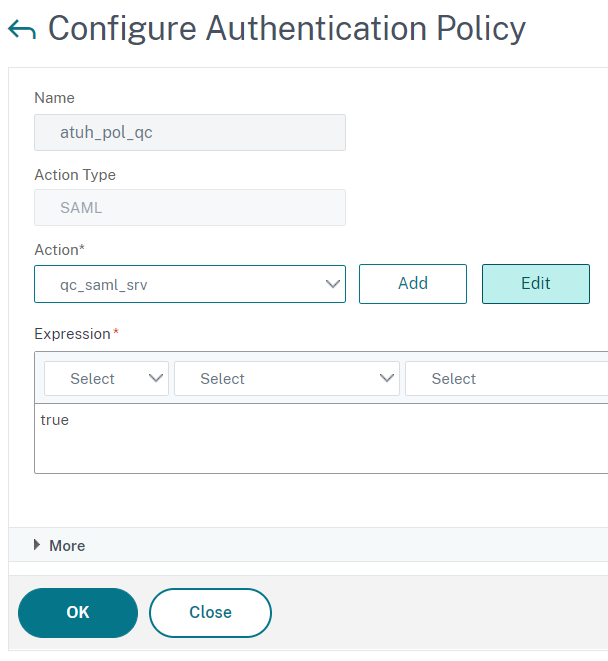
In the Configure Authentication Policy window click on Edit button next to the Action field:
-
In the Configure Authentication SAML Server window, click on Export SAML Metadata and save the file:
-
Depending on the configuration, the exported metadata might contain ip addresses instead of fqdns’s for SingleLogoutService and AssertionConsumerService:

In this case, you must manually edit the metadata and replace these ip addresses with the fqdn extracted from the entityID field:

-
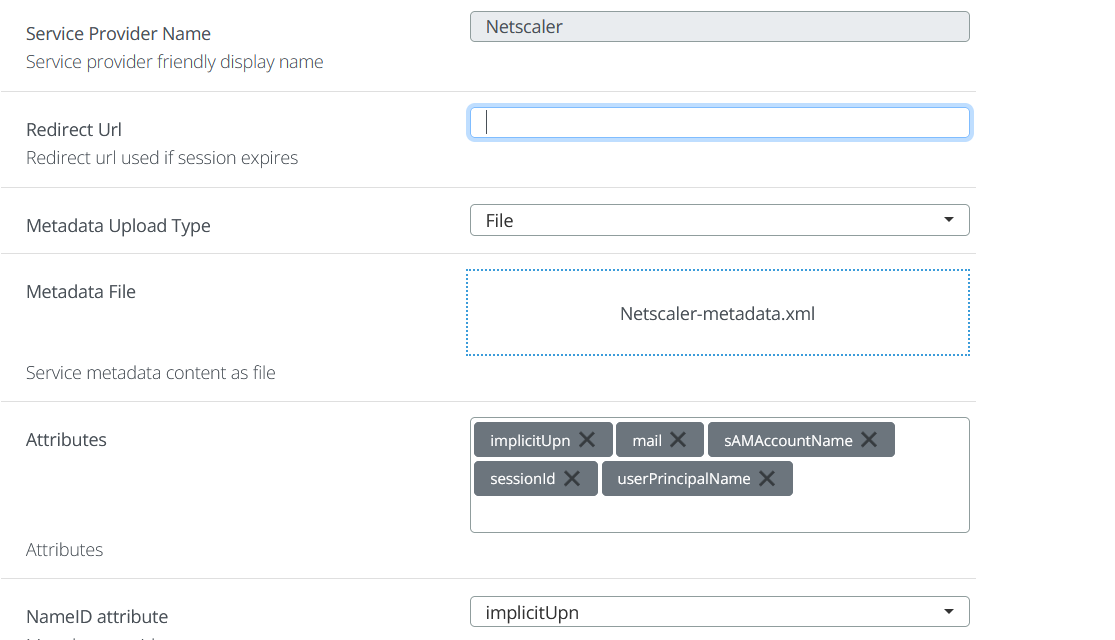
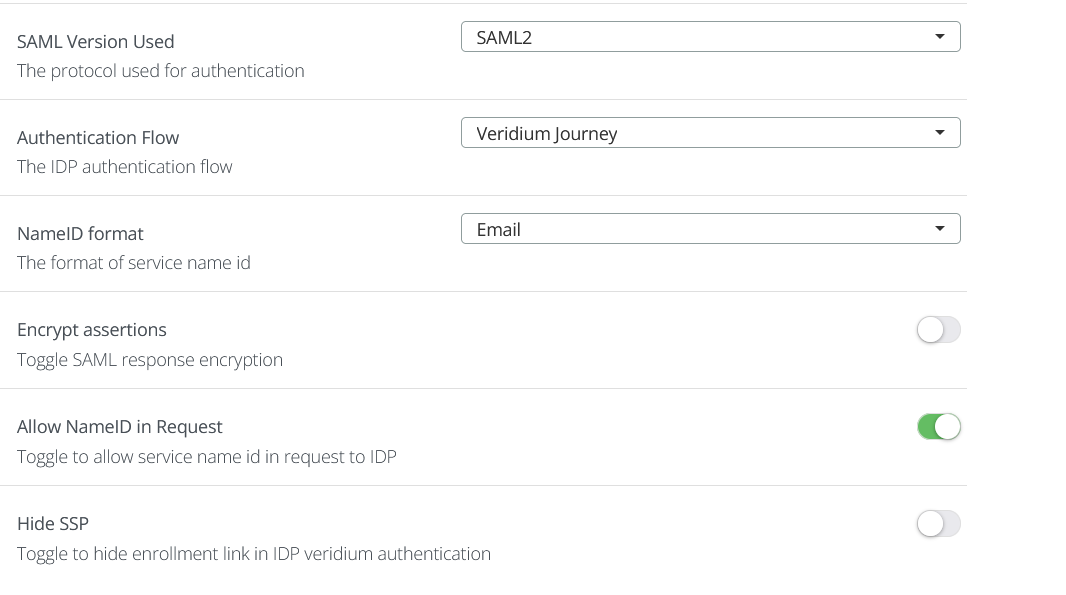
Go to VeridiumID dashboard and create a SAML application as follows:
-
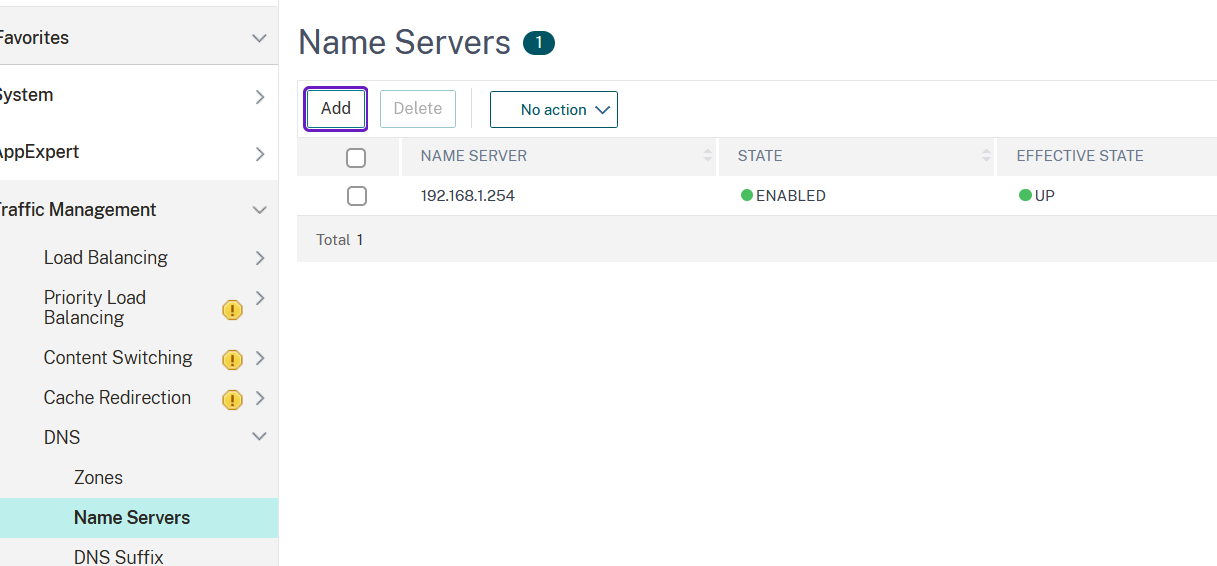
ATTENTION!!! To ensure proper DNS resolution, add a dns server that can properly resolve the storefront and domain names (e.g. the active directory sever hosting the internal domain the Storefront server is joined to). You can achieve this from the Netscaler admin interface by going to Configuration->Traffic management->DNS->Name Servers and click on Add:
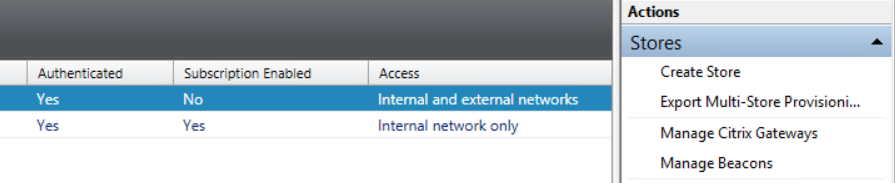
Create Citrix gateway and configure it to the desired store
-
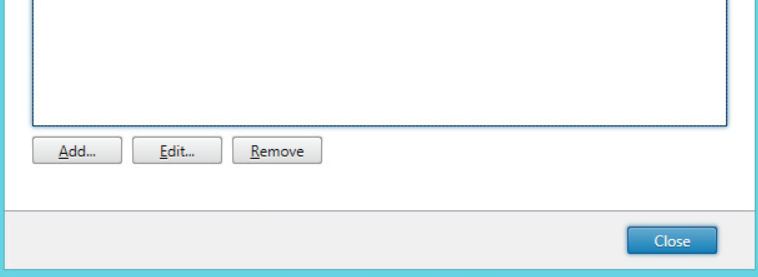
Access Storefront administrative interface an click on Manage Citrix Gateways:
-
Click on Add to add a new Citrix Gateway:
-
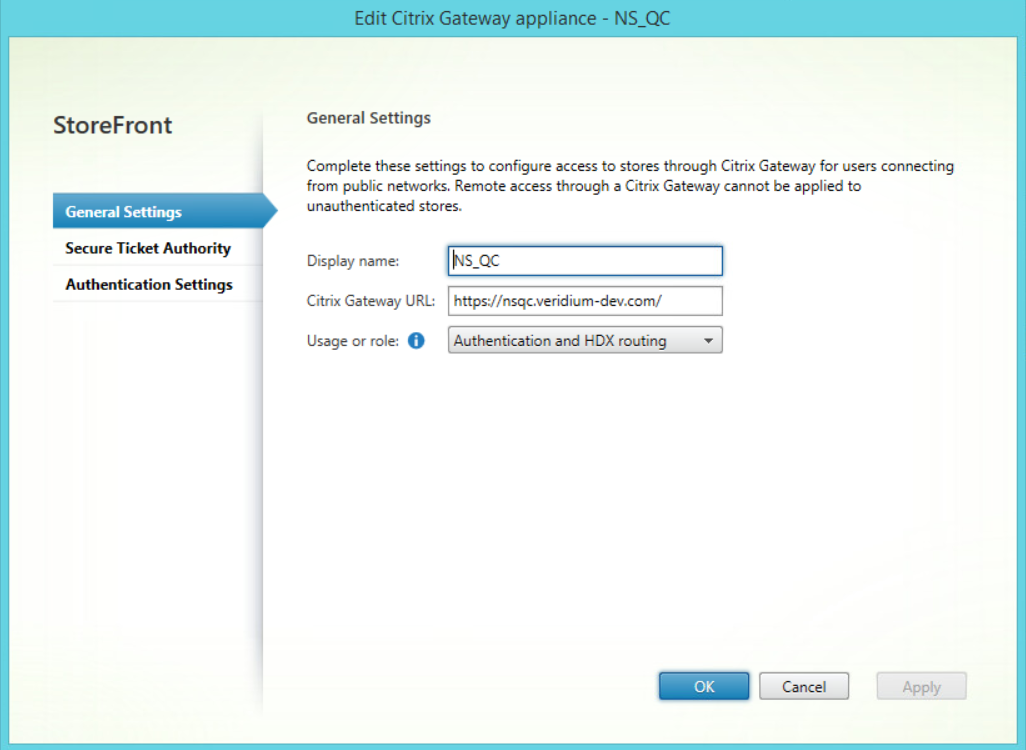
In the General Settings tab set a Display name, then in the Citrix Gateway URL type the virtual server address from Netscaler and select Authentication and HDX Routing in the Usage or role field:
-
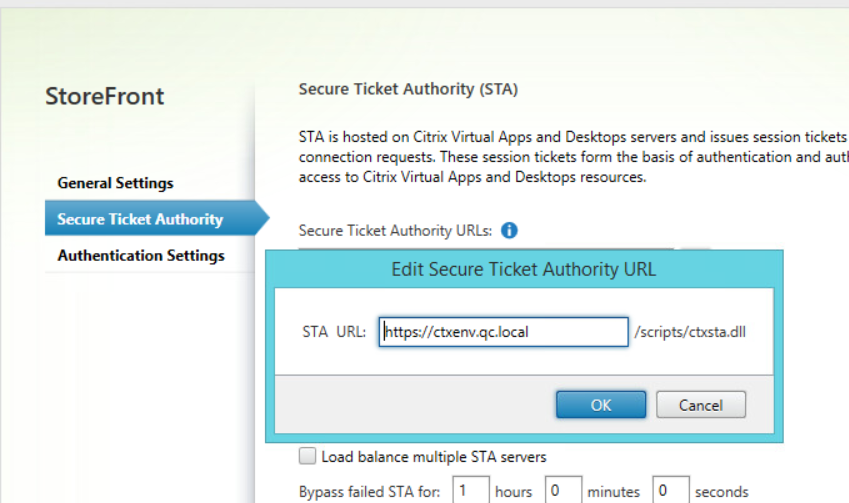
In the Secure Ticket Authority tab click on Add and enter the Storefront server address:
-
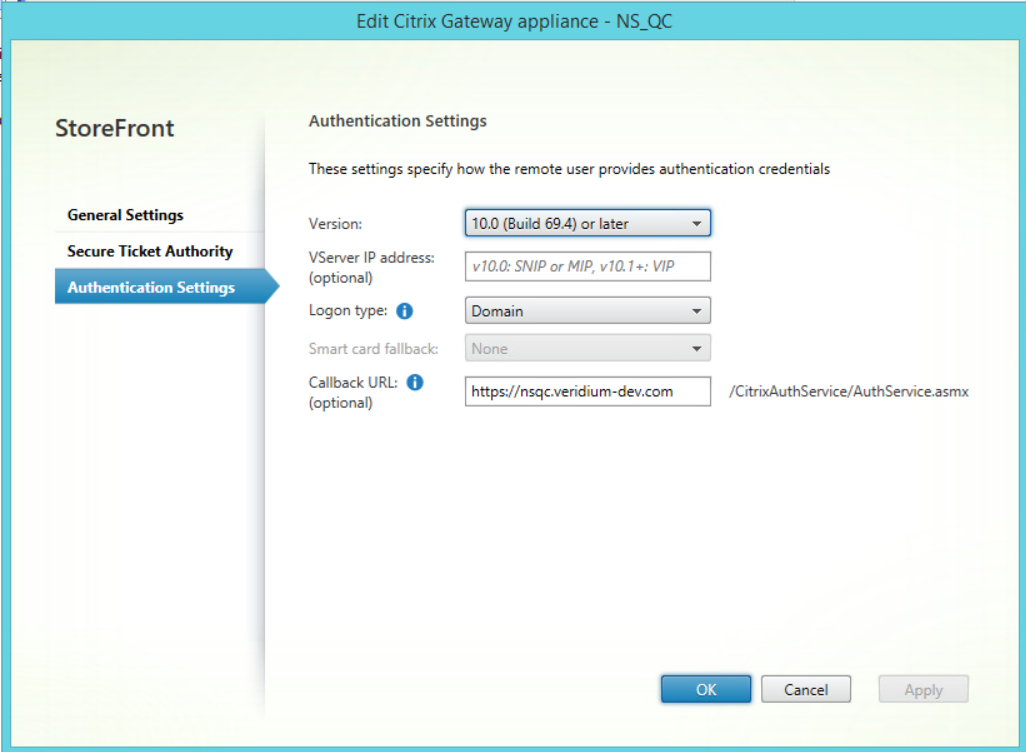
In the Authentication Settings tab, set the Logon type field to Domain, enter the virtual server address in the Callback URL field and click on OK to finish:
-
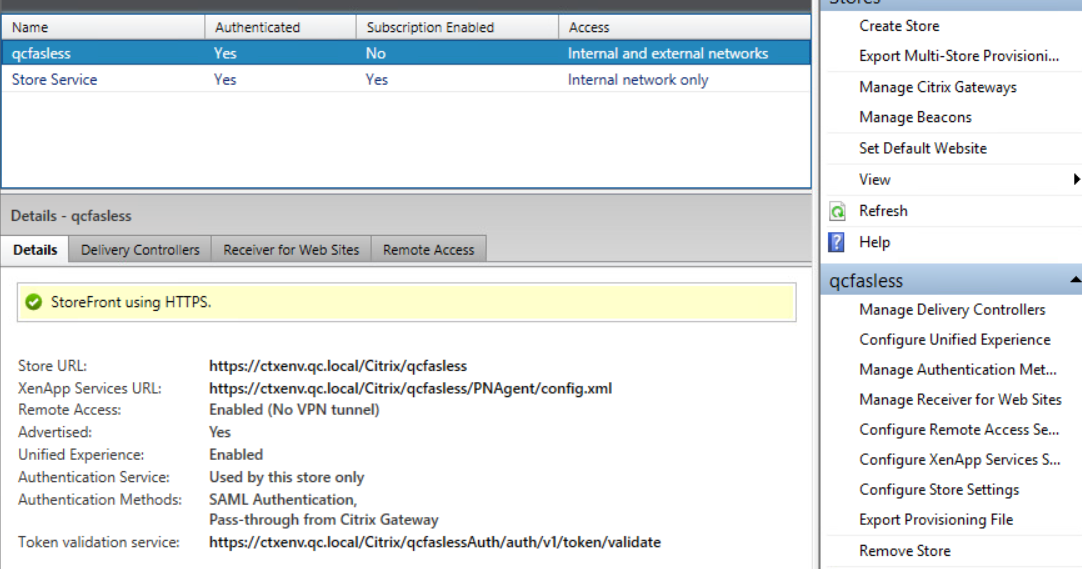
In the main Storefront window select the appropriate store and then click on Configure remote access setting:
-
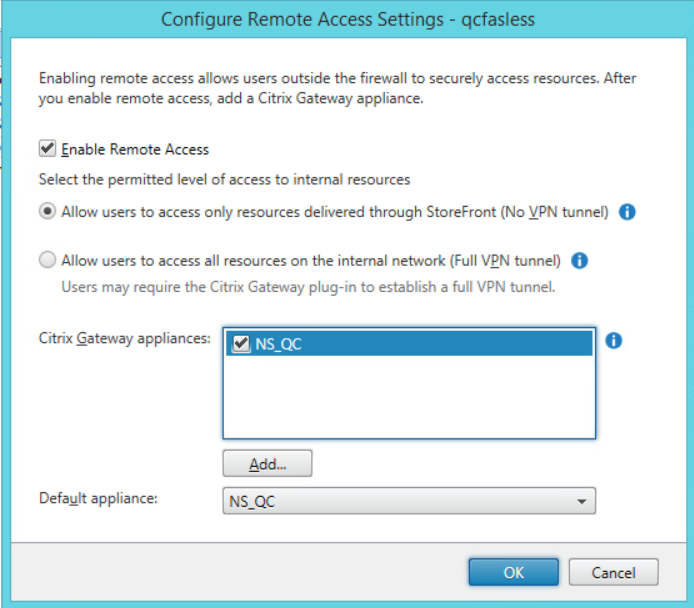
Tick the checkbox next to Enable remote access and make sure that in the Citrix Gateway appliances section the Citrix gateway created in the previous steps is selected:
-
Click on OK to finish.
IMPORTANT!!! After you perform various configurations in the Netscaler interfaces, it is highly recommended to use the Commit button in order for the changes to be written to disk. Otherwise, they will be lost in case of an appliance reset. The button can be located in the upper right part of the configuration page, next to the refresh one:
