
With this release it is possible to configure additional component from websecadmin directly avoiding connecting to linux servers.
A very important condition to use this functionality is that veridiumid user is allowed to do operations on veridium services. A list of permissions are below listed. The client should speak with linux team to allow these permissions and not delete them after update.
There were covered the following configuration actions:
-
upload application service certificate and apply it for services - for haproxy, websecadmin and websec services.
-
Create a private key and a CSR and allow for an external CA to sign it. Upload the signed certificate in veridium and apply for services.
-
modify configuration for Haproxy process: haproxy.cfg and origins.json, based on client needs.
-
renew the OPA certificate and apply it for OPA, without connecting to linux.
-
restart of different services.
Use cases:
Haproxy certificate change after installation - to use a trusted client certificate or for certificate renewal
During VeridiumID Server platform installation there is a self-signed certificate generated automatically for the haproxy service. This client certificate must be changed with a trusted one depending on the client’s setup.
When the existing client certificates are about to expire the admin users can change them using only the Admin manager platform.
For both procedures, the following steps must be performed based on the setup:
1. Using one certificate for Veridium
Applies on the following cases:
-
same FQDN for internal and external services
-
different FQDN for internal and external services but the SSL termination is done in a different layer for external services
If Veridium is not used as a first SSL termination layer the self signed server.pem client certificate must be changed with a trusted one.
-
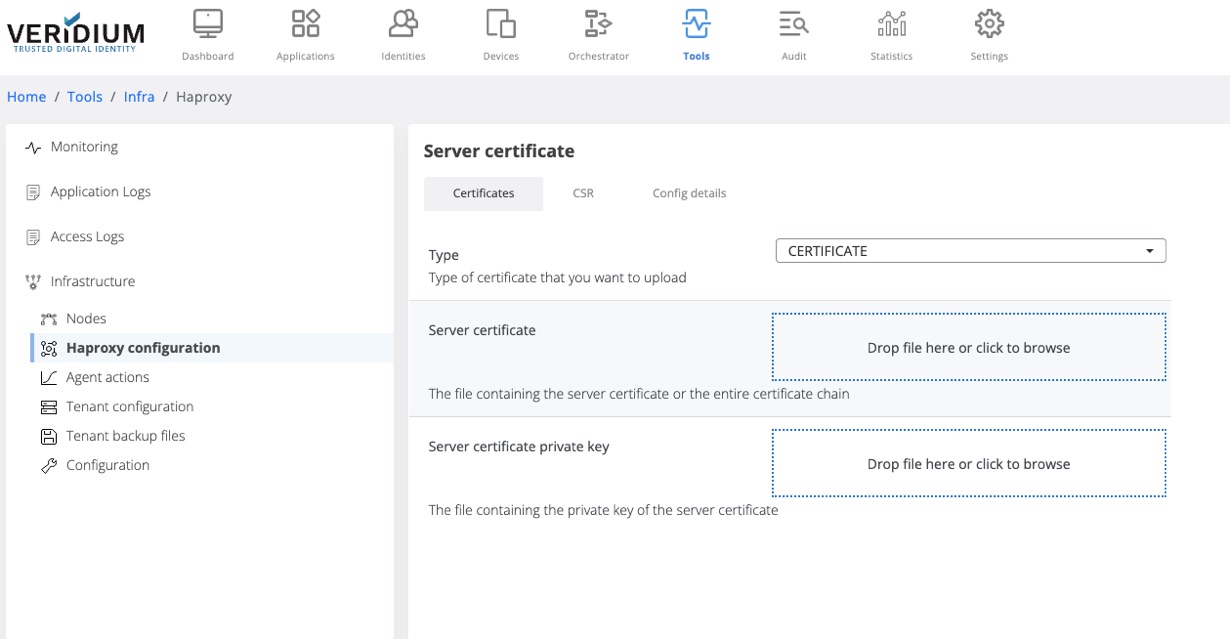
In Veridium manager, navigate to Tools → Haproxy configuration
-
In the Certificates tab select the type of the trusted client certificate that needs to be uploaded. The possible options:
-
PKCS12 - upload a certificate chain that contains also the private key and add the required password
-
CERTIFICATE - upload the certificate chain and private key as separate files
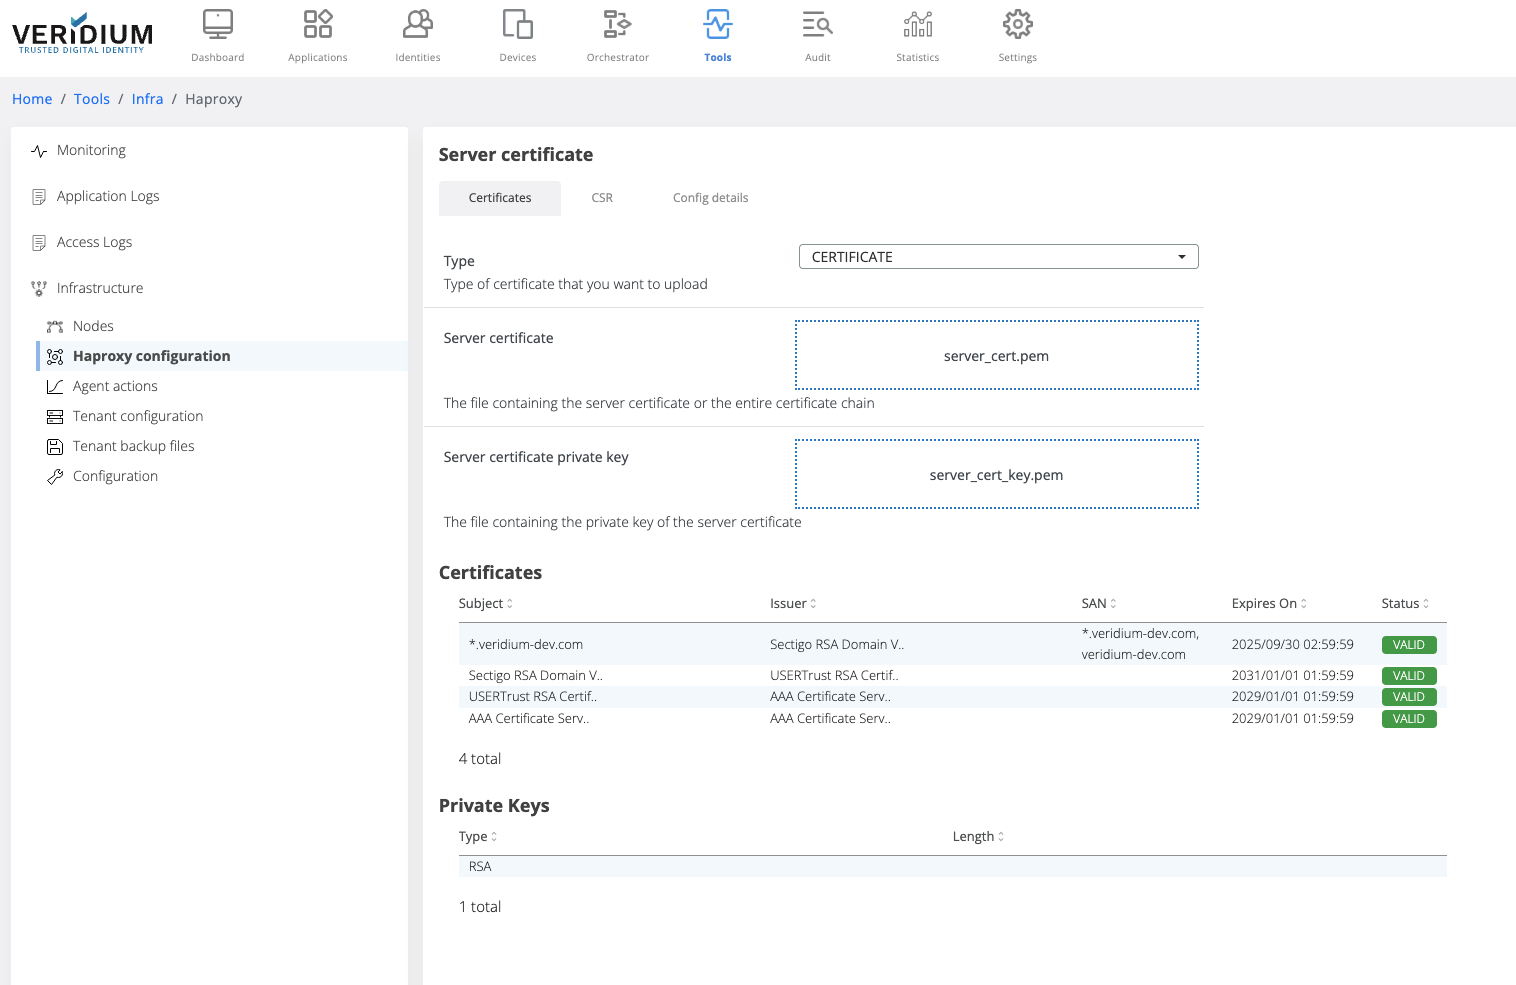
After uploading the certificate chain, the certificates part of the chain and the private key type are displayed below the upload boxes.
-
-
Click on Save button
-
When saving, the uploaded certificate chain is also added in the Veridium server Truststore
-
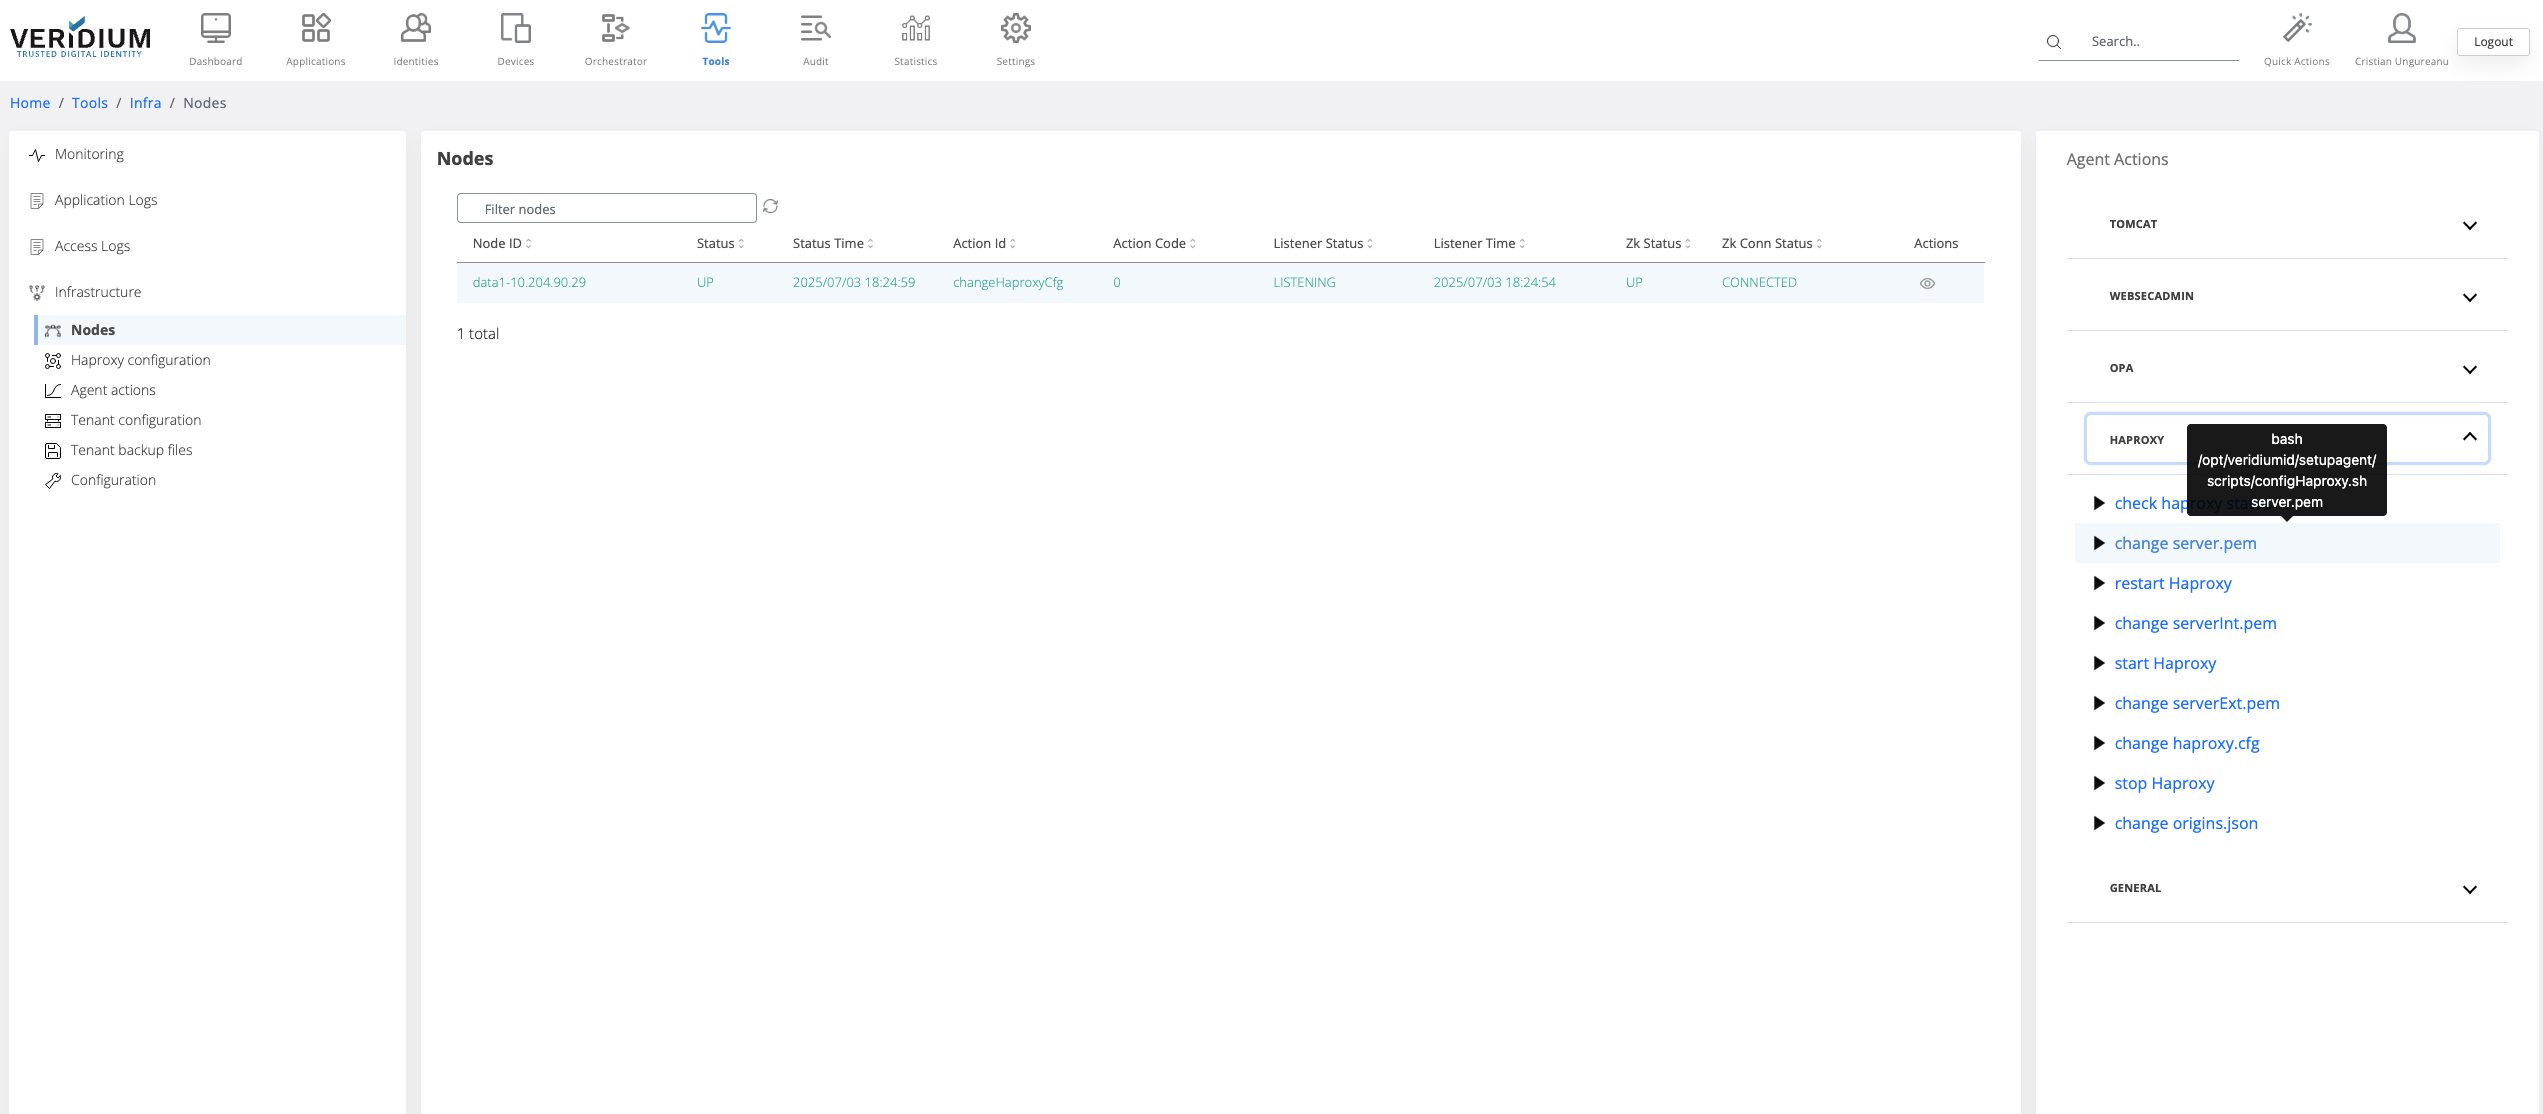
To apply the uploaded certificate on the server nodes a specific command must be ran on the webapp nodes. To do this, navigate to Settings → Nodes
-
On the right hand side panel expand the Haproxy category
-
Click on the “change server.pem” command
-
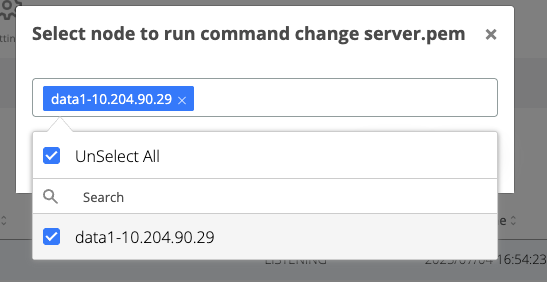
A pop-up will be displayed. Select from the drop-down field the all webapp nodes and click on Run
-
After the command is ran, the result status will be displayed for each node in the Nodes section.
-
If the command ran successfully on a node then the corresponding line in the nodes list will turn green
-
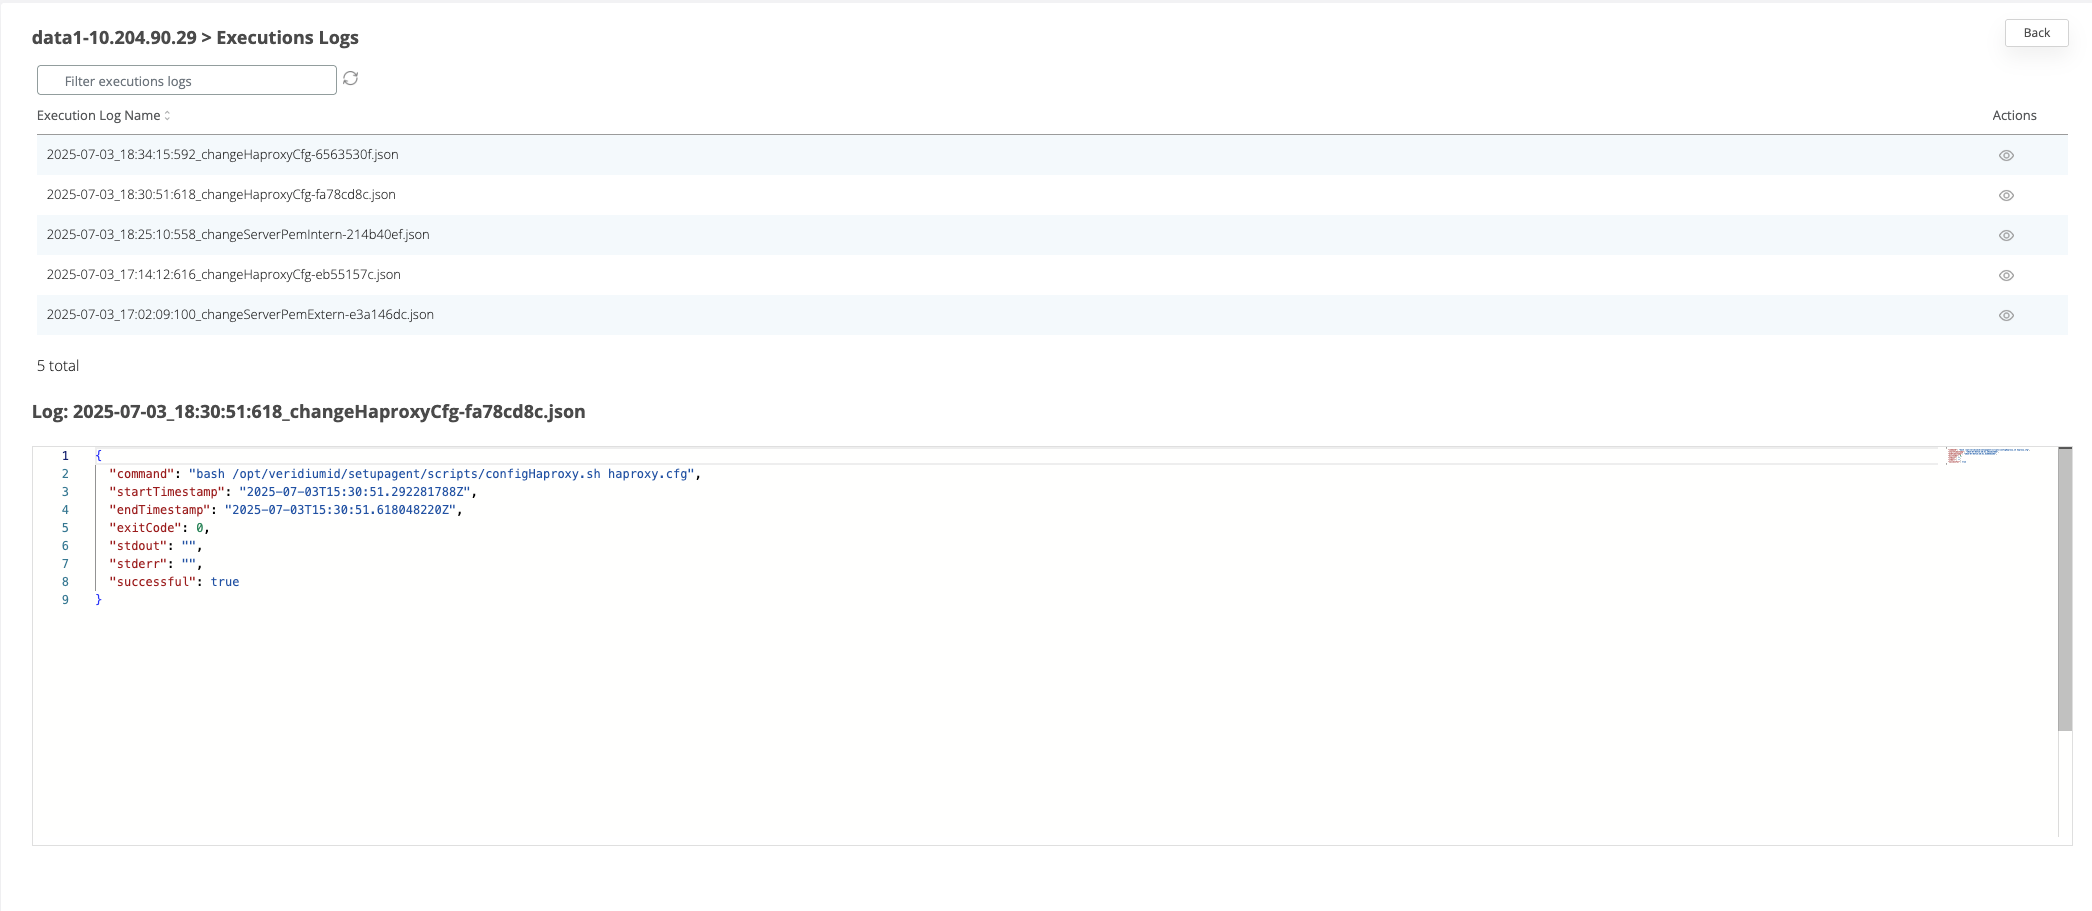
If the command failed on a node, then the corresponding line will turn red. To check the logs of the command execution on one node, click on the View actions on the corresponding line. Each execution log can be opened and see the status.
2. Using 2 client certificates for Veridium (internal and external)
Applies when:
-
Veridium is the first layer of SSL termination and there are used different internal and external FQDN
To change it the VeridiumID server will require two certificates containing the certificate and full-chain of it (one for the internal domain and another for the external).
The certificates can be in PKCS12, P7B, PEM format.
Before adding the certificates, the haproxy configuration template must be changed from the templates section to accommodate the serverExt.pem and serverInt.pem client certificates. By default, the platforms uses the server.pem client certificate for the use case when the SSL termination is done on another layer.
Changing the Haproxy configuration
-
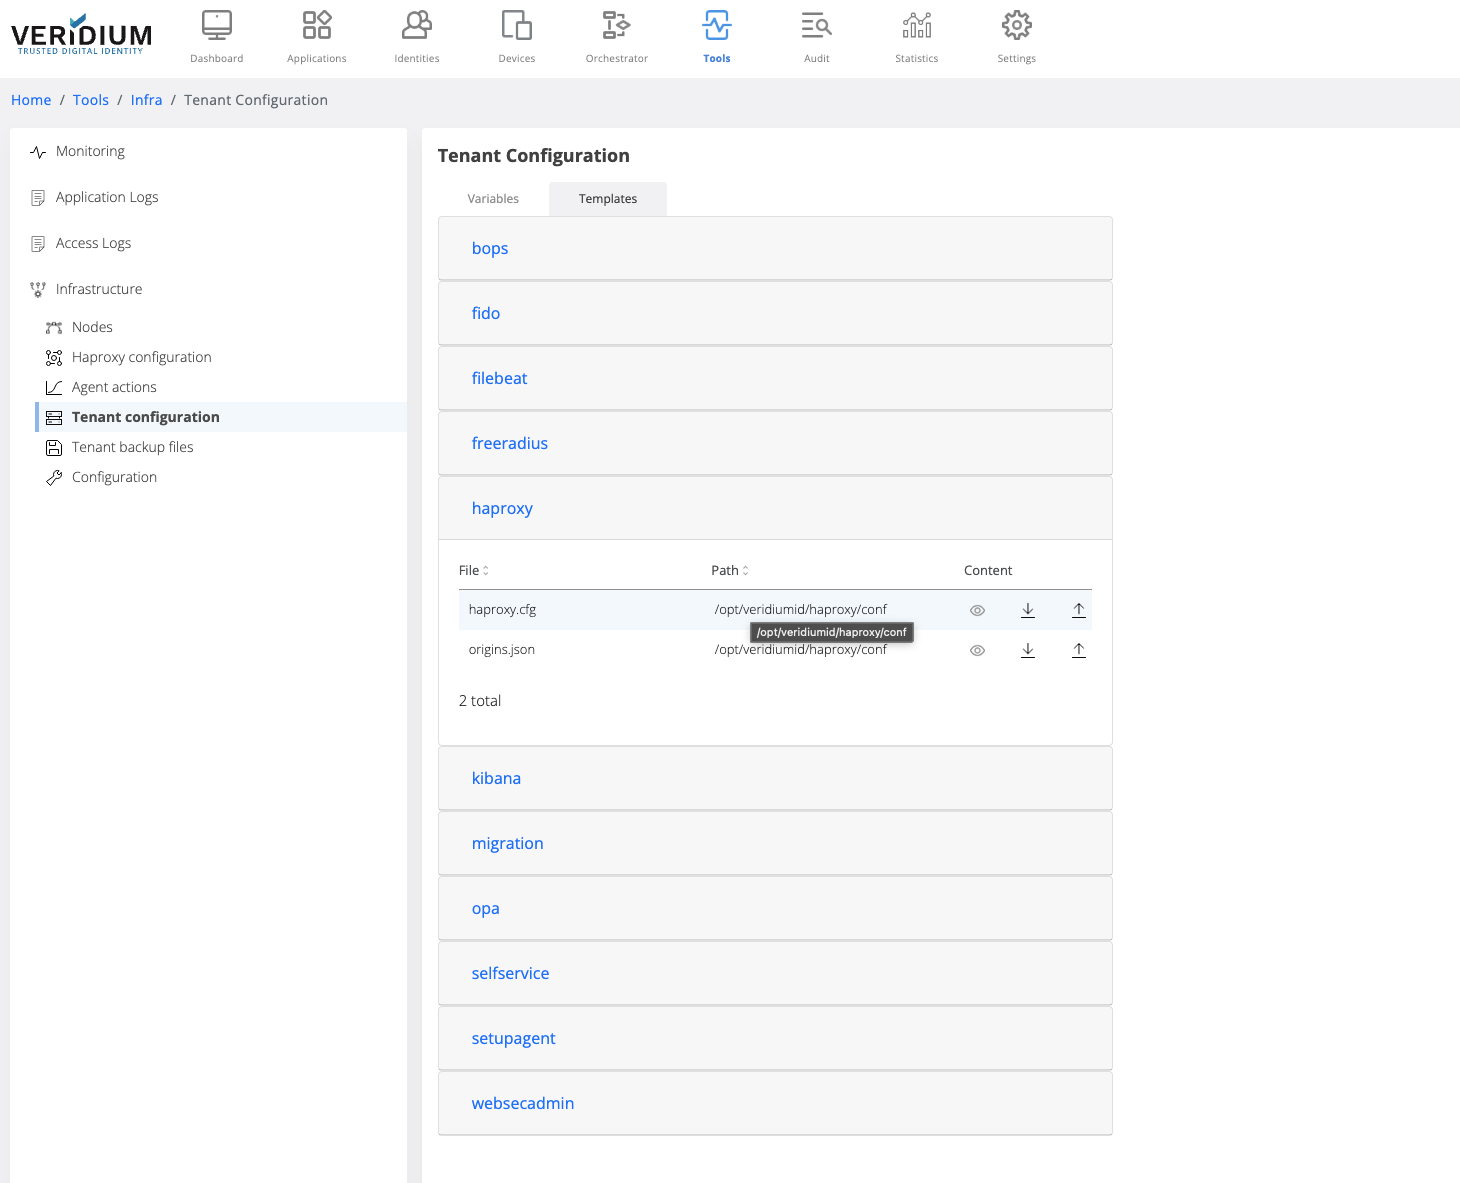
In Veridium manager go to Tools → Tenant configuration
-
In the templates tab click on “haproxy”
-
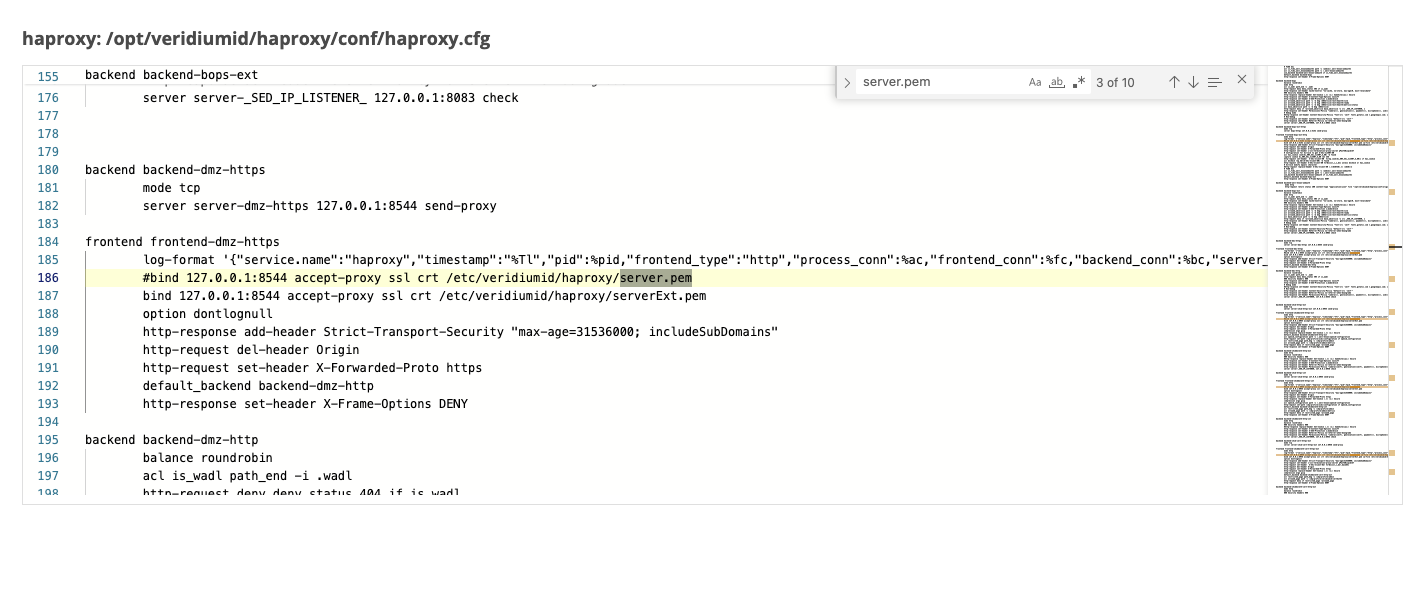
There are 2 files that will be displayed. Click on the View icon for haproxy.cfg file to see the content on the right-hand side
-
in the content box, search for the string “server.pem”. For each occurrence found, comment the line (by adding # in front of it) where “server.pem” was found and uncomment the commented line below which sets the serverInt or serverExt certificates, as in the example below. There should be 10 occurrences where this change needs to be made.
-
Save the configuration
-
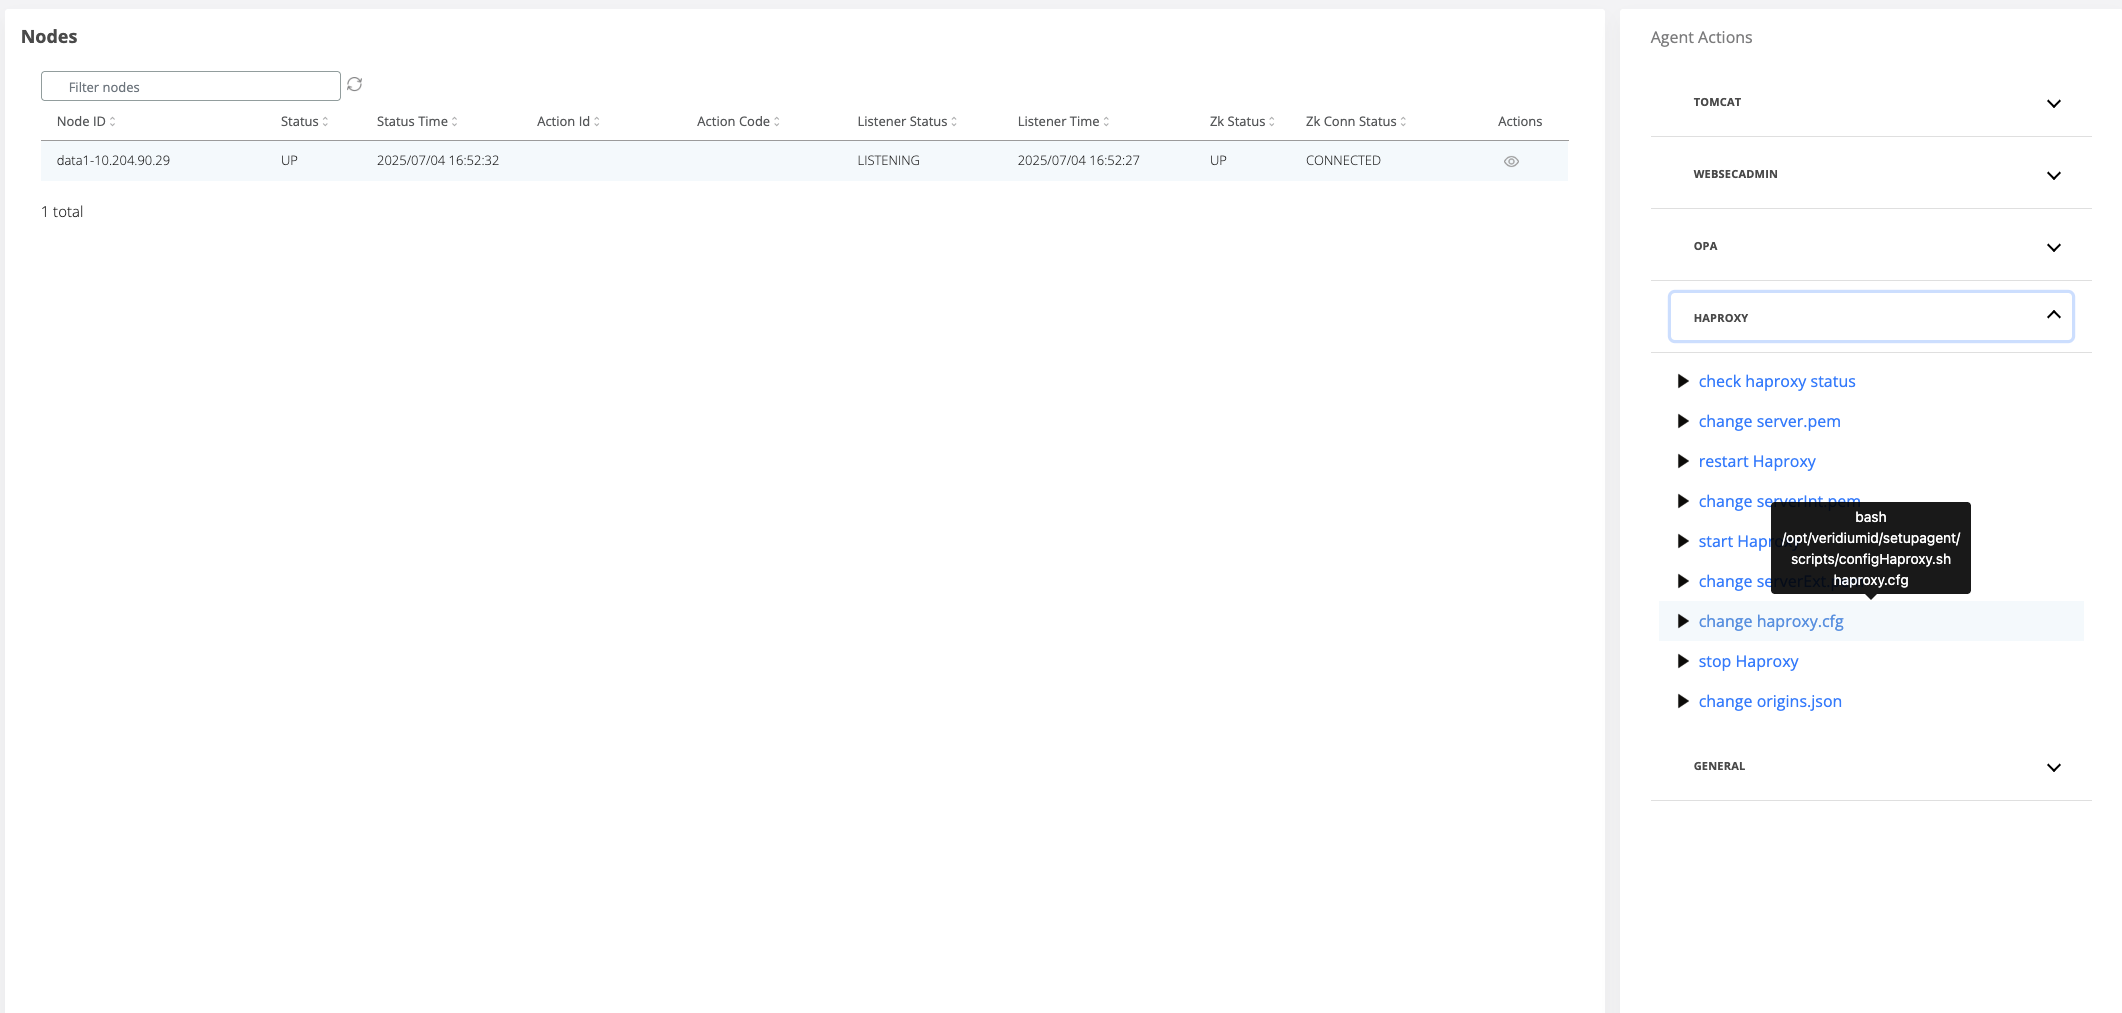
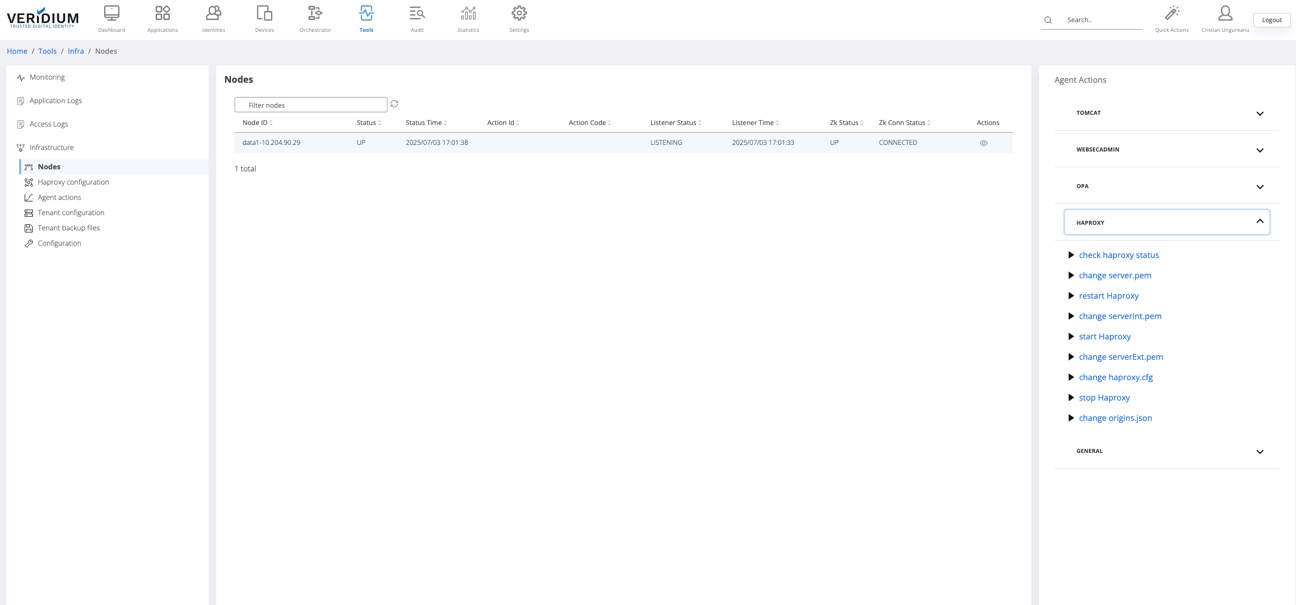
Go to Tools-> Nodes
-
On the right hand side panel, expand the Haproxy category and click on “change Haproxy.cfg” command.
-
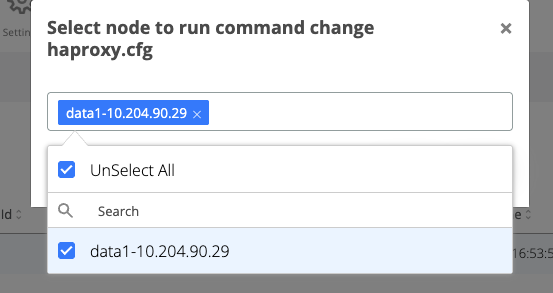
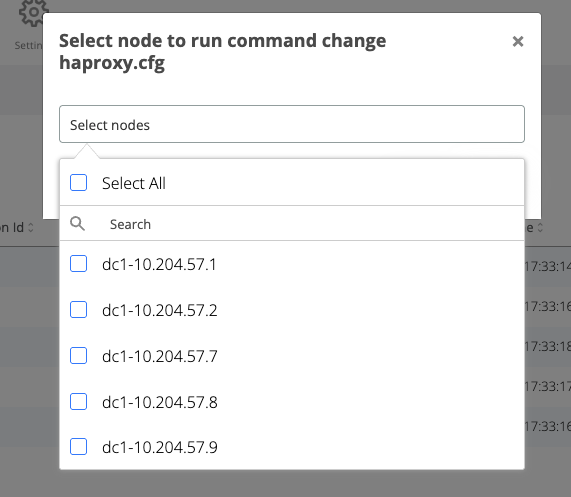
A pop-up will open where the webapp nodes must be selected for the template change to be applied.
-
Click on the Run button
Change serverExt.pem
-
In Veridium manager, navigate to Tools → Haproxy configuration
-
In the Certificates tab select the type of the trusted client certificate that needs to be uploaded for external traffic. The possible options:
-
PKCS12 - upload a certificate chain that contains also the private key and add the required password
-
CERTIFICATE - upload the certificate chain and private key as separate files
After uploading the certificate chain, the certificates part of the chain and the private key type are displayed below the upload boxes.
-
-
Click on Save button
-
When saving, the uploaded certificate chain is also added in the Veridium server Truststore
-
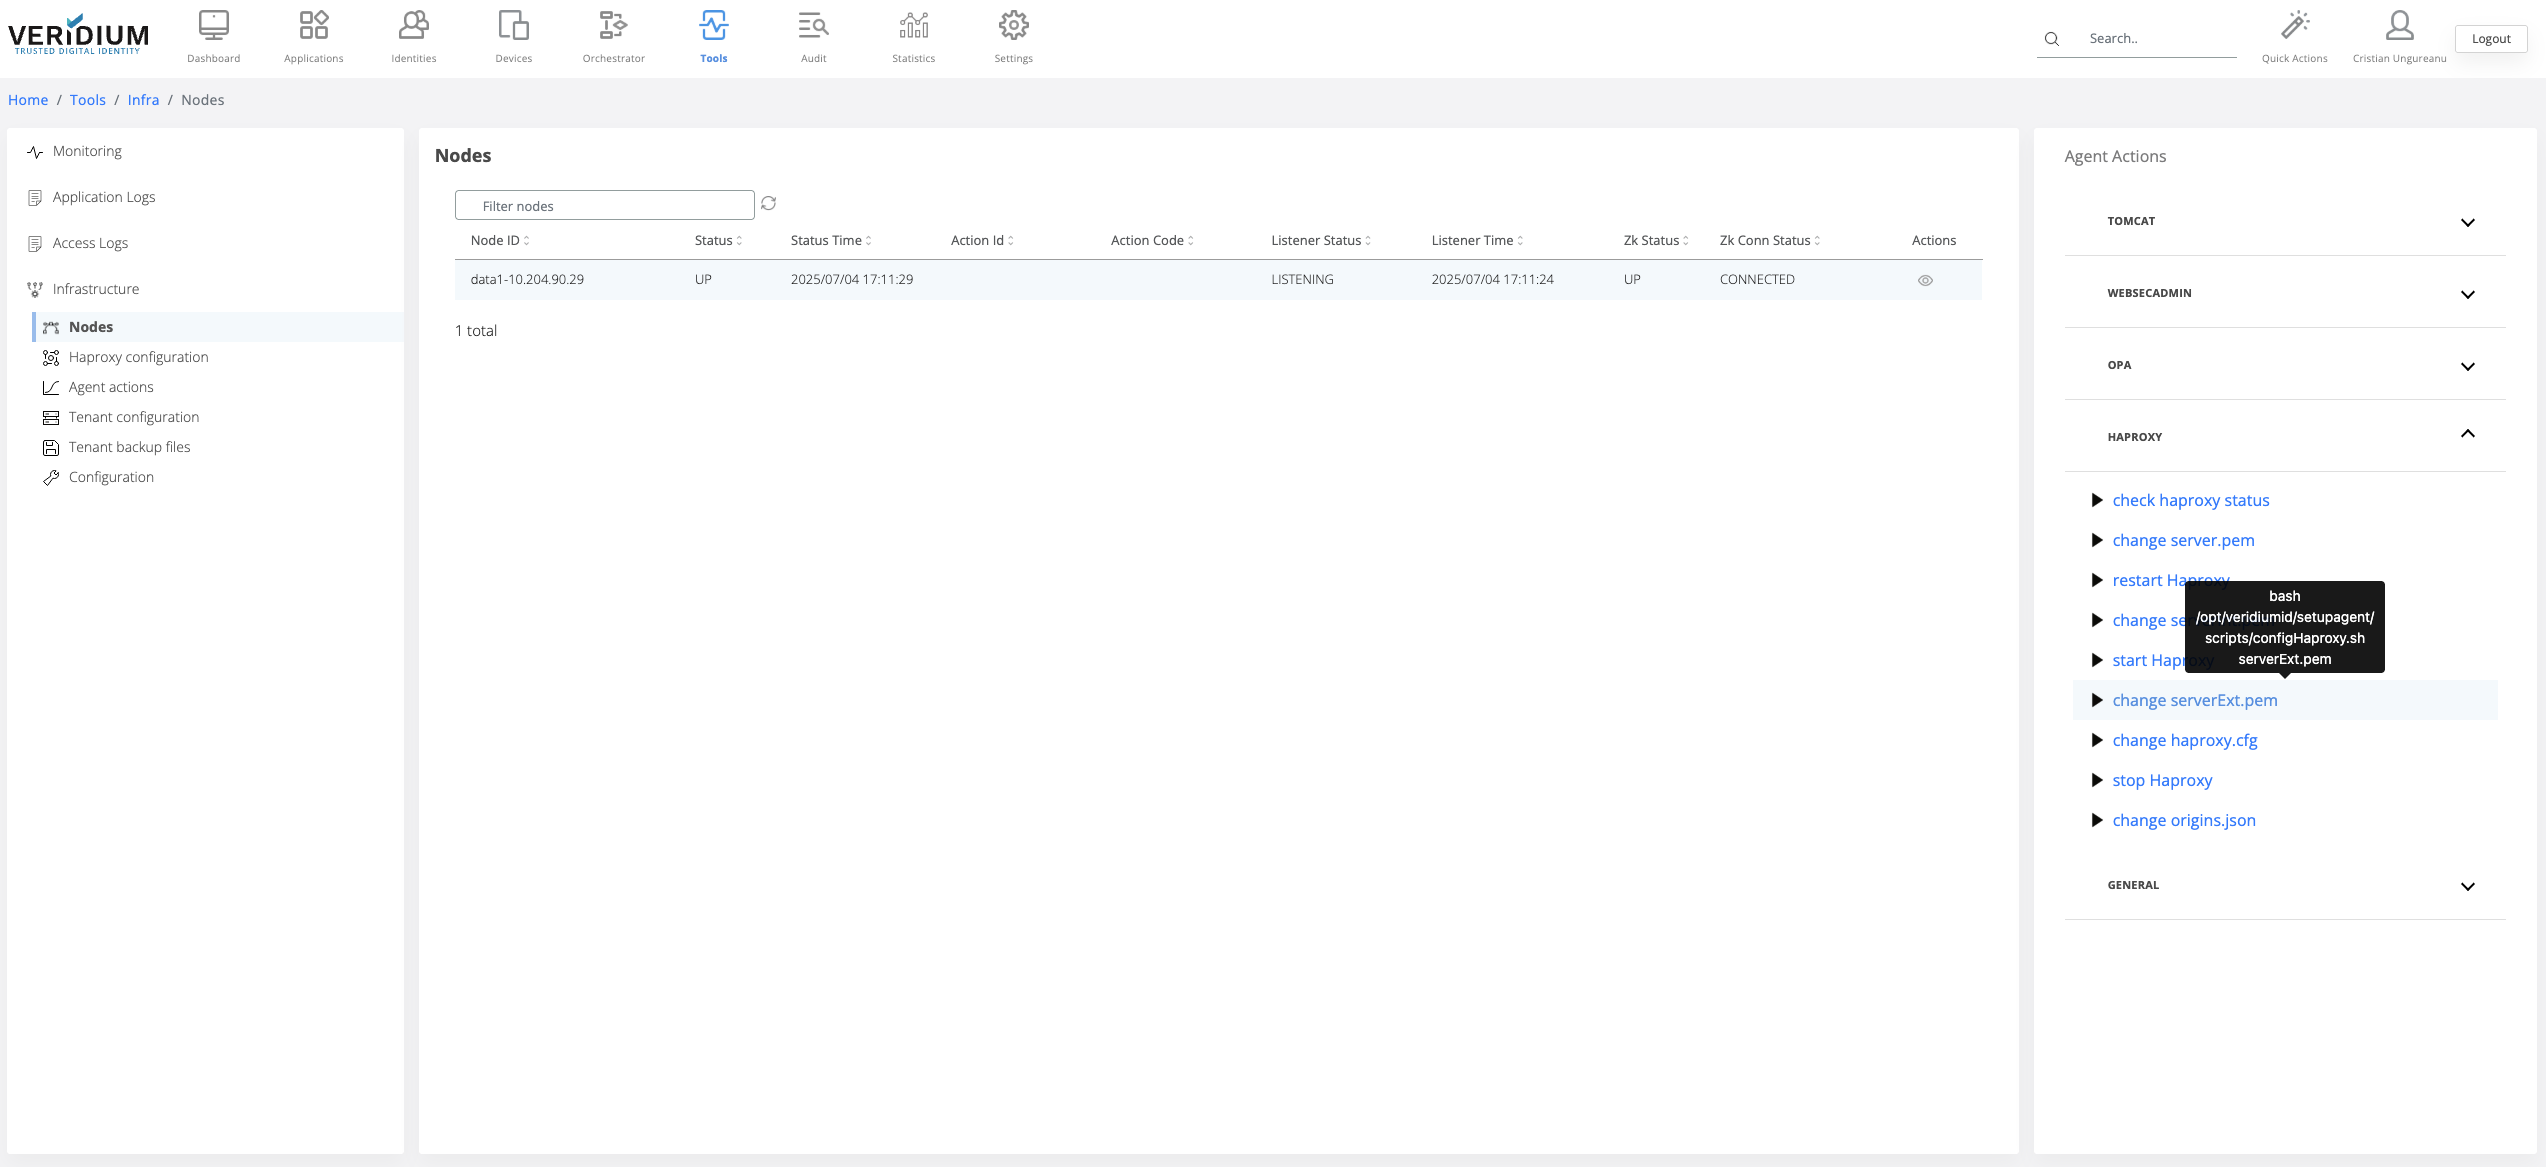
To apply the uploaded certificate on the server nodes a specific command must be ran on the webapp nodes. To do this, navigate to Settings → Nodes
-
On the right hand side panel expand the Haproxy category
-
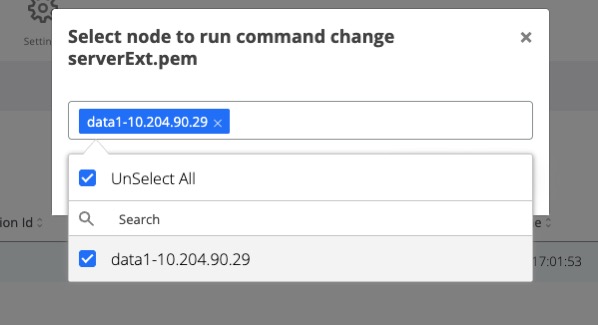
Click on the “change serverExt.pem” command
-
A pop-up will be displayed. Select from the drop-down field the all webapp nodes and click on Run
-
After the command is ran, the result status will be displayed for each node in the Nodes section.
-
If the command ran successfully on a node then the corresponding line in the nodes list will turn green
-
If the command failed on a node, then the corresponding line will turn red. To check the logs of the command execution on one node, click on the View actions on the corresponding line. Each execution log can be opened and see the status.
Generate and change serverInt.pem
To be able to add a client certificate for the internal traffic, a valid certificate must be generated from the internal certificate authority service.
Generate CSR
-
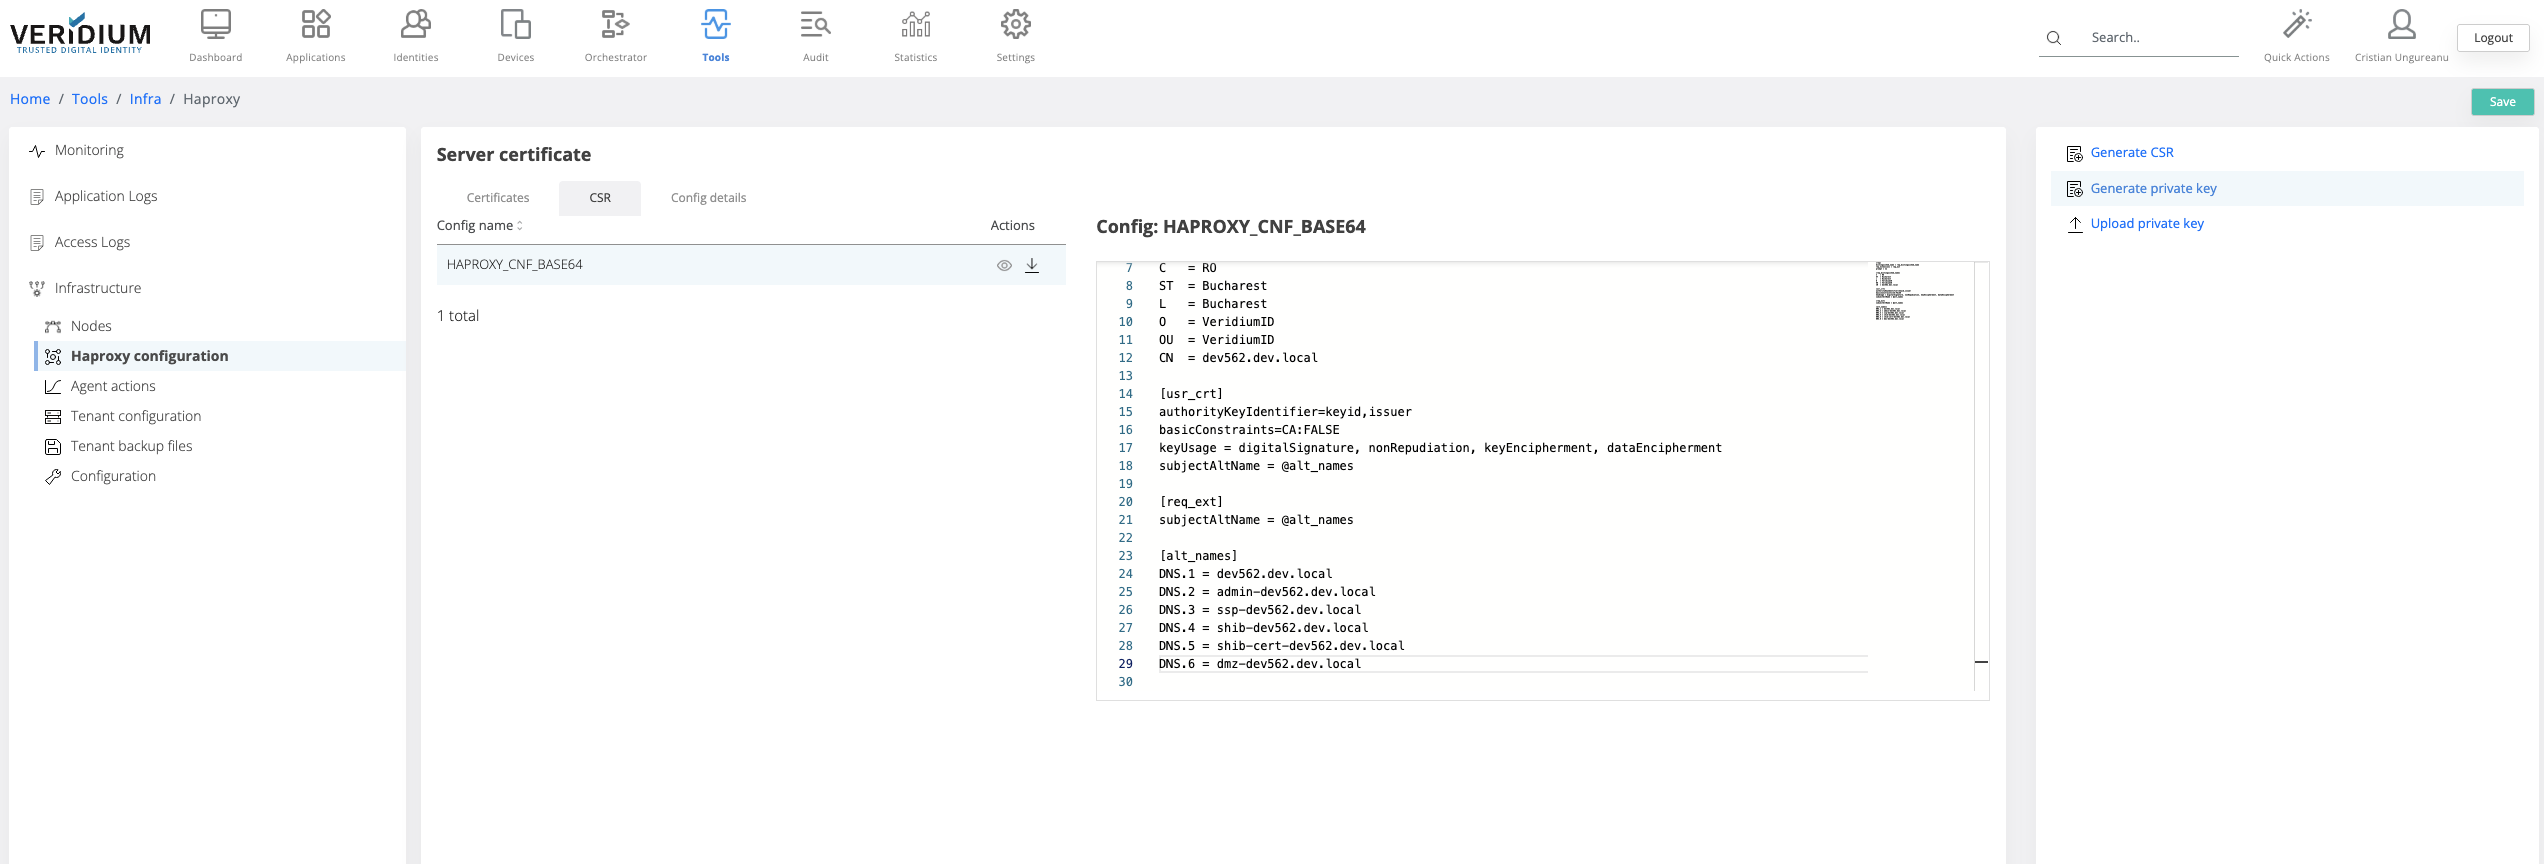
In Veridium manager go to Tools → Haproxy configuration → CSR tab
-
Click on the view icon for the HAPROXY_CNF_BASE64
-
Add the necessary details for the CSR
-
Click on Save
-
Click on Generate private key (this step is required if the client doesn’t already have a private key to be used). If the client already has a private key, it must be uploaded in veridium manager using the “Upload private key” button
-
Click on generate CSR and save the file
-
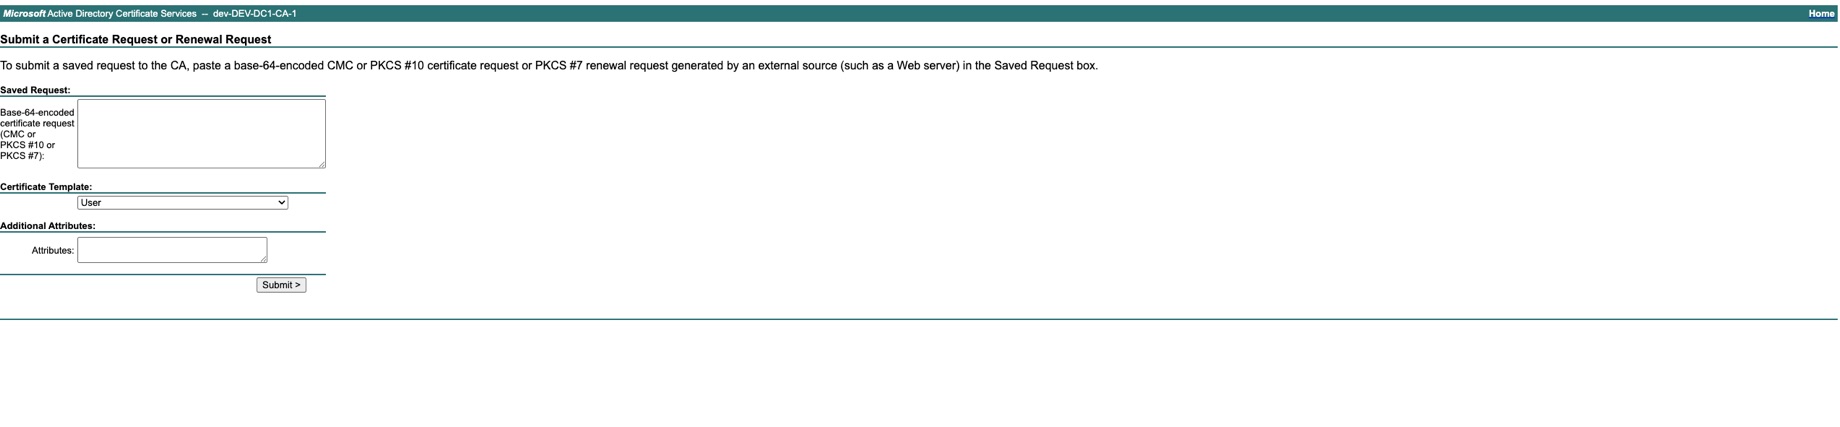
Access your internal Certificate authority service to generate the internal certificate (Below example is for Microsoft Active Directory Certificate Services)

-
Select “Get a certificate”

-
Select “advanced certificate request”
-
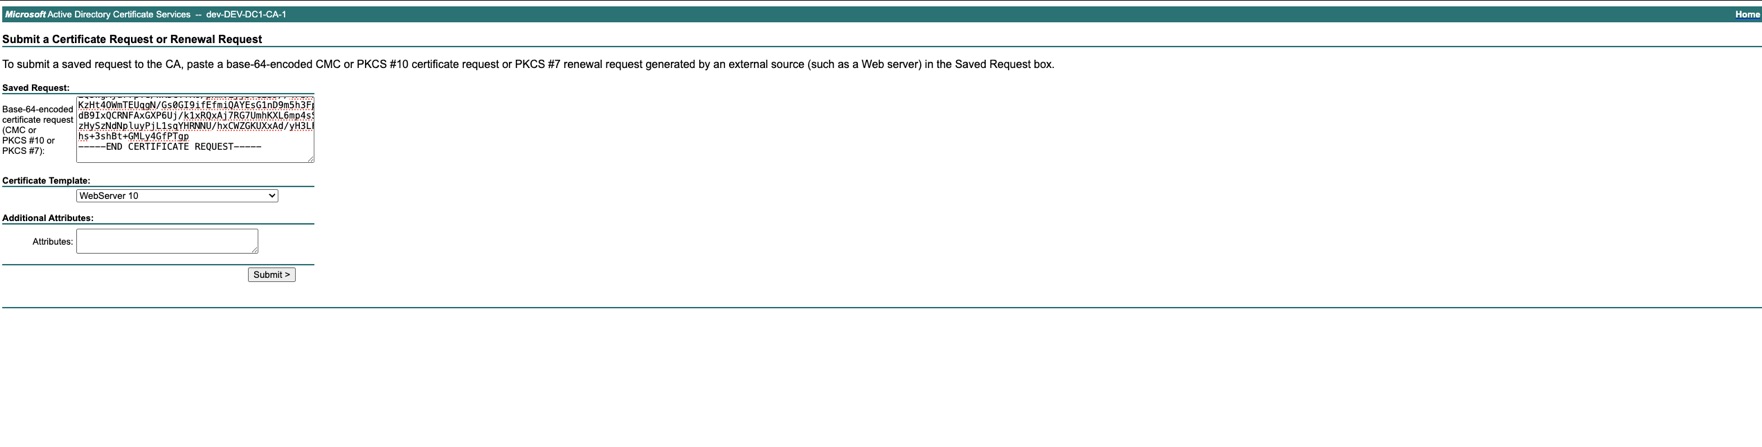
Add the content of the CSR saved at step 6 and select the Certificate Template = Web Server 10 and Submit
-
Download the certificate chain Base64 encoded

-
Get the private key generated at step 5 ( or the private key already owned) from Tools → Haproxy configuration → Config details tab -> Download HAPROXY_PUBLIC_CERT_KEY_PEM_BASE64
-
Go to Tools → Haproxy configuration → Certificates Tab and select Type=CERTIFICATE
-
Upload the generated certificate chain and the private key and click save
-
To apply the uploaded certificate in the serverInt.pem file on the server, Go to Tools → Nodes
-
Expand the Haproxy category and click on “change serverInt.pem” command
-
In the displayed pop-up select the webapp nodes and click on Run
-
The status of the execution will be displayed for each node.
Change configuration for haproxy
When specific configuration in the haproxy.cfg file are necessary, perform the following steps:
-
In Admin manager go to Tools → Tenant Configuration → Templates tab
-
Select haproxy and click on the view icon on the haproxy.cfg file
-
Make the necessary changes
-
Click on Save
-
Apply the changes on the webapp nodes by going to Tools → Nodes
-
Expand the Haproxy category on the right hand side panel and click on “change haproxy.cfg” command
-
In the displayed pop-up select the webapp nodes and click on Run
Revert changes in variables configurations
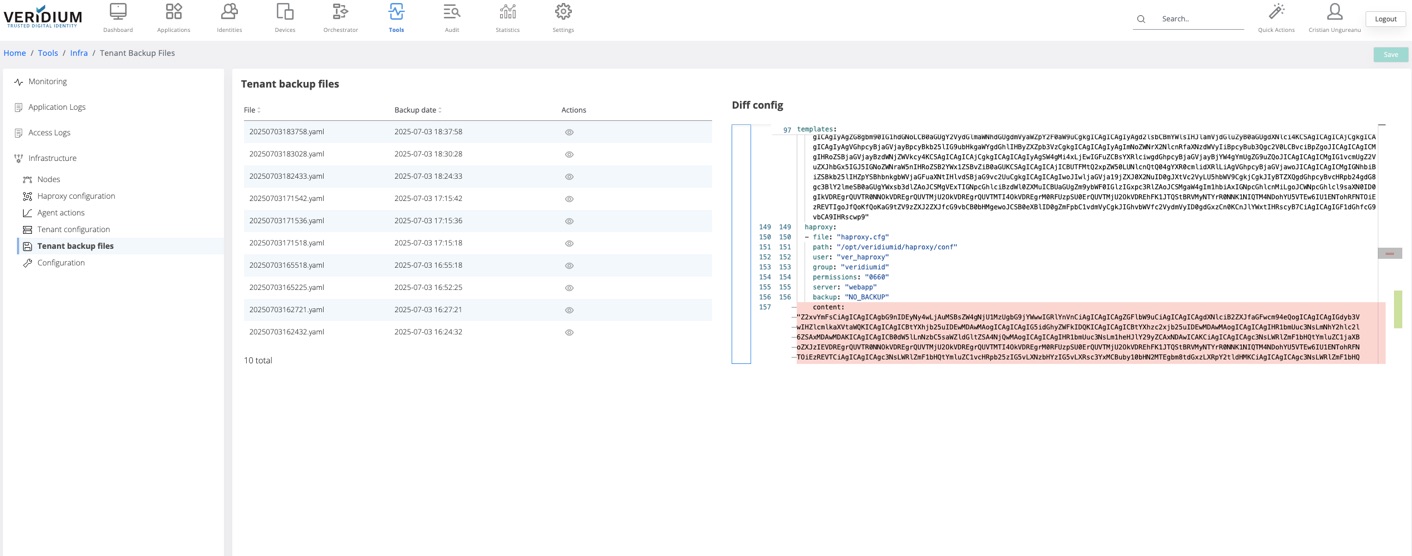
After each change on the configuration files a backup with the previous version of the variable values is logged in Tools → Tenant backup files. The changes for the variables are marked in the view window and can be reverted in the variable files.
To revert changes from the backup variable values perform the following steps:
-
Go to Tools → Tenant backup file
-
Identify the version where a change needs to be reverted from
-
Click on the view icon for the identified version
-
On the right window the version of the variables will be displayed
-
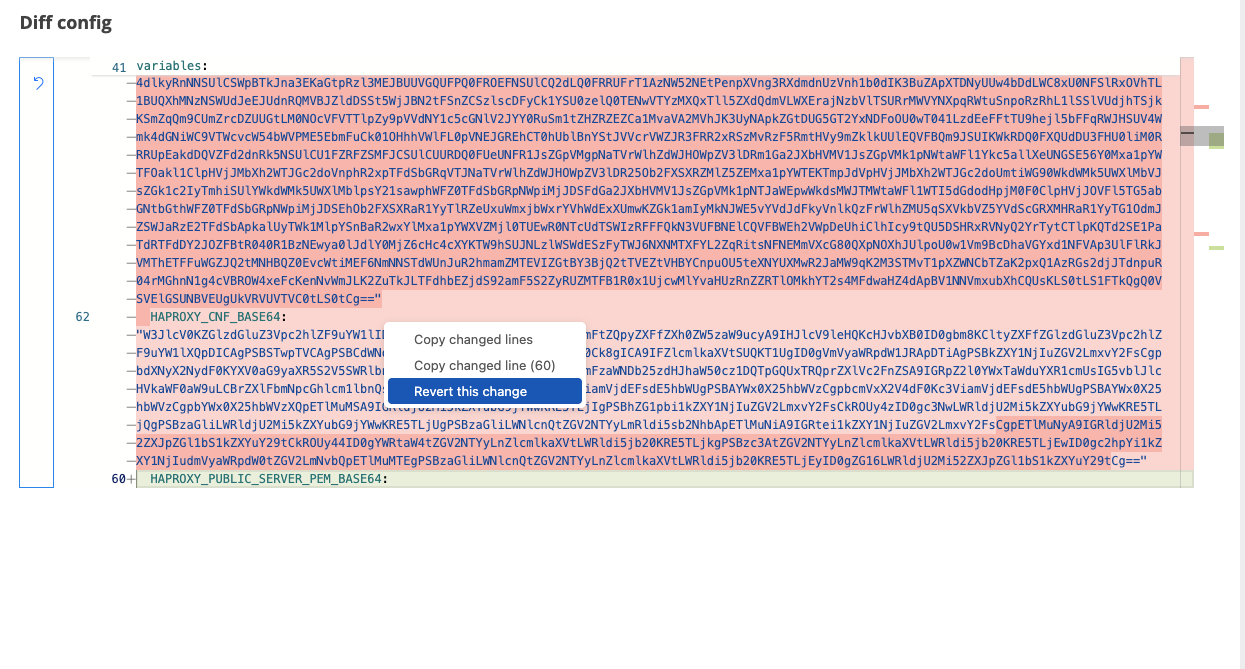
There are two types of highlights in the opened version
-
red - the old value of a variable that was changed
-
green - the current value of the variable
-
-
To revert an old version of a variable, right click on the red area and click on “Revert this change”
-
Click on Save
-
Navigate to Tools → Nodes and execute the command that will do the change for that variable. For example, if a certificate is reverted, execute the “change haproxy.cfg” command for the webapp nodes.
Change OPA certificate
To renew OPA certificate, perform the following steps:
-
In Admin manager go to Settings → Certificates → Service Credentials → Others tab

-
Click on Renew button for OPA
-
Optional - save the generated zip file
-
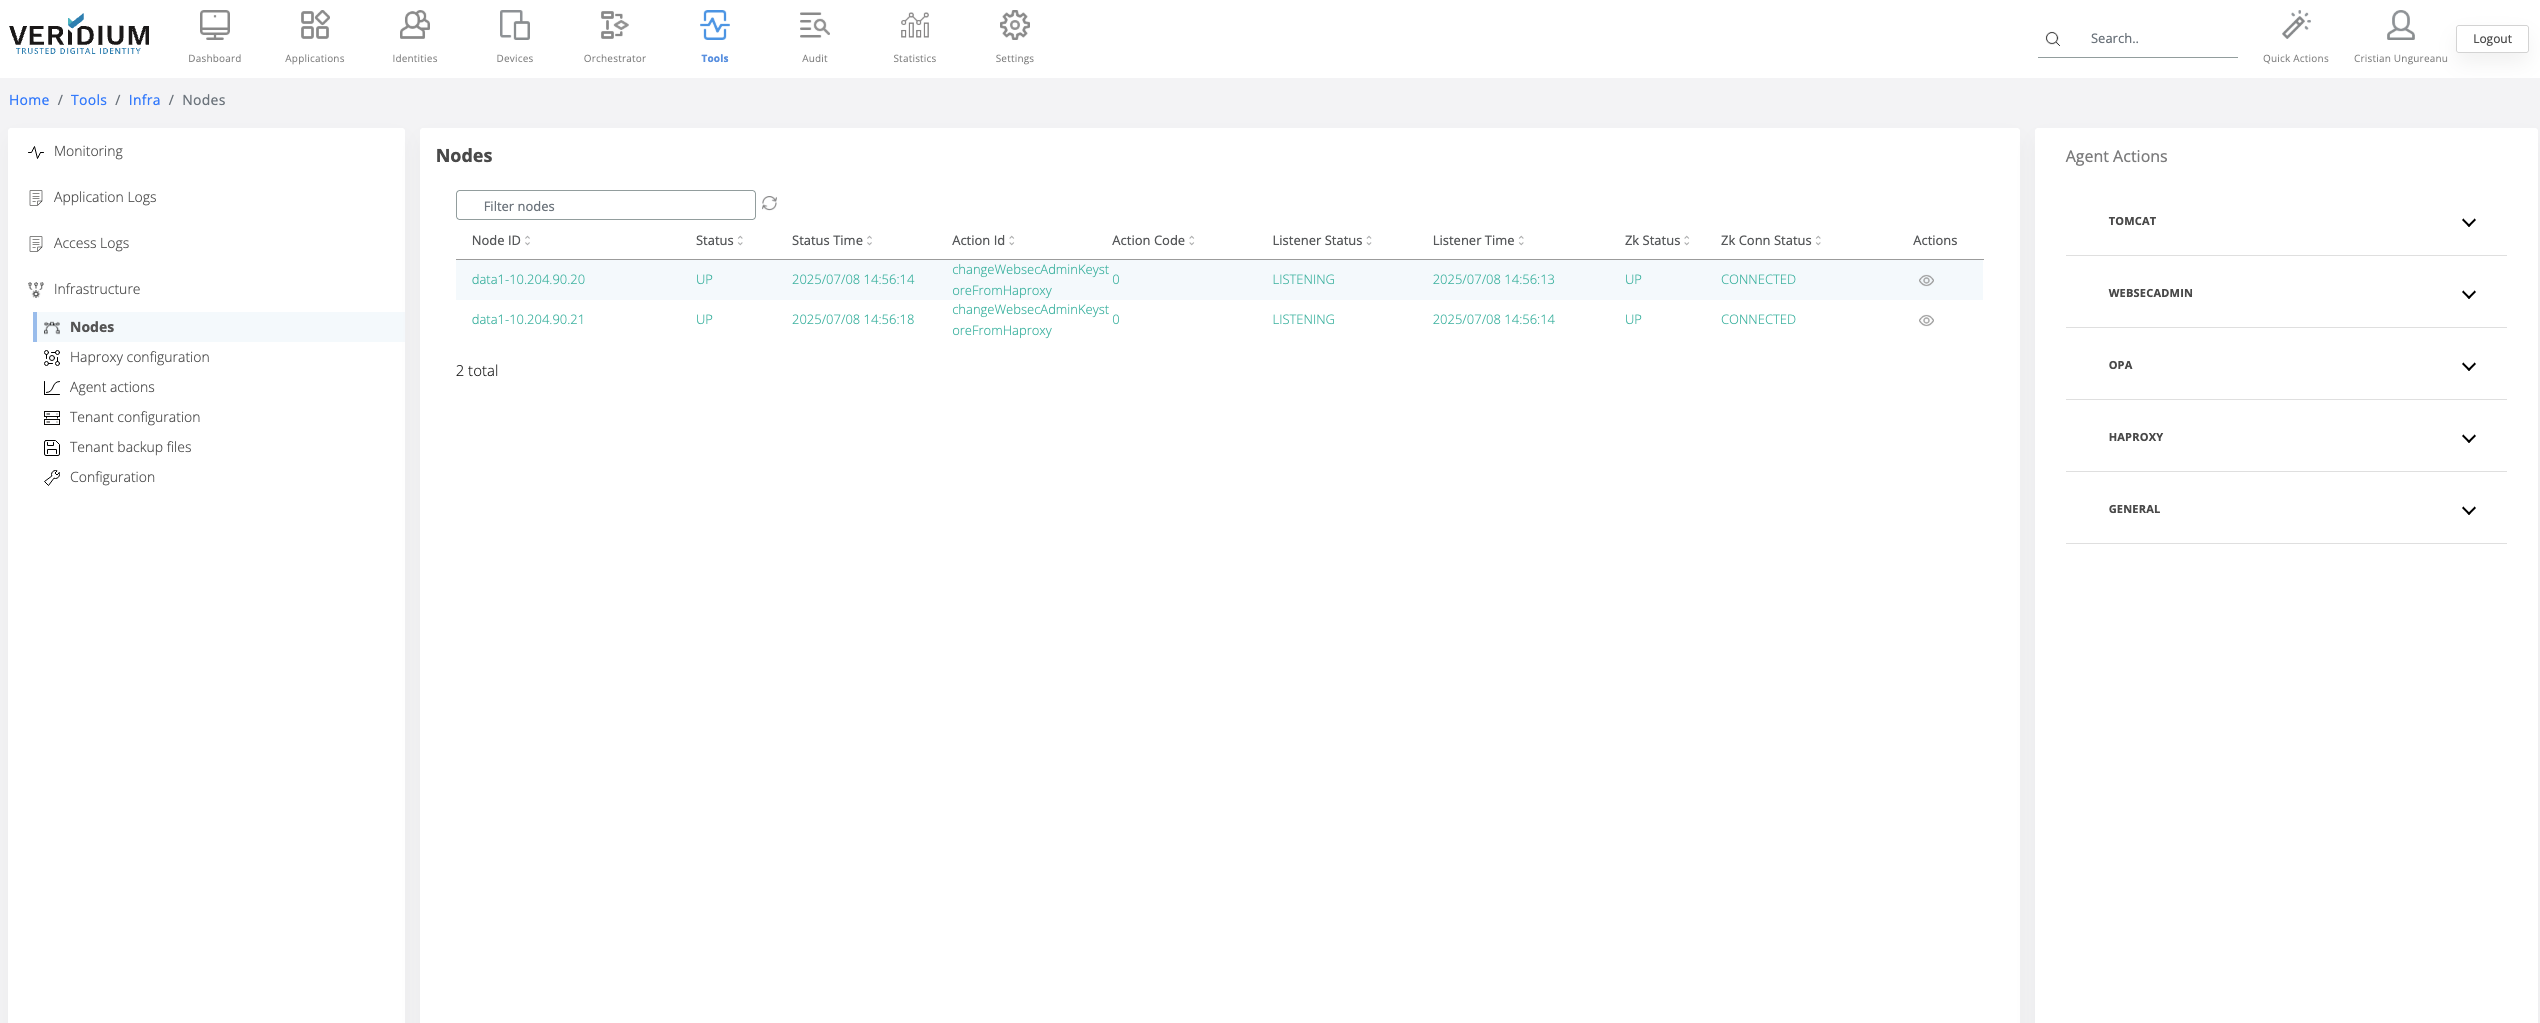
To apply the new certificate go to Tools → Infrastructure → Nodes
-
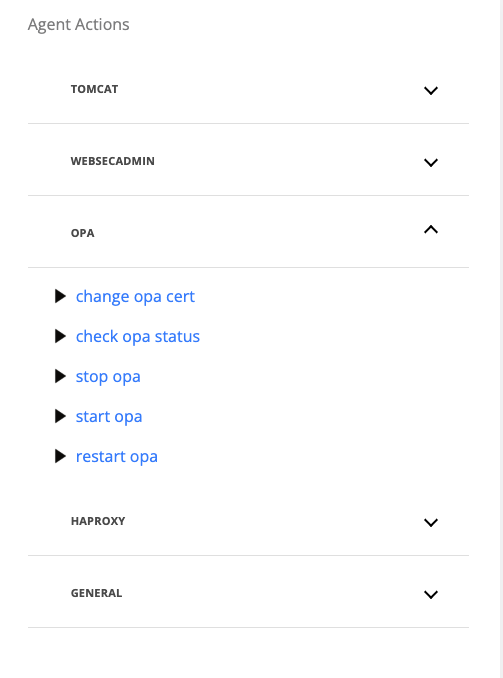
On the Agent Actions section on the right hand side expand the OPA category
-
Run the command “change opa cert”
-
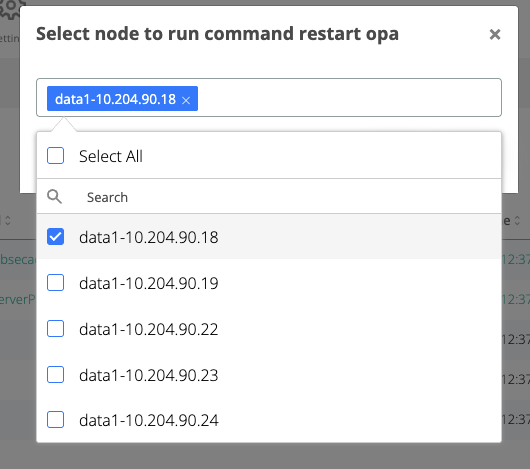
On the displayed pop-up, select the webapp nodes where the certificate will be changed
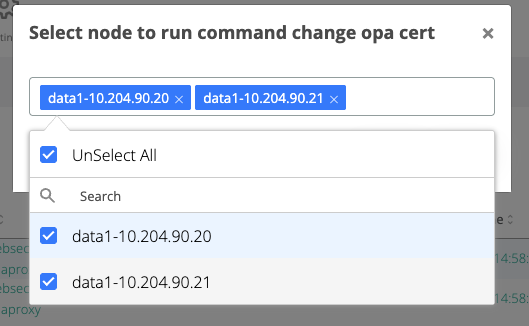
-
Click on Run button
-
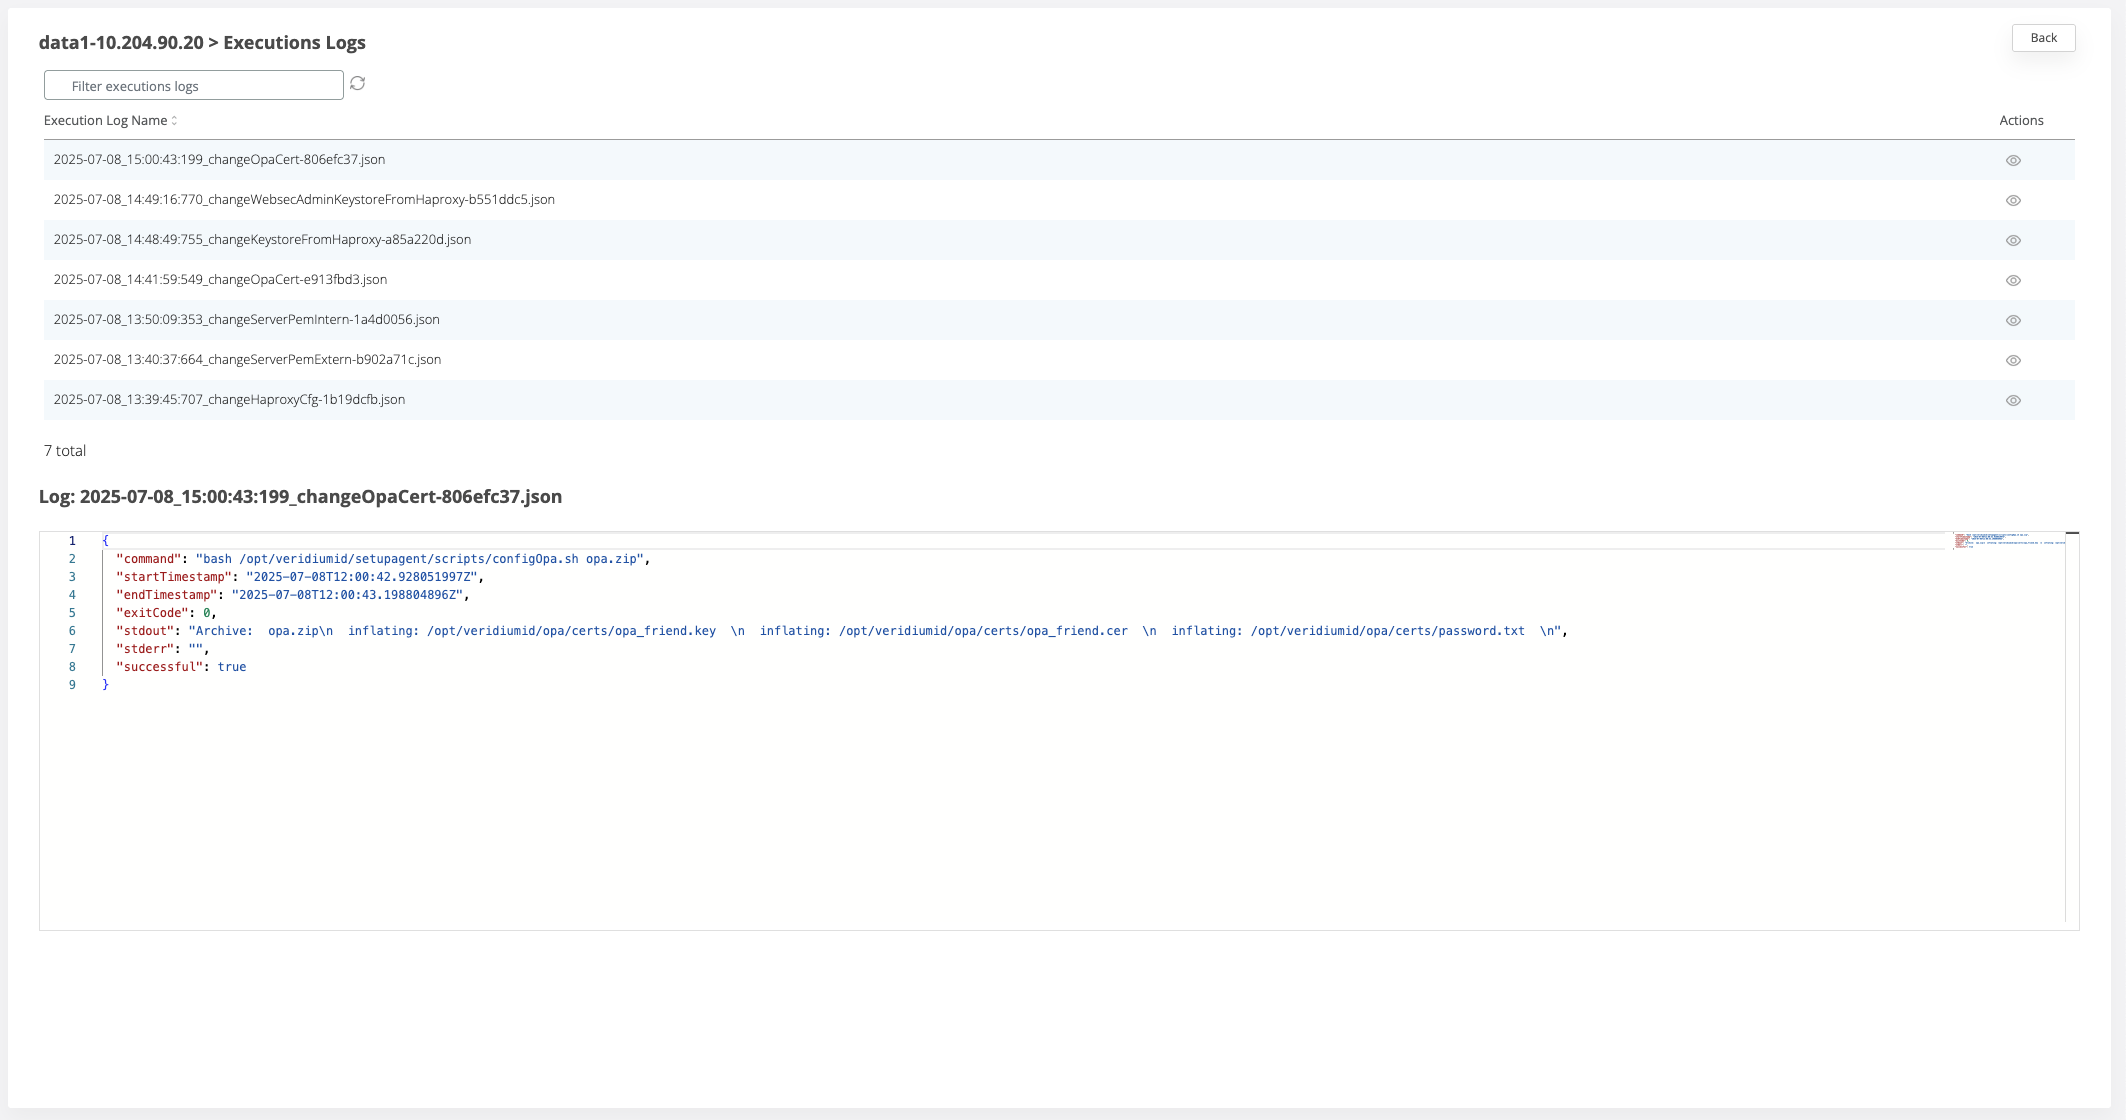
If the execution is successful, each webapp node that was selected above will turn green having the action Id “changeOpaCert”
-
If the execution is not successful, each webapp node where the command failed will turn red. To check the logs for the execution click on the View icon for a node and view the list of all executions .
-
To check one log entry, click on the view icon for the respective line
Upload application service certificate and apply it for services
To apply the uploaded client certificate to the applications' keystores perform the following steps:
For Tomcat:
This action will restart the Tomcat service for each node.
During this time, the Tomcat might encounter a service interruption and all the users connected to the restarted node will lose their session and will need to re-authenticate.
-
After setting the server.pem or serverInt.pem and serverExt.pem, go to Tools → Infrastructure → Nodes
-
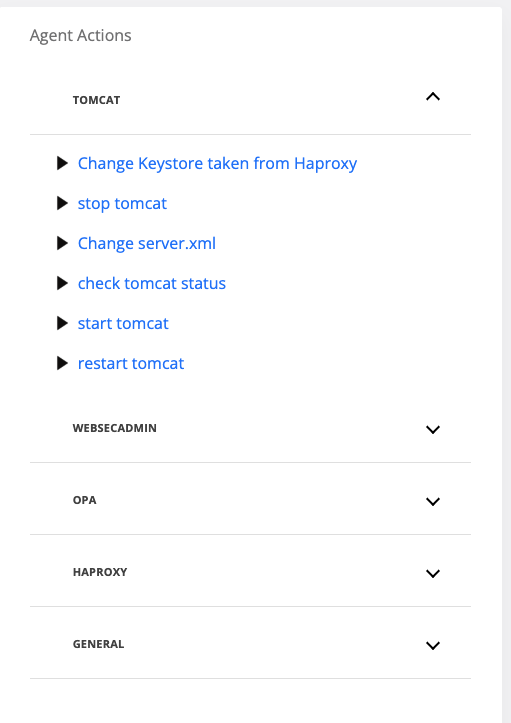
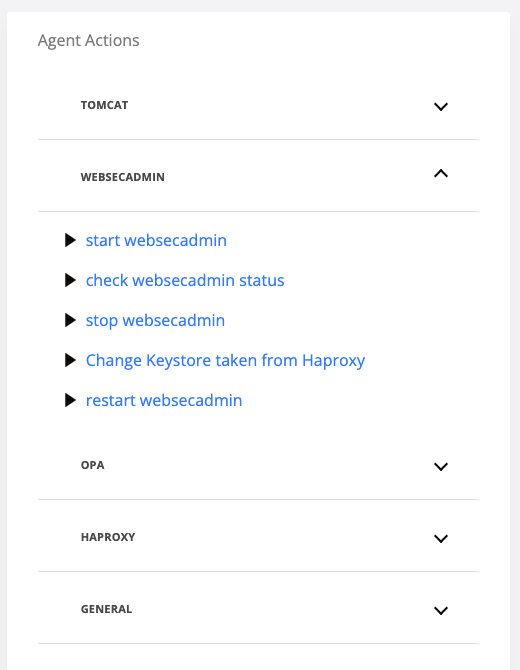
On the Agent Actions section on the right hand side expand the Tomcat category
-
Run the “Change Keystore taken from Haproxy” command
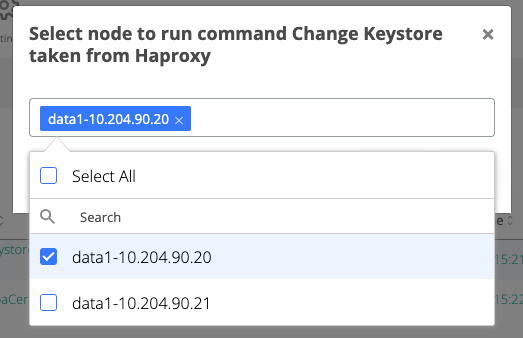
-
On the displayed pop-up, to avoid service interruption due to tomcat restart, select one webapp node and click Run
-
In the Nodes list, check the node where the command was executed and wait for the node line to turn green and the status to change to “changeKeystoreFromHaproxy”
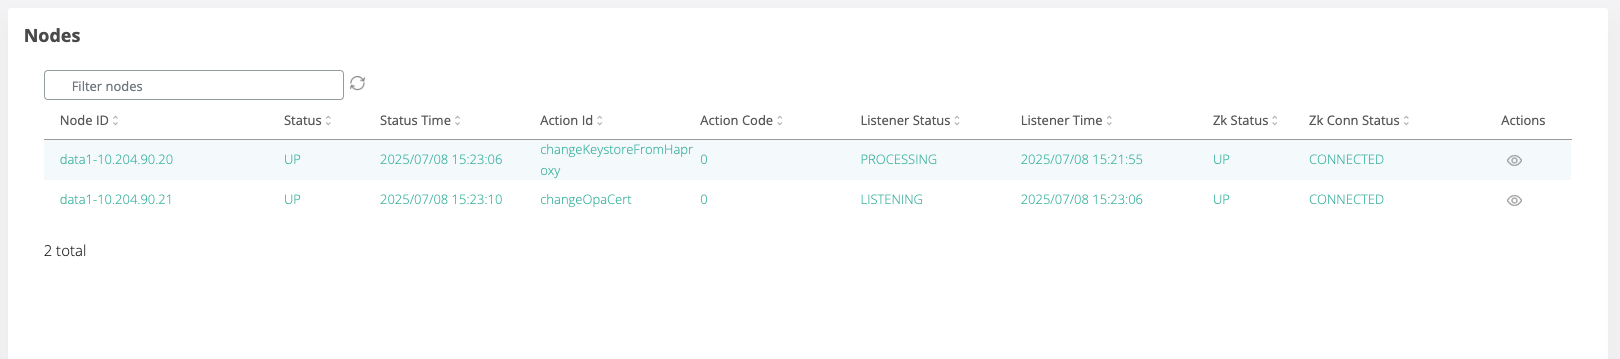
-
Repeat steps 3 to 5 for each remaining webapp node.
For Admin Manager
This action will restart the Websecadmin service for each node.
During this time, the Admin Manager might encounter a service interruption. Please wait for the operation to finish and refresh the browser.
-
After setting the server.pem or serverInt.pem and serverExt.pem, go to Tools → Infrastructure → Nodes
-
On the Agent Actions section on the right hand side expand the Webseadmin category
-
Run the “Change Keystore taken from Haproxy” command
-
On the displayed pop-up, select one webapp node and click Run
-
In the Nodes list, check the node where the command was executed and wait for the node line to turn green and the actionId to change to “changeWebsecAdminKeystoreFromHaproxy”
-
Repeat steps 3 to 5 for each remaining webapp node.
Troubleshooting
Check services status
To check the status of services perform the following steps:
-
In Admin manager go to Tools → Infrastructure → Nodes
-
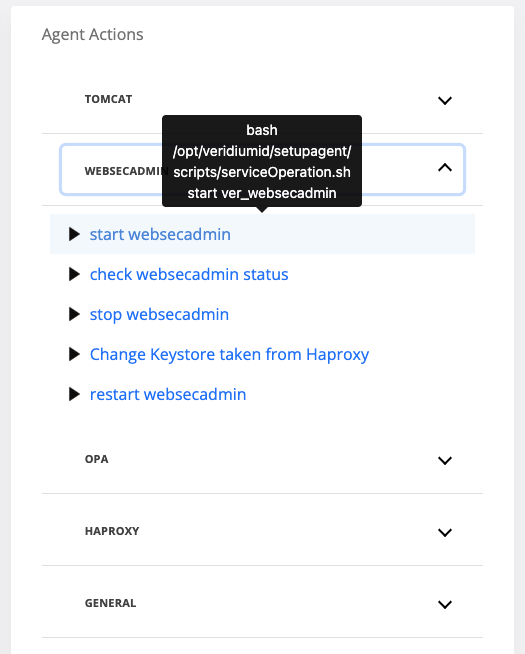
On the right hand side in the Agent Actions select the category of the service where the action is required
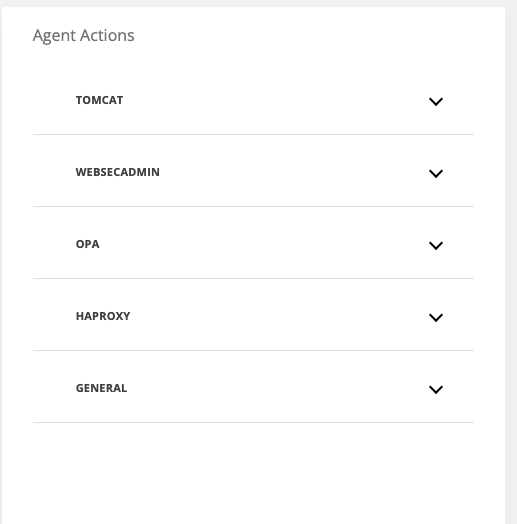
-
Click on “check <service-name> status”
-
On the displayed pop-up, select one webapp node and click Run

-
In the Nodes list, check the node where the command was executed and wait for the node line to turn green and the status to change to “check<serviceName>Status”
-
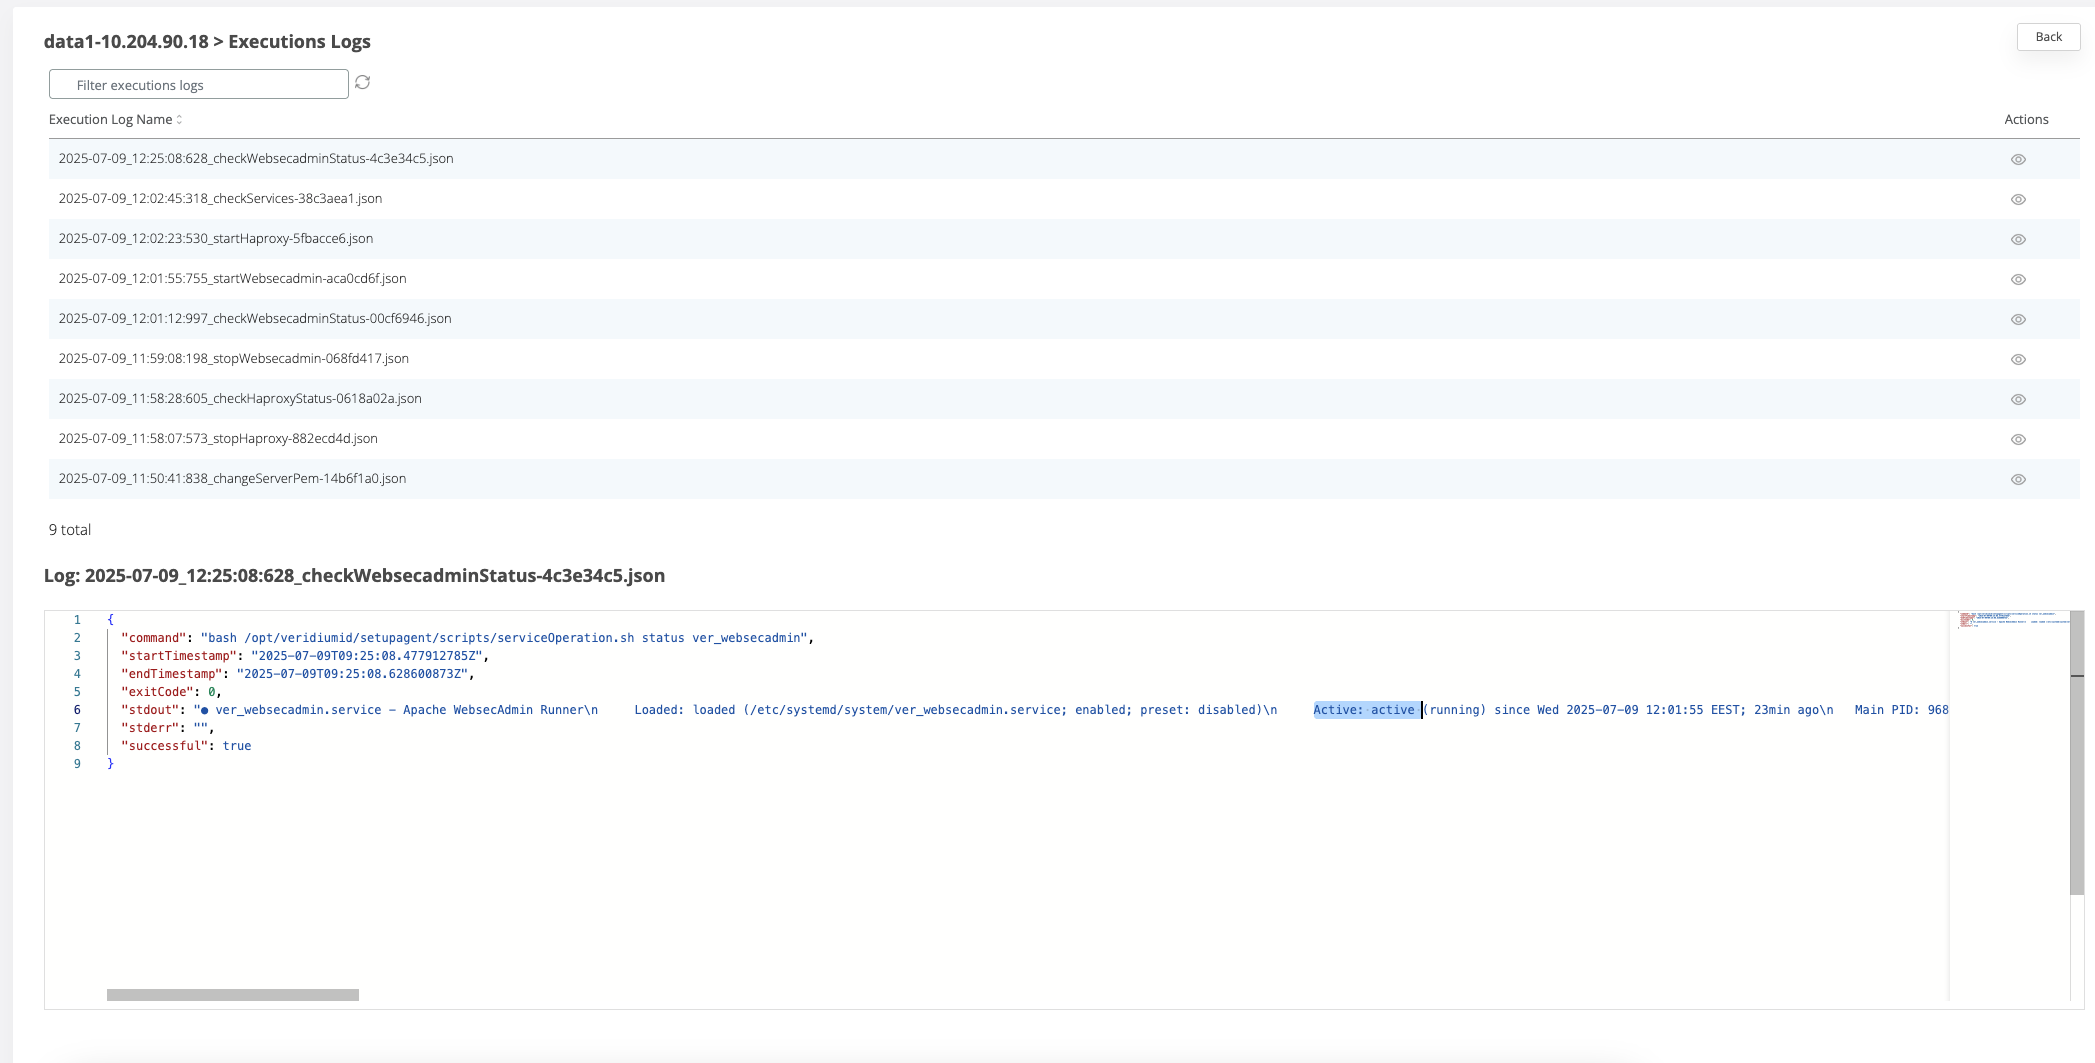
You can see the status of the service by clicking on the View icon for the node where the command was executed
-
In the Execution Logs list check the log for the “check<serviceName>Status” command by clicking the view icon
-
The status of the service will be displayed in the stdout attribute of the execution log.
Restart of services
Due to reasons caused by potential issues some services might need to be restarted, started or stopped manually. To do this perform the following steps:
-
In Admin manager go to Tools → Infrastructure → Nodes
-
On the right hand side in the Agent Actions select the category of the service where the action is required
Stopping the Websecadmin service on a node can interrupt the access of the admin user in case the current connection is made on the same node.
Stopping/restarting the Haproxy service on a node can interrupt the access of the admin user in case the current connection is made on the same node. Refresh the admin manager session to access another active node. All the end users connected to the node will lose their session and they will need to re-authenticate.
Stopping/restarting Tomcat on a node will interrupt the access of the users connected to that node losing their session.
Stopping the Websecadmin or Haproxy services on all nodes at the same time will interrupt the connection of the admin user and all the users connected in that moment will lose their sessions. Perform the start/stop/restart operations of the services on one node at a time.
-
The following actions are available:
-
stop <service-name>
-
start <service-name>
-
restart <service-name>
-
-
After selecting one action, on the displayed pop-up, select one webapp node and click Run
-
In the Nodes list, check the node where the command was executed and wait for the node line to turn green and the status to change to “start/stop/restart<serviceName>”
-
You can see the status of the service by clicking on the View icon for the node where the command was executed
-
In the Execution Logs list check the log for the “start/stop/restart<serviceName>” command by clicking the view icon
Listed permissions to be added in sudoers.
veridiumid ALL=(root) NOPASSWD: /bin/systemctl stop ver_opa
veridiumid ALL=(root) NOPASSWD: /bin/systemctl stop ver_zookeeper
veridiumid ALL=(root) NOPASSWD: /bin/systemctl stop ver_haproxy
veridiumid ALL=(root) NOPASSWD: /bin/systemctl stop ver_freeradius
veridiumid ALL=(root) NOPASSWD: /bin/systemctl stop ver_tomcat
veridiumid ALL=(root) NOPASSWD: /bin/systemctl stop ver_kibana
veridiumid ALL=(root) NOPASSWD: /bin/systemctl stop ver_filebeat
veridiumid ALL=(root) NOPASSWD: /bin/systemctl stop ver_elasticsearch
veridiumid ALL=(root) NOPASSWD: /bin/systemctl stop ver_cassandra
veridiumid ALL=(root) NOPASSWD: /bin/systemctl stop ver_websecadmin
veridiumid ALL=(root) NOPASSWD: /bin/systemctl stop ver_fido
veridiumid ALL=(root) NOPASSWD: /bin/systemctl stop ver_selfservice
veridiumid ALL=(root) NOPASSWD: /bin/systemctl stop ver_setupagent
veridiumid ALL=(root) NOPASSWD: /bin/systemctl start ver_opa
veridiumid ALL=(root) NOPASSWD: /bin/systemctl start ver_zookeeper
veridiumid ALL=(root) NOPASSWD: /bin/systemctl start ver_haproxy
veridiumid ALL=(root) NOPASSWD: /bin/systemctl start ver_freeradius
veridiumid ALL=(root) NOPASSWD: /bin/systemctl start ver_tomcat
veridiumid ALL=(root) NOPASSWD: /bin/systemctl start ver_kibana
veridiumid ALL=(root) NOPASSWD: /bin/systemctl start ver_filebeat
veridiumid ALL=(root) NOPASSWD: /bin/systemctl start ver_elasticsearch
veridiumid ALL=(root) NOPASSWD: /bin/systemctl start ver_cassandra
veridiumid ALL=(root) NOPASSWD: /bin/systemctl start ver_websecadmin
veridiumid ALL=(root) NOPASSWD: /bin/systemctl start ver_fido
veridiumid ALL=(root) NOPASSWD: /bin/systemctl start ver_selfservice
veridiumid ALL=(root) NOPASSWD: /bin/systemctl start ver_setupagent
veridiumid ALL=(root) NOPASSWD: /bin/systemctl enable ver_opa
veridiumid ALL=(root) NOPASSWD: /bin/systemctl enable ver_zookeeper
veridiumid ALL=(root) NOPASSWD: /bin/systemctl enable ver_haproxy
veridiumid ALL=(root) NOPASSWD: /bin/systemctl enable ver_freeradius
veridiumid ALL=(root) NOPASSWD: /bin/systemctl enable ver_tomcat
veridiumid ALL=(root) NOPASSWD: /bin/systemctl enable ver_kibana
veridiumid ALL=(root) NOPASSWD: /bin/systemctl enable ver_filebeat
veridiumid ALL=(root) NOPASSWD: /bin/systemctl enable ver_elasticsearch
veridiumid ALL=(root) NOPASSWD: /bin/systemctl enable ver_cassandra
veridiumid ALL=(root) NOPASSWD: /bin/systemctl enable ver_websecadmin
veridiumid ALL=(root) NOPASSWD: /bin/systemctl enable ver_fido
veridiumid ALL=(root) NOPASSWD: /bin/systemctl enable ver_selfservice
veridiumid ALL=(root) NOPASSWD: /bin/systemctl enable ver_setupagent
veridiumid ALL=(root) NOPASSWD: /bin/systemctl disable ver_opa
veridiumid ALL=(root) NOPASSWD: /bin/systemctl disable ver_zookeeper
veridiumid ALL=(root) NOPASSWD: /bin/systemctl disable ver_haproxy
veridiumid ALL=(root) NOPASSWD: /bin/systemctl disable ver_freeradius
veridiumid ALL=(root) NOPASSWD: /bin/systemctl disable ver_tomcat
veridiumid ALL=(root) NOPASSWD: /bin/systemctl disable ver_kibana
veridiumid ALL=(root) NOPASSWD: /bin/systemctl disable ver_filebeat
veridiumid ALL=(root) NOPASSWD: /bin/systemctl disable ver_elasticsearch
veridiumid ALL=(root) NOPASSWD: /bin/systemctl disable ver_cassandra
veridiumid ALL=(root) NOPASSWD: /bin/systemctl disable ver_websecadmin
veridiumid ALL=(root) NOPASSWD: /bin/systemctl disable ver_fido
veridiumid ALL=(root) NOPASSWD: /bin/systemctl disable ver_selfservice
veridiumid ALL=(root) NOPASSWD: /bin/systemctl disable ver_setupagent
veridiumid ALL=(root) NOPASSWD: /bin/systemctl restart ver_opa
veridiumid ALL=(root) NOPASSWD: /bin/systemctl restart ver_zookeeper
veridiumid ALL=(root) NOPASSWD: /bin/systemctl restart ver_haproxy
veridiumid ALL=(root) NOPASSWD: /bin/systemctl restart ver_freeradius
veridiumid ALL=(root) NOPASSWD: /bin/systemctl restart ver_tomcat
veridiumid ALL=(root) NOPASSWD: /bin/systemctl restart ver_kibana
veridiumid ALL=(root) NOPASSWD: /bin/systemctl restart ver_filebeat
veridiumid ALL=(root) NOPASSWD: /bin/systemctl restart ver_elasticsearch
veridiumid ALL=(root) NOPASSWD: /bin/systemctl restart ver_cassandra
veridiumid ALL=(root) NOPASSWD: /bin/systemctl restart ver_websecadmin
veridiumid ALL=(root) NOPASSWD: /bin/systemctl restart ver_fido
veridiumid ALL=(root) NOPASSWD: /bin/systemctl restart ver_selfservice
veridiumid ALL=(root) NOPASSWD: /bin/systemctl restart ver_setupagent
veridiumid ALL=(root) NOPASSWD: /bin/systemctl status ver_opa
veridiumid ALL=(root) NOPASSWD: /bin/systemctl status ver_zookeeper
veridiumid ALL=(root) NOPASSWD: /bin/systemctl status ver_haproxy
veridiumid ALL=(root) NOPASSWD: /bin/systemctl status ver_freeradius
veridiumid ALL=(root) NOPASSWD: /bin/systemctl status ver_tomcat
veridiumid ALL=(root) NOPASSWD: /bin/systemctl status ver_kibana
veridiumid ALL=(root) NOPASSWD: /bin/systemctl status ver_filebeat
veridiumid ALL=(root) NOPASSWD: /bin/systemctl status ver_elasticsearch
veridiumid ALL=(root) NOPASSWD: /bin/systemctl status ver_cassandra
veridiumid ALL=(root) NOPASSWD: /bin/systemctl status ver_websecadmin
veridiumid ALL=(root) NOPASSWD: /bin/systemctl status ver_fido
veridiumid ALL=(root) NOPASSWD: /bin/systemctl status ver_selfservice
veridiumid ALL=(root) NOPASSWD: /bin/systemctl status ver_setupagent