VMWare Workspace One and VeridiumID SAML integration
Don’t export procedure before removing video setup instructions
Veridium & APRO MFA PoC-20240315_102817-Meeting Recording.mp4
The goal of this article is to provide a step by step procedure in order to configure SAML authentication provided by VeridiumID server within the VMWare Workspace ONE.
This article assumes you already have:
a directory (Active Directory or ldap) configured in the VMware Workspace One interface
at least one user imported from the directory
the appropriate rights for the imported user in order to be able to login.
Configuring SAML authentication in VMWare Workspace One consists in two main steps:
Define VeridiumID Shibboleth as an IDP in the VMWare Workspace One admin interface. For this you must do the following:
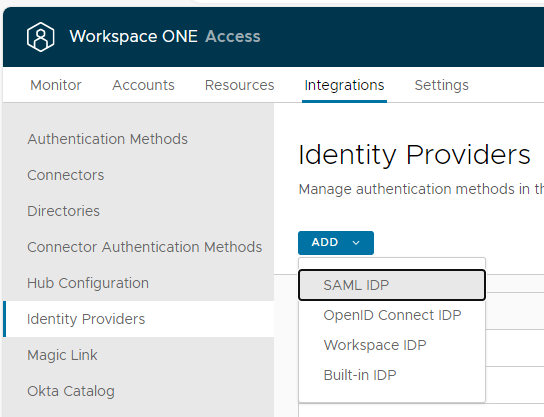
Go to Integrations → Identity Providers, then click on Add and select SAML IDP:
In the next window, set a name for the IDP, then choose HTTP-POST as a binding protocol, enter the idp metadata extracted from the VeridiumID dashboard:
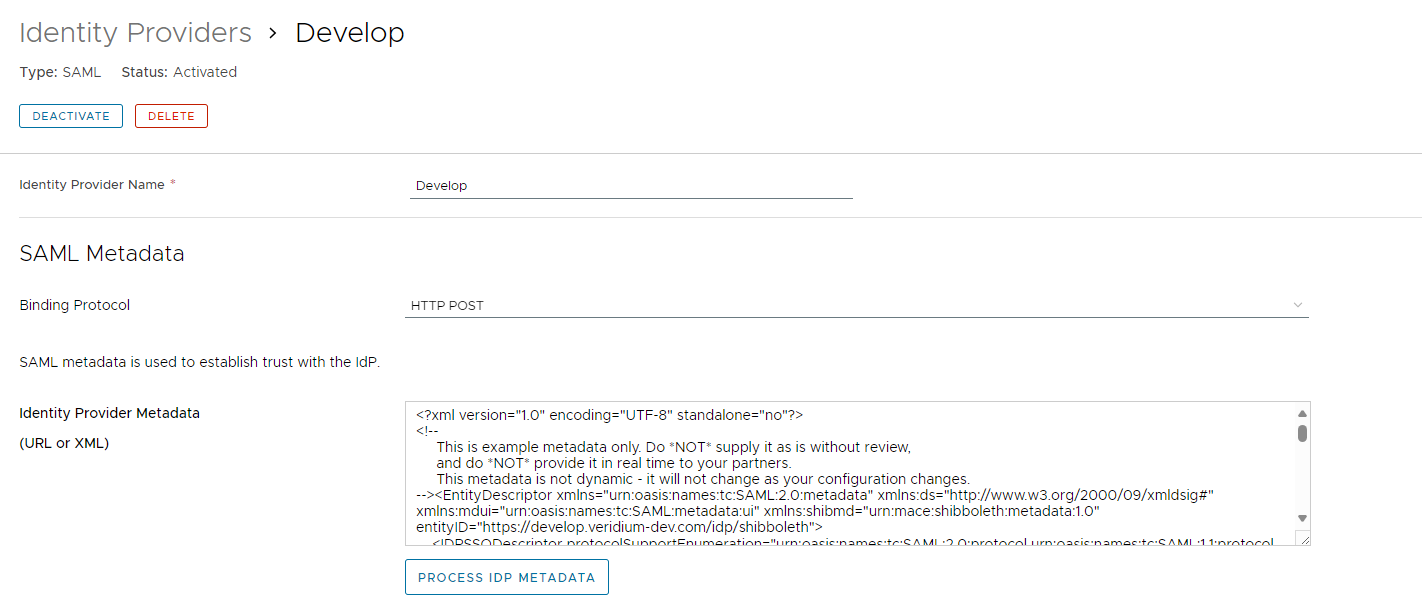
Note: Make sure the HTTP-POST section under SingleSignOnService is the first one in the list, as shown below. Otherwise you will get a Stale request error when accessing the service provider:

After editing the metadata, click on PROCESS IDP METADATA.
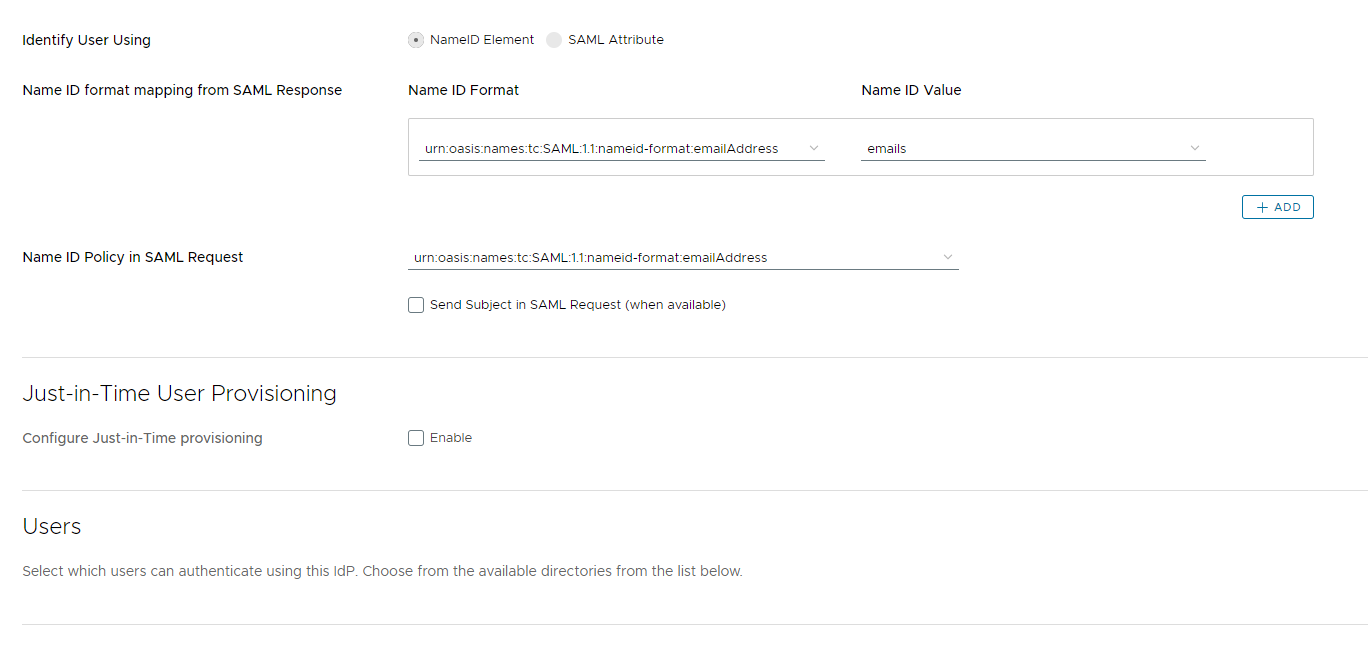
Scroll down and under Identify User Using section select NameID Element, then, under Name ID format mapping from SAML Response set the NameID Format to urn:oasis:names:tc:SAML:1.1:nameid-format:emailAddress, the Name ID Value to emails and the Name ID Policy in SAML Request to urn:oasis:names:tc:SAML:1.1:nameid-format:emailAddress:
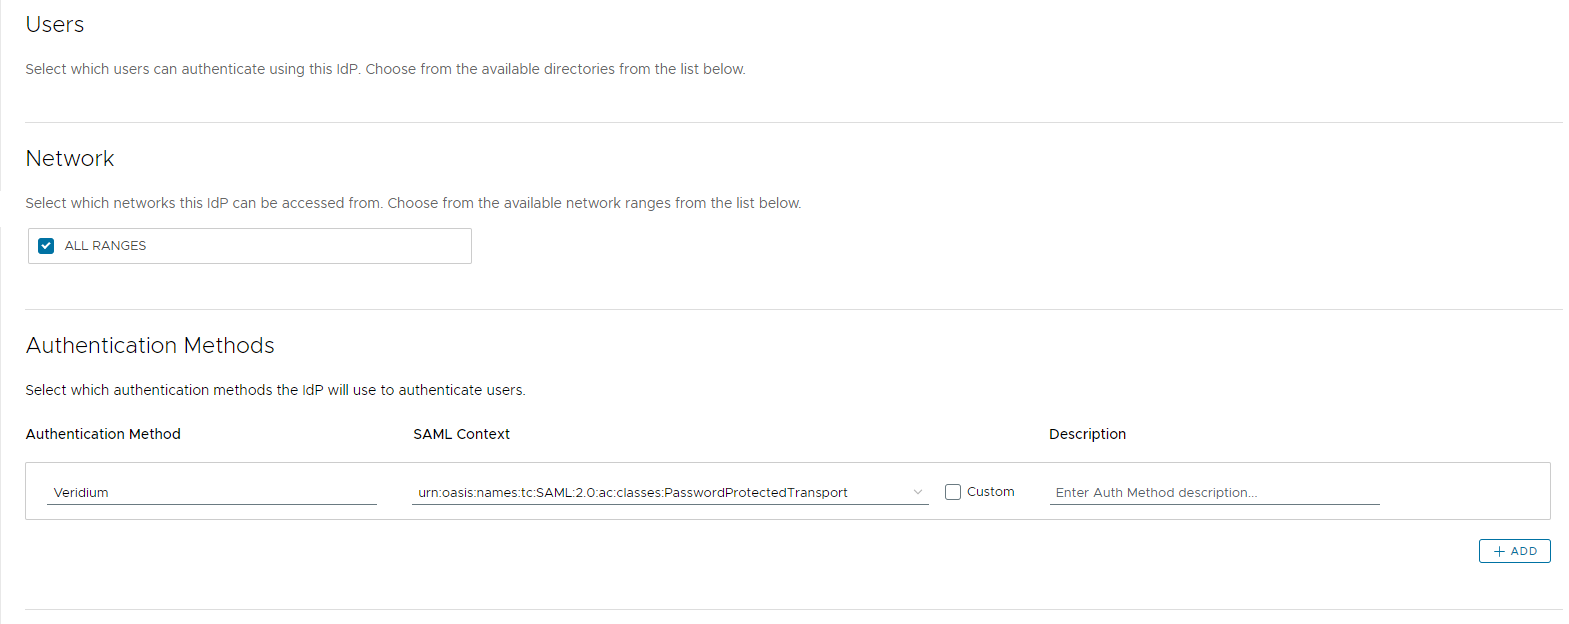
Scroll further down and select the user and network ranges for which this idp will apply. Then, under Authentication Methods, type a relevant name for the method (e.g. Veridium) and then select urn:oasis:names:tc:SAML:2.0:ac:classes:PasswordProtectedTransport
Continue scrolling and in the SAML METADATA section, click on Servove Provider (SP) metadata to extract the service provider metadata needed for the VeridiumID saml application configuration. Click on SAVE to acknowledge the configuration.

Define a SAML application for VMWare Workspace One in the VeridiumID dashboard:
Click on Applications, then click on Add SAML app:

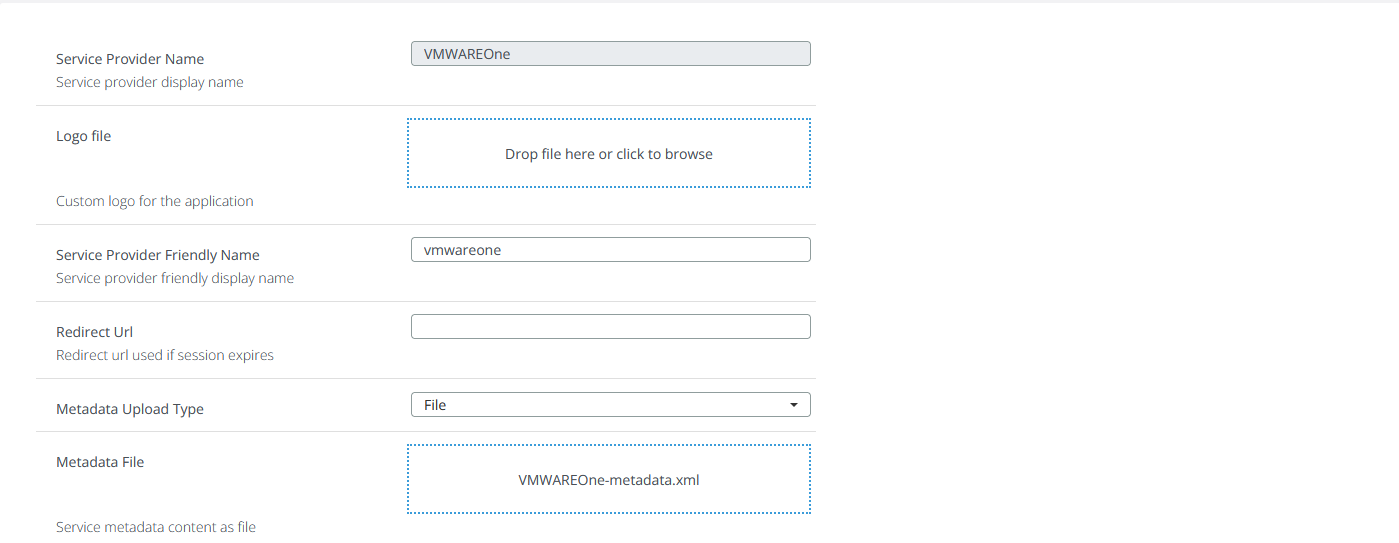
Type in a name and a friendly name for the application, then load the metadata exported from the VMWare Workspace One admin interface:
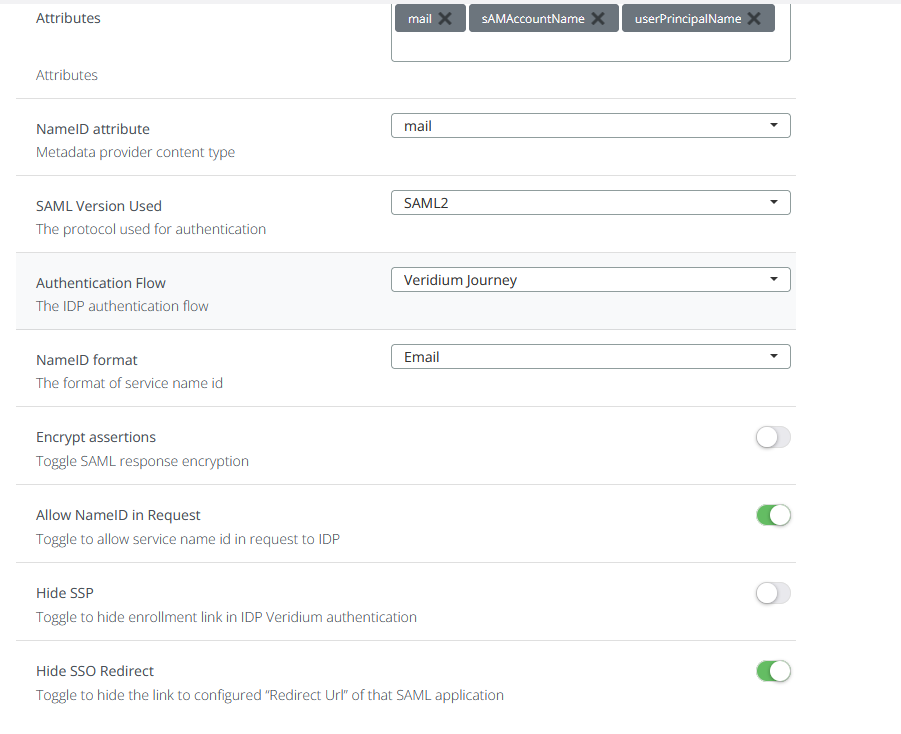
Set the Name ID attribute to mail, NameID format to Email an toggle on Hide SSO Redirect:
Click on Save to finish configuring and then try accessing the VMWare Workspace One interface. You should be redirected to the Shibboleth page where you will be able to perform the authentication.
