

We choose in our example “10.2.3.169” to be for management F5 and 10.2.3.118 to be for Load Balancing. Both IPs on the same interface, this means we will have only one NIC associated with this F5, where “10.2.3.169” is primary private ip and “10.2.3.118” is a secondary private ip.
1. Add Nodes
Login to our F5 interface https://10.2.3.169:8443/ then go to the “Local Traffic” → “Nodes”, here we need to click on “Create” (located in the right side).
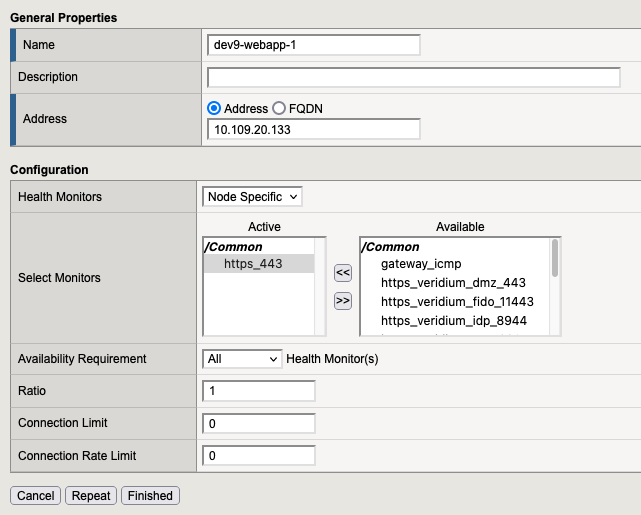
Node 1:
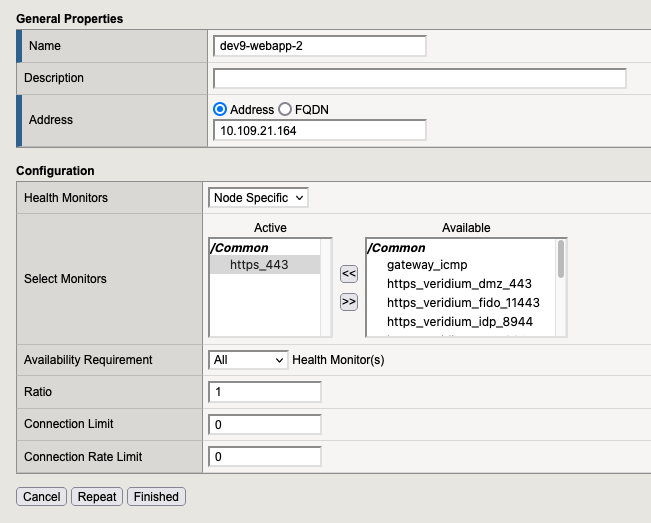
Node 2
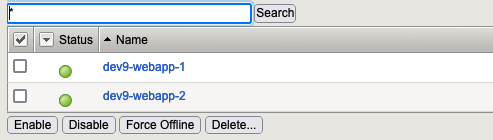
At the end in Local Traffic → Nodes , we need to have:
2. Create Pools
Go in “Local Traffic” → “Pools” and here press “create” button (located in the right side).
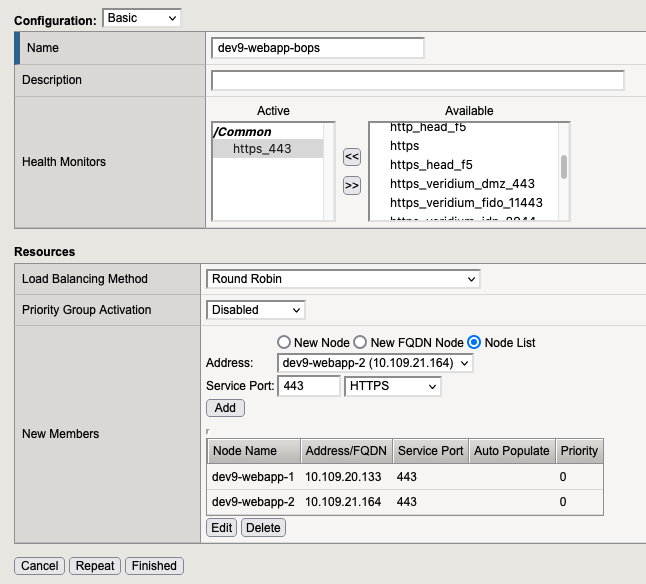
2.1 Pool for bops
2.2. Pool for dmz
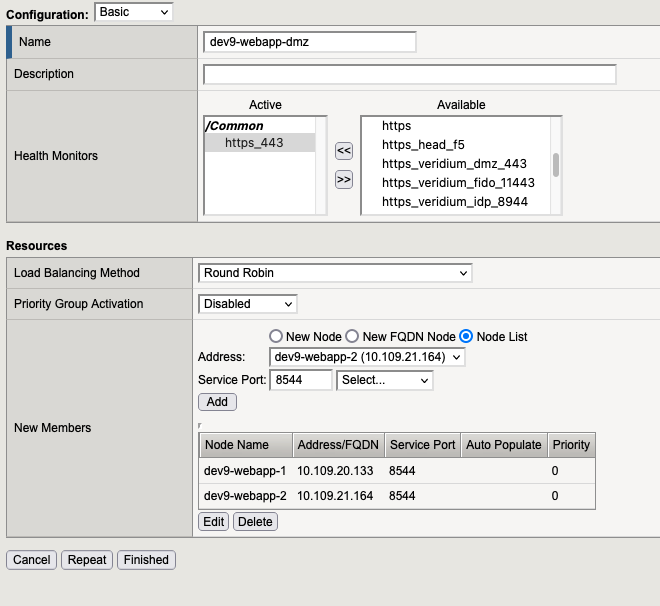
2.3. Pool for idp
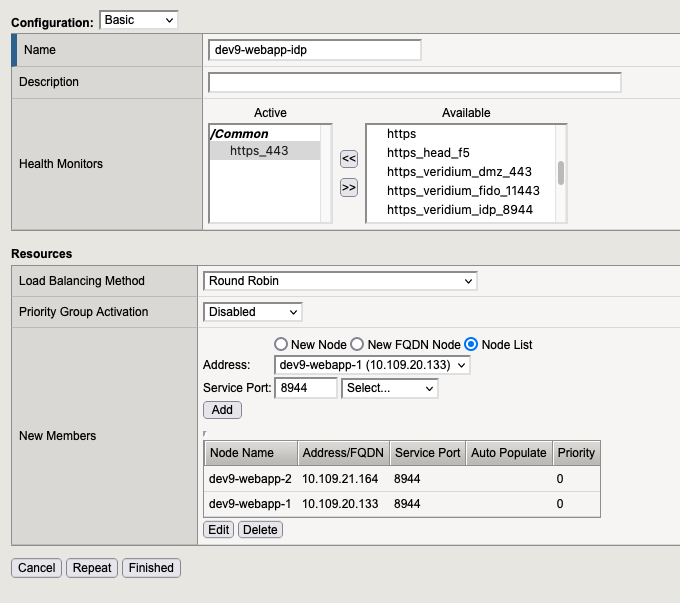
2.3. Pool for ssp
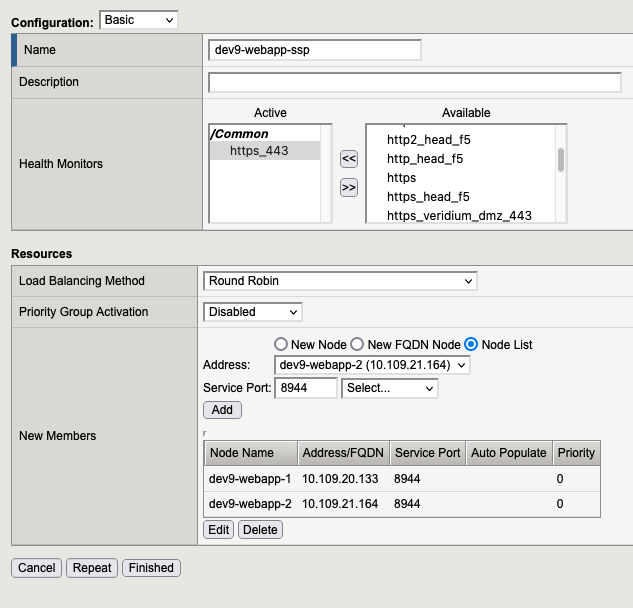
2.3. Pool for websec admin
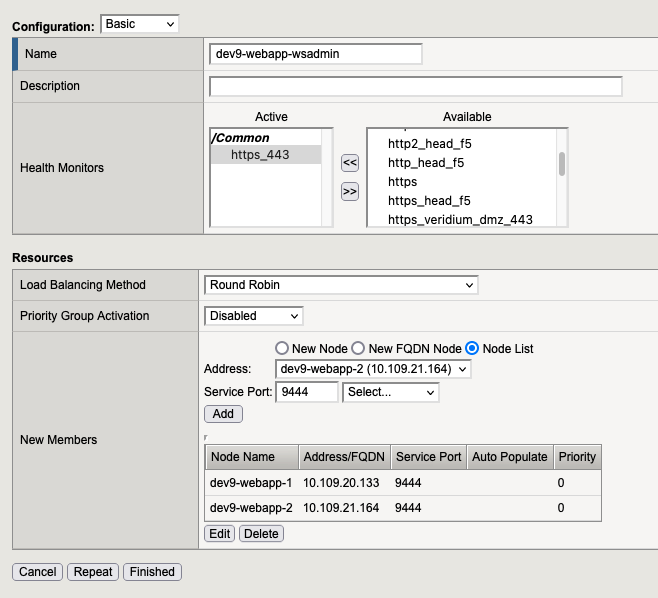
2.4. At the end we need to have

3. Create two IRules
!!! Before we create the following rules we need to get the “x-ssl-termination-proxy-secret” from haproxy located the webapp. ( /etc/veridiumid/haproxy/haproxy.cfg ) , and we need to replace XXXXXXXXX with our x-ssl-termination-proxy-secret.
Go in “Local Traffic” → “iRules” and here press “create” button (located in the right side).
3.1. Rule 1
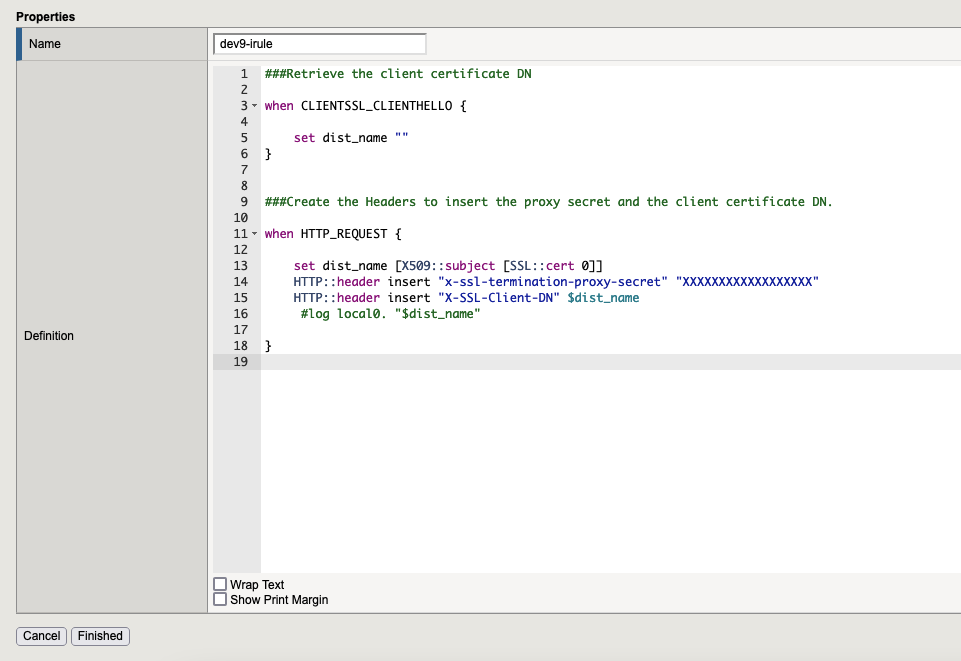
###Retrieve the client certificate DN
when CLIENTSSL_CLIENTHELLO {
    set dist_name ""
}


###Create the Headers to insert the proxy secret and the client certificate DN.

when HTTP_REQUEST {

    set dist_name [X509::subject [SSL::cert 0]]
    HTTP::header insert "x-ssl-termination-proxy-secret" "pDXXgTsfGZOCwWn"
    HTTP::header insert "X-SSL-Client-DN" $dist_name

     #log local0. "HERE START"
     #log local0. "$dist_name"
     #log local0. "HERE END"

}
3.2. Rule 2
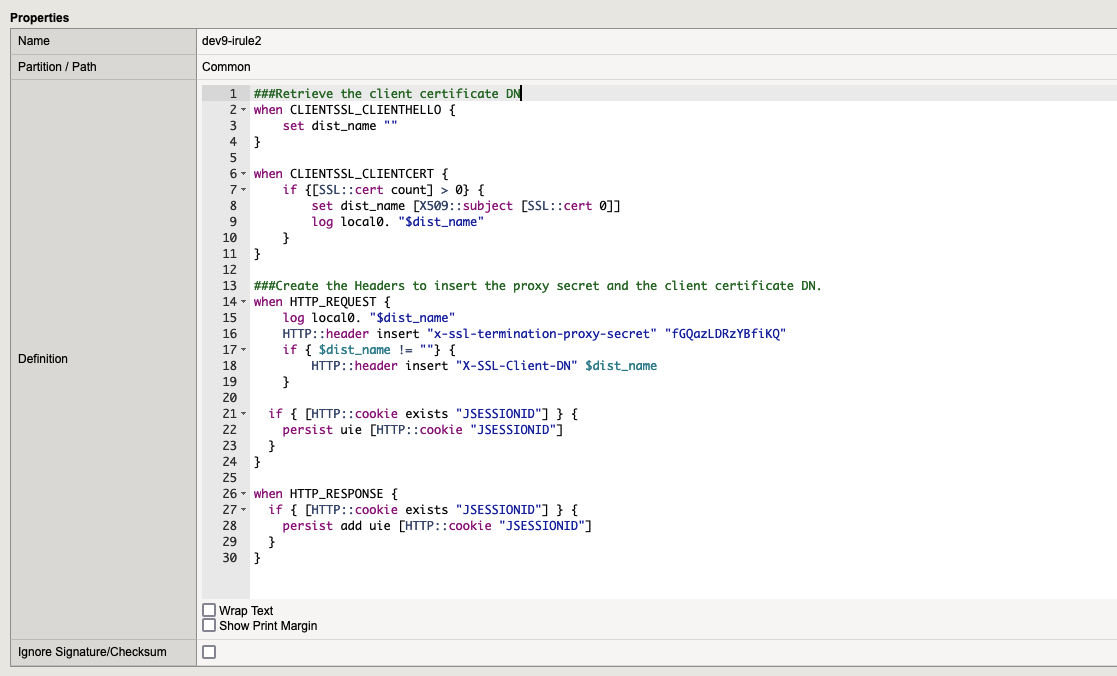
###Retrieve the client certificate DN
when CLIENTSSL_CLIENTHELLO {
    set dist_name ""
}

when CLIENTSSL_CLIENTCERT {
    if {[SSL::cert count] > 0} {
        set dist_name [X509::subject [SSL::cert 0]]
        log local0. "$dist_name"
    }
}

###Create the Headers to insert the proxy secret and the client certificate DN.
when HTTP_REQUEST {
    log local0. "$dist_name"
    HTTP::header insert "x-ssl-termination-proxy-secret" "fGQazLDRzYBfiKQ"
    if { $dist_name != ""} {
        HTTP::header insert "X-SSL-Client-DN" $dist_name
    }

  if { [HTTP::cookie exists "JSESSIONID"] } {
    persist uie [HTTP::cookie "JSESSIONID"]
  }
}

when HTTP_RESPONSE {
  if { [HTTP::cookie exists "JSESSIONID"] } {
    persist add uie [HTTP::cookie "JSESSIONID"]
  }
}
4. Add the Certificates, your service prefered certificate and client-ca.pem from Veridium Server (in our case will be *.veridium-dev.com + the client-ca).
The certificates are located in the WEBAPP in
/etc/veridiumid/haproxy/server.pem for *.veridium-dev.com
/etc/veridiumid/haproxy/client-ca.pem for client-ca
4.1. Add the “RSA Certificate & Key” for wildcard certificate in F5
Go to “System” → “Certificate Management” → “Traffic Certificate Management” → “SSL Certificate List” and click to the “IMPORT” button (located in the right side).
Our file is /etc/veridiumid/haproxy/server.pem, but we need to have the following format:
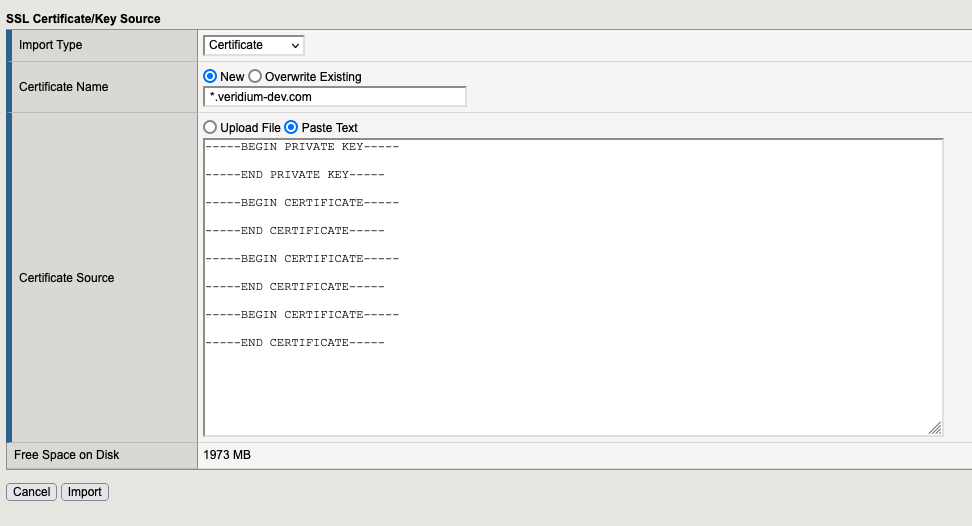
At the end we need to have something like this:

4.2. Add the “Certificate Bundle“
Go to “System” → “Certificate Management” → “Traffic Certificate Management” → “SSL Certificate List” and click to the “IMPORT” button (located in the right side).
Our file is /etc/veridiumid/haproxy/client-ca.pem but we need to have the following format:
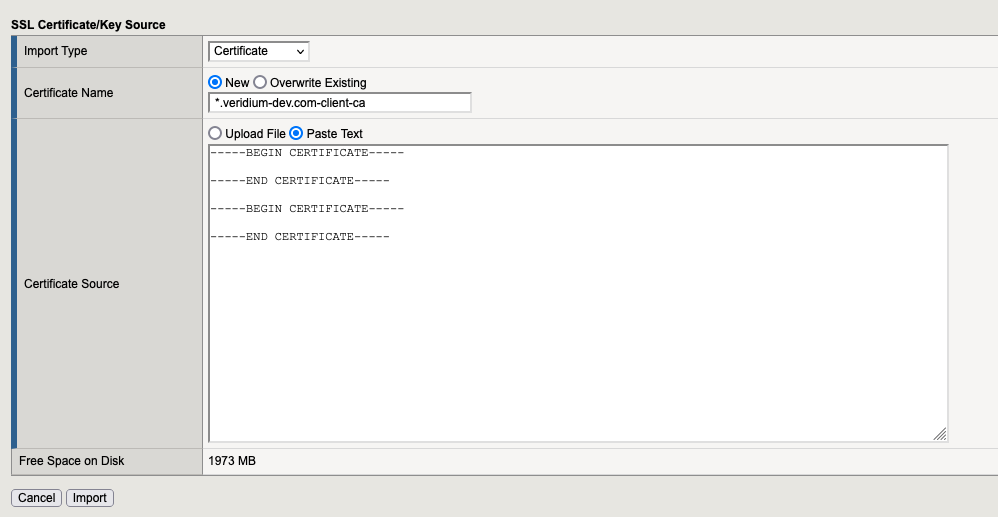
5. SSL Profiles
5.1. Profile for SSL Client
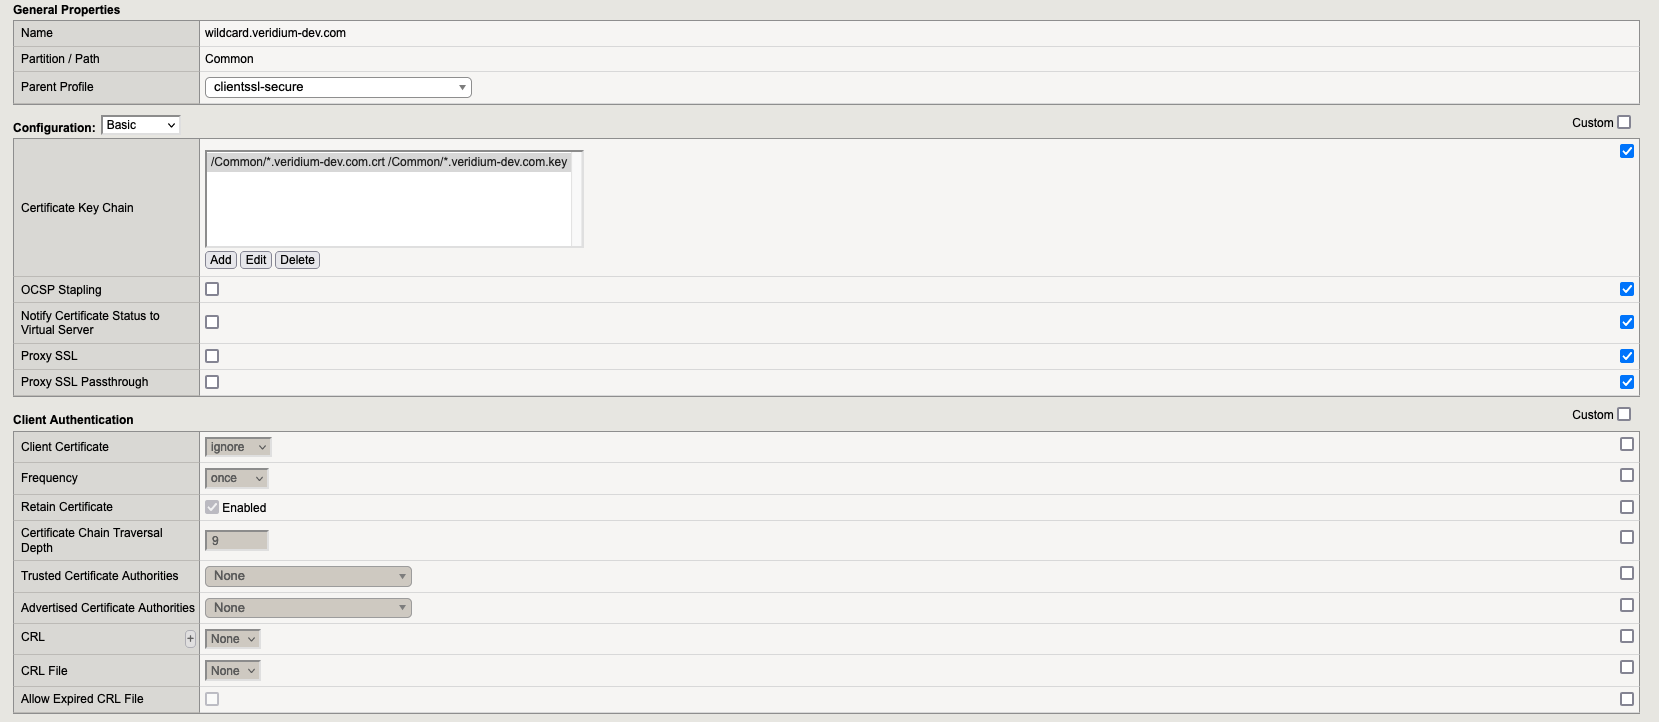
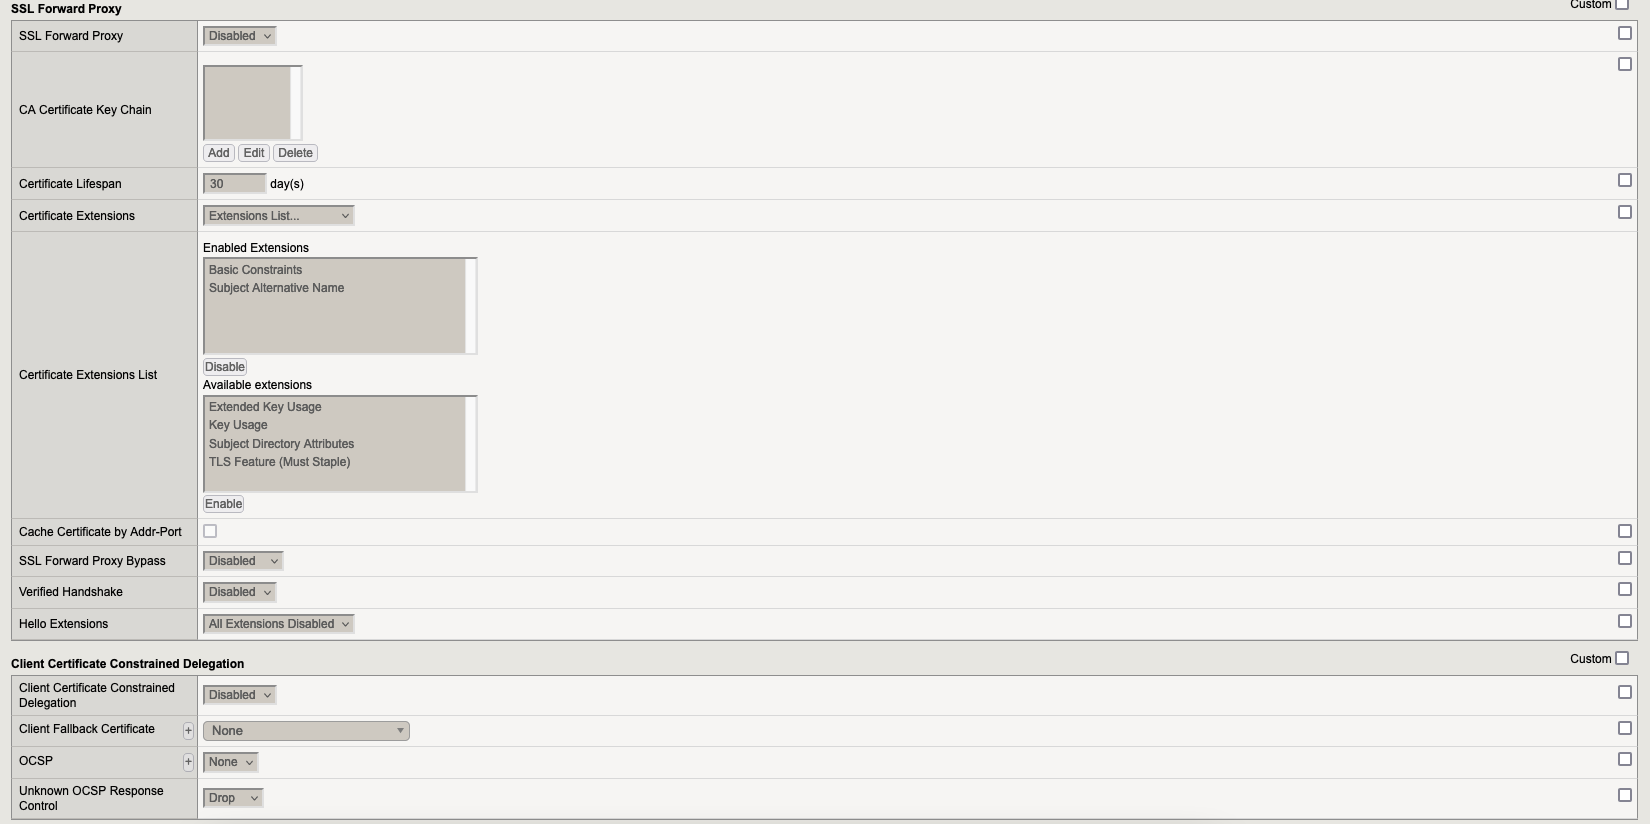
Go to “Local Traffic” → “Profiles” → “SSL” → Client and here we need to create 3 profiles:
5.1.1. Profile wildcard.veridium-dev.com

5.1.2. Profile wildcard.veridium-dev.com-client-ca
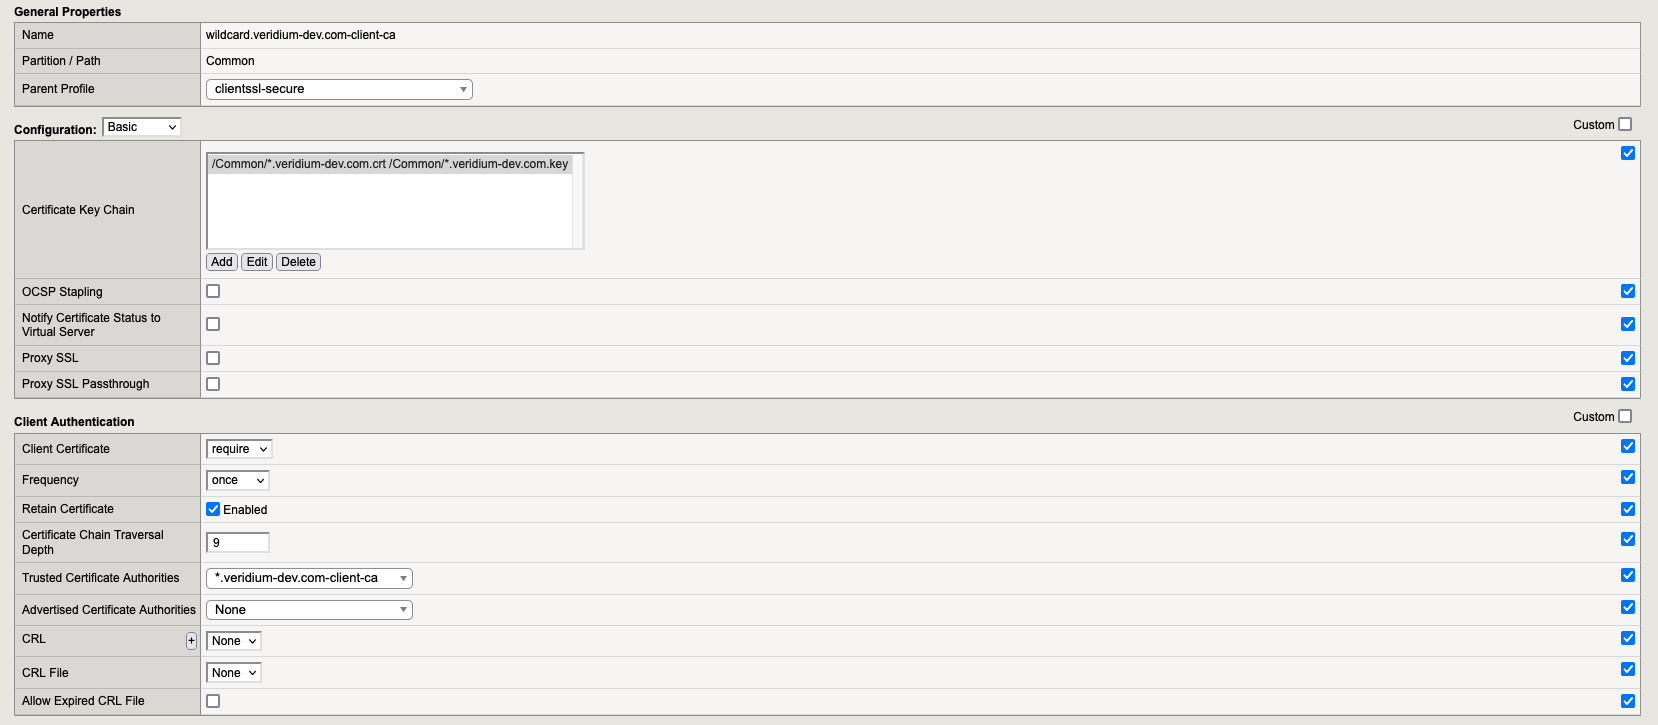
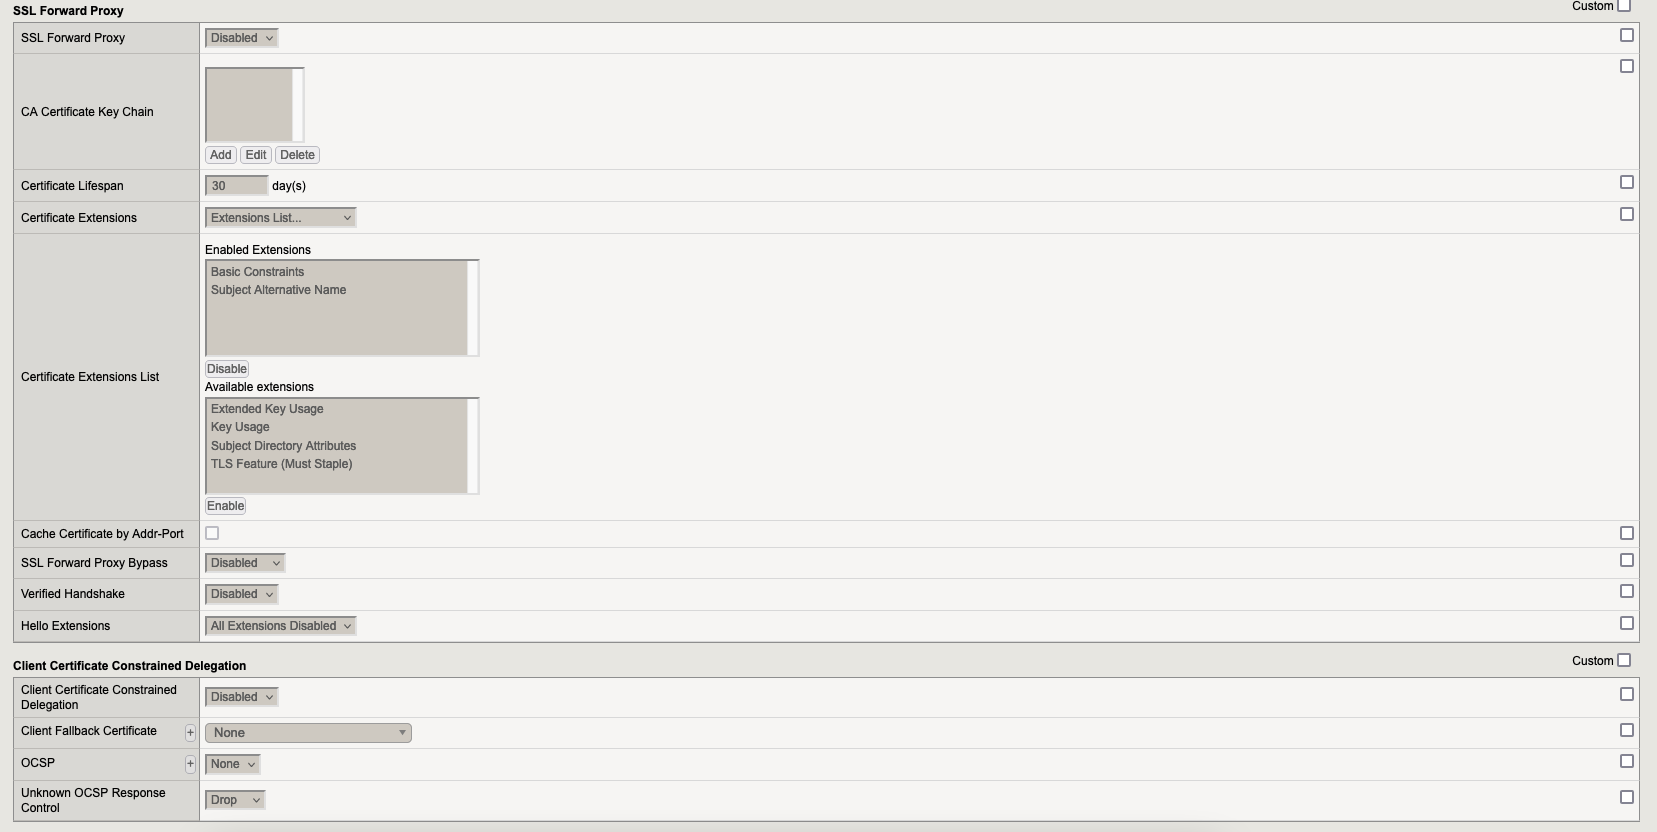
5.1.3. Profile wildcard.veridium-dev.com-client-ca-opt
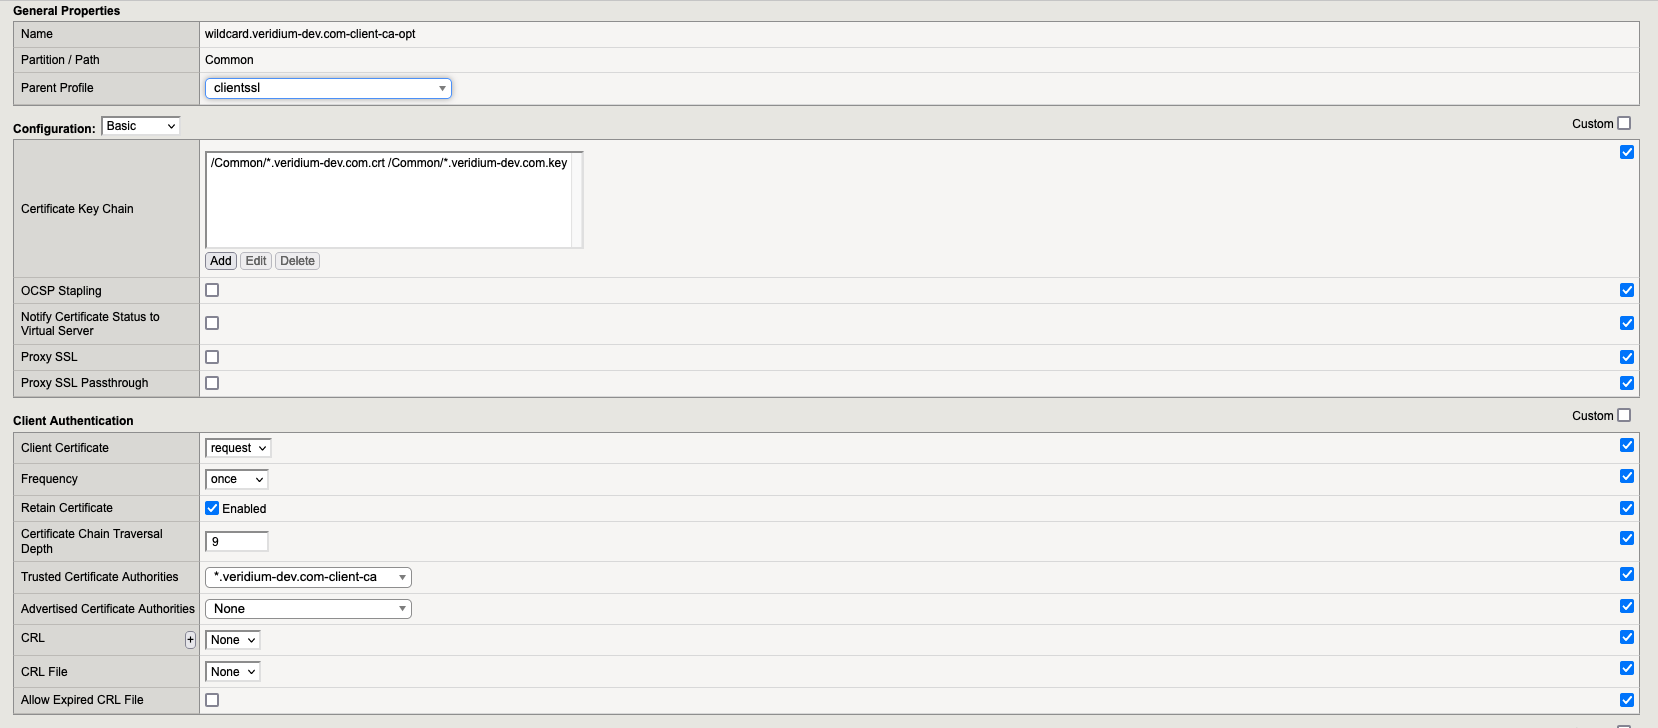
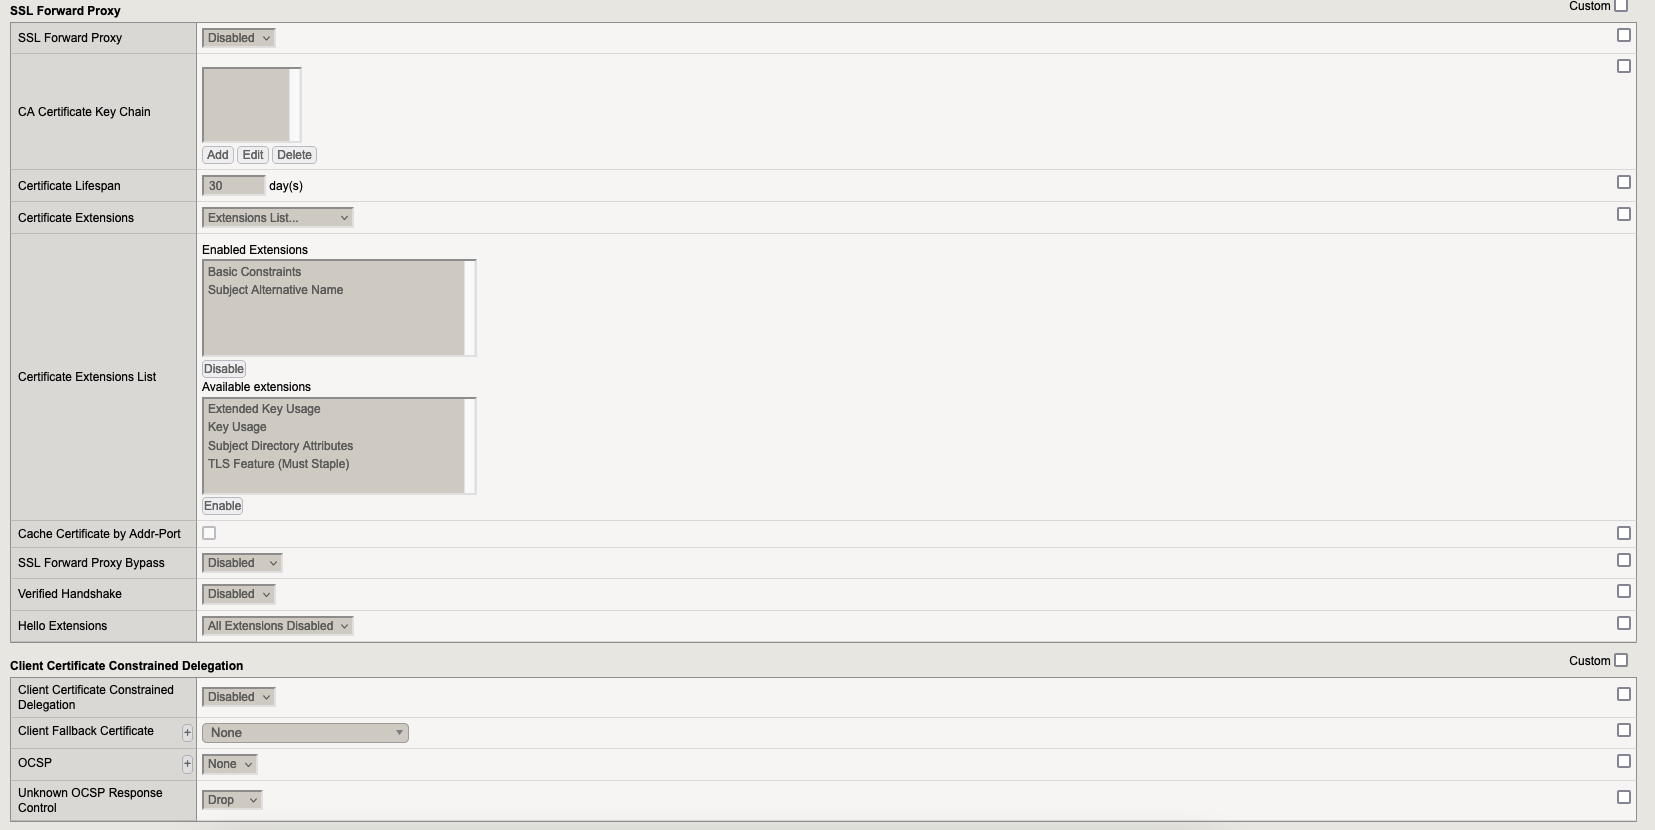
5.1. Profile for SSL Server
Go to “Local Traffic” → “Profiles” → “SSL” → Server and here we need to create 1 profile:
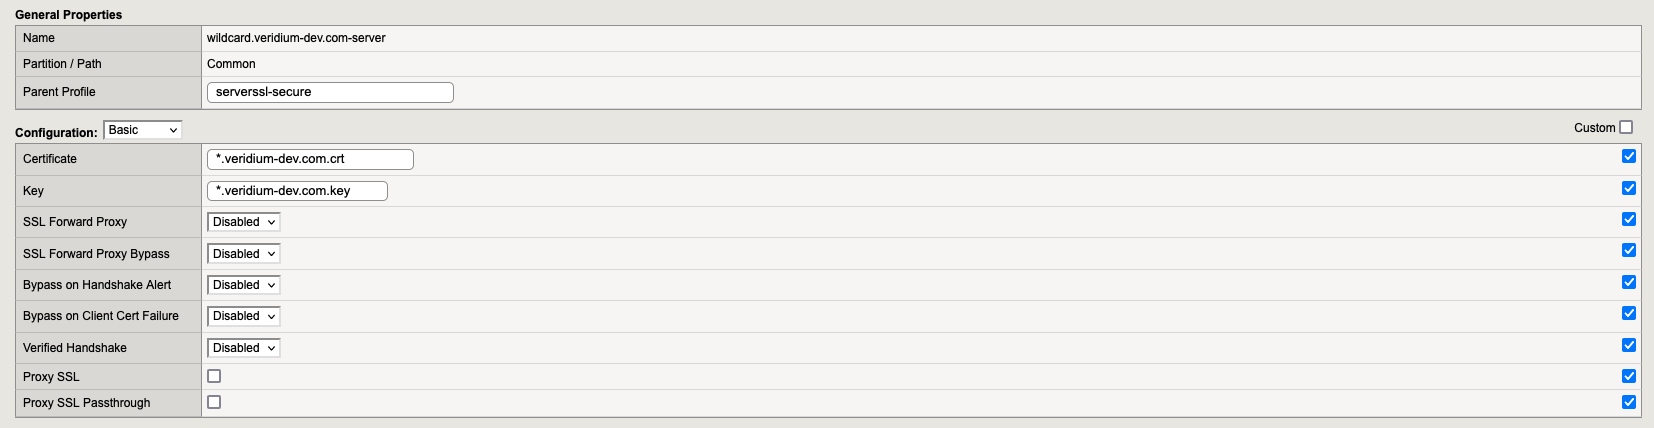
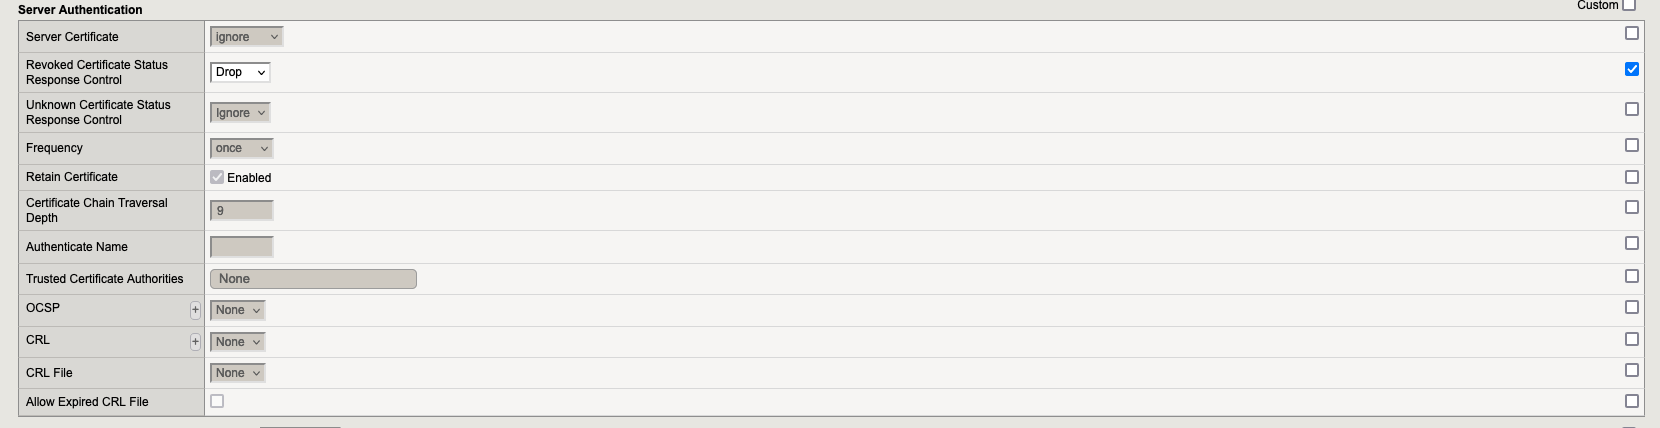
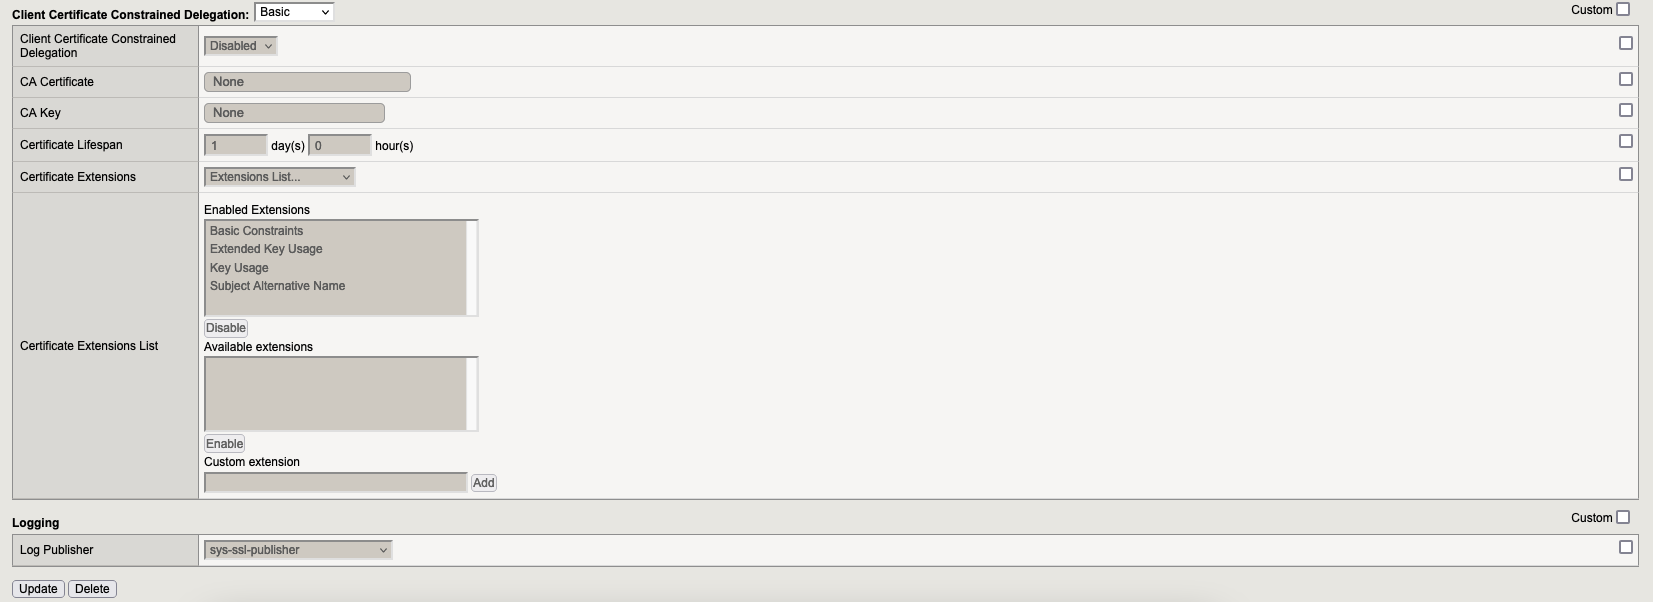
6. SSL Profiles
6.1. Profile for HTTP Profile Client
Go to “Local Traffic” → “Profiles” → “Services” and here we need to create profile “http_reverse“
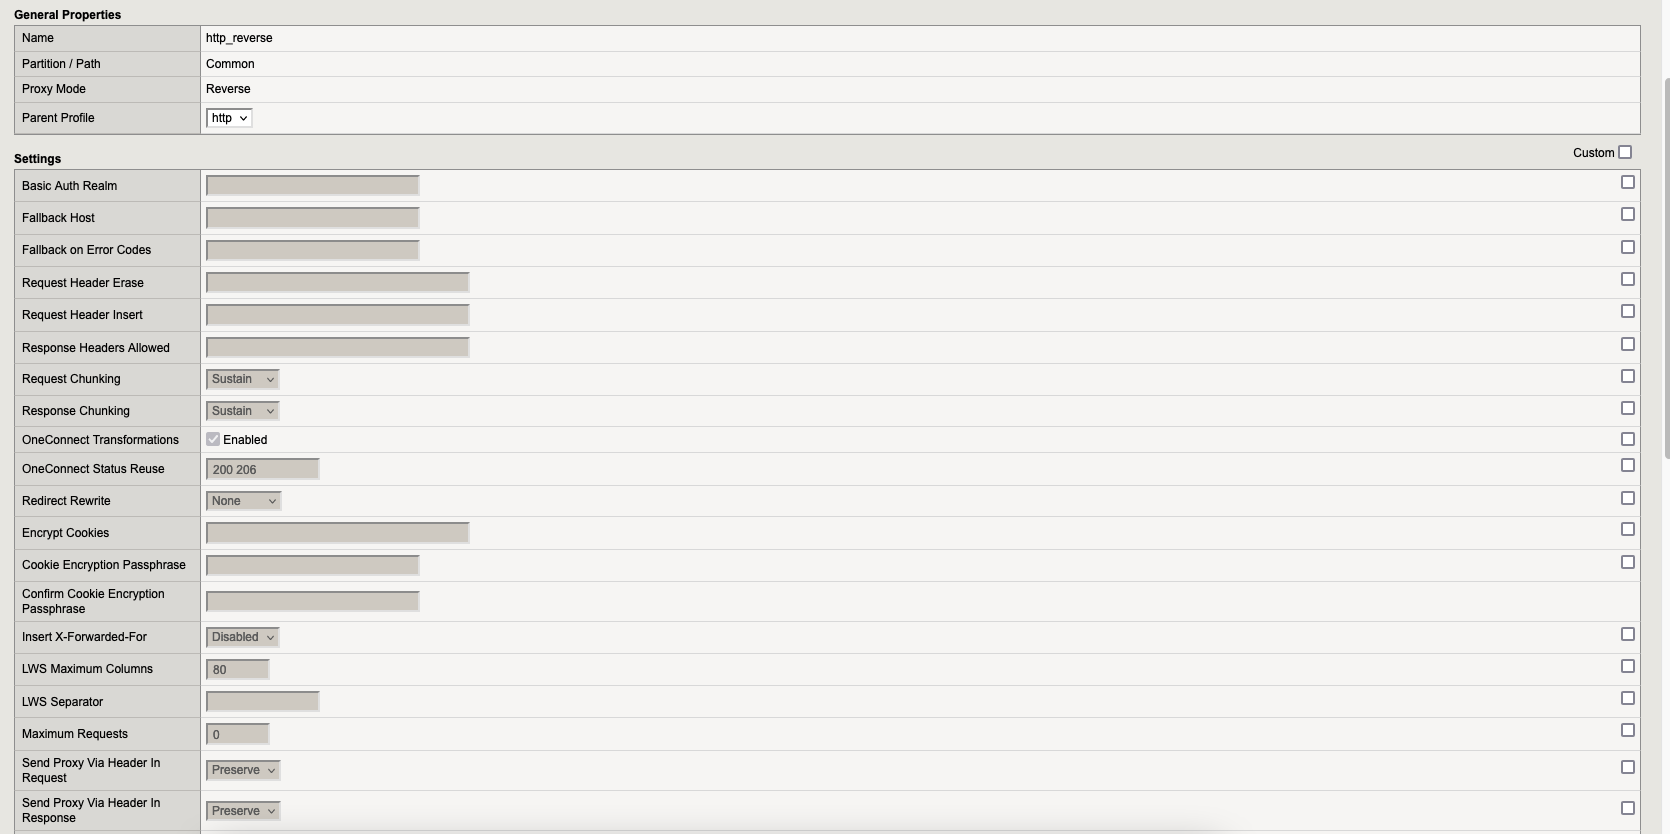
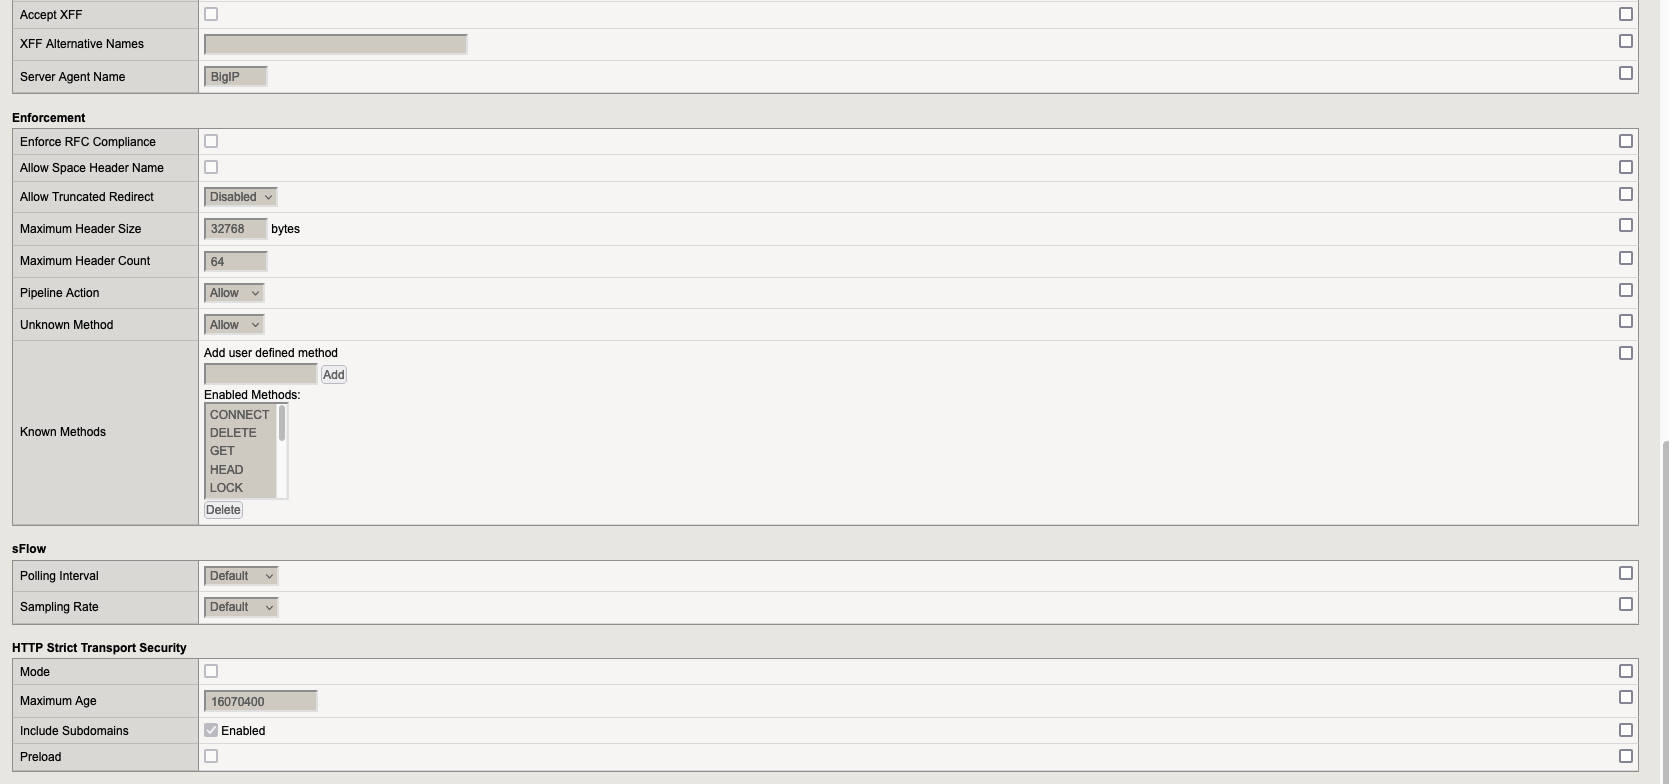
6. Policies
Go to “Local Traffic” → “Policies” → “Policy List” and here we need to create the following:
6.1. Policy dev9-webapp-dmz
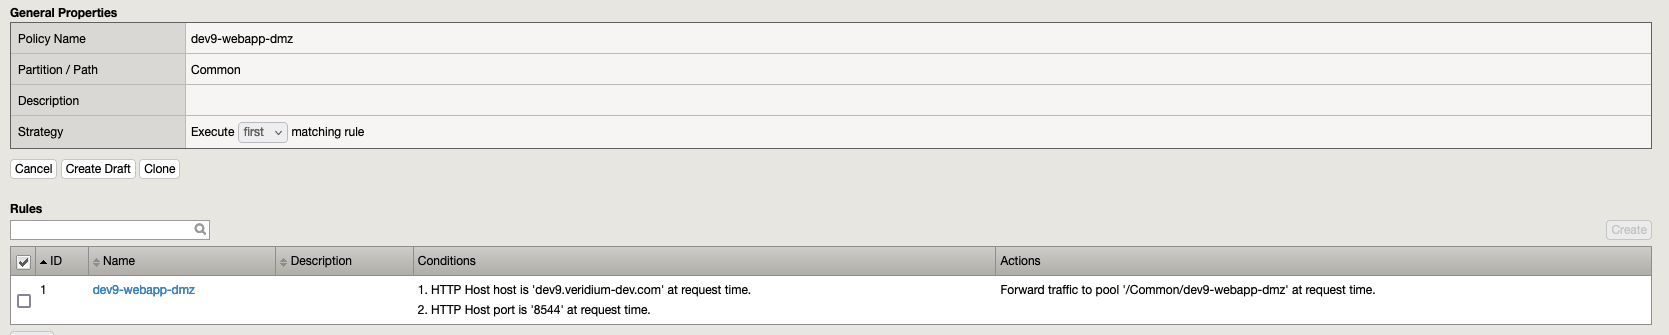
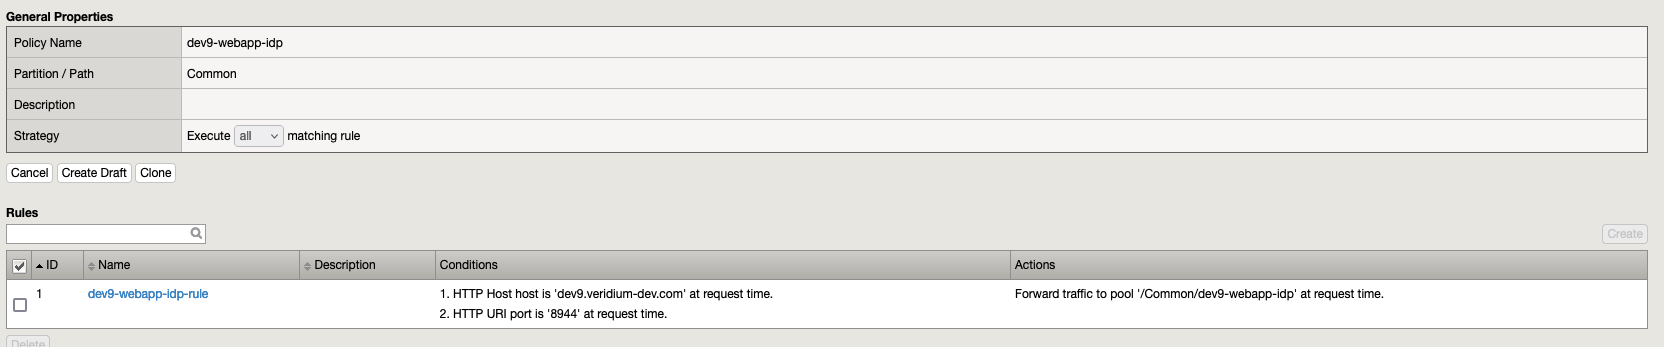
6.2. Policy dev9-webapp-idp
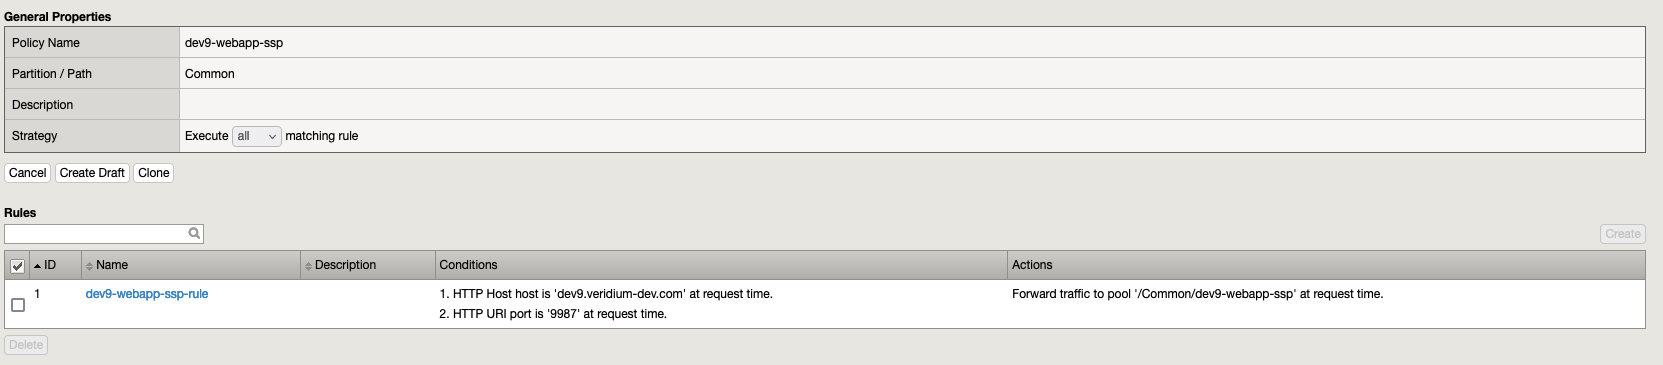
6.3. Policy dev9-webapp-ssp
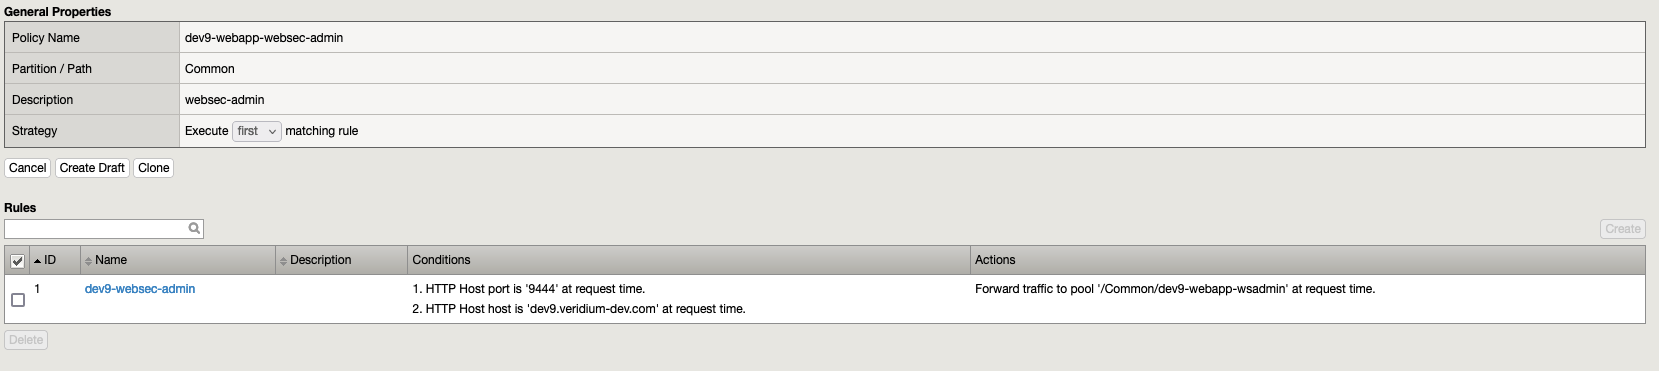
6.4. Policy dev9-webapp-websec-admin
6.5. Policy dev9-webapp-host
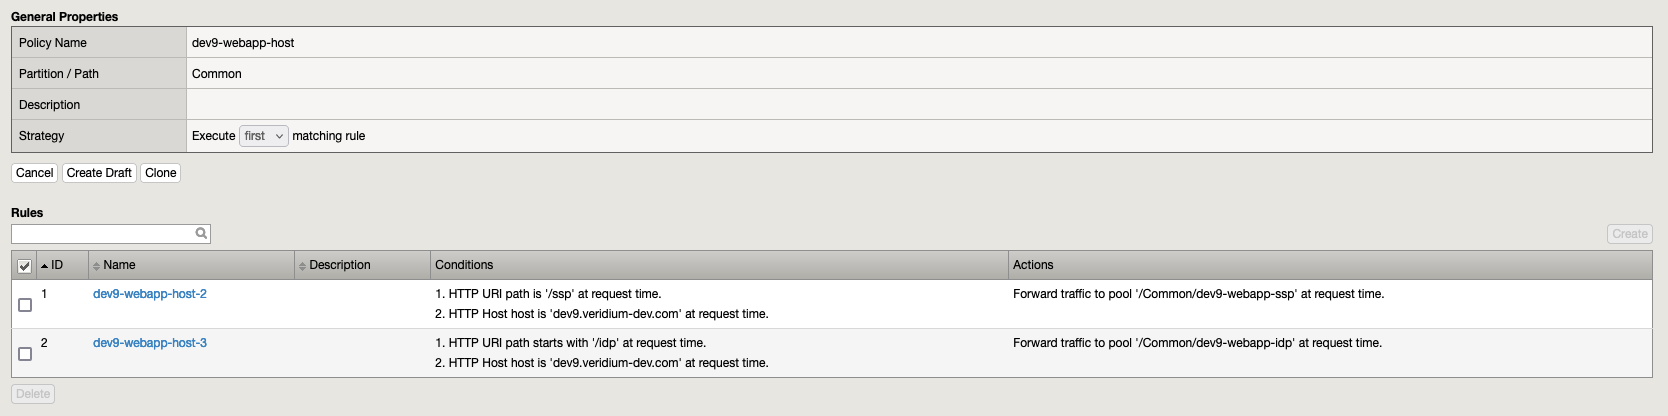
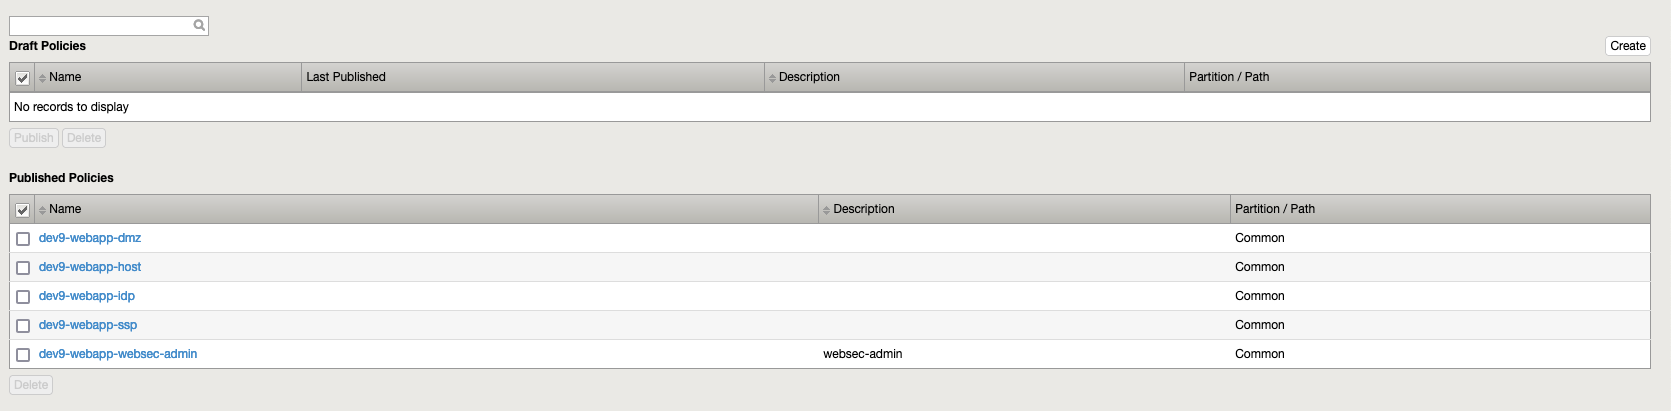
Remember!!! After we create a rule we need to publish it. Go in “Local Traffic” → Policies → in the section “Draft Policies“ select the policies/policy and press “Publish”. At the end you will have:
7. Virtual Servers
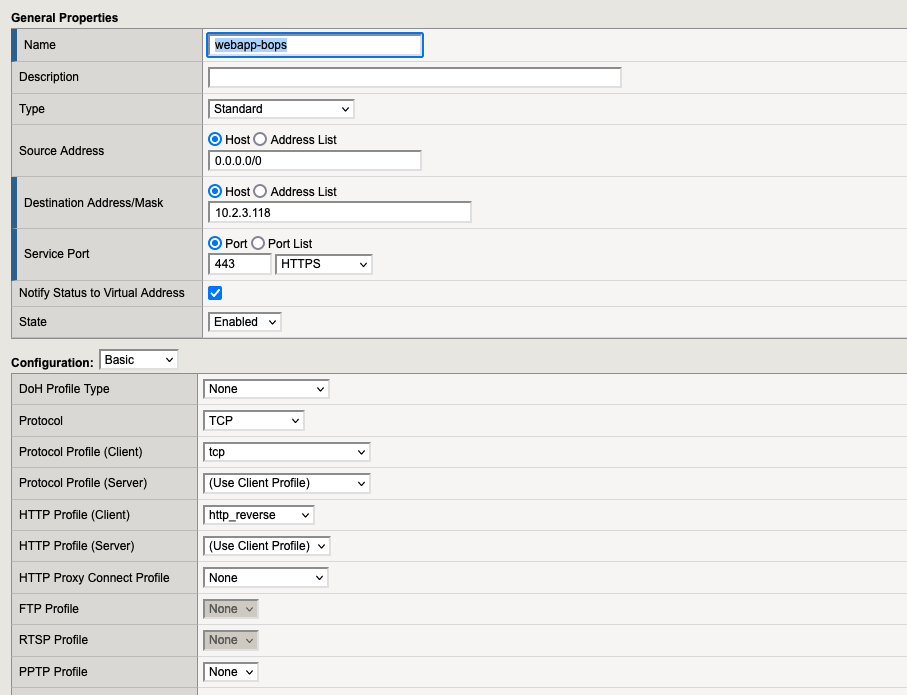
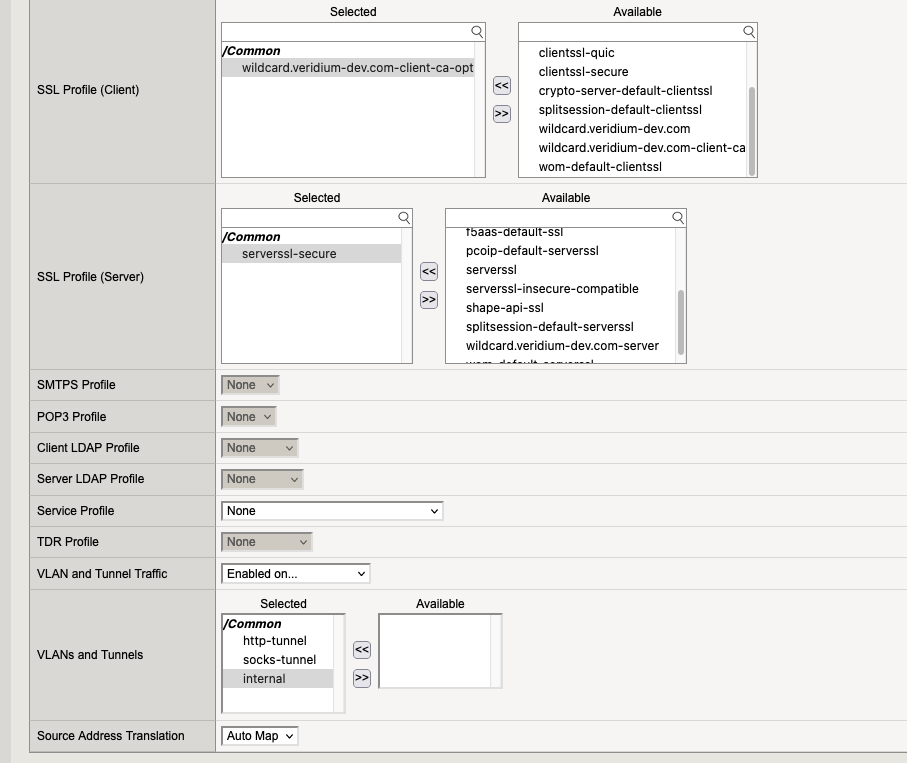
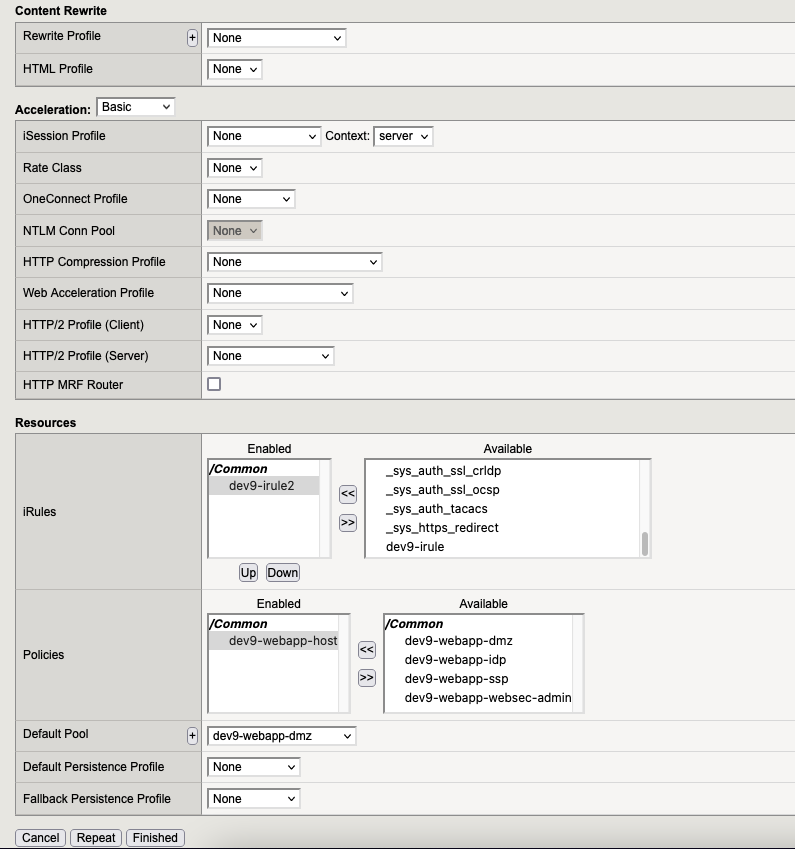
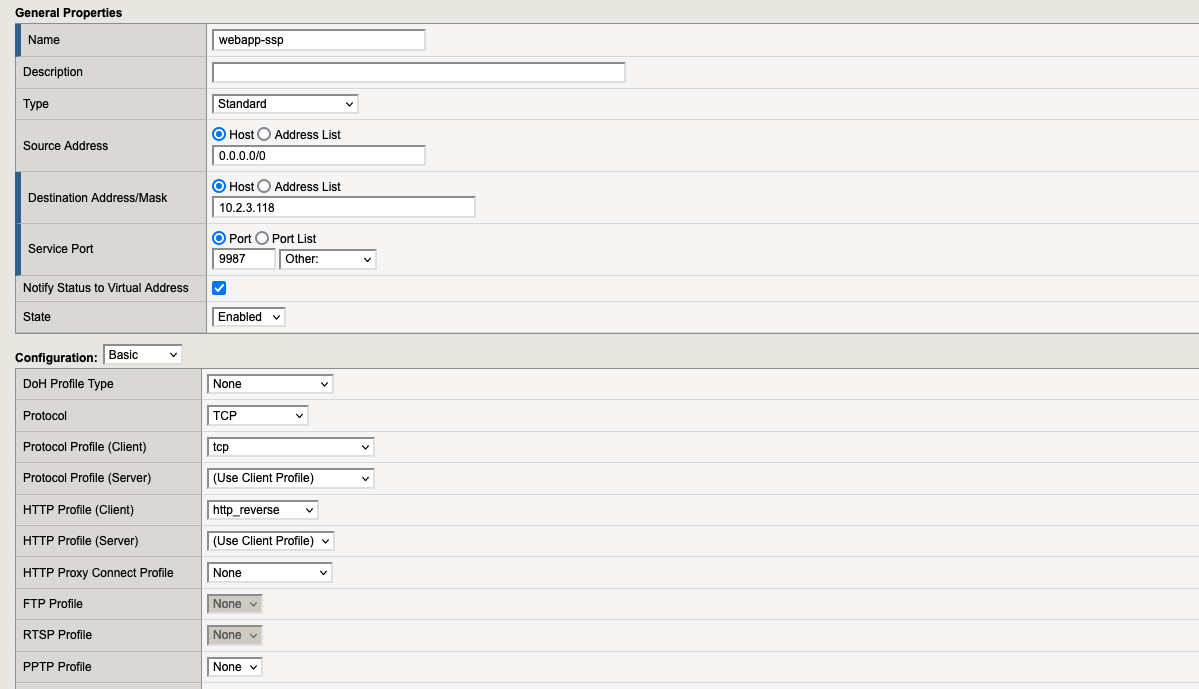
Go to “Local Traffic” → “Virtual Servers” and here we need to create the following virtual servers:
7.1. Virtual Server “webapp-bops“
7.2. Virtual Server “webapp-dmz“
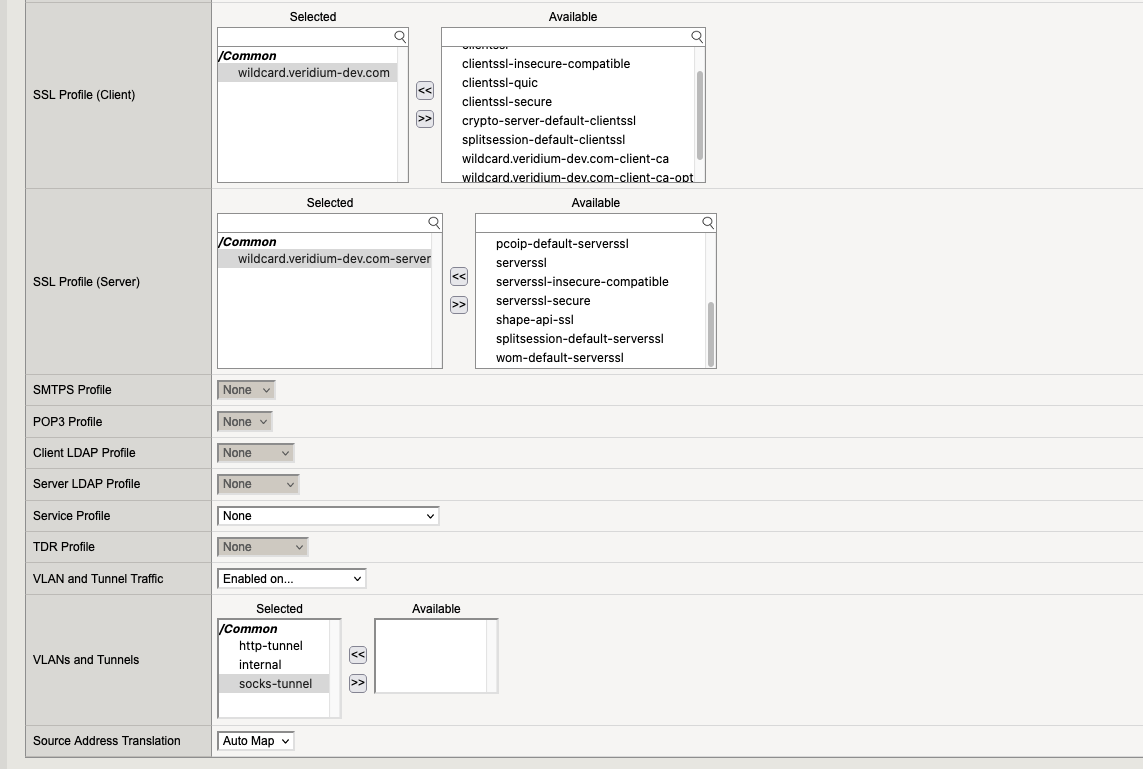
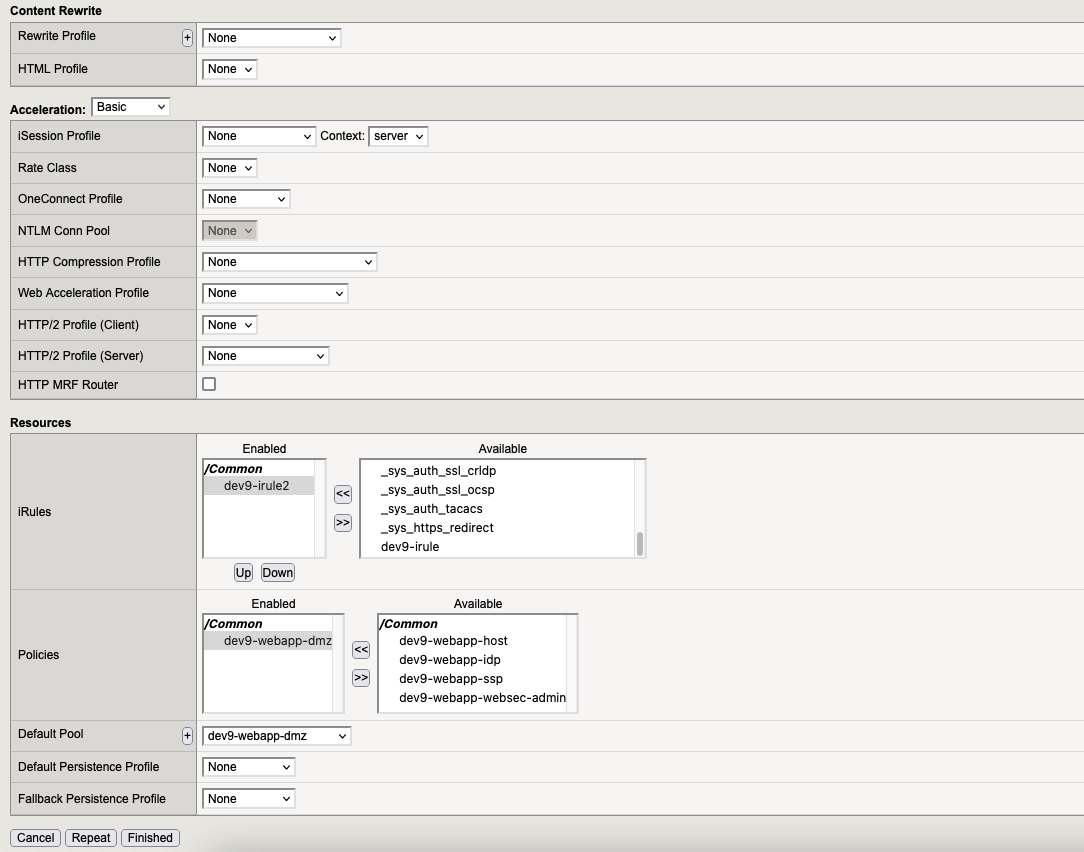
7.3. Virtual Server “webapp-idp“
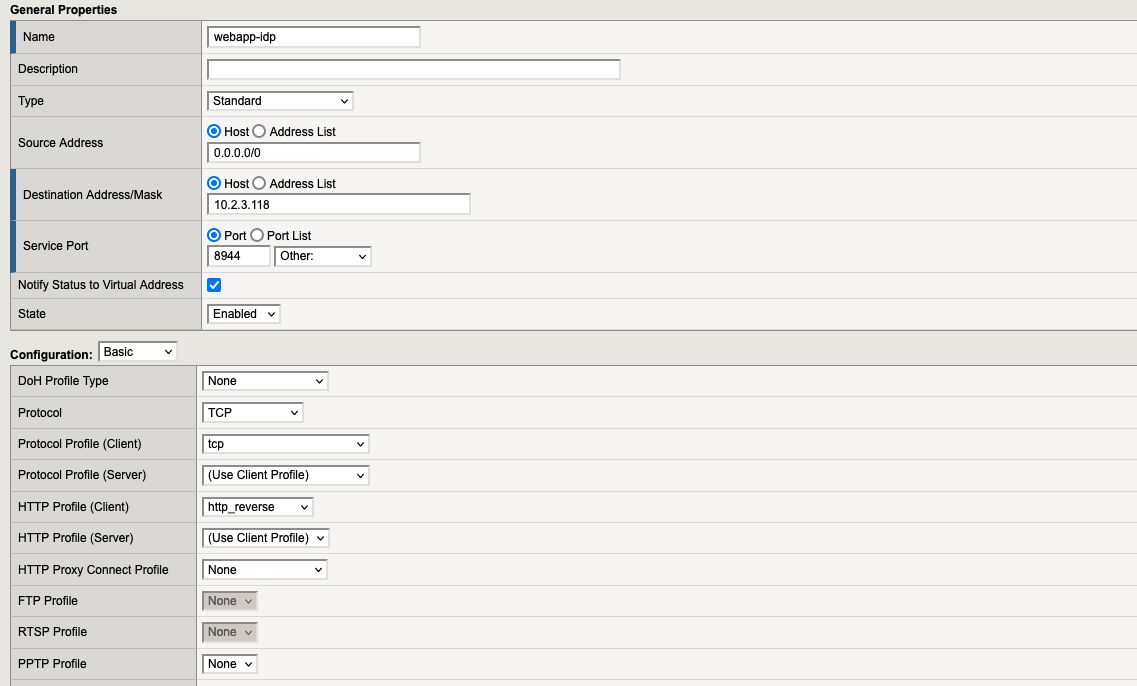
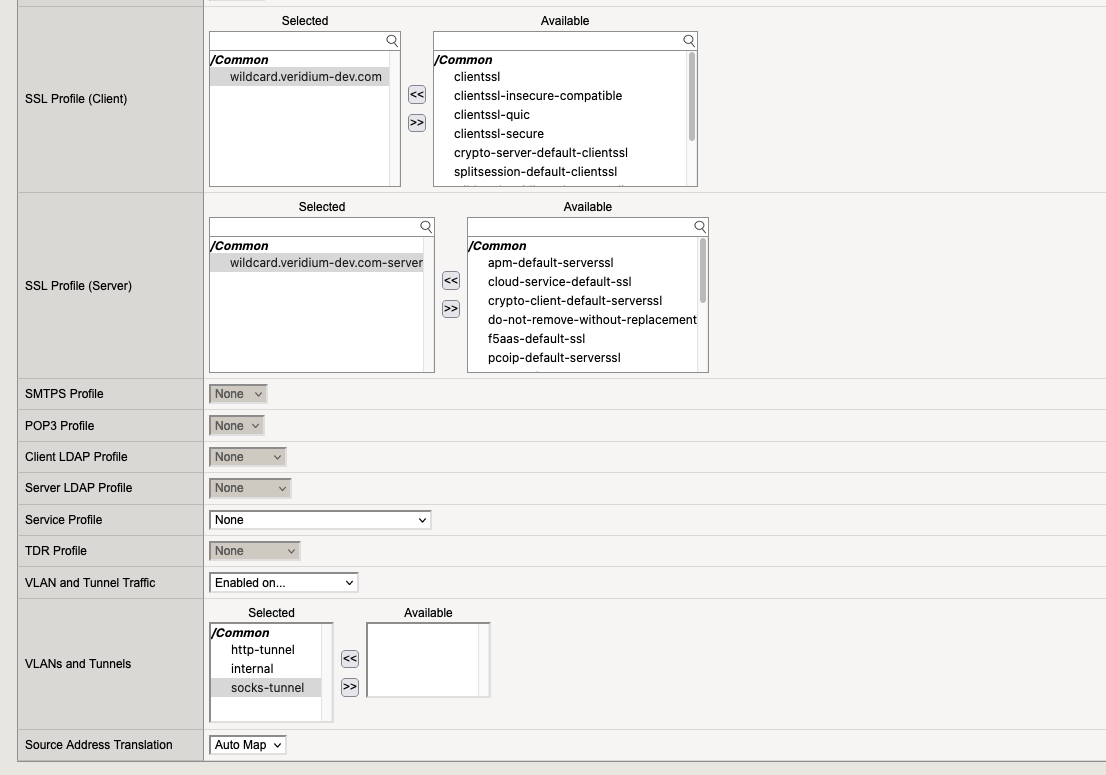
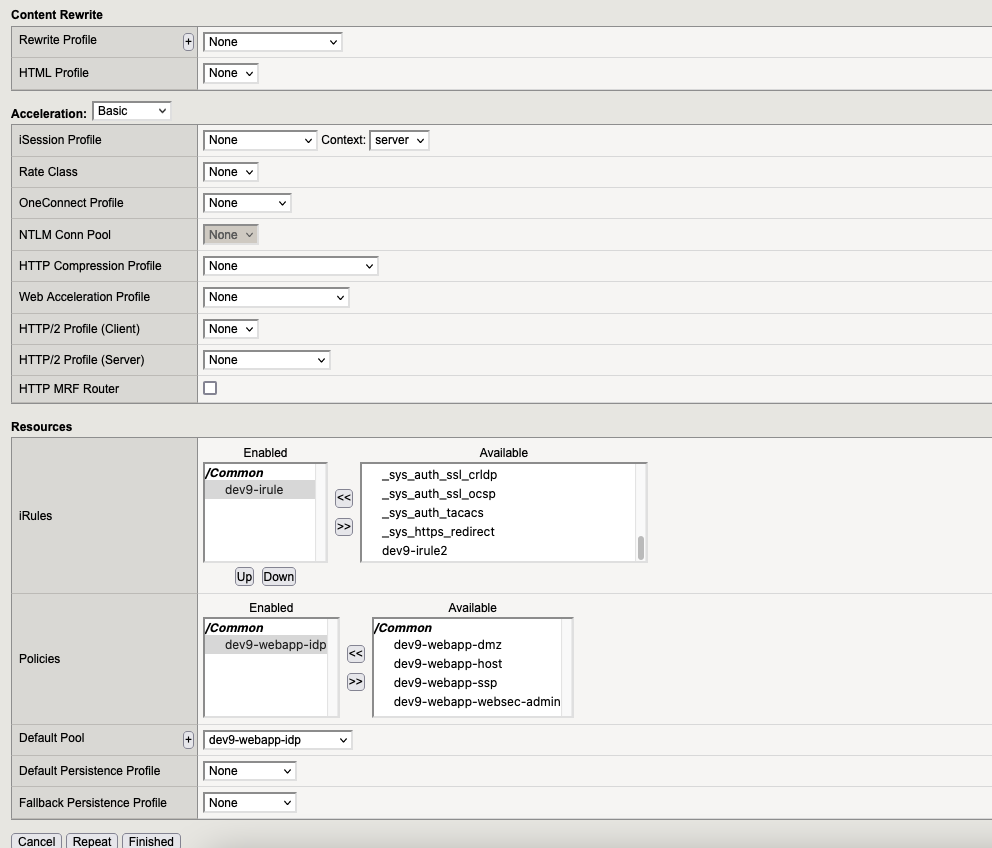
7.4. Virtual Server “webapp-ssp“
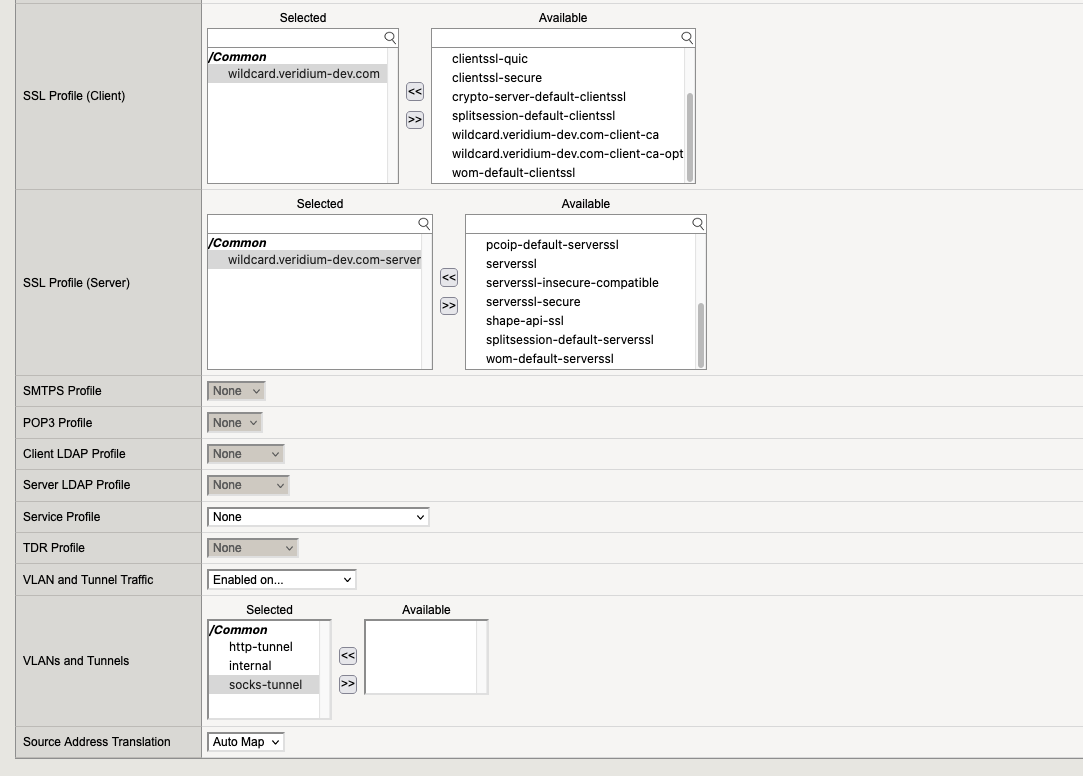
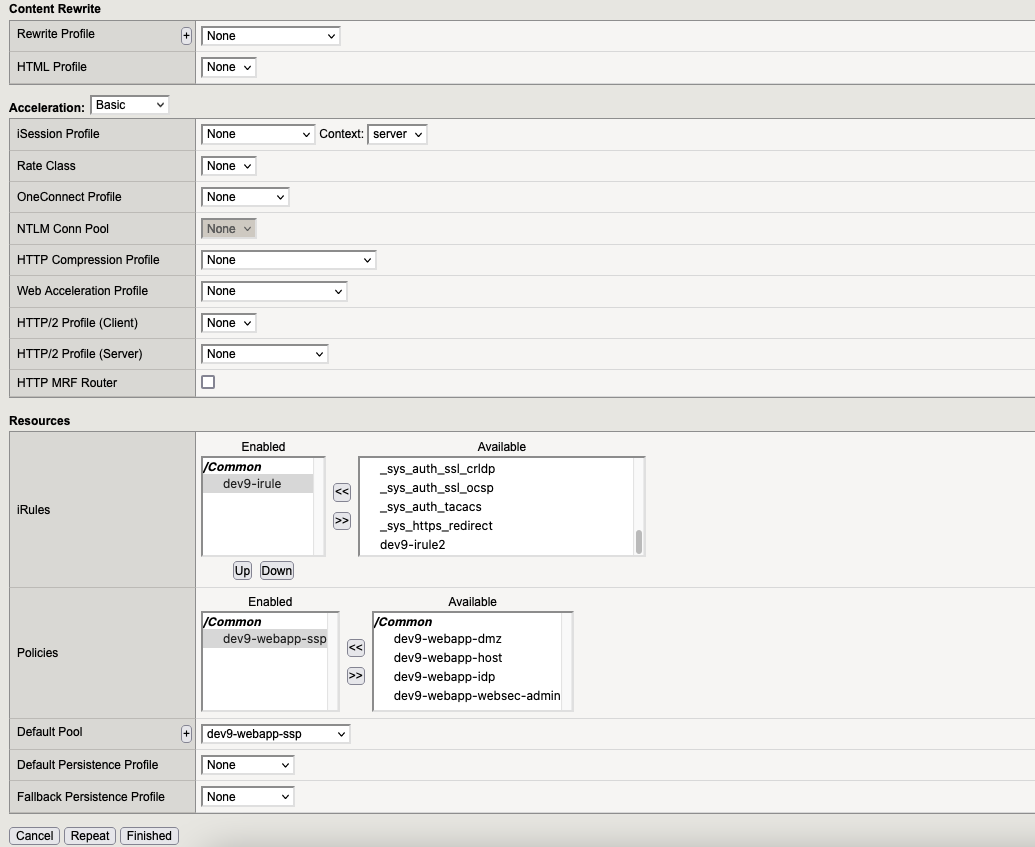
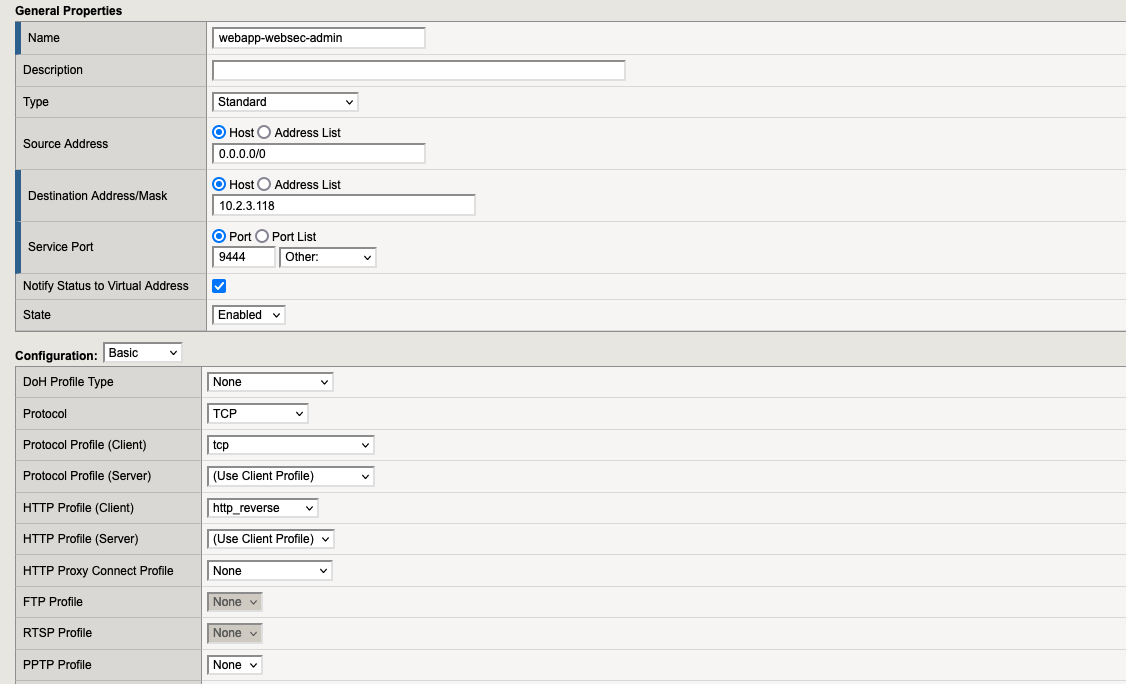
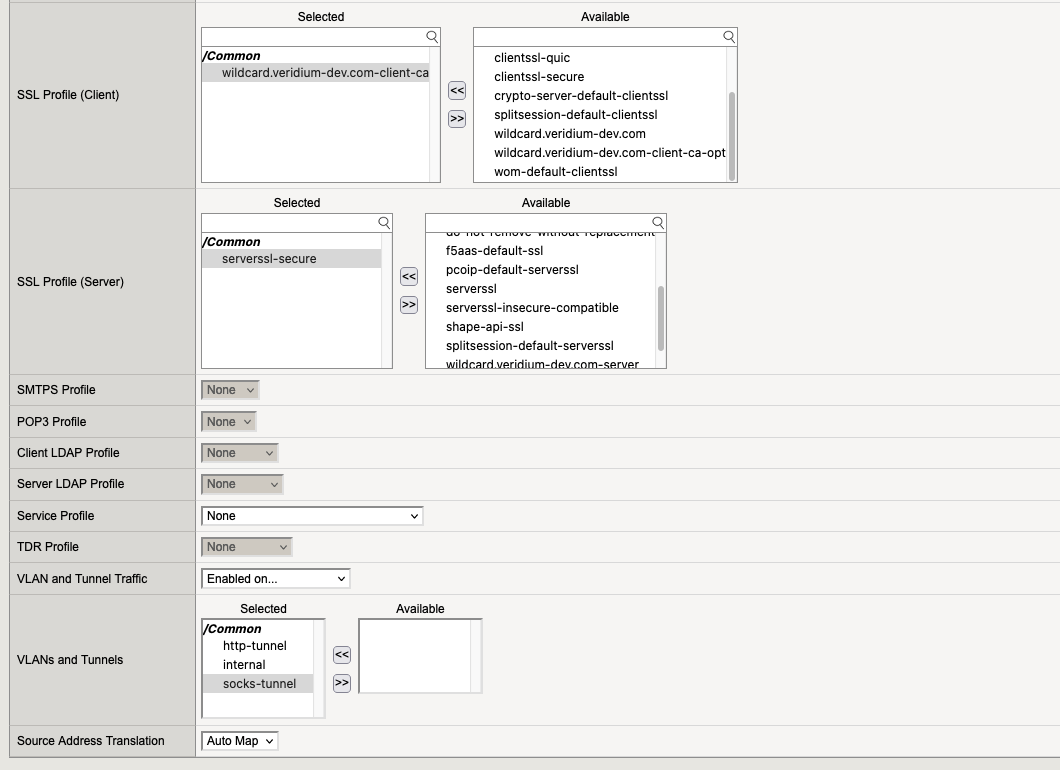
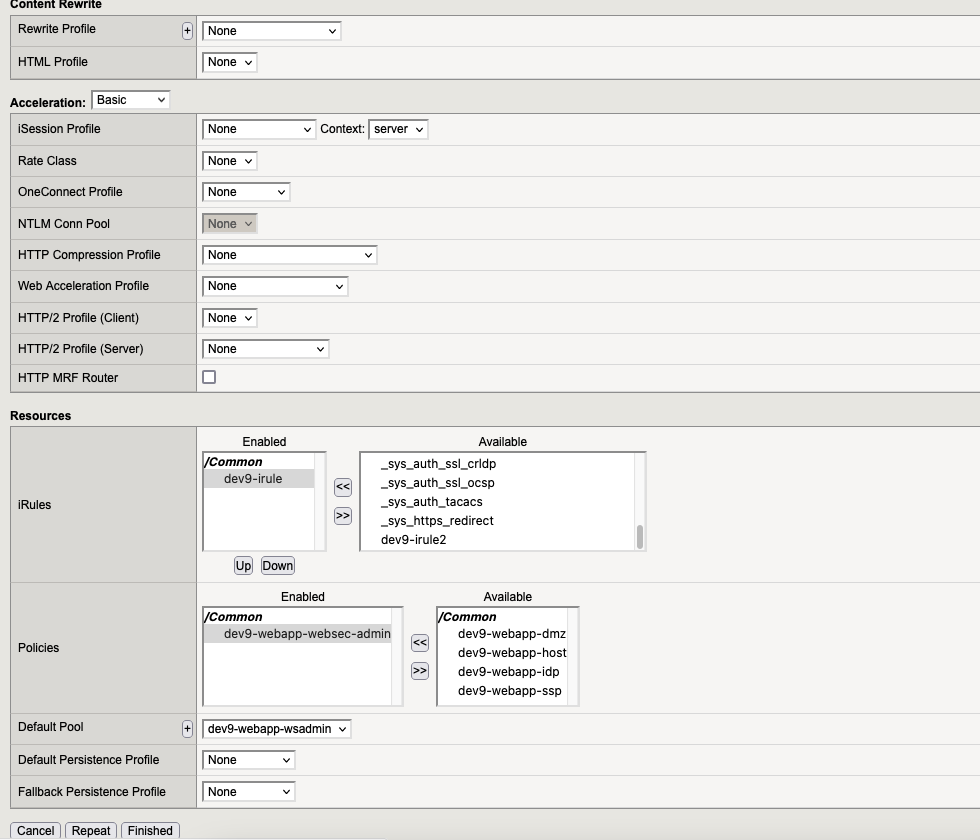
7.5. Virtual Server “webapp-websec-admin“
7.5. Virtual Servers List
At the end we need to have:
