
We’ve managed to configure a successful integration between VeridiumID 3.2 version and Palo Alto v10.2.2. SAML authentication is working both at Palo Alto admin dashboard level and at Global Protect (VPN) level.
The configuration procedure is described below:
Import idp signing certificate
This step is applies to both admin dashboard access and VPN access procedures.
-
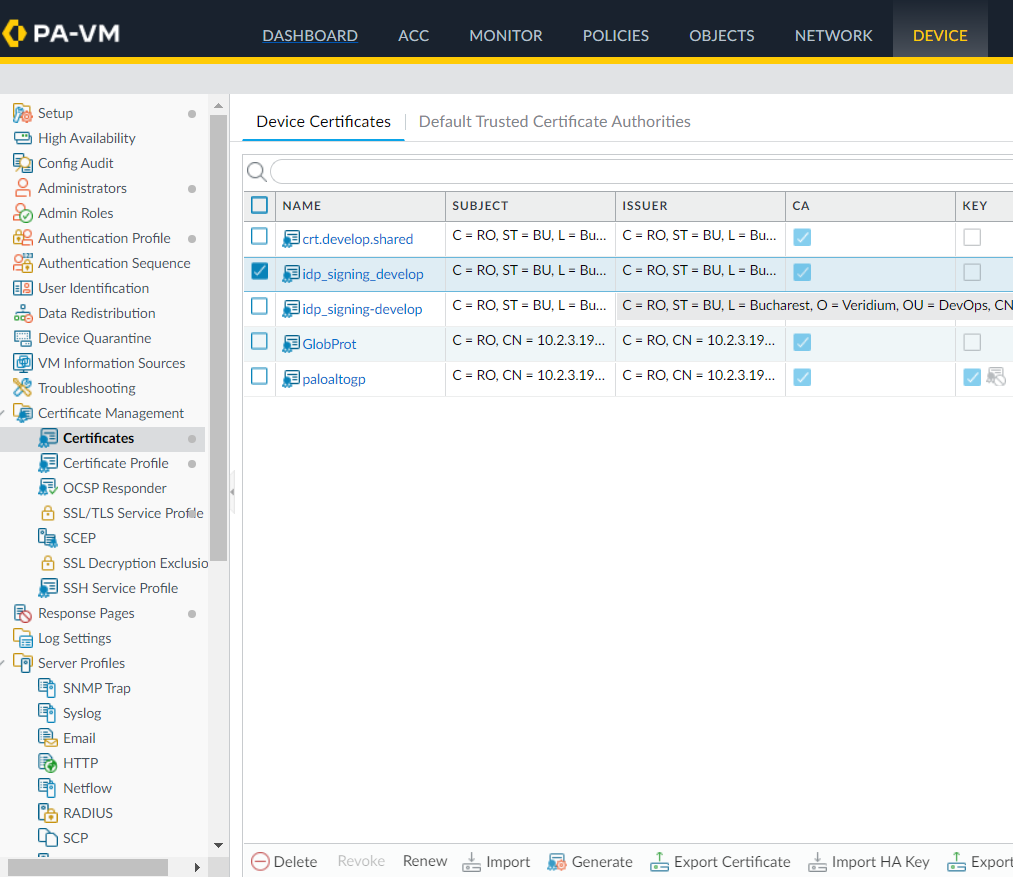
In order to import the idp signing certificate, access the Device->Certificates->Device certificates menu, and click on Import in the bottom part of the page:
2. Assign a name for the certificate enrty, import the certificate and the private key and set an import passphrase:
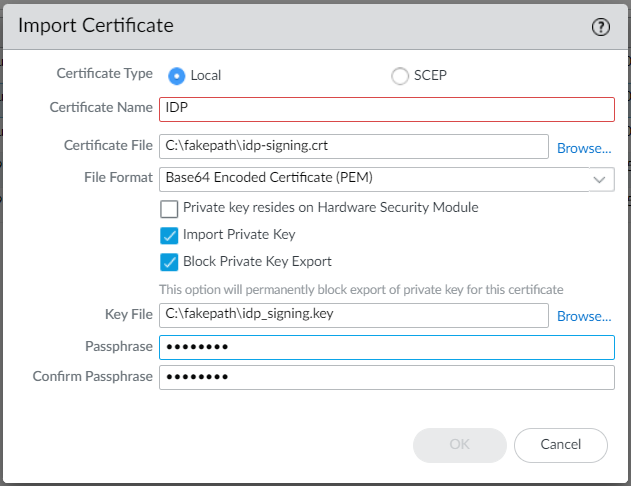
3. Click on Ok to finish the import process.
Admin dashboard SAML integration
-
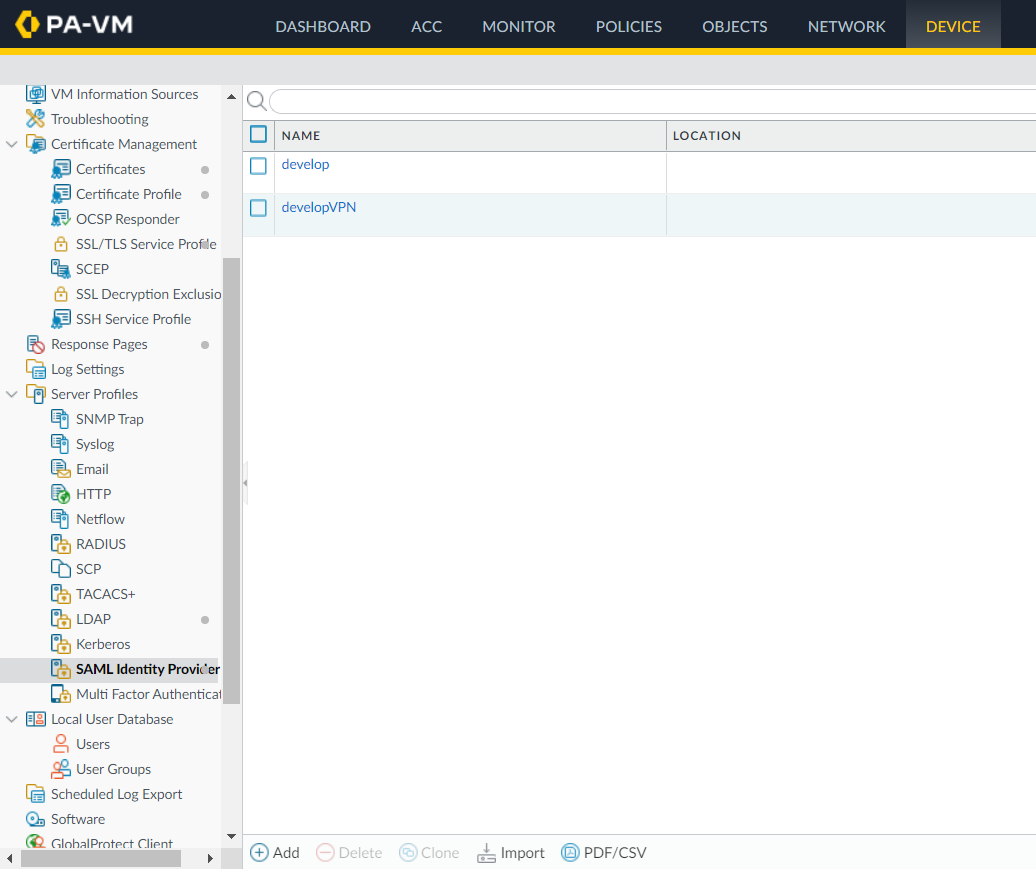
Define the idp inside the PaloAlto admin interface by accessing Device->Server profiles->SAML Identity Provider menu and click on Import:
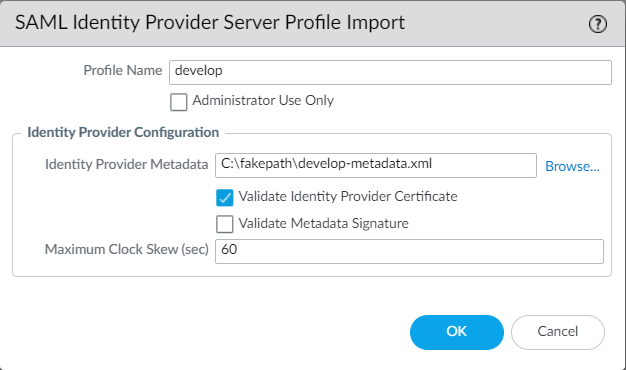
2. Assign a name, select the VeridiumID metadata file and click on OK.
3. Review the settings by clicking on the newly defined idp and make sure the binding methods are correct. If not, change them accordingly:

4. Next you’ll have to create an authentication profile. For this, access the Device->Authentication profile menu and click on Add to add a new one:
5. Set the type as SAML, assign a name, select the imported idp signing certificate in the Certificate for signing requests field and then select a certificate profile (or create one). In order to avoid trust related errors on clients, you can use a non self-signed certificate for this step. Click Ok to finish.
For testing purposes, under the Advanced tab we chose All:

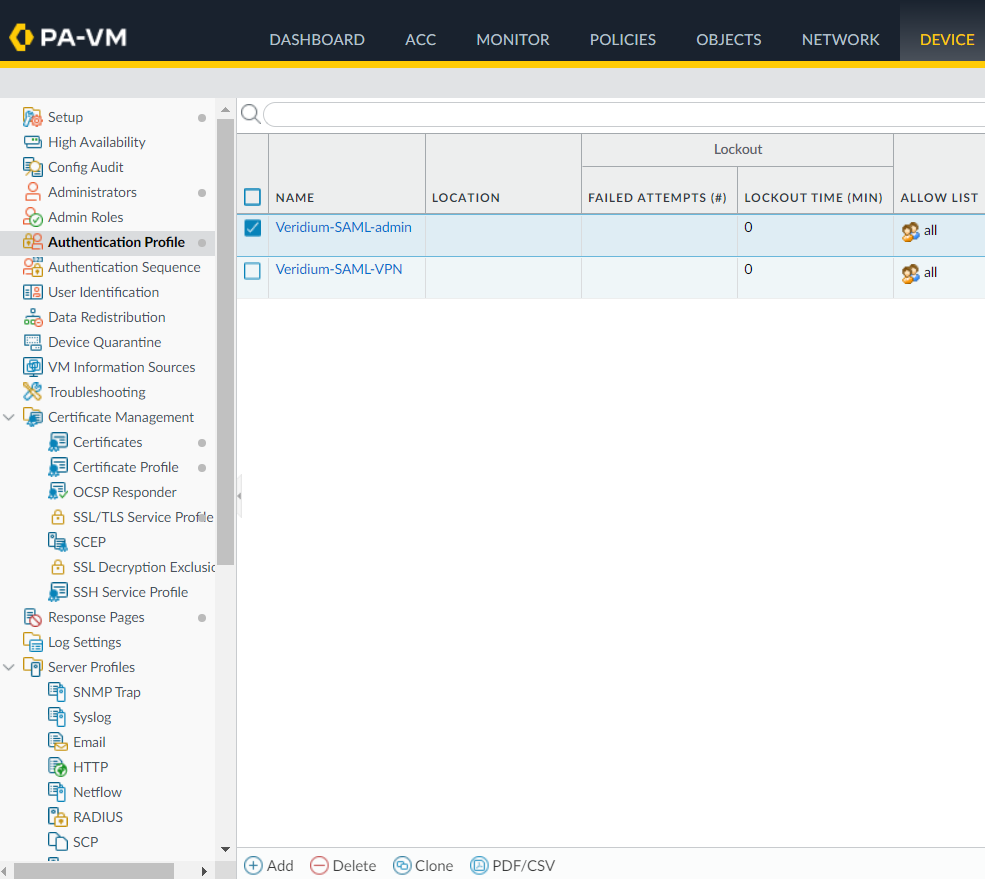
6. You can extract the admin dashboard service provider metadata at this point. In the Authentication profile list click on the metadata link corresponding the the profile created at step 5:

7. Select management as service, then IP or hostname in the Type section and fill in the correct ip or hostname value:
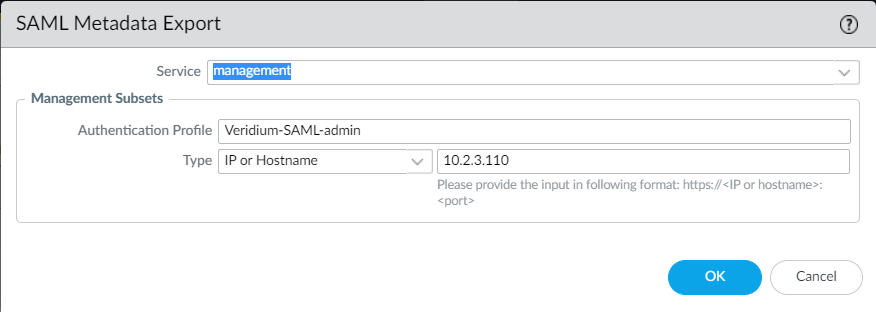
Click OK to save the metadata file.
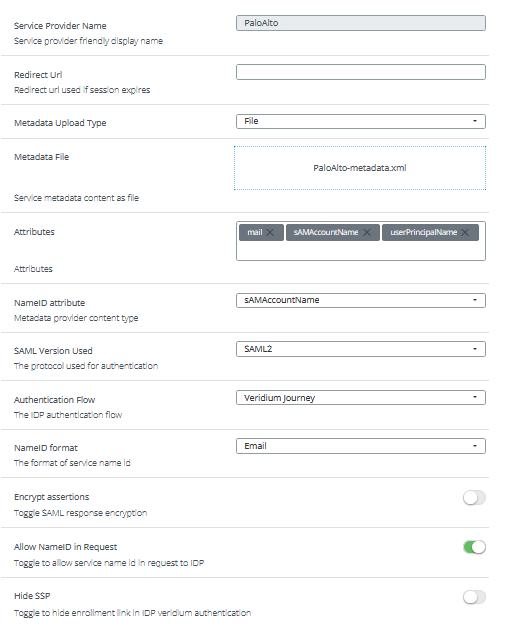
8. Access the Veridiumid admin dashboard and create a new SAML application as follows:
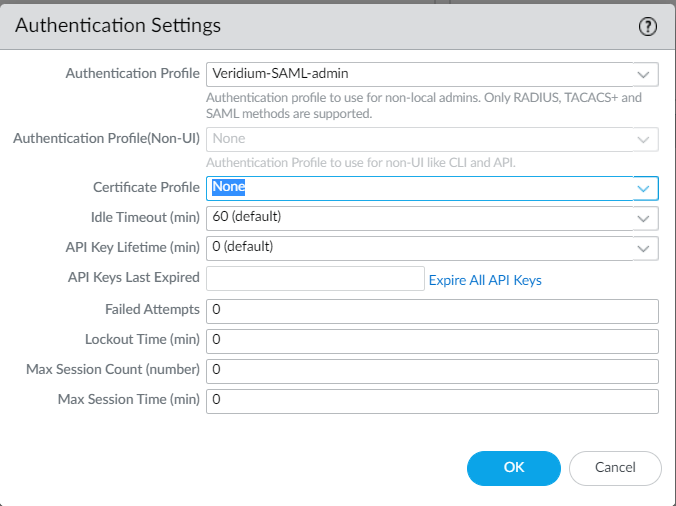
9. Go back to Palo Alto admin dashboard and access the Device->Setup->Management menu. Click on the gear icon next to Authentication settings section:
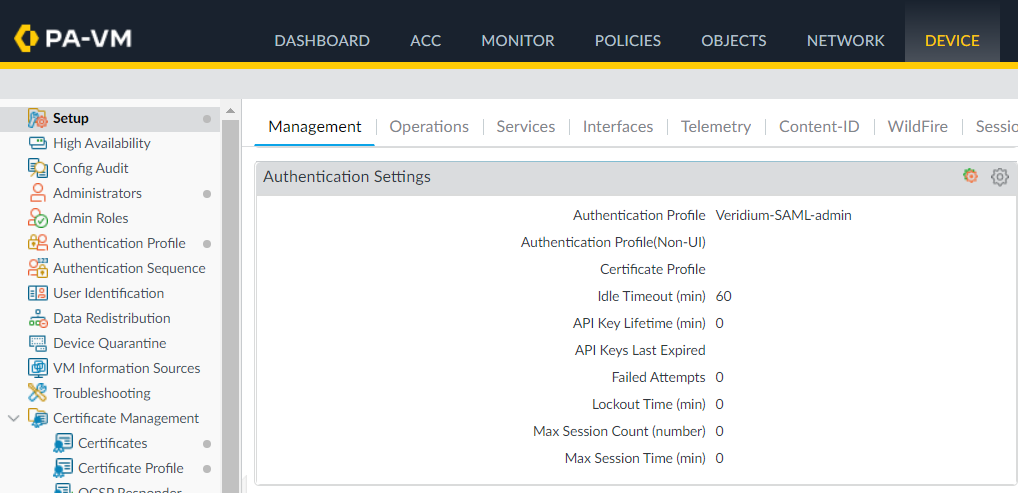
10. Select the authentication profile created at step 4, select or create a certificate profile, then click OK to save:
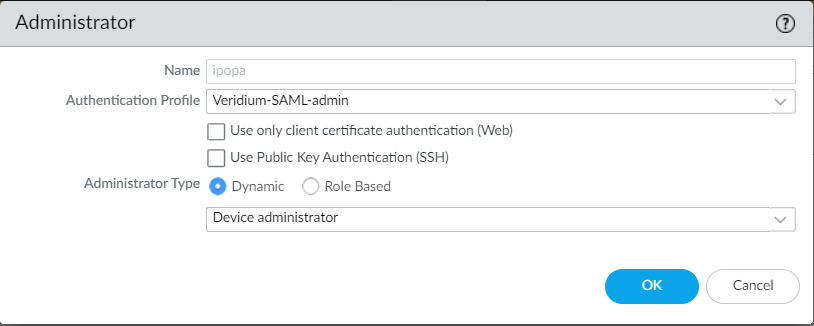
11. Create an admin account by accessing the Device->Administrators menu. The name must be the same as the username provided by the SAML idp. Also, you must select the authentication profile created at step 4 and also Device administrator under Administrator Type section:
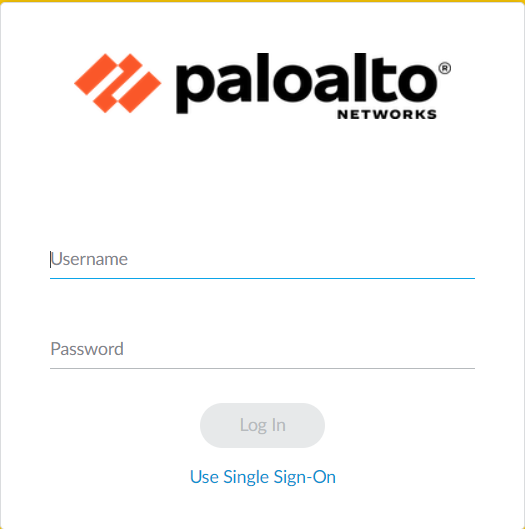
12. Commit all the changes by clicking the Commit button in the upper right corner. Next time you will access the admin dashboard, a Use Single Sign-On link should appear in the login window:
Click on it, then enter the admin username created at step 11 and click on Continue:
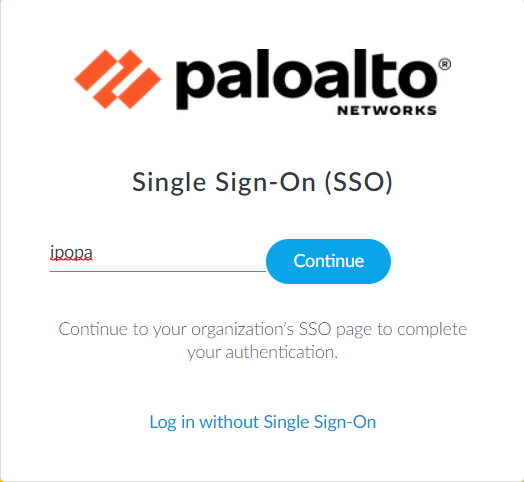
Follow the on-screen instructions to finish the authentication process.
Global Protect (VPN) SAML integration
-
The first two steps are the same (aside from assigning a different name to the idp definition).
-
On the idp definition part, configure the options like in the below example:
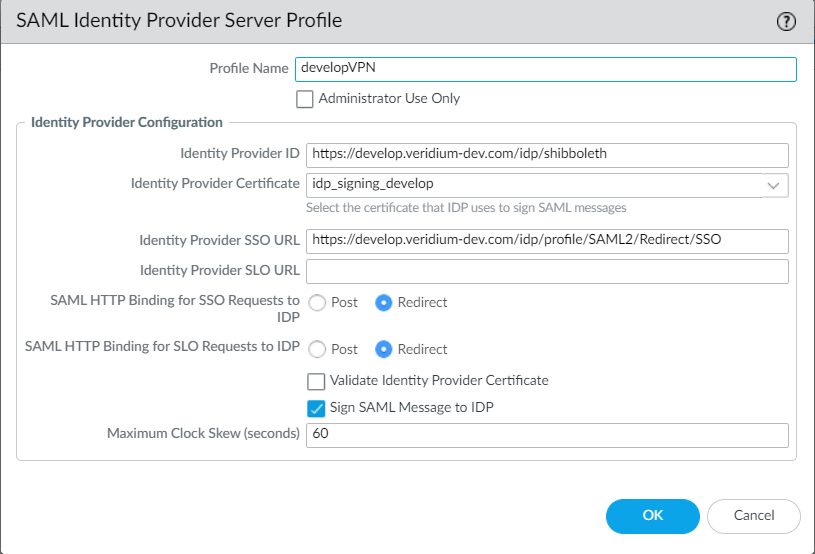
Notice that the Identity Provider SSO URL corresponds to the Shibboleth Redirect endpoint and, also, the binding method needs to be Redirect.
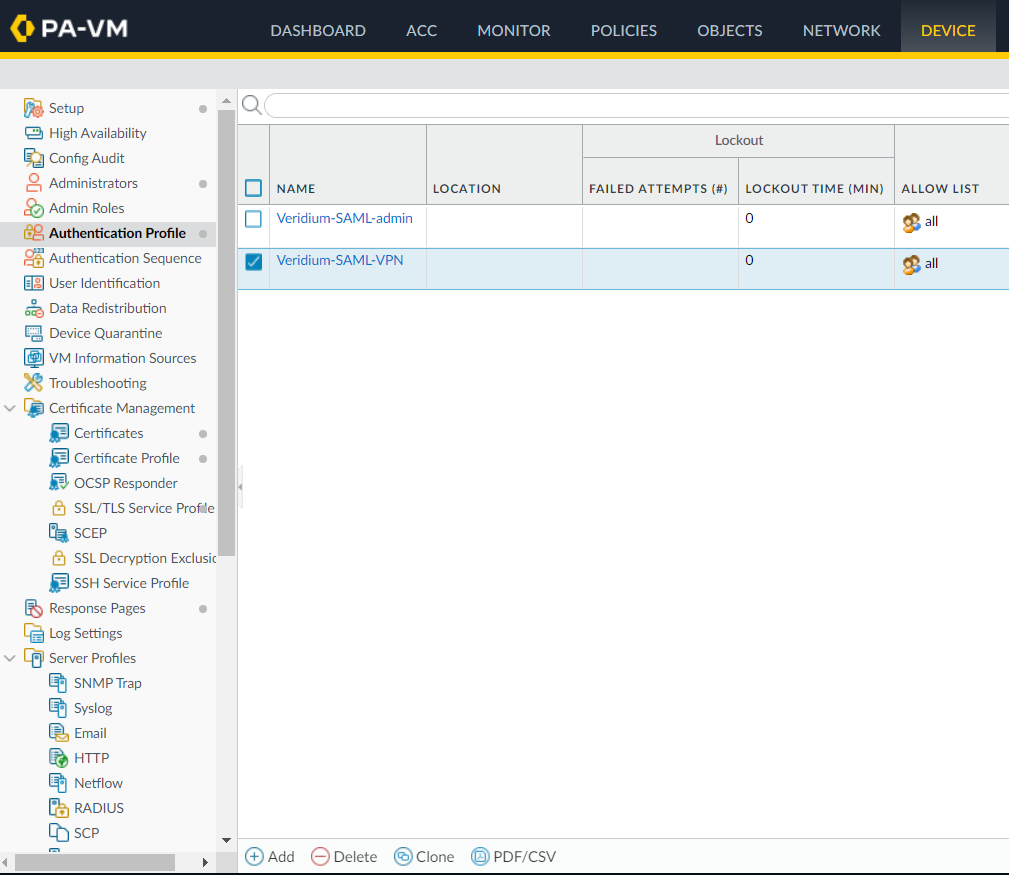
3. Next you’ll have to create an authentication profile. For this, access the Device->Authentication profile menu and click on Add to add a new one:
4. Set the type as SAML, assign a name, select the imported idp signing certificate in the Certificate for signing requests field and then select a certificate profile (or create one). Click Ok to finish:
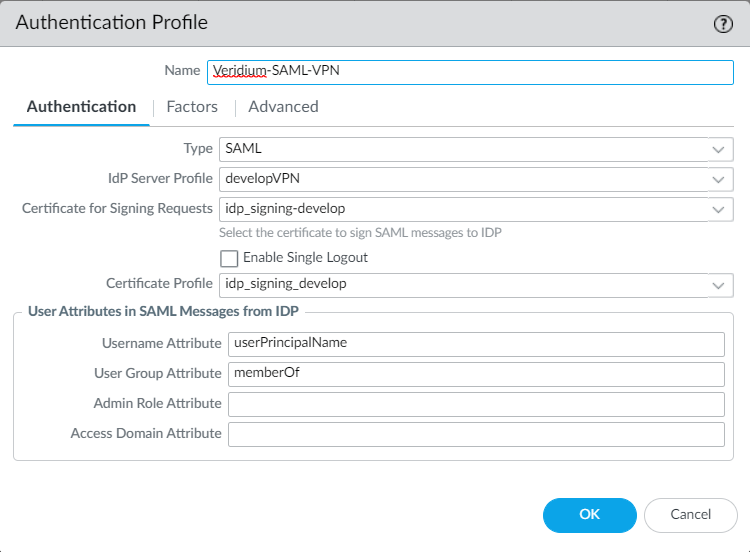
For testing purposes, under the Advanced tab we chose All:
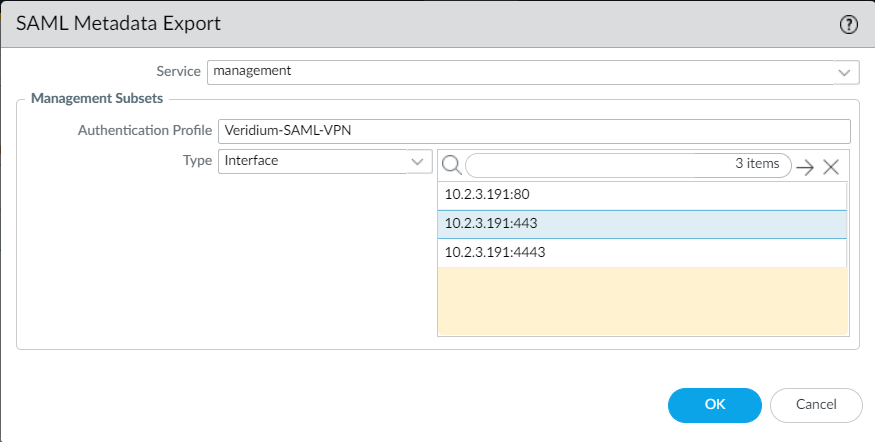
5. You can extract the admin dashboard service provider metadata at this point. In the Authentication profile list click on the metadata link corresponding the the profile created at step 4:

6. Select the ip address of the interfarce associated to the vpn and click Ok:
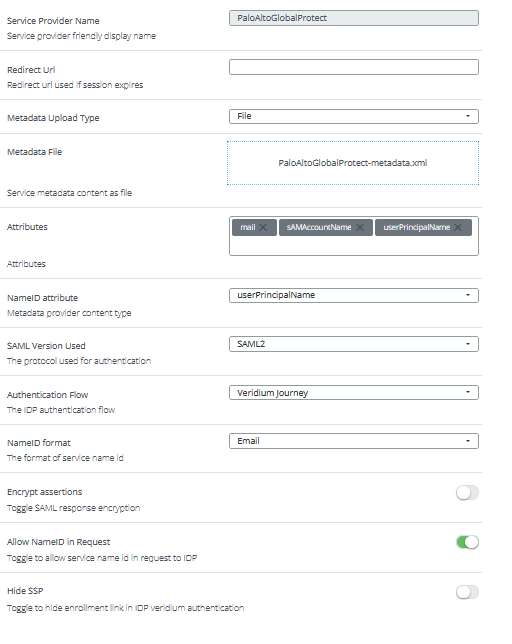
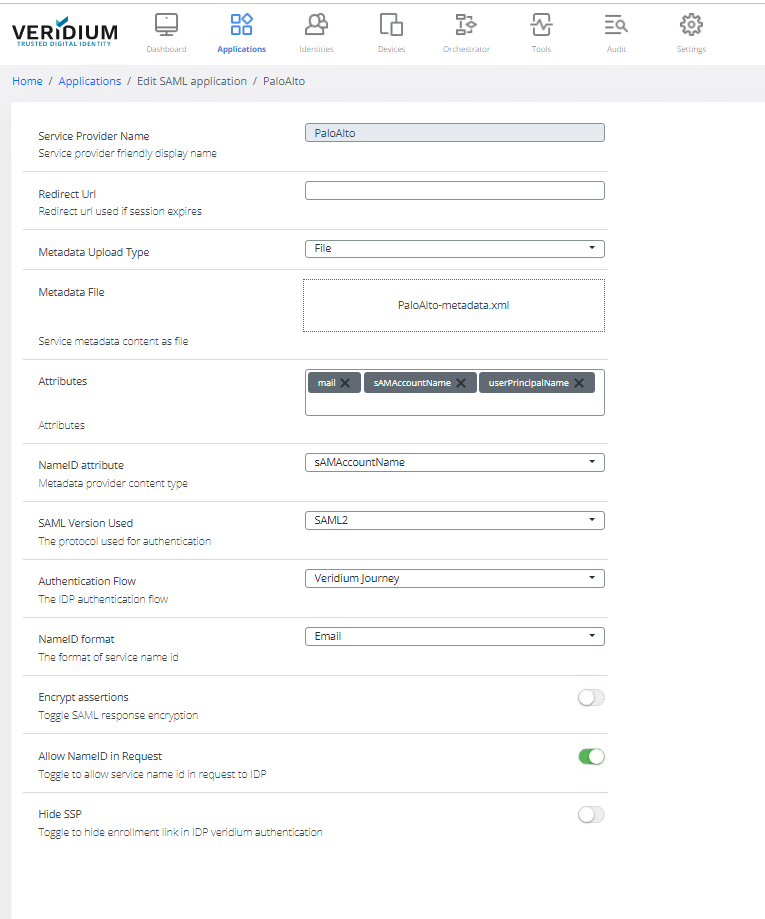
7. Go to VeridiumID dashboard and create a SAML application for GlobalProtect using the metadata file obtained at the previous step as follows:
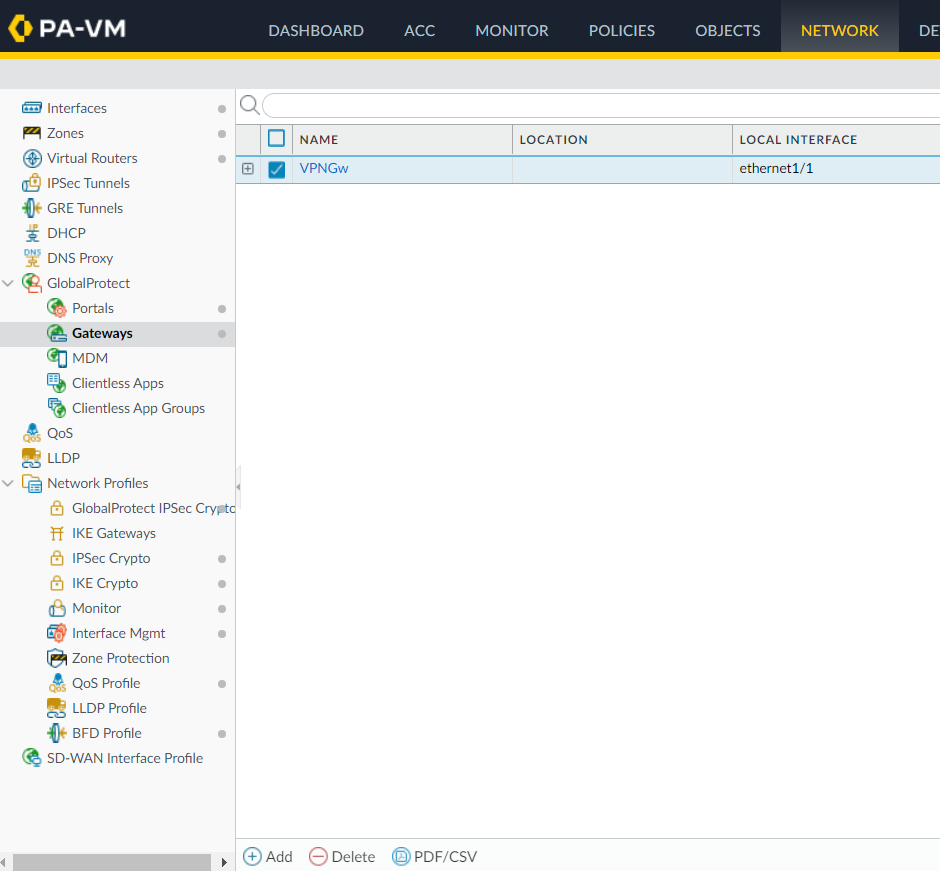
8. Next you’ll have to add a new Gateway for VPN purporses. For this, access the Network->Gateways menu and click on Add to add a new Gateway:
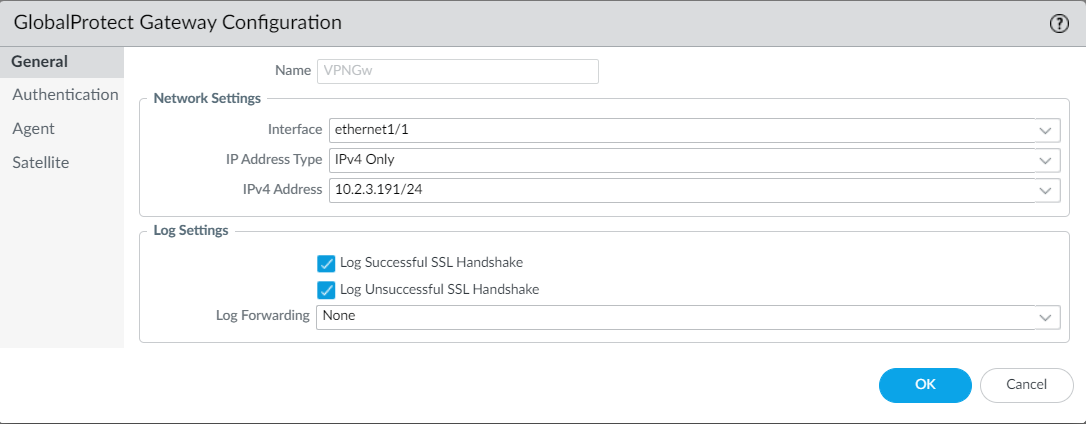
9. In the General tab, set a name, Interface for client connection and an ipv4 address:
10. In the Authentication tab, select a SSL/TLS Service Profile. It is recommended to use a certificate issued from a trusted CA, otherwise client connection will fail. Select also a Certificate profile (idp signing certificate) and add a new Client authentication setting by clicking on Add:
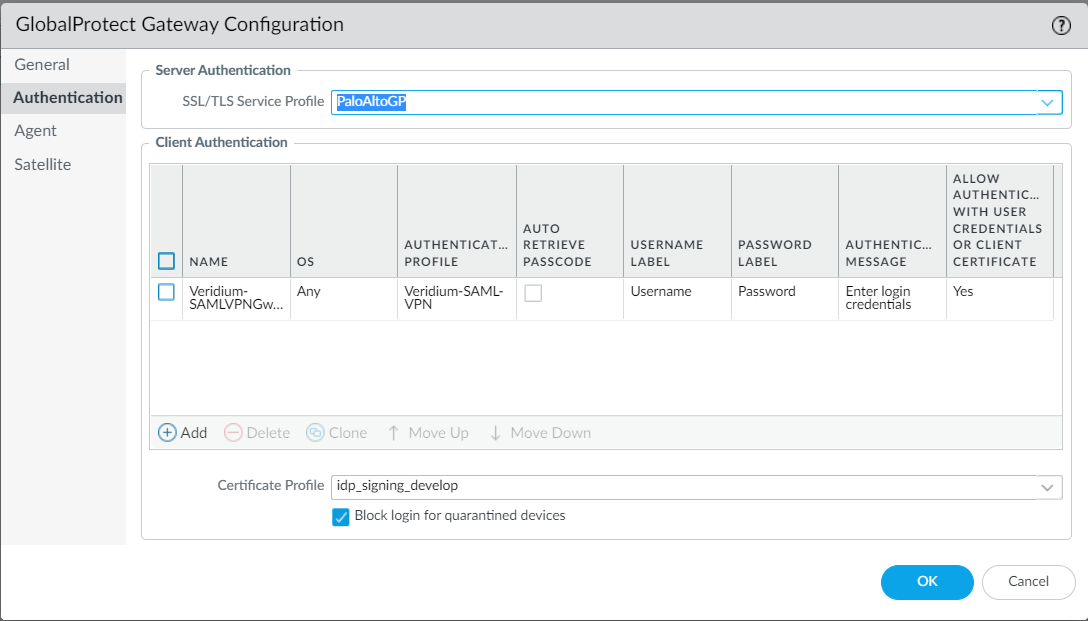
11. Set a Name, Authentication Profile (created at step 3) and select Yes in the Allow Authentication with Credentials OR Client Certificate:
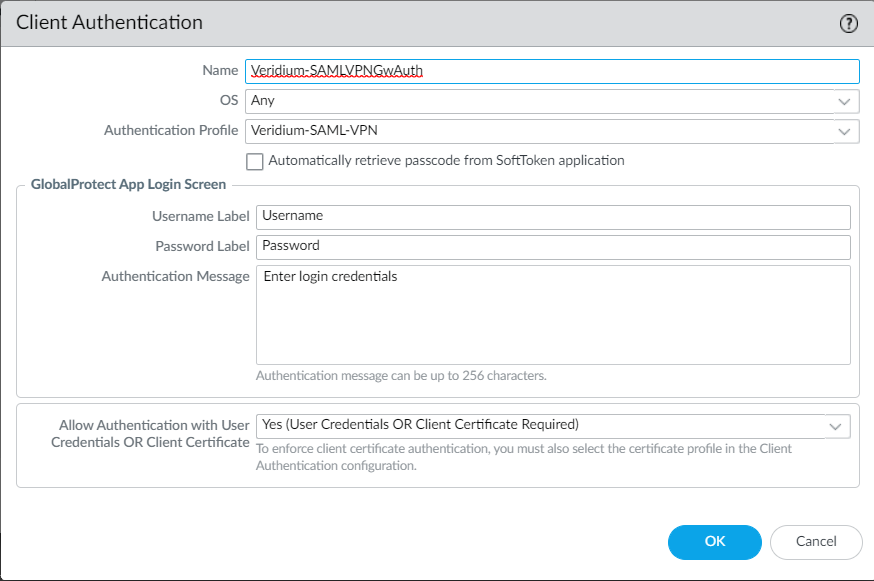
Click OK to save the settings.
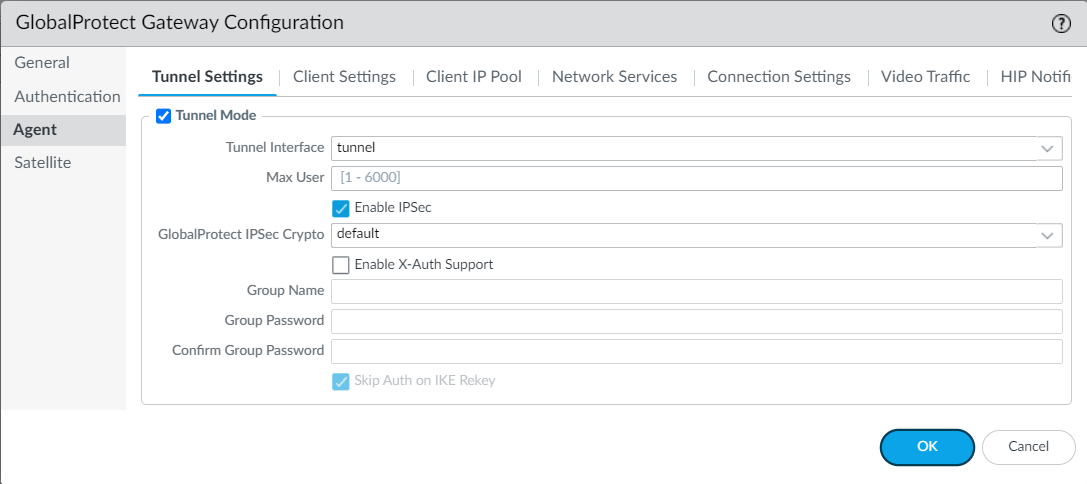
12. Under the Agent tab, in the Tunnel Settings section, enable Tunnel Mode:
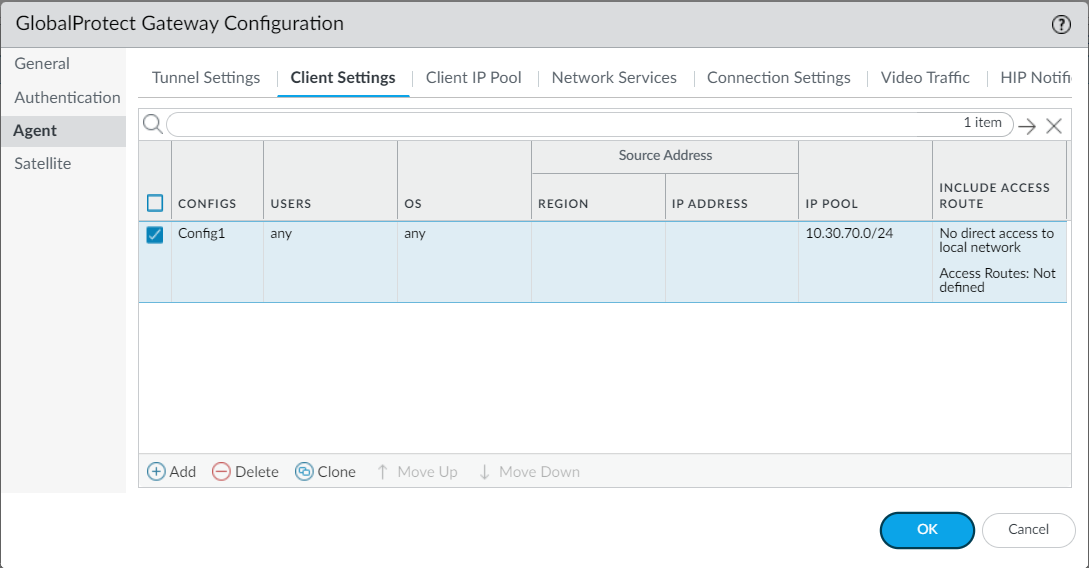
13. In the Client Settings tab click on Add to add a new config:
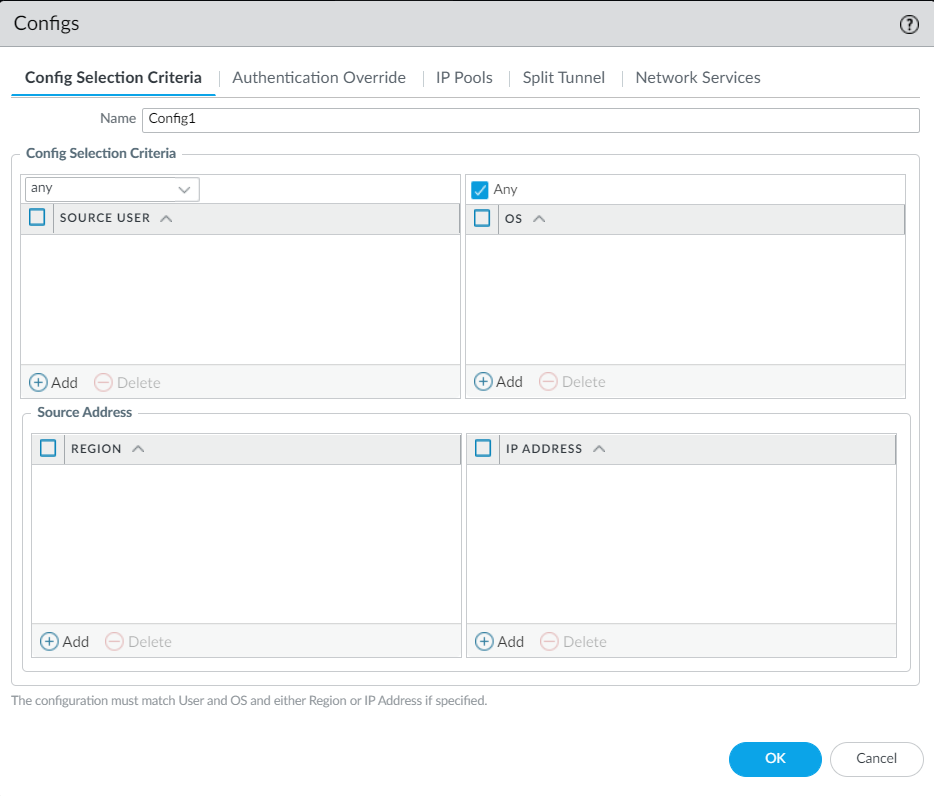
14. For testing purposes we have chosen Any for SOURCE USER and OS:
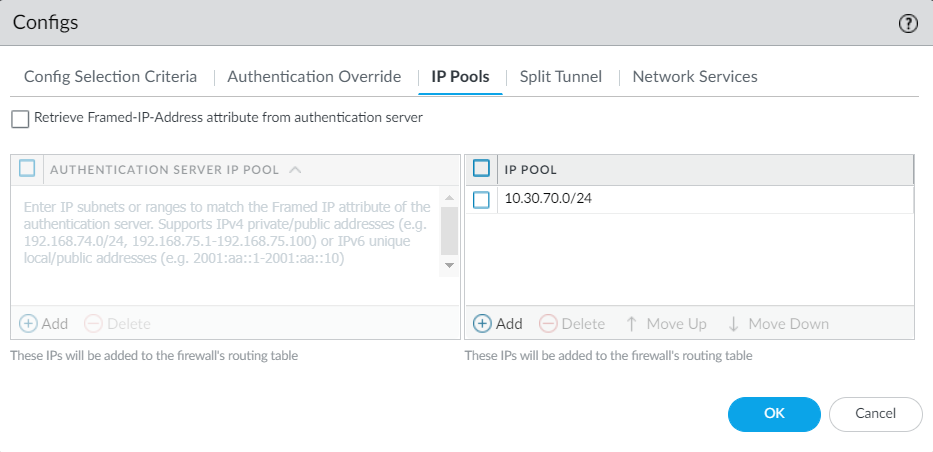
15. Configure a client IP Pool from the IP Pools tab:
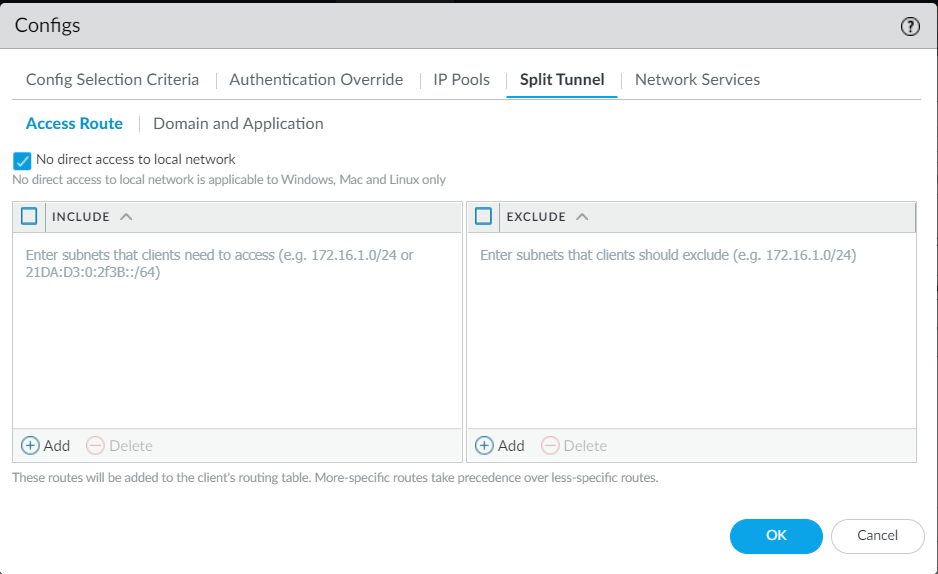
16. [Optional] enable Split Tunnel:
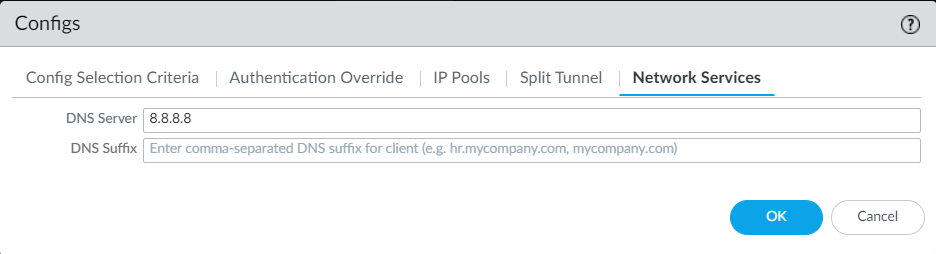
and configure a DNS server to be assigned to the client:
Click on OK to save, then click again on Ok to save the Gateway definition and commit the changes.
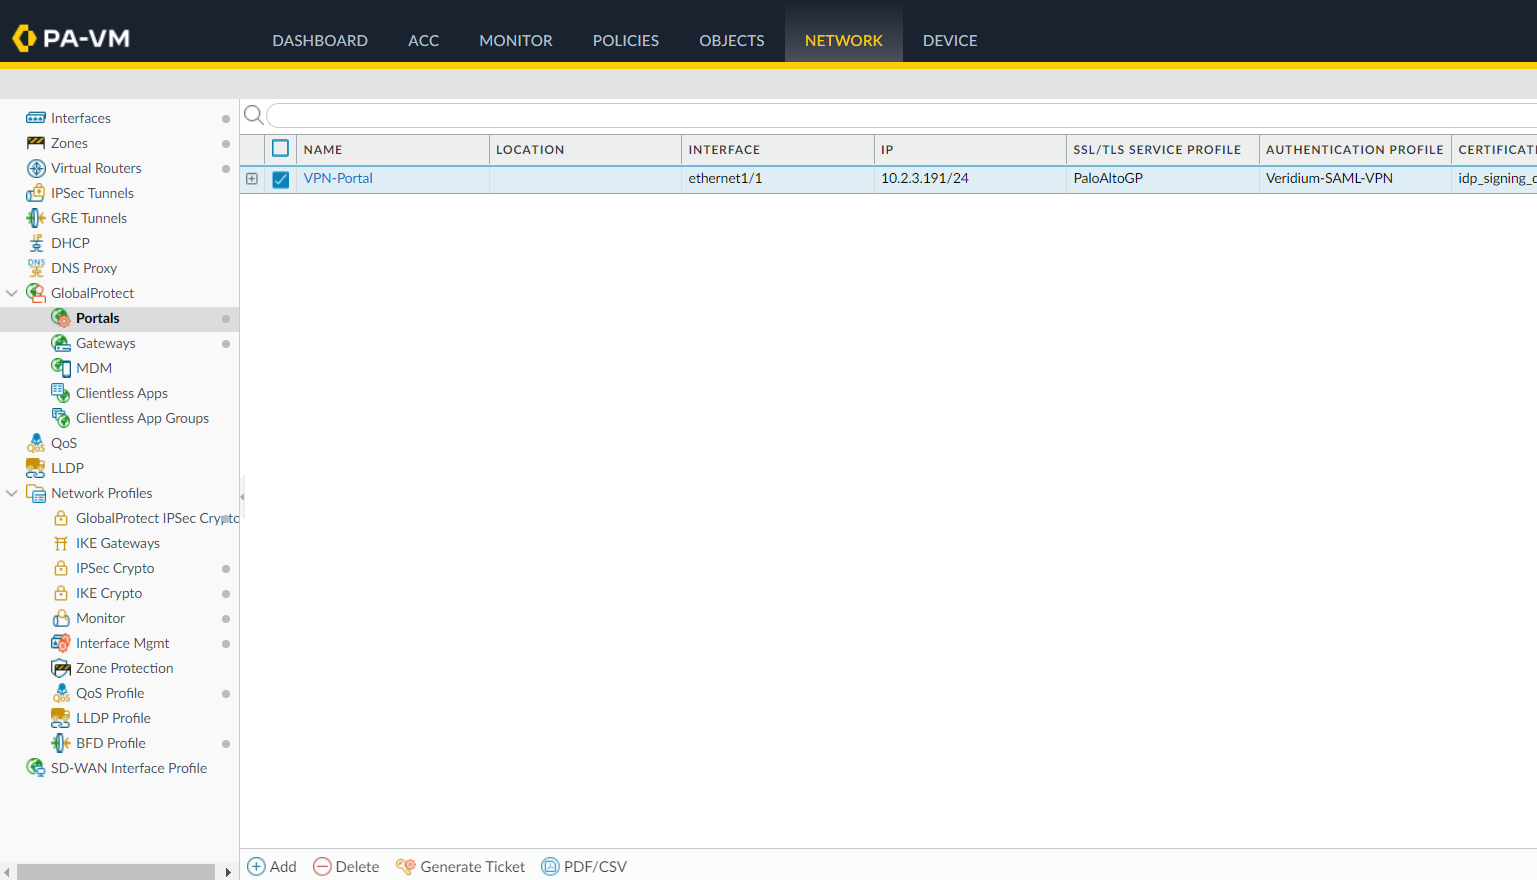
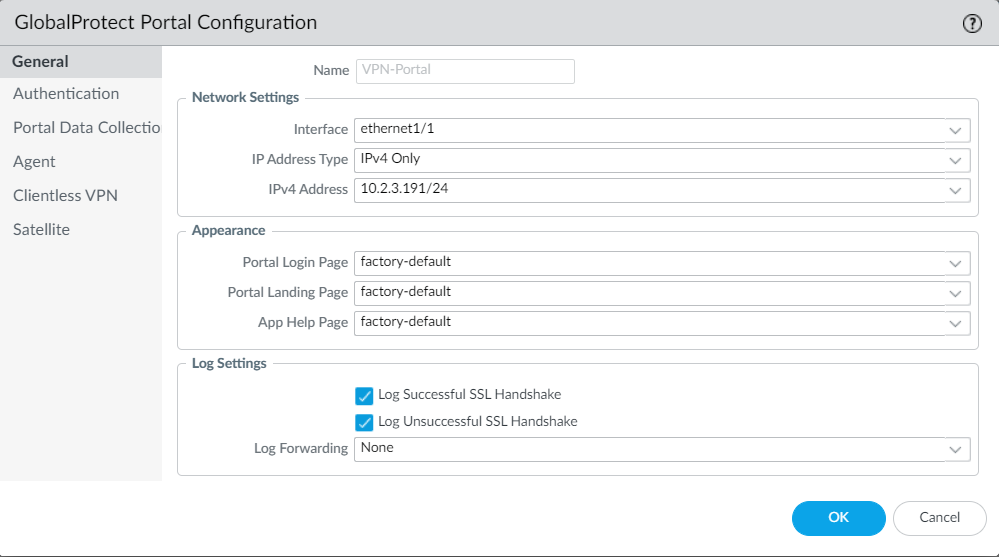
17. To allow user to download the vpn client from the server, you can configure a captive portal by accessing the Network->GlobalProtect->Portals menu and click on Add:
18. Under the General tab, set a Name, an Interface on which the portal will listen and an IPv4 Address:
19. For the Authentication part, repeat step 10.
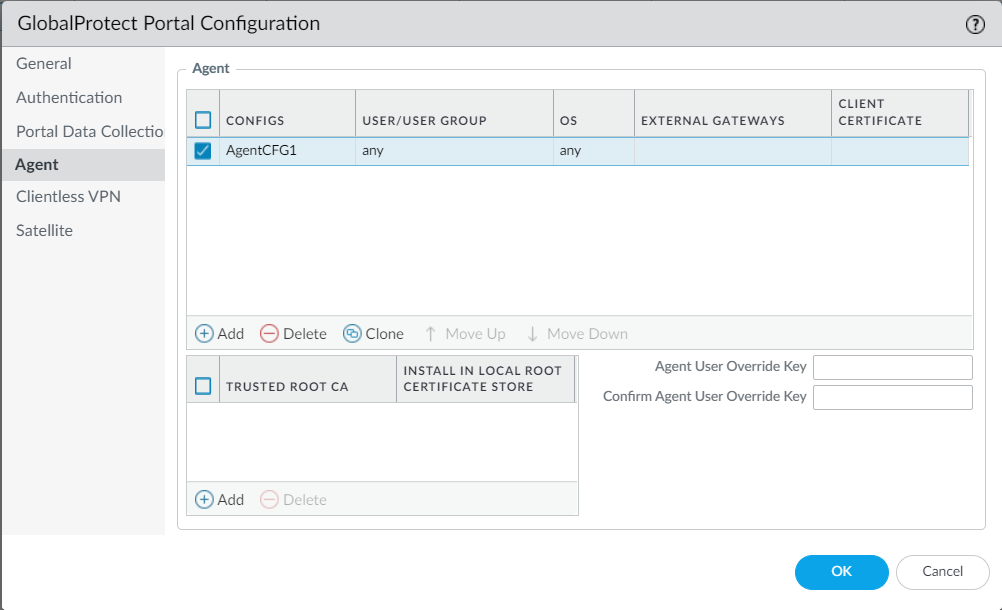
20. Under the Agent tab click on Add to add a new Agent config:
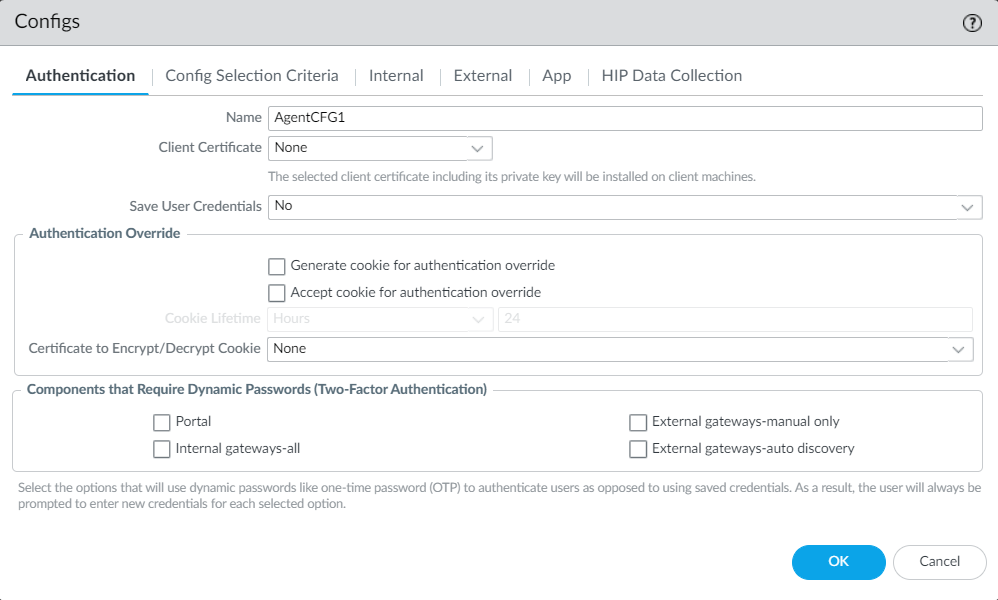
21. Set a Name in the Authentication tab:
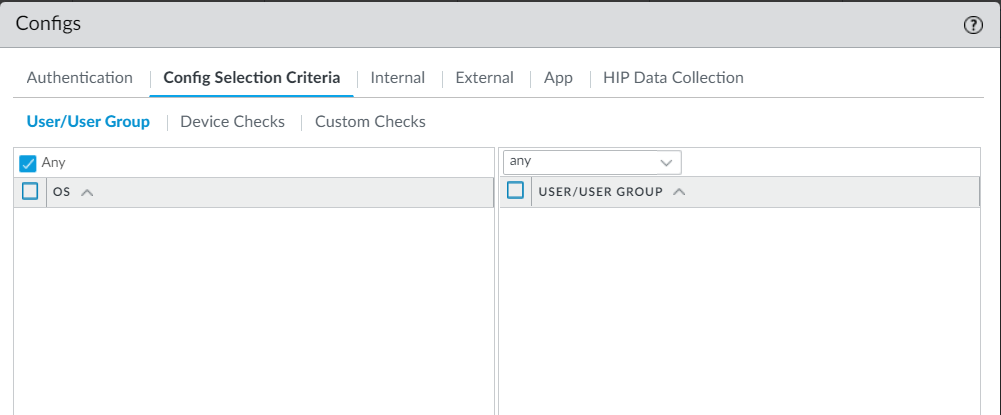
22. For testing purposes, select Any in the Config Selection Criteria/ User/User Group section:
23. Configure a new Internal Gateway by clicking Add in the Internal Gateways section:
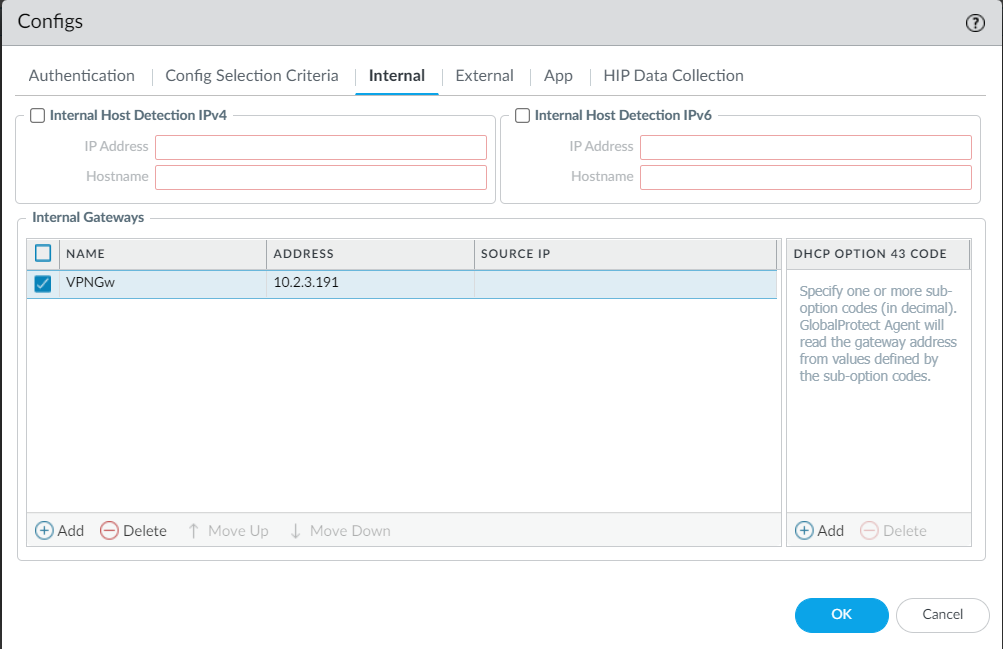
24. Set a Name and the ip address of the internal gateway:
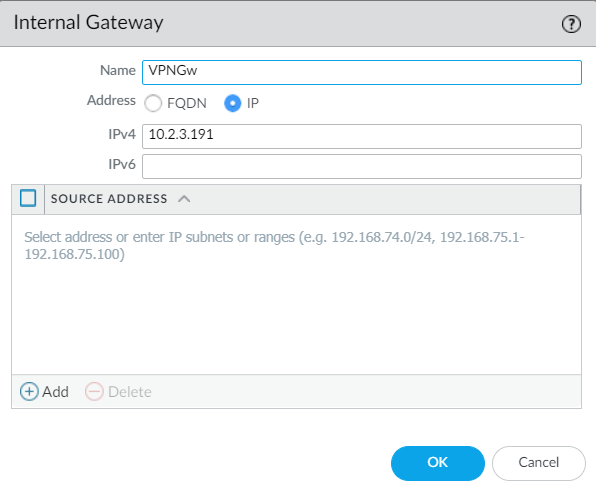
Click OK to save the settings and commit the modifications at OS level.
25. Test the settings:
-
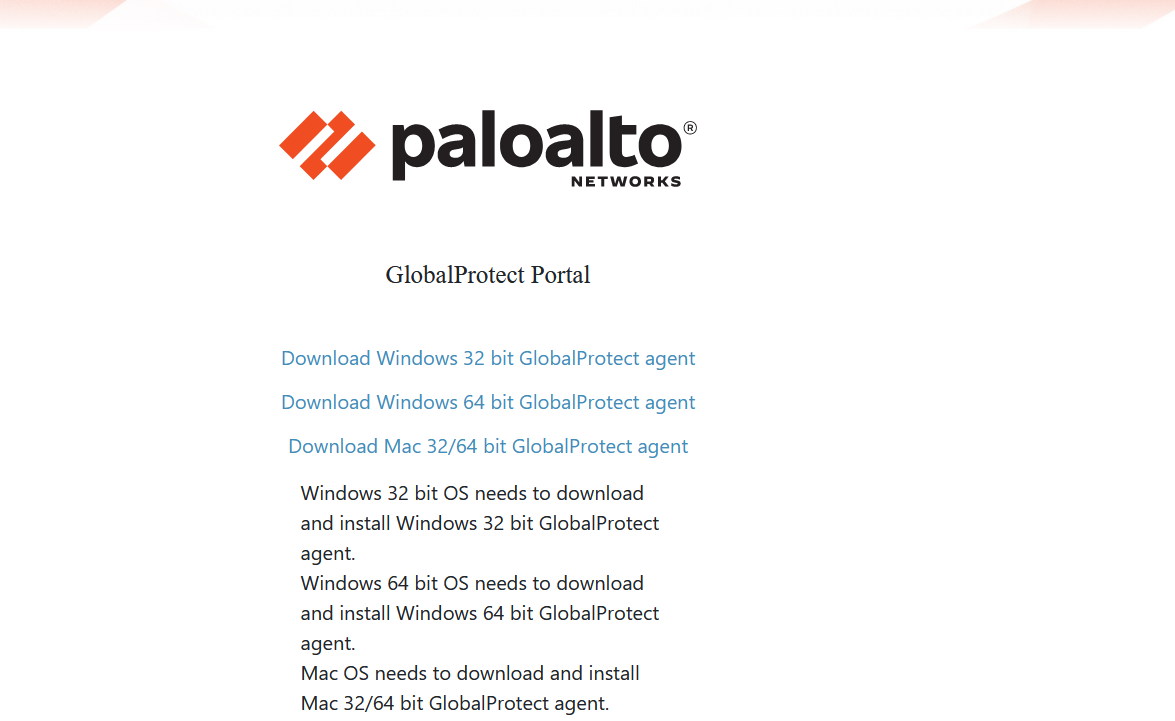
Upon accessing the portal at https://<portal_address> you should be redirected to the IDP single sign on page. If the authentication is successful, you should be able to download the cGlobalProtect client:
-
Upon connecting using GlobalProtect client, you should also be redirected to the idp single sign=on page:
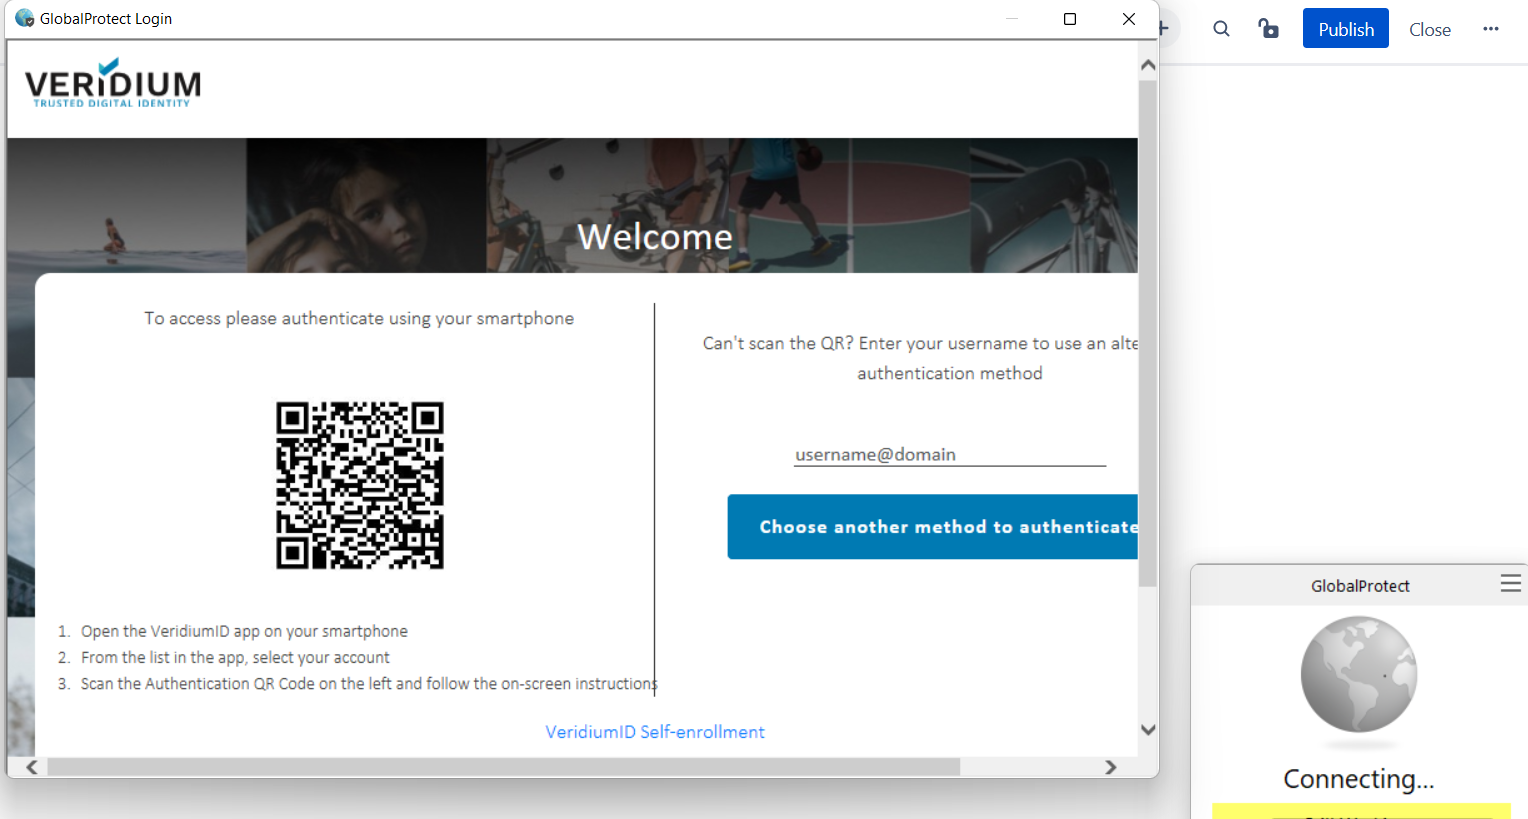
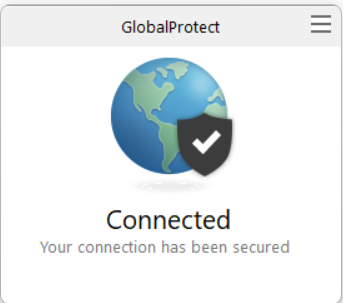
If all goes well, you should see a successful connection message from GlobalProtect:
VID Configuration
VID Metadata example for Palo Alto
<?xml version="1.0" encoding="UTF-8"?>
<md:EntityDescriptor xmlns:md="urn:oasis:names:tc:SAML:2.0:metadata" entityID="https://10.2.3.110:443/SAML20/SP">
  <md:SPSSODescriptor AuthnRequestsSigned="false" WantAssertionsSigned="true" protocolSupportEnumeration="urn:oasis:names:tc:SAML:2.0:protocol">
    <md:KeyDescriptor>
      <ds:KeyInfo xmlns:ds="http://www.w3.org/2000/09/xmldsig#">
        <ds:X509Data>
          <ds:X509Certificate>
MIIDtjCCAp4CCQCWxMlGiWgqJjANBgkqhkiG9w0BAQsFADCBmzELMAkGA1UEBhMC
<<Certificate>>
lmXle9QPJnyuTplyJ+jtNRDtociEDesxBsDexaMwE0R7d3KC12E1Rxv6
          </ds:X509Certificate>
        </ds:X509Data>
      </ds:KeyInfo>
    </md:KeyDescriptor>
    <md:AssertionConsumerService Binding="urn:oasis:names:tc:SAML:2.0:bindings:HTTP-POST" Location="https://10.2.3.110:443/SAML20/SP/ACS" index="0"/>
  </md:SPSSODescriptor>
</md:EntityDescriptor>