FreeRadius service configuration
This purpose of this article is to provide the configuration steps for freeradius service.
This article assumes that the freeradius rpm package has already been installed of the machine we are about to make changes to.
Overview
After a fresh instalation, there are 2 steps to be done for configuring FreeRadius:
1) You need to define the Radius clients from which Radius server should accept requests from.
A Radius client is usually a Network Access Server (NAS) or an Access Point.
It’s an operation which requires to edit a certain file on the disk and requires the restart of FreeRadius service.
This must be done on each server where FreeRadius is deployed.
2) You need to specify the authentication methods allowed for each Radius Client
This is performed from the Veridium Manager dashboard and it doesn't require restart of FreeRadius service.
Location of freeradius - related files
The systemd unit service that defines the freeradius service can be found at
/etc/systemd/system/ver_freeradius.serviceFreeradius instalation location is
/opt/veridiumid/freeradius
Here we can find the source files, the binaries and the clients.conf file which will discuss a little bit later in the article.Log file can be found at
/var/log/veridiumid/freeradius/freeradius.log
Configuration
1) Define Radius Clients
Check /opt/veridiumid/freeradius/etc/raddb/clients.conf file.
This file contains definitions of Radius clients.
By default, the file contains one client that accepts authentication requests from any ip addressclient localnet { ipaddr = 0.0.0.0/0 secret = testing123 require_message_authenticator = no nas_type = other}
The minimal required informations for defining a client are ipaddr and secret.
ipaddr represents the ip address of the client.
secret represents the RADIUS shared secret used for communication between the client/NAS and the RADIUS server.
Here you can define as many clients as you want for different ip addresses/ip classes.
A full list of configurable options for a RADIUS client can be found here:
https://linux.die.net/man/5/clients.conf
![]() After you make changes to clients.conf file, make sure to restart ver_freeradius service with
After you make changes to clients.conf file, make sure to restart ver_freeradius service withsystemctl restart ver_freeradius
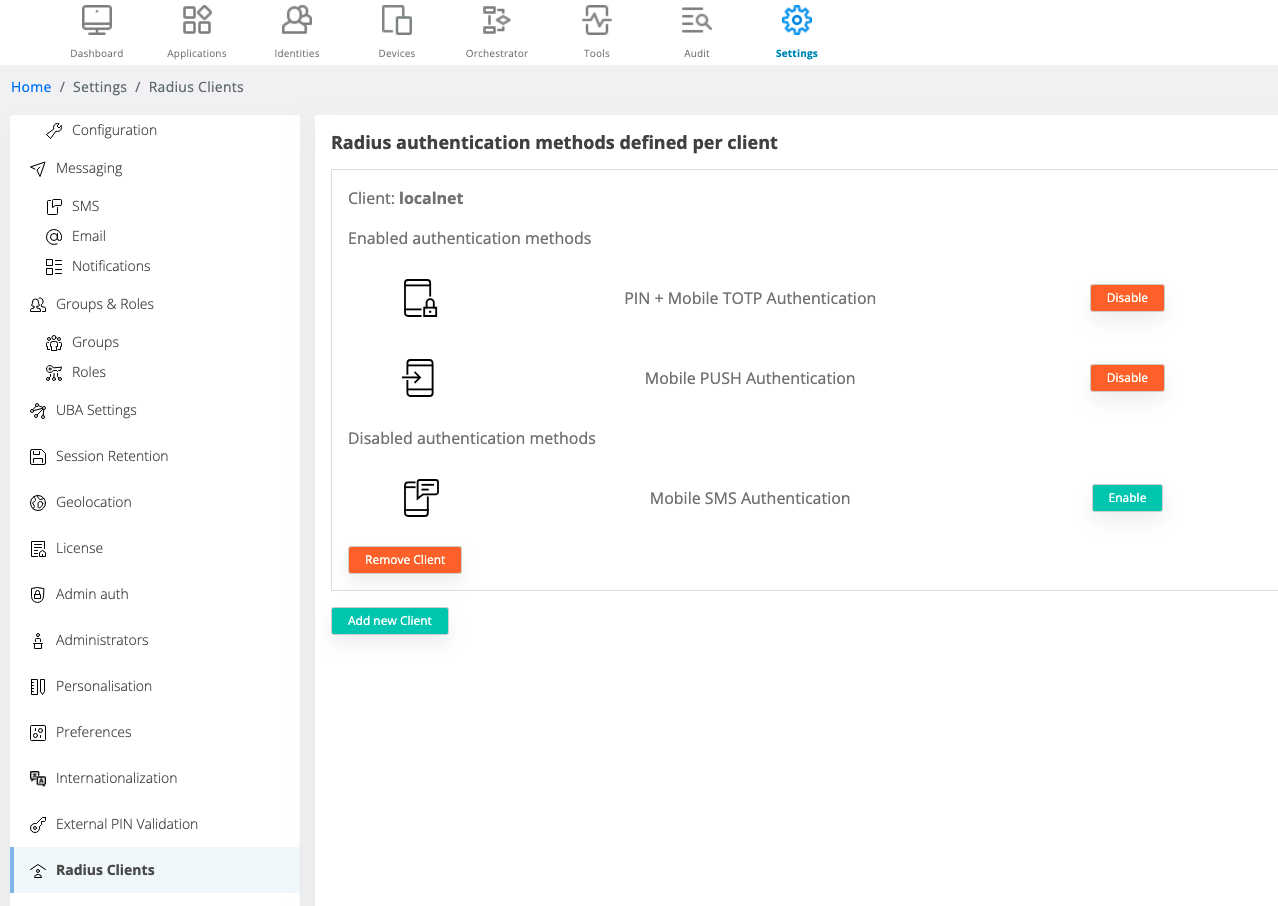
2) Specify the authentication methods allowed for each Radius Client
Inside Veridium Manager, go to Settings / Radius Clients section.

For each client defined into clients.conf file, you must specify here what what are the authentication methods allowed for that respective client.
![]() If you don’t specify (omit) a certain client, server will consider that client as not having any authentication method present.
If you don’t specify (omit) a certain client, server will consider that client as not having any authentication method present.
FreeRadius server will know to automatically retrieve the new configuration, so it's not necessary to restart ver_freeradius service when you make changes here.
Radius Authentication method - Orchestration Matrix
The authentication type selection is based on the lenght of the password which is provided during the authentication or a specific keyword for SMS ( ie : SMS )
Lenght of the password | Authentication Method | Input expected | Behavior |
|---|---|---|---|
0 Characters | none | N/A | Authentication refused |
12 Characters | PIN + Mobile TOTP Code | PIN ( 4 ) + TOTP Code ( 8 ) | Correct value : Authentication validated Inorrect value : Authentication refused |
Between 1 and 11 included Above 12 | Mobile Push notification | any character | A push is sent to device and trigger |
3 Characters | SMS OTP | “SMS” | This specific password will trigger the OTP authentication method. More information on SMS configuration method here Deploy Radius Server locally - Chapter 9.b |
