
As part of deployment resources, Veridium provides an out of the box OVA image which can be obtained from Veridium Sales Engineering team or Professional services.
This OVA image can be used for PoC's or Production.
The operating system is Rocky 8 or Rocky 9, based on the OVA you have downloaded.
See chapter How to Import an OVA file on how to import an OVA file.
After the OVA is imported, start the setup and installation of VeridiumID product. Make sure you have a FQDN for your VeridiumID server in DNS (bonus if you also have the PTR)
1. Connect ssh/scp and transfer HTTPS security certificate.
The certificate should be signed by a publicly trusted authority in p12 format with full chain included. Installation can be done also using a self signed certificate however that will make enrolling user devices difficult, vanilla iOS and Android devices need to trust the certificate in order to enroll.
1.1. Connect to the virtual console, authenticate, change default password, hostname and IP Address.
-
The default credentials are :
Login : veridiumid
Password: Ch4ng3Me!
-
Use the ‘passwd’ command to change the password:

-
Use ‘sudo ifconfig’ to display network configuration information:
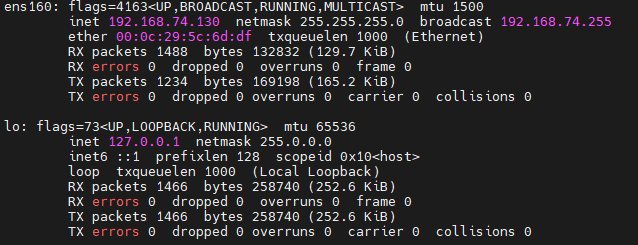
-
Use sudo nmtui command to configure the network. Here is an example, so the server will have always the same IP:
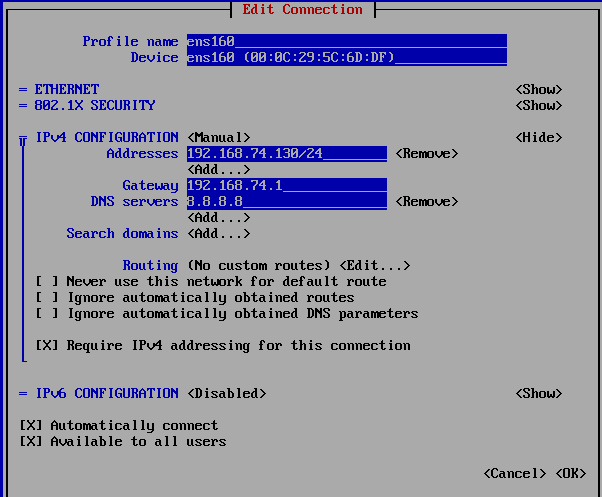
Also, from this interface the hostname can be changed.
-
Reboot the VM (I like using the command line ‘sudo reboot’, but you may also reboot using VMware as tools are installed)
-
Set the proper Chrony server:
sudo systemctl status chronyd
sudo systemctl enable chronyd; sudo systemctl start chronyd
sudo date
sudo chronyc -a sources

## check also if localzone is defined fine
sudo timedatectl

## also set timedate zone
sudo timedatectl list-timezones | grep Bucharest

## timedatectl set-timezone Europe/Berlin
## if no ntp server is available, the date can be modified manually
## sudo date -s "14 FEB 2024 18:08:00"
2) Run the VeridiumInstaller
All further steps will be performed using the veridiumid user and from the user’s home directory (/home/veridiumid).
2.1) Running the VeridiumInstaller script
Run the following script as veridiumid user to start the configuration of VeridiumID:
./veridium-installer-rhel9.sh
This script will start the installation and Configuration of the VeridiumID deployment and guide the user through the installation wizard. PLEASE read carefully the following information:
###########################
1. If you want to use one domain, set both INTERNAL and EXTERNAL domain with the same value.
2. if you choose ports, then the following entries are necessary in your DNS:
## INTERNAL SANs: veridium.client.local
## EXTRENAL SANs: veridium.client.com
3. if you choose FQDN, then the following entries are necessary in your DNS:
## INTERNAL SANs: admin-veridium.client.local, ssp-veridium.client.local, shib-veridium.client.local, veridium.client.local
## EXTRENAL SANs: ssp-veridium.client.com, ssp-veridium.client.com, dmz-veridium.client.com, veridium.client.com
2.2) Provide deployment details using the Installation Wizard
When the installation wizard will start the following screen will be seen in the terminal:
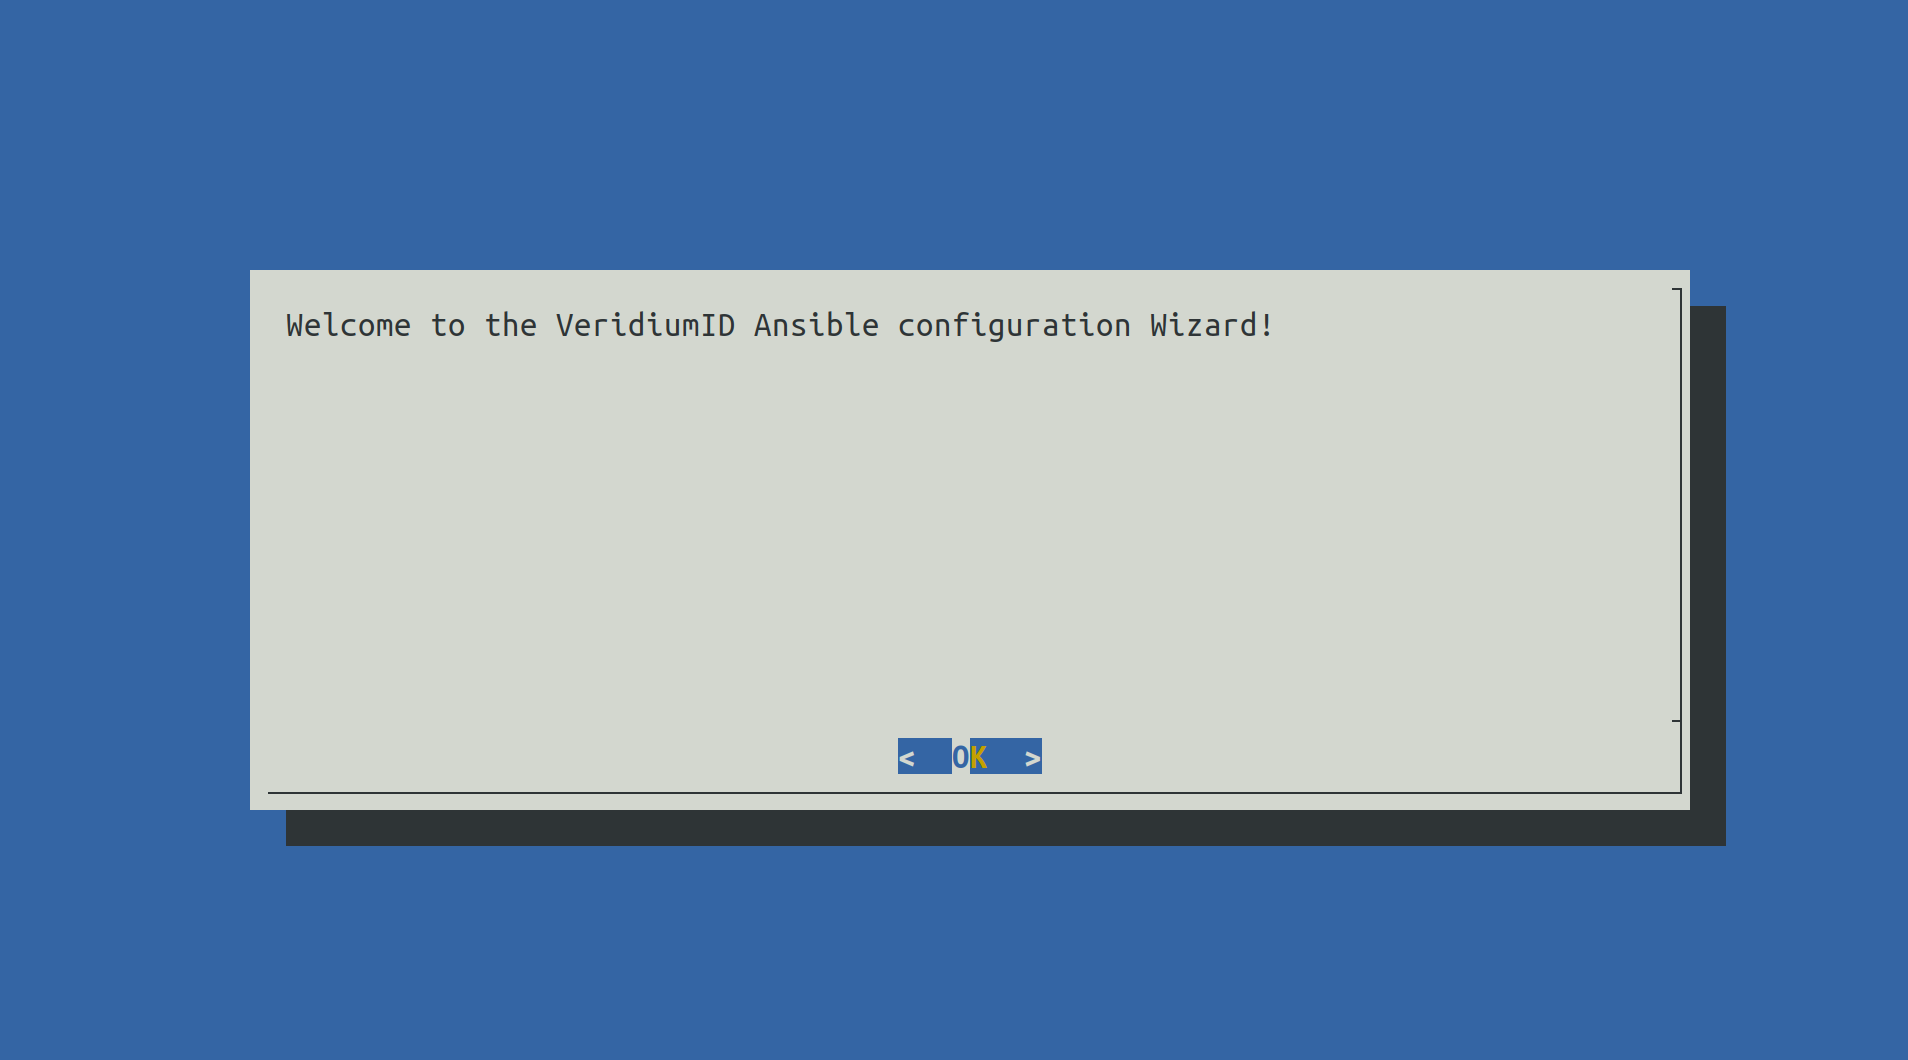
Press Enter to proceed.
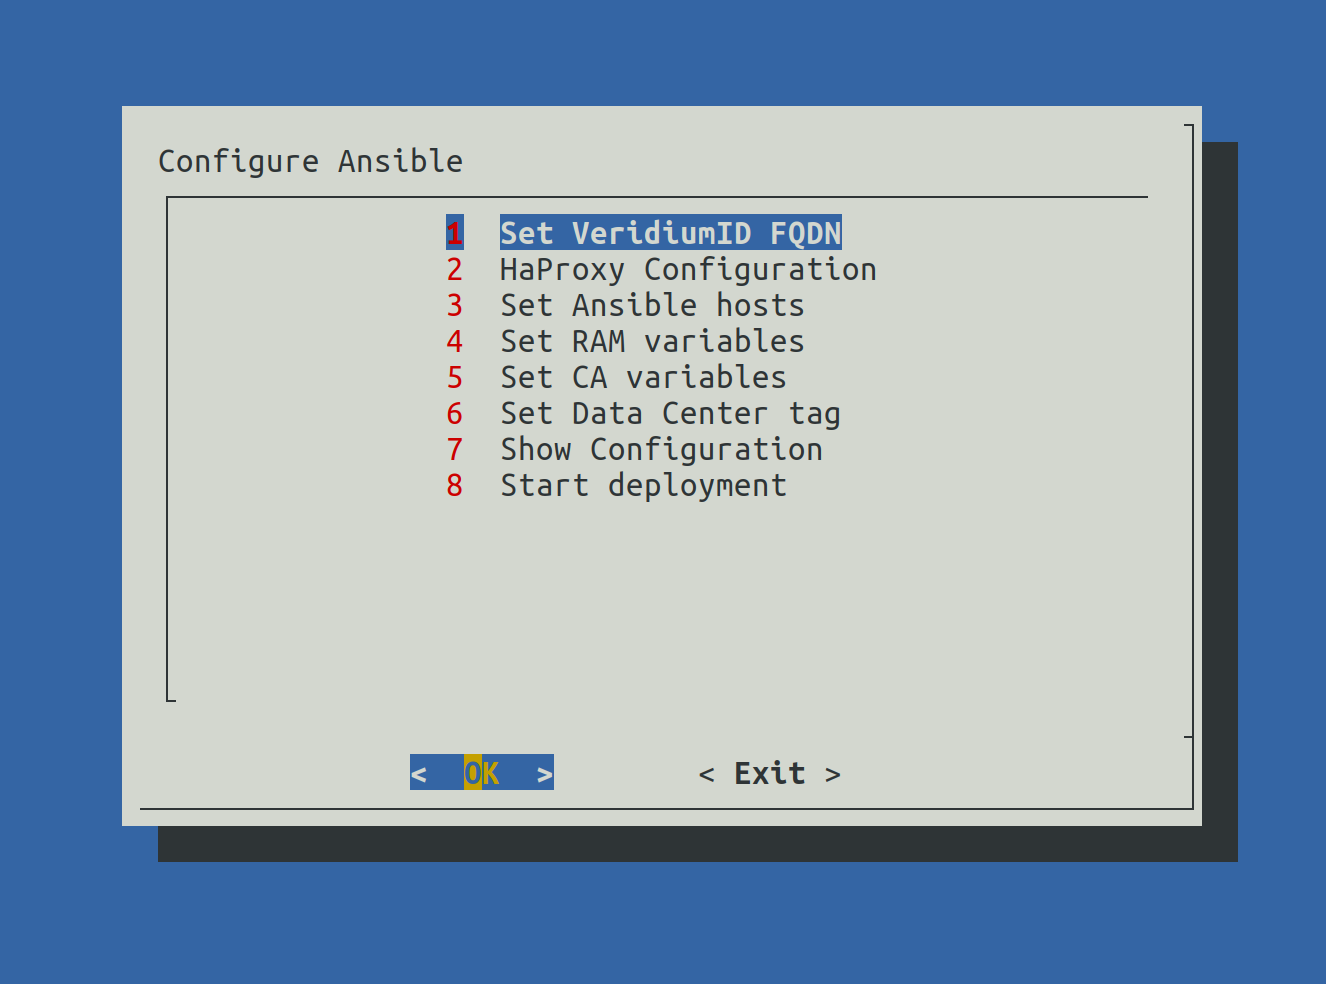
All steps from the Menu will be detailed in the following steps.
2.2.1) Set VeridiumID FQDN - First time INTERNAL and second time EXTERNAL
When selecting Set VeridiumID FQDN the following screen will be shown:
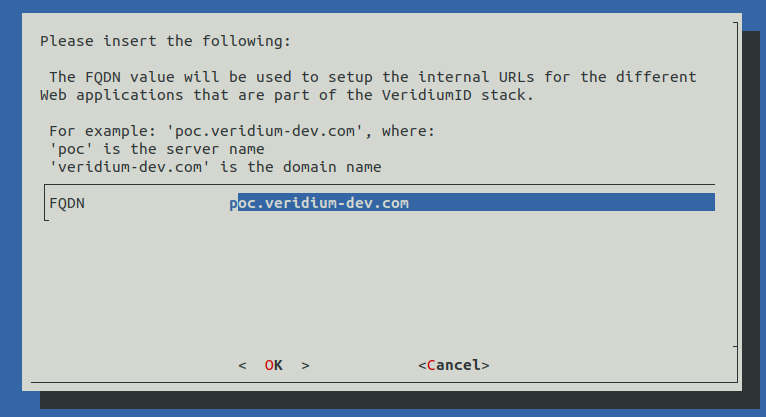
Write the correct INTERNAL FQDN in place of poc.veridium-dev.com and press the TAB key to go to OK and press Enter to continue.
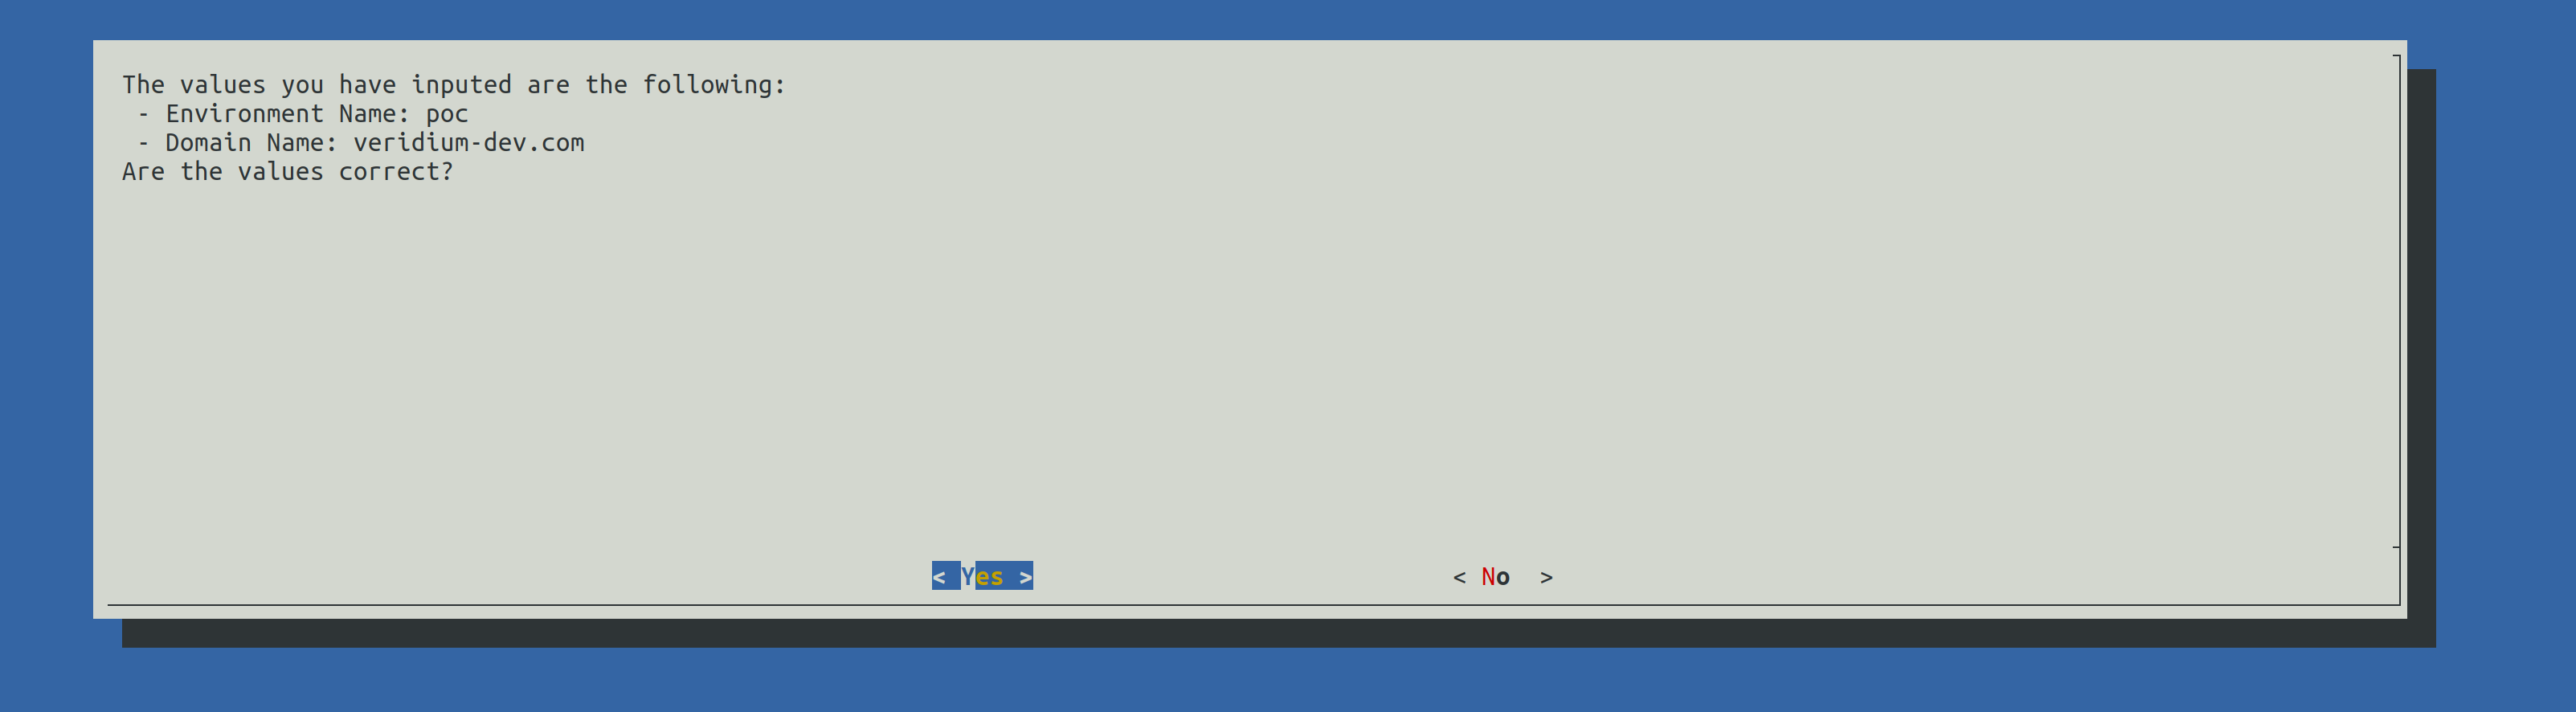
A validation of the FQDN will be prompted. Press Enter to continue.
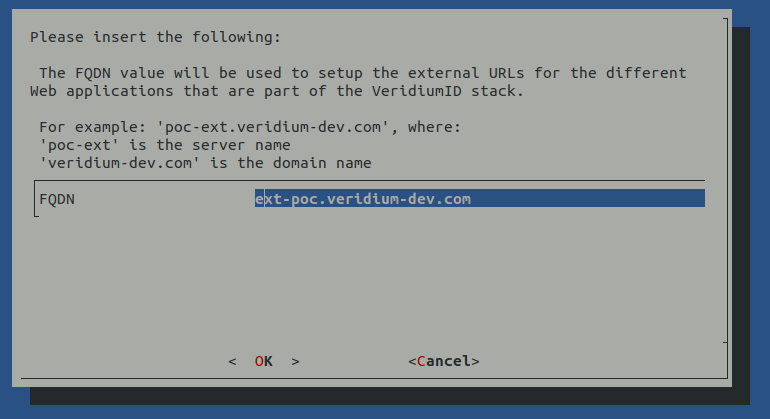
Write the correct EXTERNAL FQDN in place of ext-poc.veridium-dev.com and press the TAB key to go to OK and press Enter to continue.
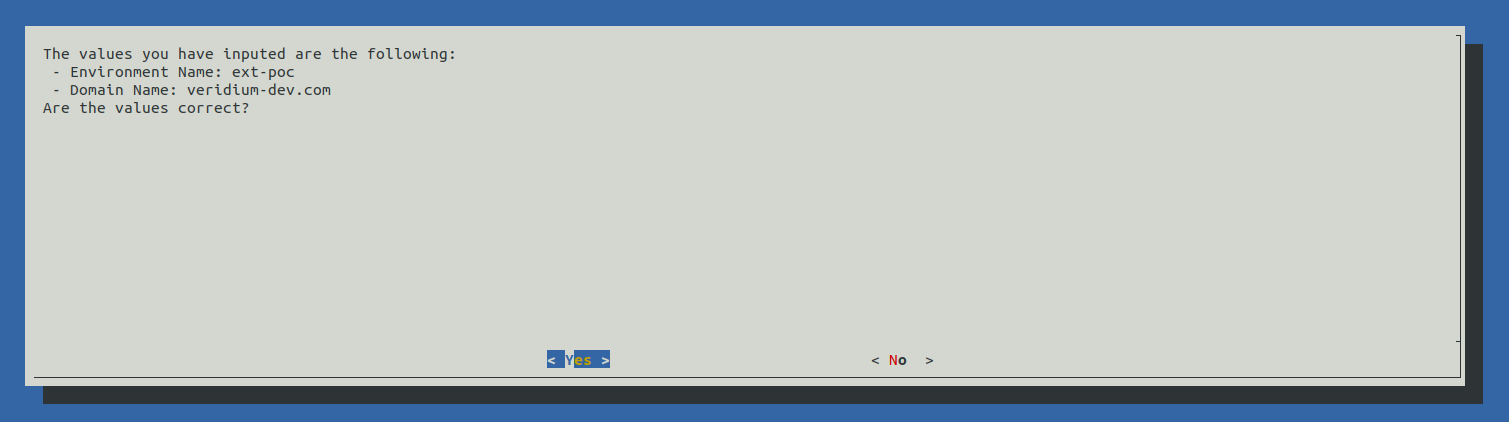
A validation of the FQDN will be prompted. Press Enter to continue.
2.2.2) HaProxy configuration
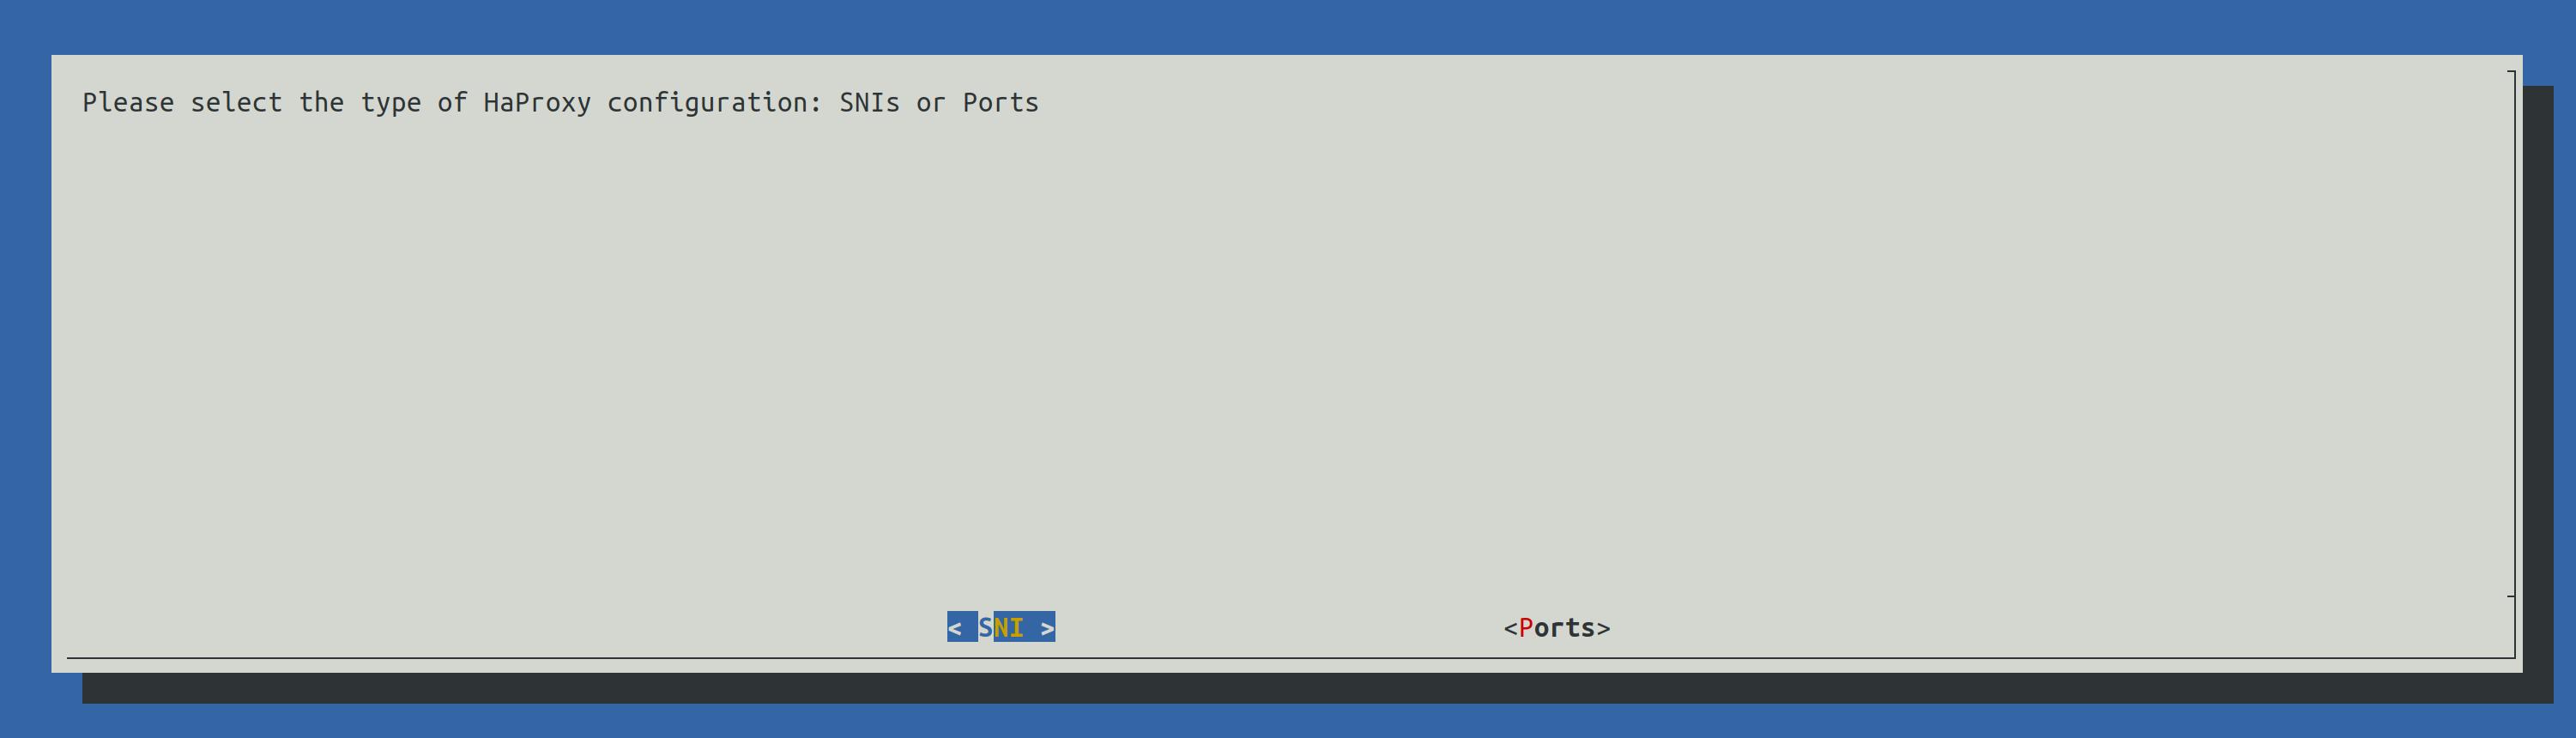
There are two configuration for HaProxy:
-
SNI: all component URLs will be composed from the base FQDN (the one provided during step 2.3.3.1) along side the components name, for example:
-
for the Admin Dashboard : admin-intFQDN
-
for the Self Service Portal: ssp-intFQDN
-
for the Websec API: intFQDN
-
for Shibboleth Internal (Identity Provider): shib-intFQDN
-
for Shibboleth External (Identity Provider): shib-extFQDN
-
for the Self Service Portal: ssp-extFQDN
-
for the DMZ Websec API: dmz-extFQDN
-
for the Websec API: extFQDN
-
-
Ports: all component URLs will be composed from the base FQDN and a different port for each component, for example:
-
for the Admin Dashboard: intFQDN:9444
-
for the Self Service Portal: intFQDN:9987
-
for the Websec API: intFQDN:443
-
for internal Shibboleth (Identity Provider): intFQDN:8945
-
for the Self Service Portal: extFQDN:9987
-
for the Websec API: extFQDN:443
-
for external Shibboleth (Identity Provider): extFQDN:8944
-
for the DMZ Websec API: extFQDN:8544
-
2.2.3) Set Ansible Hosts
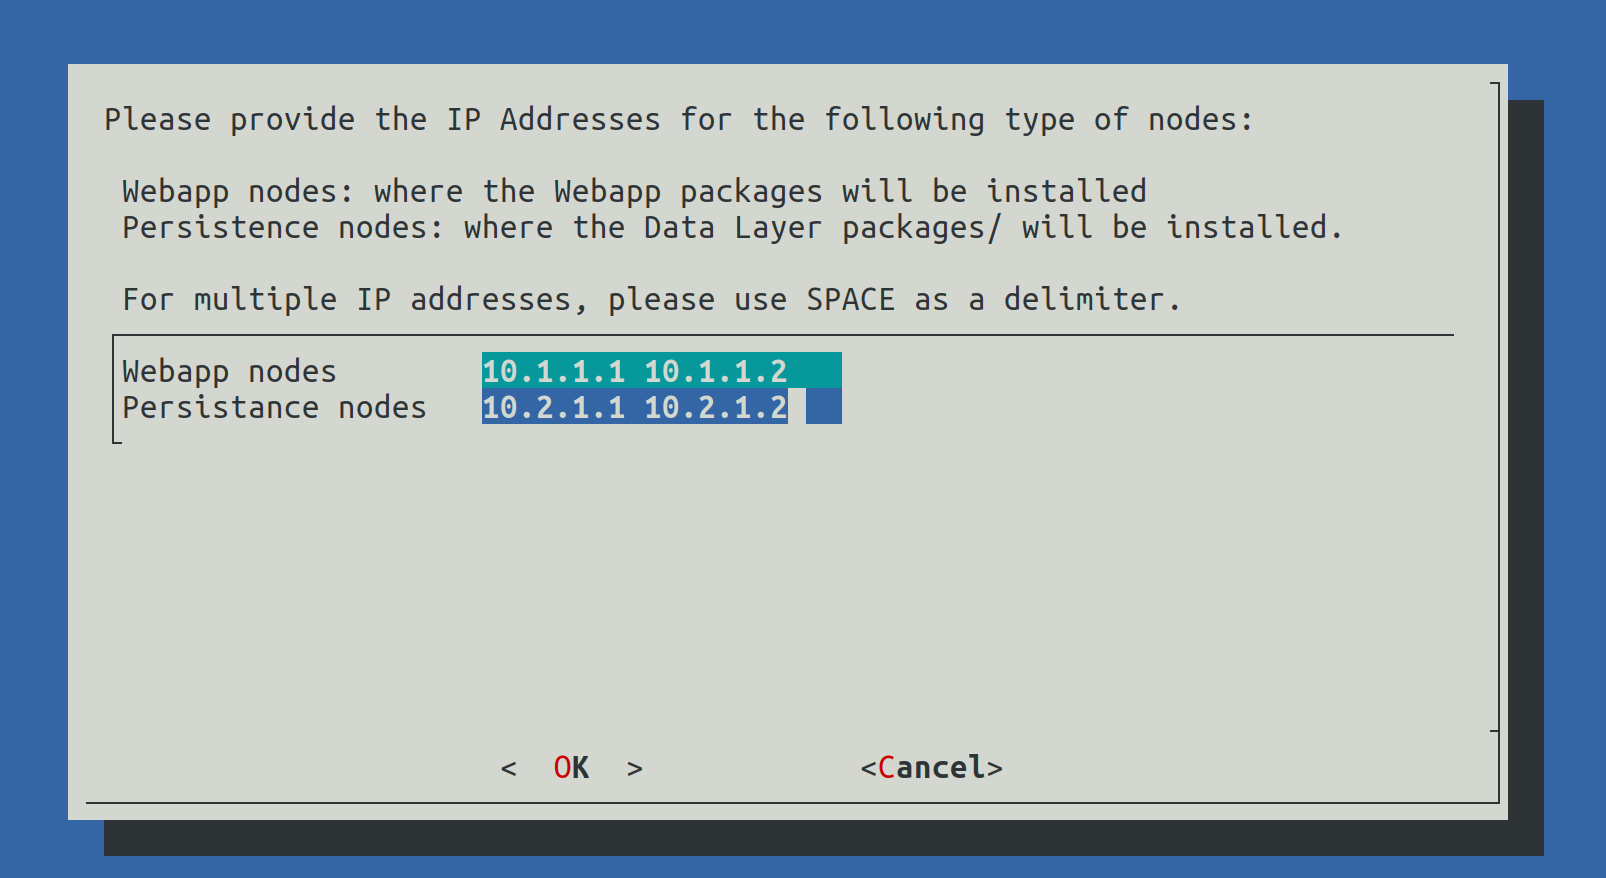
In this step the select from the list of IP addresses which will be Webapplication nodes and which will be Persistence node (Data nodes).
The list of nodes must be delimitted by Spaces.
2.2.4) Set RAM values

In this step the RAM values for different components will be configured. The value must contain a number followed by g for Gb or m for Mb.
2.2.5) Set CA variables
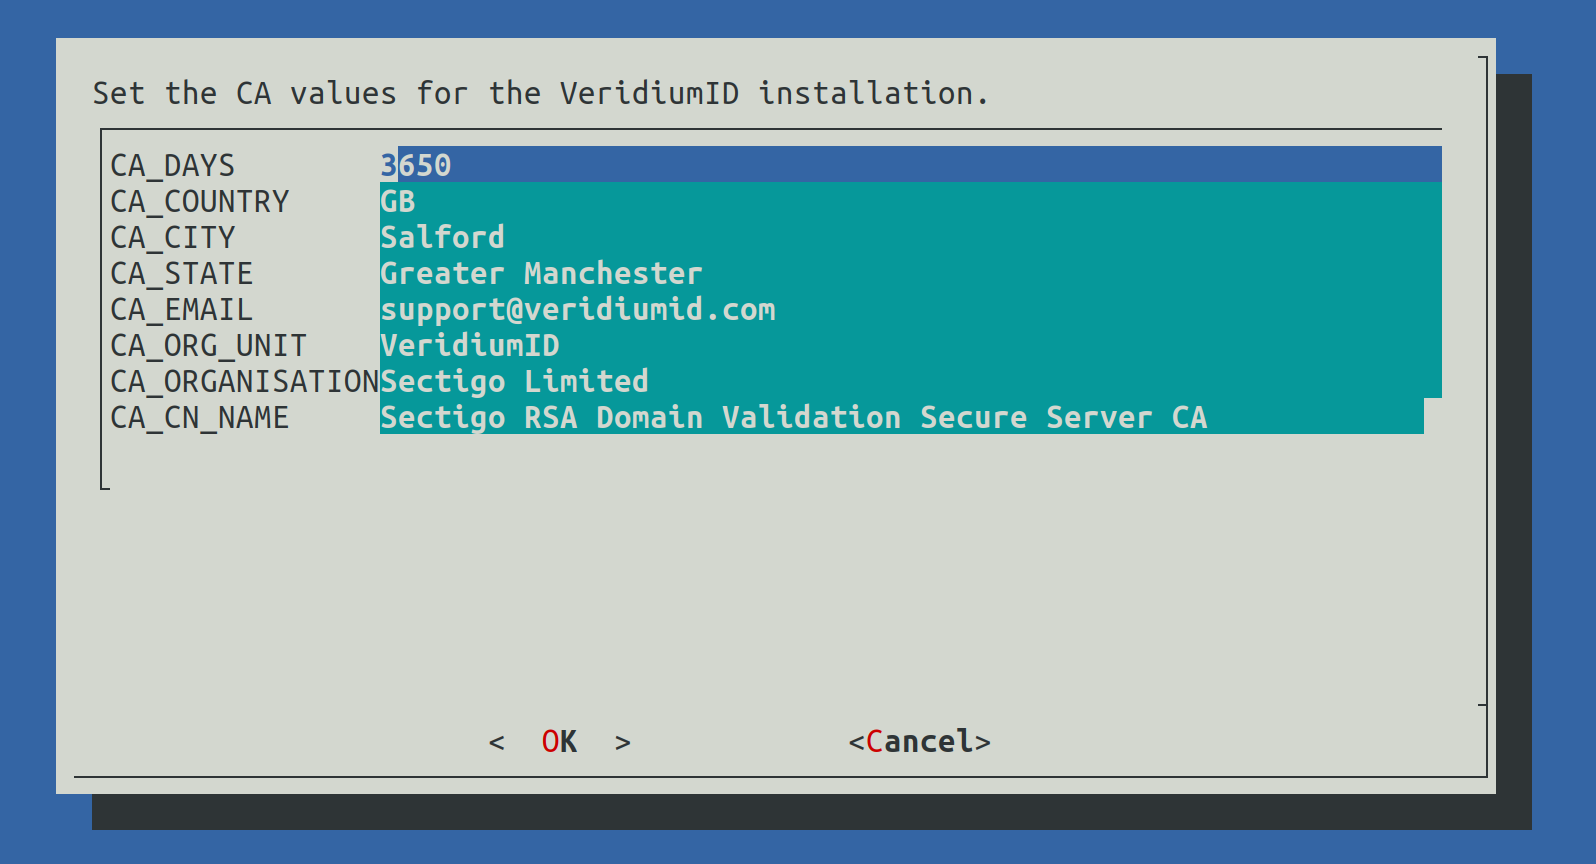
This step will configure the values used for the internal Certification Authority of the VeridiumID deployment (used to generate internal certificates).
2.2.6) Set Data Center Tag

This value will be used to define the name of the current data center.
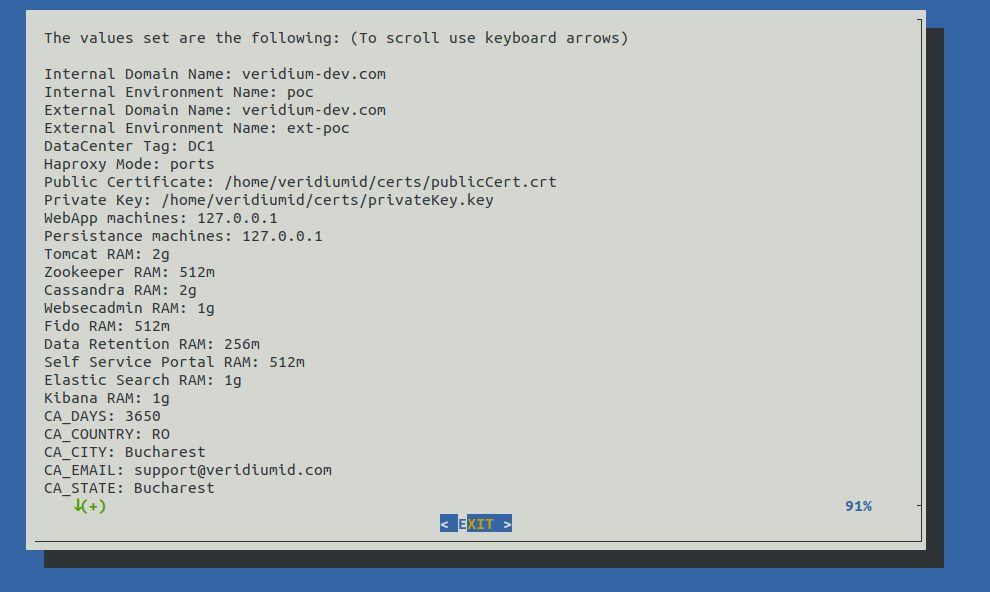
2.2.7) Show configuration
In this step we can verify all value provided earlier to validate them.
2.2.8) Start deployment
This step will close the Installation Wizard and provide the list of FQDNs:

The values can be viewed later in the following file: /home/veridiumid/host_list.txt
After exiting the Installation Wizard, the deployment process will start by:
-
Checking the SSH connectivity from this node to all other nodes
-
Install specific VeridiumID components for Webapplication and Persistence nodes
-
Start the Ansible configuration
3) Cleanup installation files
In veridiumid user’s home directory the following script will take care of cleaning up installation files (in case of needing the same machine to deploy another environment or redeploying the environment).
Run the following command as veridiumid user:
# To remove local installation files (in order to deploy on a new environment):
./cleanup_install_files_rhel9.sh
# To redeploy the same environment (requires to remove the deployment's CA directory)
./cleanup_install_files_rhel9.sh -c
In order to redeploy the same environment, after using the cleanup command (with CA directory included) the following must be performed as well:
-
Connect to all webapp nodes and stop all services running the following command as root:
-
bash /etc/veridiumid/scripts/veridium_services.sh stop
-
-
Connect to a persistence node and do the following:
-
Remove Zookeeper data using the following command as root:
-
/opt/veridiumid/zookeeper/bin/zkCli.sh
# And after accessing the Zookeeper command line
deleteall veridiumid
# To exit
quit
-
-
Remove Cassandra keyspace using the following command as root:
-
/opt/veridiumid/cassandra/bin/cqlsh --cqlshrc=/opt/veridiumid/cassandra/conf/veridiumid_cqlshrc --ssl -e 'drop keyspace veridium;'
#(even it received timeout, it should be deleted; check with the following command; the veridium keyspace should not exists)
/opt/veridiumid/cassandra/bin/cqlsh --cqlshrc=/opt/veridiumid/cassandra/conf/veridiumid_cqlshrc --ssl -e 'desc keyspaces;'
-
-
-
Connect to all persistence nodes and stop all services running the following command as root:
-
bash /etc/veridiumid/scripts/veridium_services.sh stop
-