
4Finger-ID can function in an Enrol-Authentication use case, or act as an exporter whereby fingerprint data is output in a chosen format for 3rd party matching / storage outside of the Veridium SDK. In either case, integration follows the same steps.
This guide covers the use of the 4FingerID biometric specifically and its use in the Veridium SDK. However, we demonstrate the necessary steps to use the 4FingerID biometric from the SDK, and the UI customisation that it allows.
Requirements
4FingerID requires a minimum Android API level of 16, a rear camera with a minimum resolution of 5 MP, and a rear LED for illumination.
Modules
-
veridium-fourf-release.aar- This contains the core logic of the biometric and the Activity from which the biometric is run. (package name:com.veridiumid.sdk.fourf -
veridium-fourf-ui-release.aar- A UI for portrait mode, self capture, as used in the Veridium Authenticator app. (package name:com.veridiumid.sdk.fourf.ui)
In addition to the 4FingerID modules you must also include the following dependencies from the Veridium SDK:
-
veridium-analytics-release -
veridium-core-release -
veridium-sdk-release -
veridium-secure-data-release -
veridium-support-release
Base Activity
The 4FingerID base activity,FourFBiometricsActivity, is contained within the veridium-fourf module. Create an Android activity within your own application that extends the base activity. Here you can customise some aspects of the biometric, such as the UI fragment to use, or the biometric storage location.
package my.app.package

import com.veridiumid.sdk.fourf.FourFBiometricsActivity;

public class FourFCaptureActivity extends FourFBiometricsActivity {
    ....
}
Meta-data configuration
To configure the SDK use the built-in biometric AndroidManifest.xml meta-data mechanism. Add a manifest entry for your 4FingerID activity extending FourFBiometricsActivity.
AndroidManifest.xml allows the insertion of <meta-data> tags that can be parsed/extracted at runtime. The SDK extracts each Activity's meta-data with the property 'android:name="com.veridiumid.sdk.component.config'.
Below is a sample configuration for the 4FingerID biometric, identified by the UID 4F:
<activity
    android:name="my.app.package.FourFCaptureActivity"
    android:screenOrientation="portrait">
    <meta-data
        android:name="com.veridiumid.sdk.component.config"
        android:value="uid=4F,optional=false,validator=com.veridiumid.sdk.fourf.FourFValidator" />
</activity>
The default configuration string format is comma-separated key=value pairs.
android:value="parameterName=parameterValue, anotherParameterName=anotherParameterValue"
The validator value is an IBiometricValidator that detects if the biometric component has all its dependencies met to function properly on the target device.
In full, the supported parameters are:
-
uid=stringValue- unique biometric identifier used to resolve desired biometric components. Useuid=4Ffor 4FingerID. -
optional=booleanStringValue-true|falseindicates that enrolment of this component could be skipped. -
validatorClass=stringClassName- the full class name of an IBiometricsValidator implementation. Use the provided classcom.veridiumid.sdk.fourf.FourFValidator
Permissions
-
Required camera permissions:
<uses-permission android:name="android.permission.VIBRATE" />
<uses-permission android:name="android.permission.CAMERA" />

<uses-feature
    android:name="android.hardware.camera"
    android:required="true" />
<uses-feature
    android:name="android.hardware.camera.autofocus"
    android:required="true" />
-
Required connectivity permissions:
<uses-permission android:name="android.permission.INTERNET" />
<uses-permission android:name="android.permission.ACCESS_NETWORK_STATE" />
Initialization and Licensing
Each biometric requires its own licence (Please contact your Veridium sales representative to purchase licence keys).
Provide your licence to the VeridiumSDKFourFInitializer during SDK initialisation, for example:
try {
    String fourFLicense = "my_licence_key";
    VeridiumSDK.init(this,
            new DefaultVeridiumSDKModelFactory(this),
            new VeridiumSDKDataInitializer(),
            new VeridiumSDKFourFInitializer(fourFLicense));


} catch (SDKInitializationException e) {
    Log.w("App", "Failed to initialize Veridium SDK", e);
}
Liveness
This version uses passive liveness. No additional action by the user is required.
Failure to pass liveness halts the capture process and the SDK returns a IVeridiumSDK#LIVENESS_FAILED result.
Turning liveness on/off is now controlled using ExportConfig:
ExportConfig.setUseLiveness(true);
Configuration with ExportConfig
In brief, to configure 4Finger ID, import the ExportConfig class and alter its parameters. These take effect during capture. For example:
import com.veridiumid.sdk.fourf.ExportConfig;

...

// Configure to capture the left hand without allowing the user to switch hands.
ExportConfig.setFingersToCapture(ExportConfig.ExportMode.FOUR_F_LEFT_ENFORCED);

ExportConfig.setCalculate_NFIQ(true);
Many options are available to configure capture and export. Refer to formats and configuration for details as to the options available.
Invoking an Operation
Start an operation by invoking the corresponding IVeridiumSDK interface methods:
-
IVeridiumSDK#enroll(String[] biometricUids)-
Generate enrolment templates
-
String[] biometricUids- biometric unique identifiers, as registered by the suppliedIConfiguration#detectComponents()implementation.
-
-
IVeridiumSDK#authenticate(String[] biometricUids)-
String[] biometricUids- biometric unique identifiers, as registered by the suppliedIConfiguration#detectComponents()implementation.
-
-
IVeridiumSDK#export(String[] biometricUids)-
Fingerprint capture only, no enrolment or authentication
-
String[] biometricUids- biometric unique identifiers, as registered by the suppliedIConfiguration#detectComponents()implementation.
-
The methods return an Intent object which the calling activity uses to receive the result.
After getting the intent (by calling the above methods), the parent activity must call startActivityForResult([biometric_intent], [requestCode]);
where requestCode is an integer identifier for the result.
For example, to run the export operation :
import com.veridiumid.sdk.fourf.FourFInterface;

static final int REQUEST_CAPTURE = 100

try {
    Intent fourFIntent = VeridiumSDK.getSingleton().export(FourFInterface.UID);
    startActivityForResult(fourFIntent, REQUEST_CAPTURE);
} catch (LicenseException e) {
    e.printStackTrace();
}
where FourFInterface.UID provides the biometric UID string ("4F").
External parameters
Any operation has support to send external parameters using Intent Extras. In order to avoid collision between external parameters and the internal parameters that SDK uses, all the external parameters are encapsulated within a Bundle and set on the reserved key IVeridiumSDK.EXTRA_KEY_EXTERNAL_PARAMETERS
Sending external parameters:
public class MainActivity{

    private void capture4F(){}
        try {
            String sessionId = UUID.randomUUID().toString();
            Intent fourFIntent = VeridiumSDK.getSingleton().export(FourFInterface.UID);
            fourfIntent.putExtra("sessionId", sessionId )
            startActivityForResult(fourFIntent, REQUEST_CAPTURE);
        } catch (LicenseException e) {
            e.printStackTrace();
        }
    }

}
Reading external parameters:
public class FourFCaptureActivity extends FourFBiometricsActivity {

    private String mSessionId;

    @Override
    protected void onCreate(final Bundle savedInstanceState) {
        super.onCreate(savedInstanceState);

        Bundle externalParams =  getIntent().getExtras().getBundle(IVeridiumSDK.EXTRA_KEY_EXTERNAL_PARAMETERS);
        mSessionId = externalParams.getString("sessionId");

    }
}
Handling An Operational Result
To receive the operation result the calling activity implements the onActivityResult() method.
You receive three parameters: requestCode, resultCode, data
-
requestCodeinteger identifier for the result. -
resultCodecontains the biometric operation result. Note: its value can be one of the examples specified in the Result codes section. -
dataIntent containing additional information, such as error messages.
To access biometric data you must use the BiometricResultsParser. Implement the IBiometricResultsHandler interface to customise actions and pass it to the BiometricResultsParser, along with the resultCode and intent data:
IBiometricResultsHandler customResultHandler = new IBiometricResultsHandler() {
    @Override
    public void handleSuccess(Map<String, byte[][]> results) {
        // handle template data here
    }

    @Override
    public void handleFailure() {
    }

    @Override
    public void handleCancellation() {
    }

    @Override
    public void handleError(String message) {
    }
};

@Override
protected void onActivityResult(int requestCode, int resultCode, @Nullable Intent data) {
    if (requestCode == REQUEST_CODE_FOURF_CAPTURE) {
        BiometricResultsParser.parse(resultCode, data, customResultHandler);
    } else {
        super.onActivityResult(requestCode, resultCode, data);
    }
}
public void handleSuccess(Map\<String, byte[][]> results)
Results are received for all the biometrics run. Access the data for 4FingerID using its UID, for example, one handleSuccess() implementation may contain:
byte[] template = null;
byte[] export_data = null;
byte[] dev_data = null;

for (Map.Entry<String, byte[][]> entry : results.entrySet()) {
    String bio_key = entry.getKey();
    byte[][] data = entry.getValue();

    if(bio_key.equals(FourFInterface.UID)){
        template = data[0];    // enrolment data
        template = data[1];    // export data
        dev_data = data[2];    // development info (in zip format)
    }
}
Dimension of the byte array are as follows:
-
byte[0][] - Enrolment template data.
-
byte[1][] - Export template data in the configured format
-
byte[2][] - Development output contained in zip format
Note To receive development data set ExportConfig.setPackDevOutput(true).
public void handleFailure()
The operation was unsuccessful, despite the users efforts, for one of the following reasons:
-
Biometric authentication with the enrolment failed.
-
Timeout or maximum allowed capture attempts were reached. Capture failed due to failure to detect fingers or reach an acceptable quality.
public void handleCancellation()
A user chooses to cancel during an operation and not capture any data. The operation finishes without returning any biometric data. The user did not exhausted their opportunities to capture. Once data has been captured the user is not able to cancel the operation. Using the provided UI, a cancelation may occur in the following ways:
-
Pressing 'Cancel' on the instruction screen.
-
Pressing the
Xicon on the capture screen. -
Interaction with OS navigation buttons interrupting the capture.
public void handleError(String message)
An unexpected error occurred during the operation preventing completion. This may occur due to the following:
-
Incorrect configuration (message: Platform submitted an unsupported config request). This should be resolved during app development. It will not occur again once configuration is corrected.
-
Code Exception (message: Library threw an otherwise unhandled exception.) The operation threw an exception that could not be recovered from. For example, the camera disconnected during capture.
-
Liveness (NOTE TBD To be re-assigned as a Failure) (message: Liveness failed). The user failed to pass liveness.
Data Storage Customization
The biometric default activity FourFBiometricsActivity contains the overridable method:
@Override
   protected IKVStore openStorage() {
}
This returns a Key-Value Storage object, IKVStore. The SDK provides two storage types:
-
InMemoryKVStoreData stored in memory only (data is lost on application and never written to disk) -
SecureKVStoreData is written to secure preferences. This type should be used via the providedcom.veridiumid.sdk.defaultdata.DataSorageclass.
For example, to have data written only to memory, and accessed externally, override the openStorage() method:
private static InMemoryKVStore myMemoryKVStore = new InMemoryKVStore();

@Override
protected IKVStore openStorage() {
    return myMemoryKVStore;
}
To create a secure preferences storage object, for example to create multiple enrolments for multiple users, use the DataStorage class with your own keys:
private static String ENROL_KEY_A =  "enrol_storage_a";
private static String ENROL_KEY_B =  "enrol_storage_b";

@Override
protected IKVStore openStorage() {
    if(use_storage_A){
        return DataStorage.openStorage(ENROL_KEY_A);
    }else{
        return DataStorage.openStorage(ENROL_KEY_B);
    }
}
Device Support Definition
Certain Android devices may behave more reliably if using Camera 1 API, or a different mechanism of manual focus.
Internally, Veridium defines a list of devices to switch them to certain camera implementations. However, additional devices can be added to custom lists for on-the-fly adjustments to correct device problems.
Devices can also be blocked from functioning with 4Finger ID.
Use the static class com.veridiumid.sdk.fourf.SupportDefinition as follows.
Create a list of devices, devices identified by a String id:
private String[] force_cam1_list = {
        "Samsung SM-G973F"
};

private String[] block_list = {
        "NXT-G877G"
};

private String[] force_manual_focus = {
        "LG H930H"
};
The Veridium SDK provides a utility for generating devices names, which is also used to match against set device lists:
import com.veridiumid.sdk.model.help.Devices;

String device = Devices.getDeviceName();
Set custom lists:
import com.veridiumid.sdk.fourf.SupportDefinition;

SupportDefinition.setCustomCamera1List(force_cam1_list);
SupportDefinition.setCustomBlockList(block_list);
SupportDefinition.setCustomManualFocusList(force_manual_focus);
Finger Selector Module
The veridium-finger-selector module provides a simple UI for user finger selection. The user is displayed a graphic of a hand, and can tap those fingers that they wish to capture.
[Note, this a feature for Export only, and not Enrol / Authenticate use cases.]
The finger selector is not a required component, so is provided in the Android Quick Start project. It can be used directly, or as an example for building a custom UI for finger selection. Usage is demonstrated in the sample-ffid-export app.
Launch the FingerSelectionActivity:
import com.veridiumid.sdk.fingerselector.FingerSelectionActivity;
...
Intent intent = new Intent(MainFragmentActivity.this, FingerSelectionActivity.class);
startActivityForResult(intent, REQUEST_ID_FINGER_SELECT);
Catch the result and read extra data key IndividualCapture for success or failed user selection:
@Override
protected void onActivityResult(int requestCode, int resultCode, Intent data) {
    if (requestCode == REQUEST_ID_FINGER_SELECT) {
        bool success = data.getBooleanExtra("IndividualCapture", false);
    }

    // complete
    super.onActivityResult(requestCode, resultCode, data);
}
No further action is needed to configure the fingers to capture.
[The necessary Export config settings are be applied by FingerSelectionActivity according to the fingers selected by the user, via ExportConfig.setFingersToCapture().]
User Interface
4FingerID provides single UI as a separate module:
-
veridium-fourf-ui-release.aar- UI for portrait mode, self capture, as used in the Veridium Authenticator app.
The UI is implemented as fragment which is displayed full screen. It is composed of a main capture screen and an optional help screen (shown prior to biometric capture).
You can design your own fragment for display by implementing the required interface FourFUIInterface and making requests via the FourFUIIntegrationWrapper. However, it is recommended to extend the provided UI and override methods as needed.
Specifying a UI fragment
To use the desired UI fragment, override the fragmentToShow() method of your 4FingerID activity. For example, the default UI:
import com.veridiumid.sdk.fourf.FourFBiometricsActivity;
import com.veridiumid.sdk.fourf.ui.FourFUIFragment;

public class FourFCaptureActivity extends FourFBiometricsActivity
{
    ...

    @Override
    protected <FourFFragmentInterfaceUnion extends Fragment & FourFUIInterface> FourFFragmentInterfaceUnion fragmentToShow() {
        return (FourFFragmentInterfaceUnion) new FourFUIFragment();
    }
}
Introduction Screen
By default, the instruction screen will show before fingerprint capture for Enrol and Export operations. Control it manually by overriding
protected boolean showInstructionScreen()
UI Customisation
UI Customisation: UI Source Project
Any aspect of the UI can be altered by importing the project veridium-fourf-ui and editing its source. The following example demonstrates this using the sample-ffid-export app provided in the Android Quickstart package.
-
In Android Studio, open quickstart-android as an existing project (open the root folder). You should see
sample-ffid-exportandveridium-fourf-uilisted.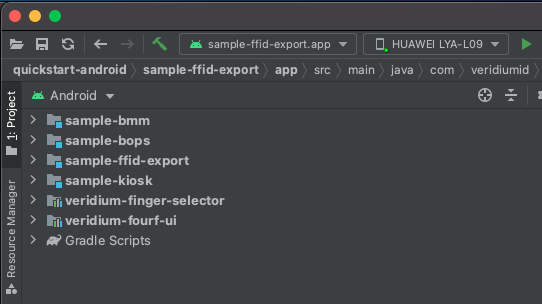
-
Build and run
sample-ffid-export.appand ensure it runs successfully. -
Replace the pre-packaged
veridium-fourf-ui-release.aarwith the source project. In quickstart-android/sample-ffid-export/app/build.gradle, under dependencies, removeimplementation(name: 'veridium-fourf-ui-release', ext: 'aar')and instead addimplementation project(':veridium-fourf-ui').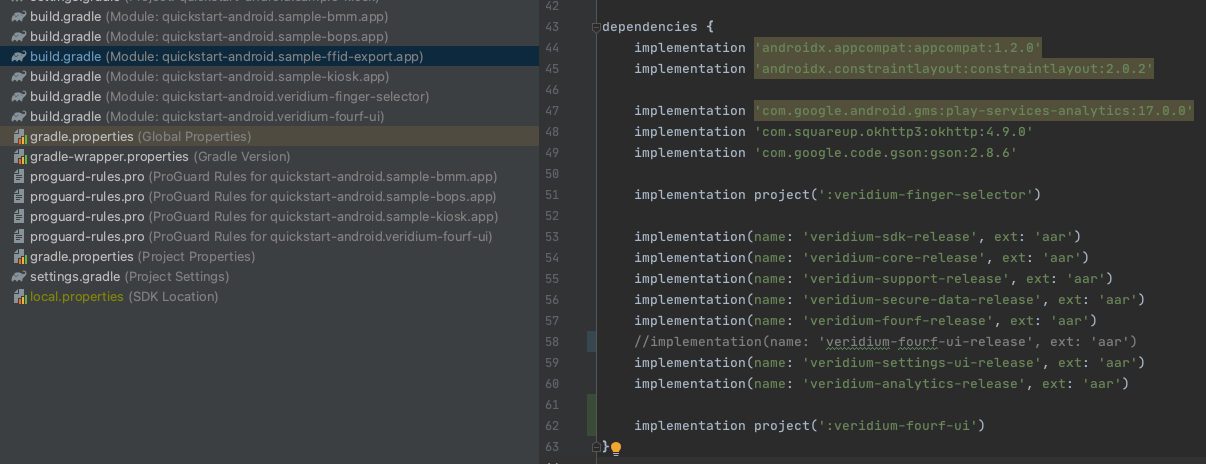
-
Clean and build
sample-ffid-export.app. It will now be usingveridium-fourf-uiproject source and edits can be made.
UI Customisation: Extending the Default UI
The simplest method of customisation is to extend the provided UI and override its methods.
For example, create a custom UI class by extending FourFUIFragment:
import com.veridiumid.sdk.fourf.ui.FourFUIFragment;

public class customFourFUI extends FourFUIFragment{
}
, and then overload fragmentToShow() in a custom Base Activity, along with any methods you wish to alter, for example,
public class CustomFourFActivity extends FourFBiometricsActivity {
    @Override
    protected <FourFFragmentInterfaceUnion extends Fragment & FourFUIInterface> FourFFragmentInterfaceUnion fragmentToShow(){
        return (FourFFragmentInterfaceUnion) new customFourFUI();
    }

    @Override
    protected boolean useBlobs(){
        return true;
    }

     @Override
    protected boolean useMitten(){
        return false;
    }

     @Override
    protected boolean useMeter(){
        return true;
    }
}
UI fragment Principles
Here we describe the main principles behind the UI fragment. For a complete description of all UI interface methods see the included JavaDoc for FourFUIInterface and FourFUIIntegrationWrapper.
Create a class extending Fragment and implementing FourFUIInterface. Import the onFourFFragmentReadyListener and override the onReady() method to indicate readiness which starts the biometric capture process.
import com.veridiumid.sdk.fourf.FourFUIInterface;
import com.veridiumid.sdk.fourf.FourFUIIntegrationWrapper;
import com.veridiumid.sdk.fourf.onFourFFragmentReadyListener;

public class FourFCaptureFragment extends Fragment implements FourFUIInterface {

    private onFourFFragmentReadyListener listener;

     @Override
    public View onCreateView(LayoutInflater inflater, ViewGroup container, Bundle savedInstanceState) {
         // inflate your layout
        return inflater.inflate(R.layout.my_capture_layout , container, false);
    }

     @Override
    public void onViewCreated(View view, @Nullable Bundle savedInstanceState) {
        super.onViewCreated(view, savedInstanceState);
        // perform setup
        listener.onFourFFragmentReady();
    }

    @Override
    public void onReady(onFourFFragmentReadyListener listener) {
        this.listener = listener;
    }
}
Specify your new fragment in the fragmentToShow() method of your 4FingerID activity.
To interact with the biometric you can call through via FourFUIIntegrationWrapper. This handles user interactions that may happen at any time, or to indicate the user wishes to progress or cancel. For example, requesting help via FourFUIIntegrationWrapper.requestHelp(). 4FingerID will receive such a request and call back to your UI fragment to request showing of help.
The UI fragment responds to events it receives via interface methods. For example, when an image is about to be captured your UI fragment receives a call to onTakePictureStart():
@Override
public void onTakePictureStart() {
   // Indicate to the user that the system is capturing a photo.
}
The UI is not required to perform an action in this case, and it can be safely ignored if desired. However, note that 4FingerID does not wait for an action to be taken in this case.
When an action is required that is blocking progress a call too handleBlockingUIInstruction() is received. This handles any case where the user is expected to provide confirmation and the process halts. Once the UI has determined the user is ready to continue, indicate this by calling FourFUIIntegrationWrapper.handledBlockingUIInstruction() with a UserAction. For example:
@Override
public void handleBlockingUIInstruction(blockingUIInstruction instruction){
    if (instruction == blockingUIInstruction.DISPLAY_HELP) {
        // show the user help

        FourFUIIntegrationWrapper.handledBlockingUIInstruction(UserAction.NEXT);
    }
}
You can choose to advance the process immediately if you wish.
Configuring For Print Capture
Because 4FingerID is able to capture a variety of fingers and thumbs, in any combination, an important interface method to implement carefully is configureUI(). This provides information about the mode 4FingerID is currently in, where the hand or digit should be placed within the camera view, and whether the user can select which hand they are capturing.
configureUI()is called whenever 4FingerID needs to capture a particular print, and this may occur several times. For example, when configured to capture both the left hand and the right hand, configureUI() is called twice; once at the start of left hand capture, and again after successful capture of the left hand to begin right hand capture. See the JavaDoc for details.
Camera Preview
4FingerID controls the camera device internally so integrators need not worry about the camera api and the complexities that come with ensuring device compatibility.
However, preview frames generated by the camera can be shown in your UI by providing a AspectRatioSafeFrameLayout frame layout in the getPreviewHolder() method. Preview frames from the camera are posted to this frame layout.
   private AspectRatioSafeFrameLayout mPreviewHolder;

   @Override
   public View onCreateView(@NonNull LayoutInflater inflater, @Nullable ViewGroup container, @Nullable Bundle savedInstanceState) {
       mPreviewHolder = view.findViewById(R.id.camera_preview_container);
   }

   @Override
   public AspectRatioSafeFrameLayout getPreviewHolder() {
       return mPreviewHolder;
   }
Switching Hands During Capture
You can request to switch hands during the capture process if the user is either enroling or exporting, by calling FourFIntegrationWrapper.requestSwitchHand().
Your logic for displaying UI components for switching hands should take notice of the canSwitchHand boolean provided by the configureUI() method.
For example:
@Override
public void configureUI(captureMode mode, printToCapture print, RectF regionOfInterest, boolean canSwitchHand) {

        usingRightHand = !print.isLeftHand();

         // if the user is allowed to switch hands, display a UI switch (left_right_switch)
        if(canSwitchHand) {
            left_right_switch.setChecked(print.isLeftHand());
            left_right_switch.setVisibility(View.VISIBLE);
        }else{
            left_right_switch.setVisibility(View.INVISIBLE);
        }

        // Request to switch hands on click
        left_right_switch.setOnClickListener(new View.OnClickListener() {
            @Override
            public void onClick(View v) {
                FourFUIIntegrationWrapper.requestSwitchHand();
            }
        });
        .....
}
Typical UI flow
An operation intent is created using the Veridium SDK from your application's activity. For example, VeridiumSDK.getSingleton().enrol(FourFInterface.UID) starts the activity. In onCreate() of FourFBiometricsActivity the following occurs:
-
openStorage()opens datastorage. -
fragmentToShow()retrieves the UI fragment to show during capture (UIFragmentin this example). -
Transition to the UI fragment.
-
UIFragment.onReady()is called with anonFourFFragmentReadyListenerobject to indicate readiness. -
The UI fragment is created, and the fragment's
onViewCreated()methodonFourFFragmentReadyListener.onFourFFragmentReady()starts the biometric capture. -
UIFragment.getPreviewHolder()passes the preview holder to the camera. -
UIFragment.setPreviewResolution()informs the UI of the camera preview resolution.
Once the above setup is complete 4 Finger ID calls UI interface methods to guide and inform during biometric capture. A typical flow is:
-
UIFragment.configureUI()informs the UI to display the appropriate interface and align UI components. -
UIFragment.handleBlockingUIInstruction(blockingUIInstruction.DISPLAY_HELP)requests the UI show a user help screen prior to capture. -
UIFragment.handleUIInstruction(uiInstruction)series of instructions received indicating the current state of capture. -
UIFragment.onTakePictureStart()an image is being taken with the camera. -
UIFragment.onTakePictureStop()image capture has completed. -
UIFragment.onImageAcceptance()the image was accepted as being good quality, otherwiseUIFragment.onImageRejection()is called and the system returns to step 3. -
UIFragment.onProcessingStart()begins extracting biometric data / matching. -
UIFragment.onProcessingStop()processing completed. -
UIFragment.dismiss()is the last call to the UI fragment, which (passes or relays?) the result to the user, and callsfinish()on the activity.
Failing to capture a good quality image returns the system to step 3. This flow can be interrupted at any time if the user cancels, requests to change hands, or requests help via handleBlockingUIInstruction().