On-Prem deployment using veridium-installer
This article will describe the deployment procedure using the veridium-installer script.
1) Prerequisites
1.1) Node requirements
All nodes used in the deployment procedure will need to have SSH connectivity between them ensured by SSH keys on a single user, for example:
all nodes will have a user name centos that has ssh connectivity to all nodes
CODE## generate key (can be generated on all servers) ssh-keygen ## take the key (id_rsa.pub) from on server, from where the installation will take place, and put it on all other servers (including himself) in .ssh/authorized_keysThe default user will require admin (sudo) privileges (at least until the end of the deployment).
1.2) Dependencies
To have VeridiumID deployed in a client’s infrastructure the following dependencies must be installed (on all nodes):
sudo yum -y install apr-devel openssl-devel libstdc++-devel curl unzip wget zlib zlib-devel nc openssh-clients perl rsync zipIn order to run the Veridium installer deployment scripts the following packages must also be installed:
sudo yum -y install createrepo yum-utils vsftpd dialog net-tools1.3) Installing docker and docker-compose (on the node from where the installation will be done)
For more information on installing these two dependencies please check the following links:
For RHEL & CentOS:
#RHEL
sudo yum-config-manager \
    --add-repo \
    https://download.docker.com/linux/rhel/docker-ce.repo

#CENTOS
sudo yum-config-manager \
    --add-repo \
    https://download.docker.com/linux/centos/docker-ce.repo

#COMMON
sudo yum -y install docker-ce docker-ce-cli containerd.io

sudo systemctl enable --now docker.service
sudo curl -L "https://github.com/docker/compose/releases/download/1.29.2/docker-compose-$(uname -s)-$(uname -m)" -o /usr/local/bin/docker-compose
sudo chmod +x /usr/local/bin/docker-compose
sudo ln -s /usr/local/bin/docker-compose /usr/bin/docker-compose
docker-compose --version
1.4) Set selinux to permissive
Please run bellow command. It is not necessary to restart the server:
sudo setenforce 0
2) Deployment steps
This section will describe the deployment steps.
## download veridium-installer and put it on server, with centos user.
wget --user <user> --password <password> https://nexus.veridium-dev.com/repository/VeridiumInstaller/veridium-installer-8.1.8.zip
unzip veridium-installer-8.1.8.zip
2.1) Running the pre-requisites script
After uploading the Veridium archive to one of the nodes and unarchiving it, using the default user (for example: “centos“) run the following command:
./pre-reqs.shThis script is in charge of the following:
Copy and install the VeridiumID layout and Python 3 packages on all nodes
Move all deployment files to veridiumid’s home directory
Configure veridiumid’s SSH connectivity using the SSH key used by the default user
Setting admin privileges (sudo) for the veridiumid user in order to ease the installation of VeridiumID
Adding veridiumid user to Docker’s list of allowed users
After running the script (as shown above) the user will be prompted for the following:

The user will need to add the list of IP addresses of all nodes including the current one, from which the installation will take place, for example:
Let’s say we have three nodes on which we wish to install VeridiumID with the following IPs: 10.0.10.1, 10.0.10.2 and 10.0.10.3
The node where the SE-Tools archive has been added to has the IP: 10.0.10.4
The user will need to add the following input to the script: 10.0.10.1,10.0.10.2,10.0.10.3,10.0.10.4
Afterwards, press the ENTER key
After providing the list of IP addresses the script will start copying the Layout and Python3 RPMs to all nodes and also install them, copying the deployment files to the current machine’s veridiumid home directory and add veridiumid to the list of users allowed to use the Docker service.
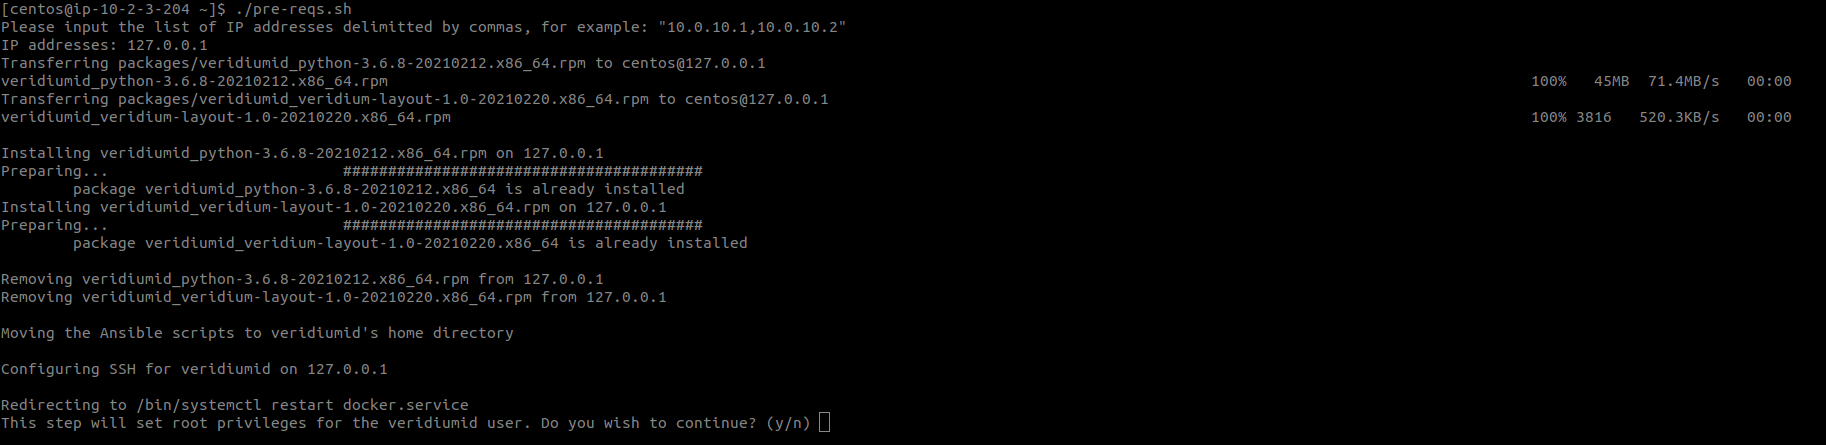
After finishing the above steps the script will ask the user if he wishes to allow the script to add root privileges to the veridiumid user. If giving “y“ as the response the following privileges will be added:

Providing “n“ as the input to the above prompt will print the following message to the standard output:

Root privileges for the veridiumid user are required in order to ease the installation phase and can be removed after finishing the deployment.
2.2) Starting the installation
Before proceeding with this step, on the installation node, copy the domain certificate to veridiumid’s home directory.
After finishing the above steps connect as the veridiumid user and go to its home directory (/home/veridiumid).
sudo su - veridiumidFrom here, start the installation by running the following script:
./veridium-installer.shThis will start the Python Installation Wizard and the user will have to select between Simple and Advanced mode:
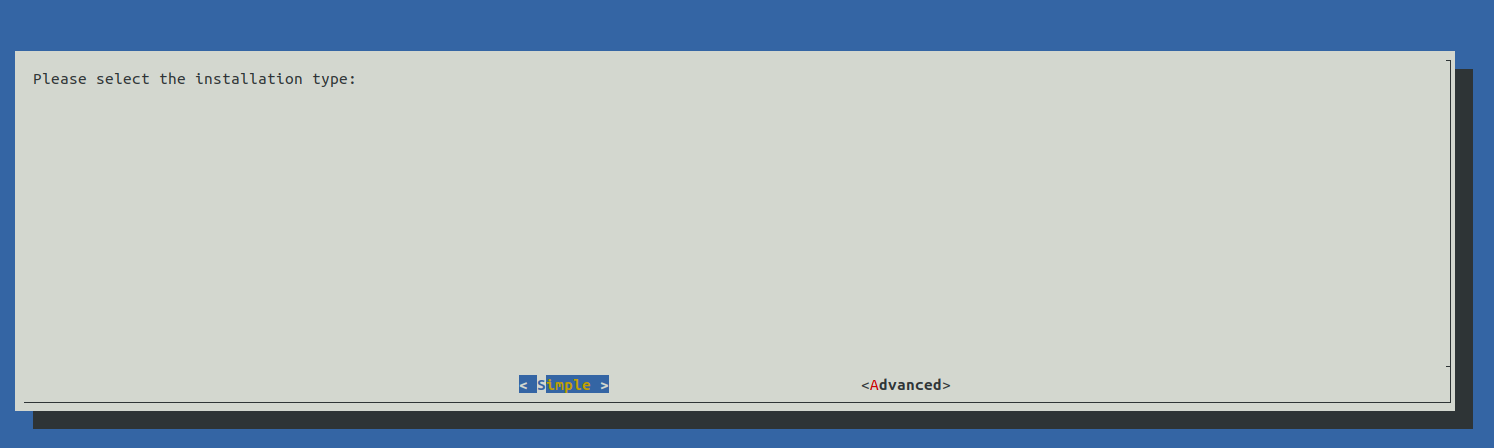
Simple mode will be used for POC deployments since it will automatically set the Ansible hosts to 127.0.0.1 and HaProxy to ports configuration.
Advanced mode will allow the user to configure every parameter configured by the VeridiumID installer.
For more information regarding the two deployment modes click on the following links:
2.3) Deployment
After exiting the Python Installation Wizard the deployment will start.
During this step please don’t close the terminal from which the script has been executed.
In case of any error during the deployment, a message will be shown in the terminal that points to the step’s log file.
All log files can be found in the following path: /home/veridiumid/logs
In case of needing to start the deployment from the beginning please run the following commands from the installation node:
# To remove local files:
bash /home/veridiumid/cleanup_install_files.sh -l

# To remove the previously generated CA (in case the install-ca step has been completed) and the local files
bash /home/veridiumid/cleanup_install_files.sh -l -c
3) Post-deployment steps
After the installation has succeeded to cleanup docker and local repository files (including vsftpd) please run the following on all nodes:
docker system prune -a
yum -y remove docker-ce docker-ce-cli containerd.io
rm -f /usr/local/bin/docker-compose
rm -rf /usr/bin/docker-compose
ip link delete docker0