HSM Integration
This article is a step by step guide on how to configure the VeridiumID server to use an HSM instance.
Instructions
Configure VeridiumID to use the private key in the HSM for signing CSR’s, resulting IdentityTokens for authentications:
Navigate to the Admin Dashboard → Settings → Configuration → config.json and set the following:
- CODE
"certStore": { "signingKeystore": { "alias": "ca", "cert": "", "pwd": "" }, "ca": { "alias": "ca", "cert": "", "pwd": "" } } - CODE
"pkcs11": {
    "propertiesFileContent": "PKCS11_CONTENT",
    "loginPin": "HSM_PASS"
  }
  where PKCS11_CONTENT is the content of pkcs11.cfg specific to the HSM used, can be found in the HSM documentation. Use '\n' instead of new lines, for example: "name = VeridiumID\nlibrary = /usr/lib64/pkcs11/libsofthsm2.so\nslot = -1"
        HSM_PASS is the password set for the HSM during the initialization step
Click on Save
Configure the VeridiumID SAML IDP to use the HSM:
Navigate to the Admin Dashboard → Settings → SAML Configuration → Security & Keys and enable the HSM toggle:
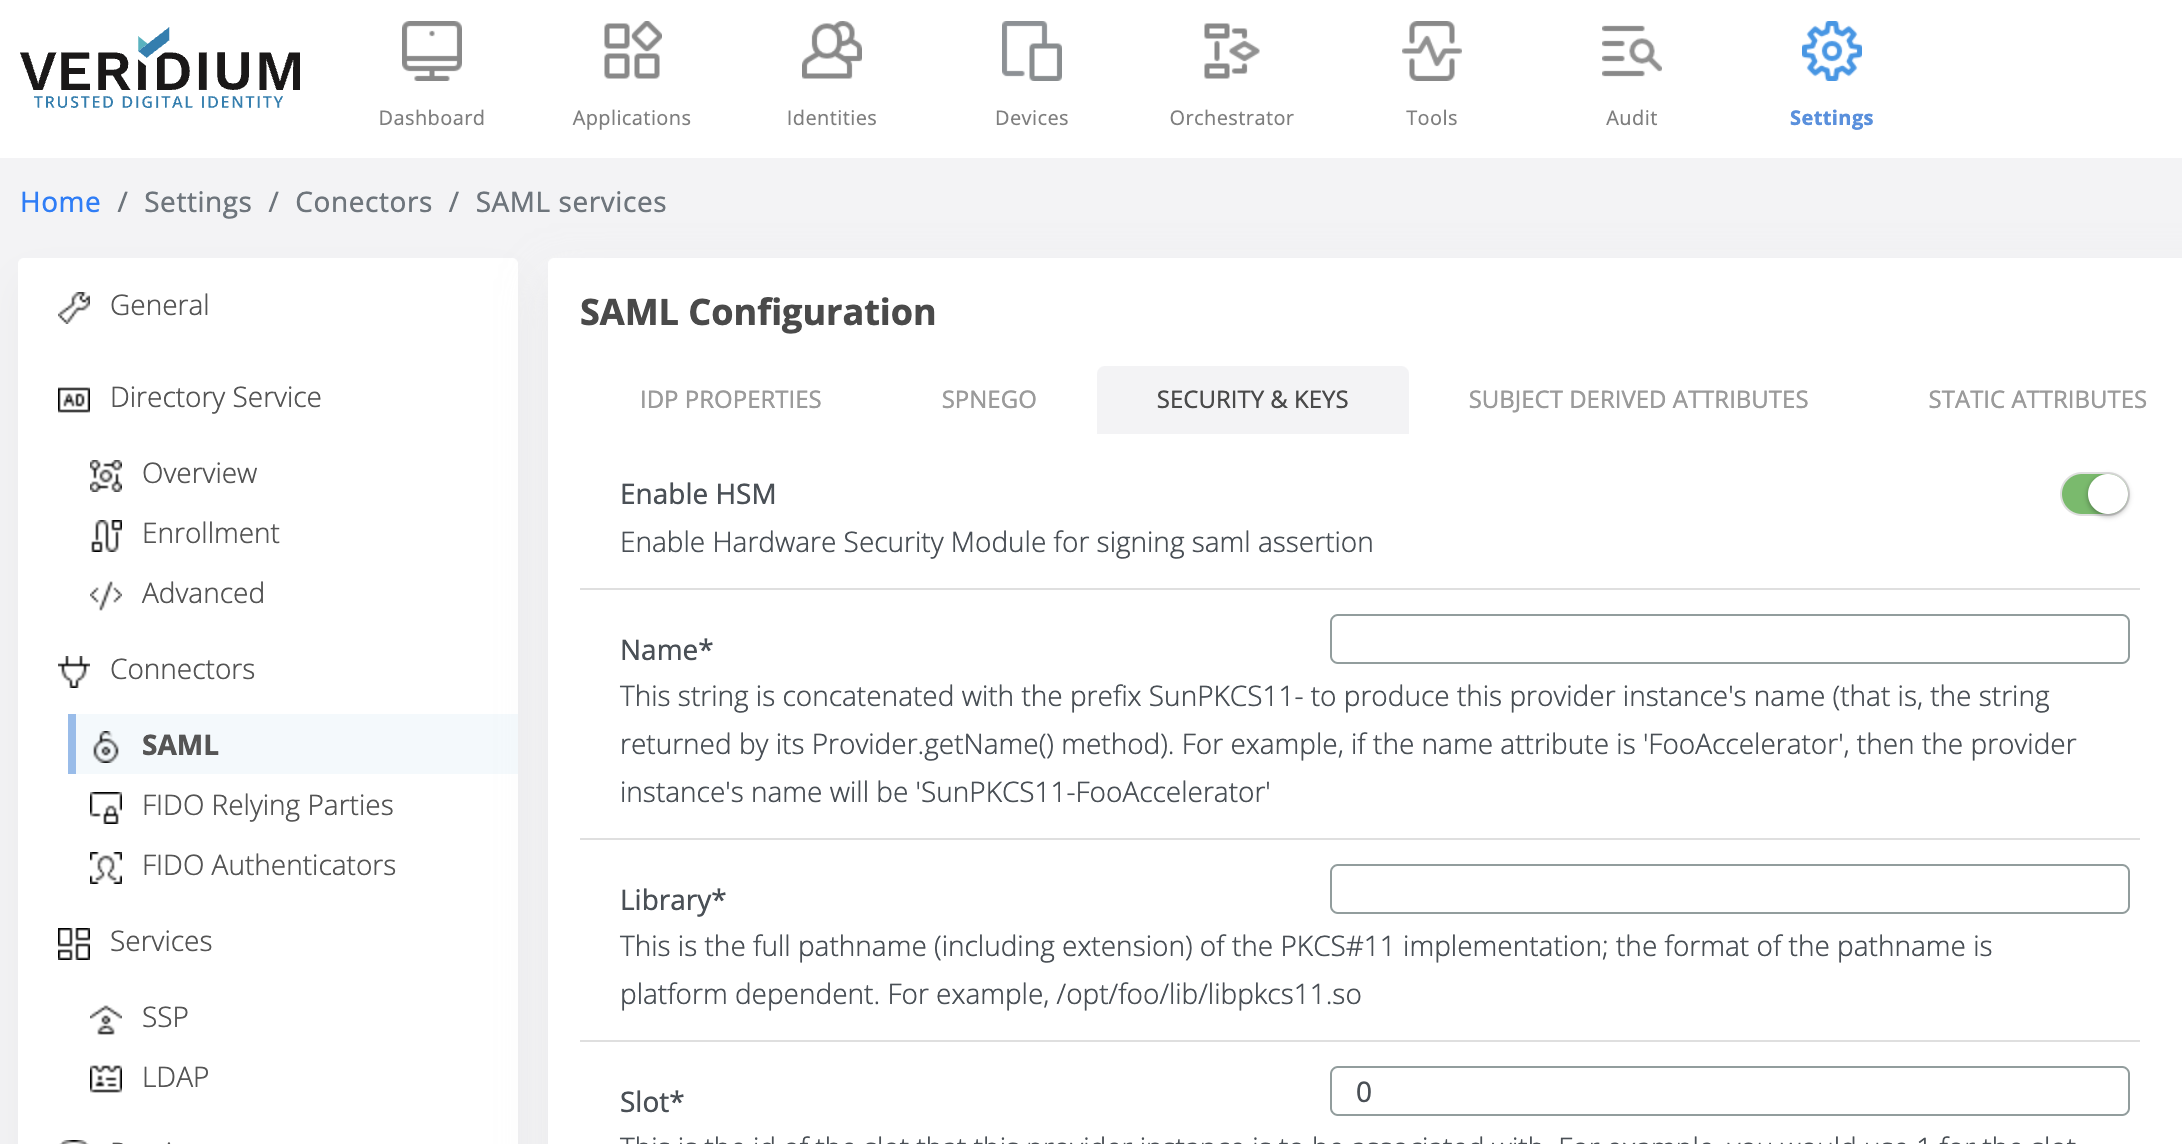
Fill in necessary fields and Save
On each frontend VeridiumID server, run the following commands:
CODEservice ver_tomcat restart; service ver_websecadmin restart